


PopupKit with its countless options and features, allows users to create and modify templates as per their campaign needs.
A key feature of modifying campaigns is setting Display Conditions that ensures the popup show up at the right time, at the place, for the right person.
We will guide you about How to Setup Display Condition Rules with PopupKit here.
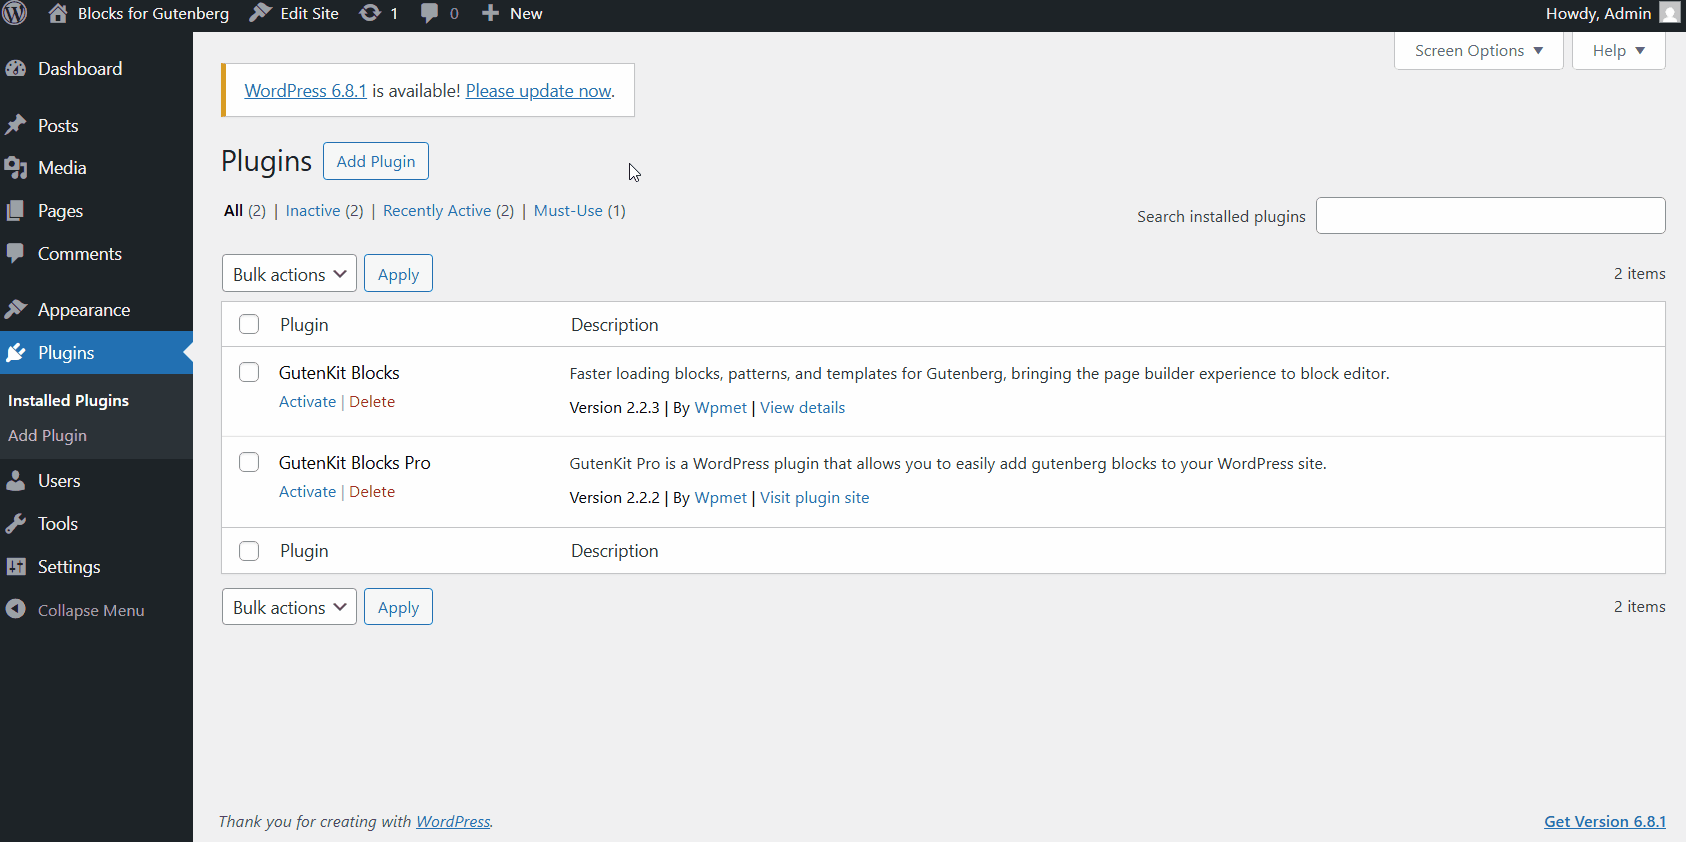
Installing PopupKit #
You need to first install PopupKit in WordPress CMS and activate it. For that you, may opt for any the following two ways:
Process 1:
- Go to the WordPress Dashboard
- Navigate to Plugins > Add New
- Search for PopupKit
- Install and Activate the plugin.
OR
Process 2:
ステップ1: に行きます WordPress Plugin Directory > Type in “PopupKit” in the search bar > Select ポップアップキット > Click “Download” on the page.
ステップ2: Go to WordPress Dashboard > Plugin > Add New > Upload Plugin and upload the PopupKit plugin file.
ステップ 3: After successful installation, just click on the “Activate” button to activate PopupKit.
ステップ 4: Go to a page and search for “PopupKit”.
前提条件: Must have Gutenberg Block Editor installed and enabled. For WordPress 5.0 or higher
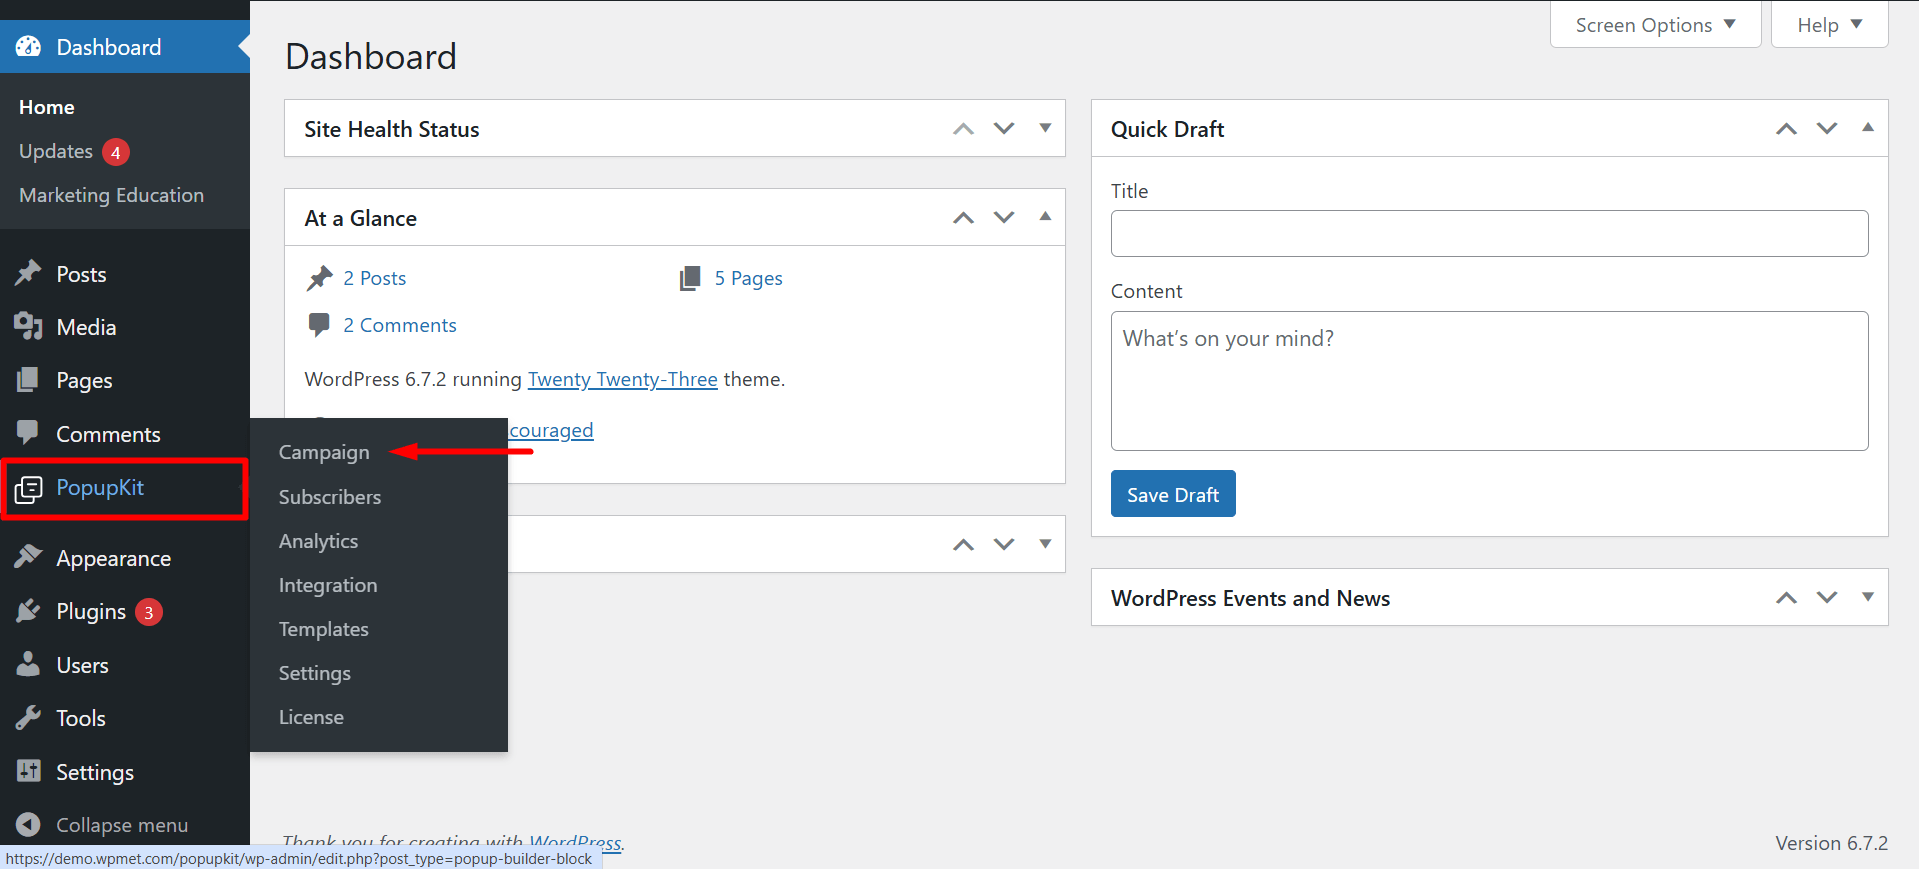
How to Use a Campaign in PopupKit? #
First, you need a template or campaign created by PopupKit.
Step 1: Go to the Campaign option #
Go to PopupKit from your WordPress dashboard > WordPress Dashboard > PopupKit > Campaign > Create Blank.
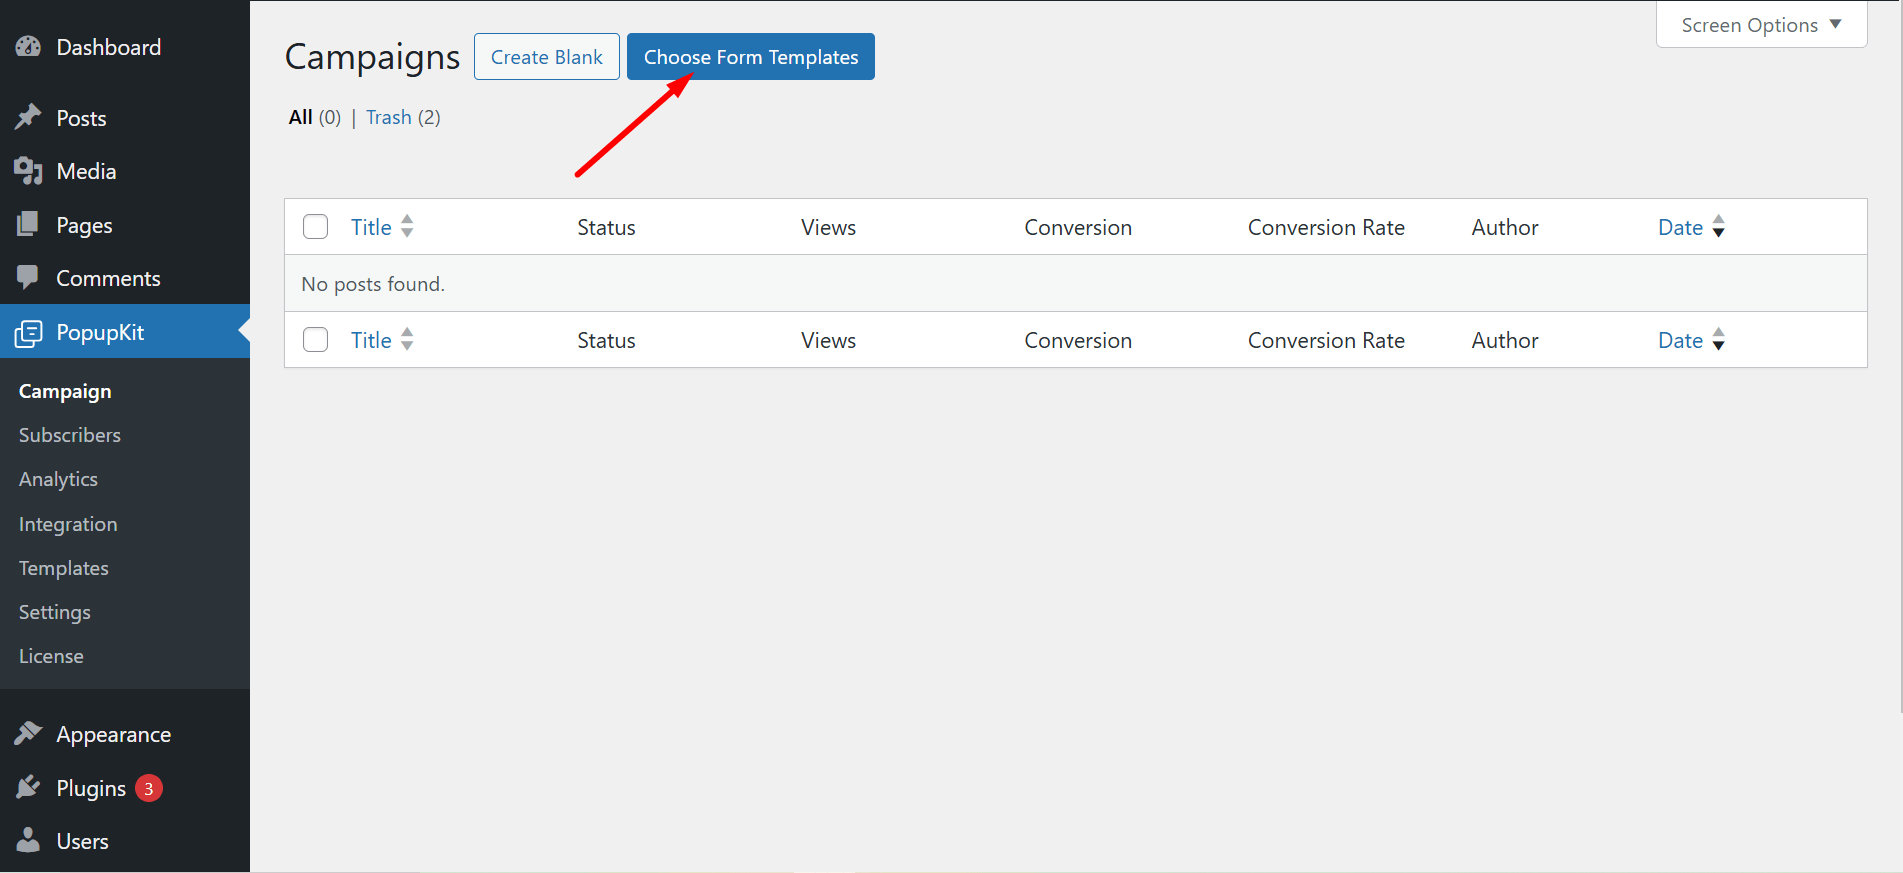
You can create your desired campaigns by selecting the ‘Create Blank’ option or ‘Choose From Template’.
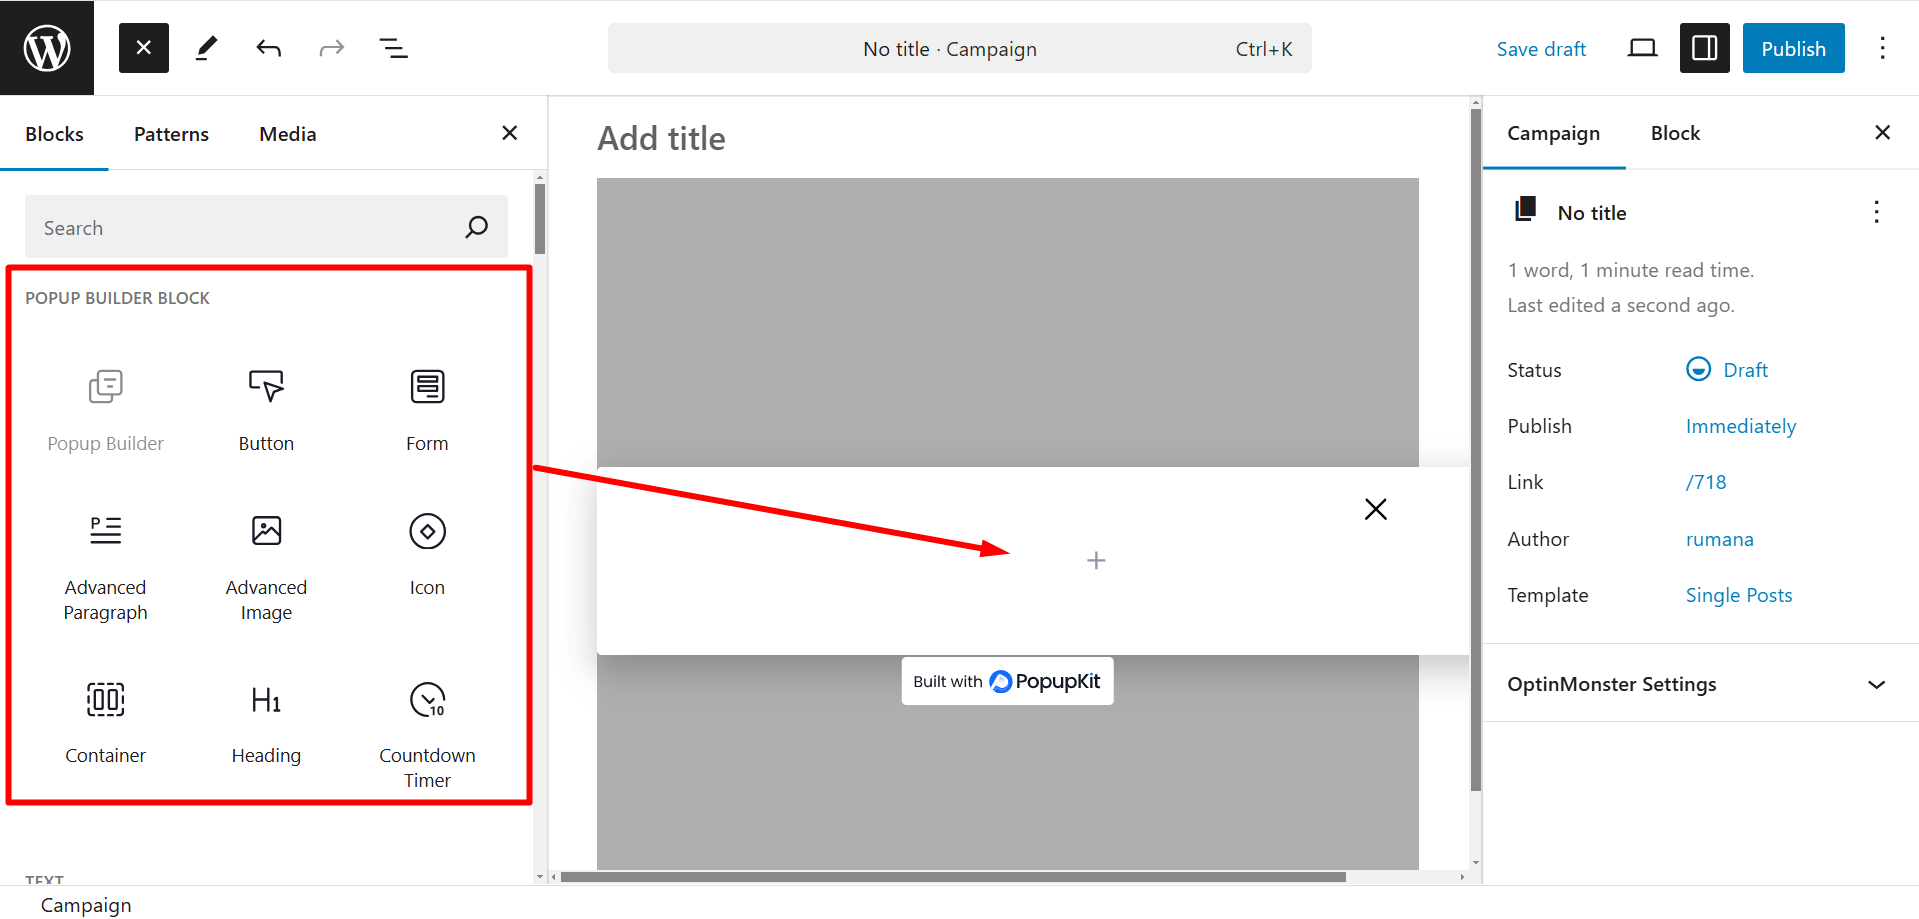
Step 2: Create Blank #
To proceed with the ‘Create Blank’ option, press the button.
Now you can find and use all the necessary popup builder blocks to design your campaign. These are drag-and-drop and customizable blocks.
または
Step 2 (alternative): Choose From Templates #
If you want to use a template to design your campaign, press the ‘Choose From Templates’ button.
There are several categories of templates to choose from.
✔ You can check the preview
✔ Click on the Use Template button, give a name and simply press the Import button to use it
✔ In the editor, you’ll see many PopupKit elements to design the template according to your choice
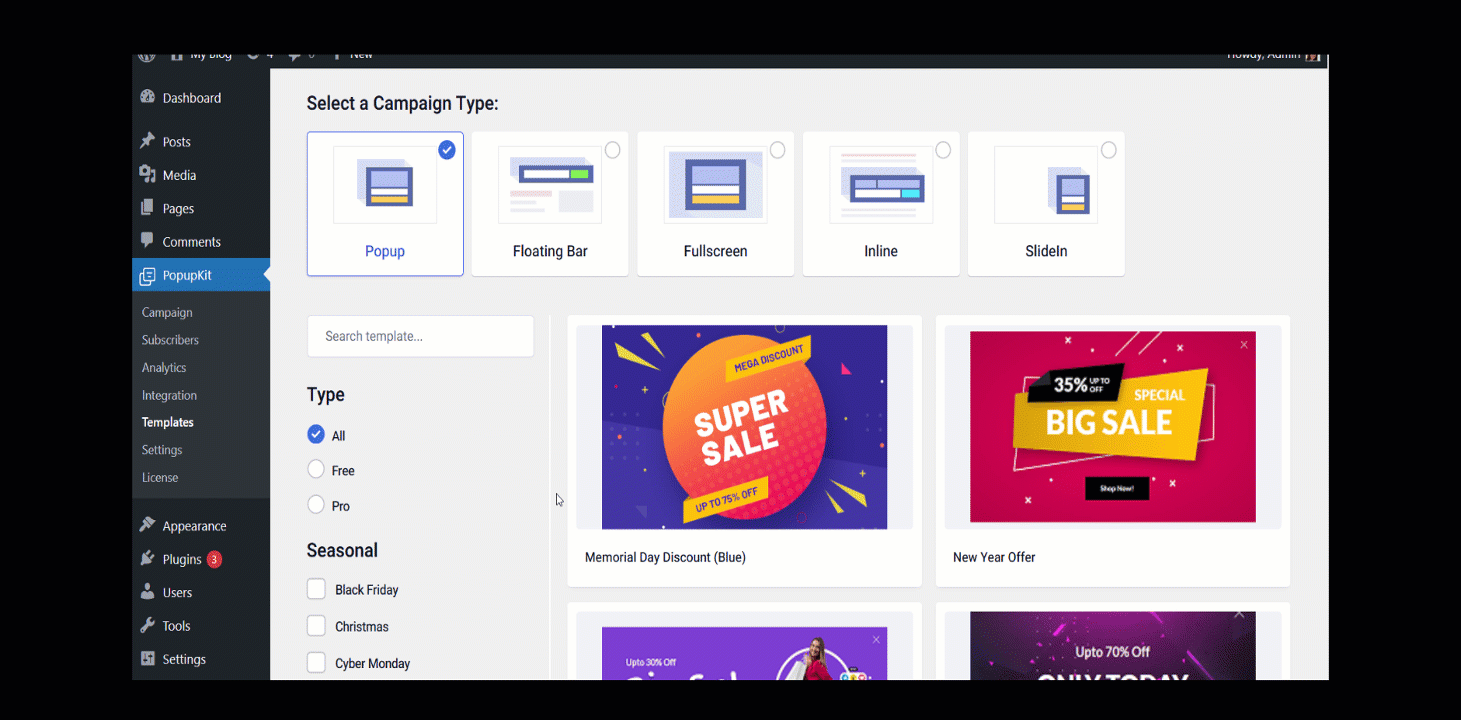
We’ll select an existing template to set up the Display Condition Rules.
How to Setup Display Condition Rules? #
When you are at the Block Editor, you will see imported campaign template displayed. Here, we are using a Popup template:
Choose a Template > Select Campaign Type > Popup > New Year Offer.
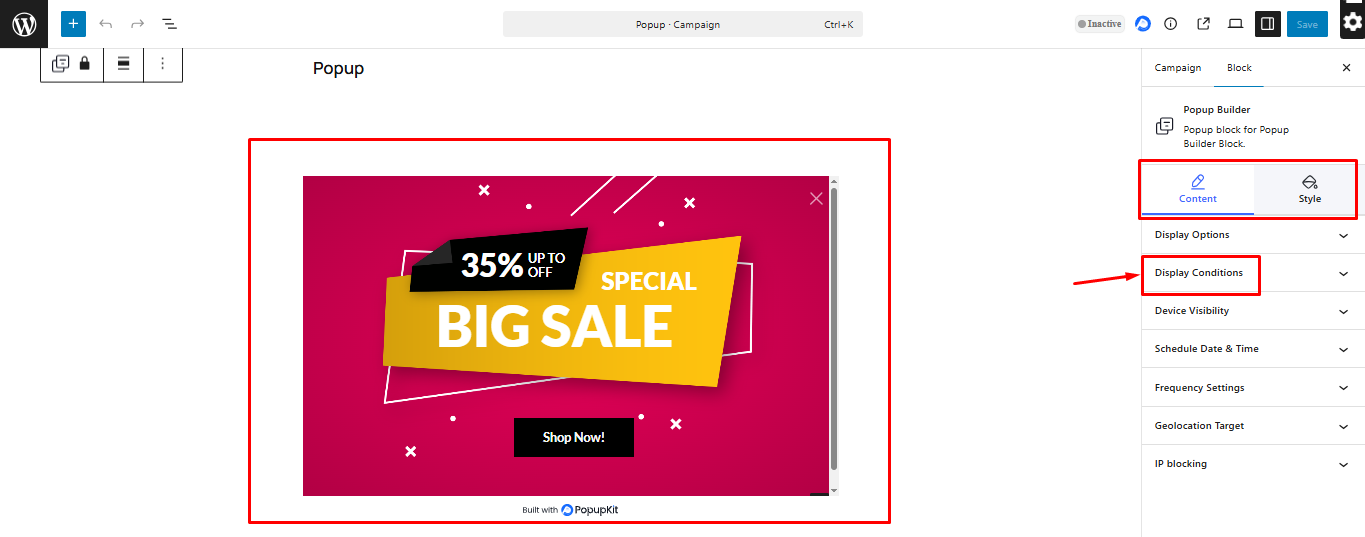
We will move to the right to Block > Content > Display Conditions .
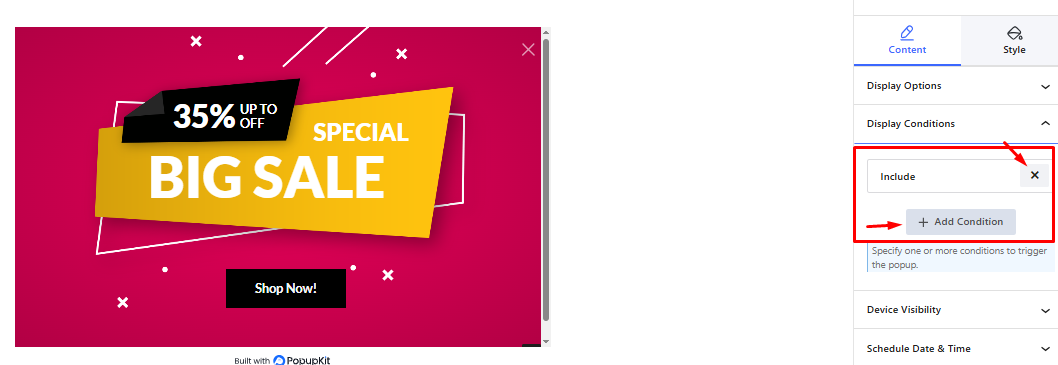
You can add or not include conditions. If you add a condition (or more), then you need to:
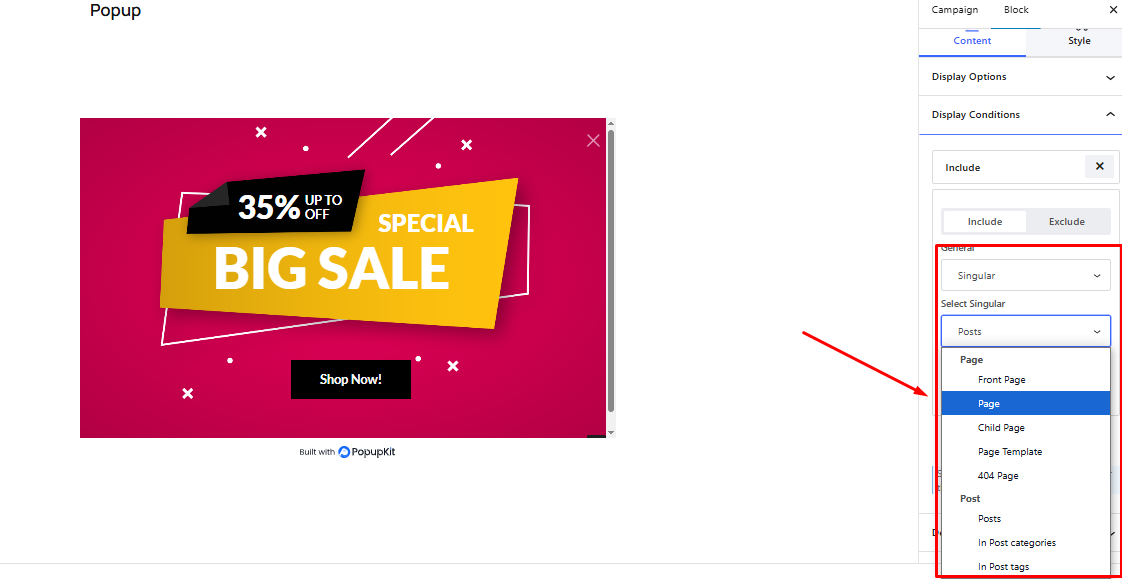
に行く Add Condition > Include/Exclude > General そして選択します Entire Site, Singular, Archive, or WooCommerce.
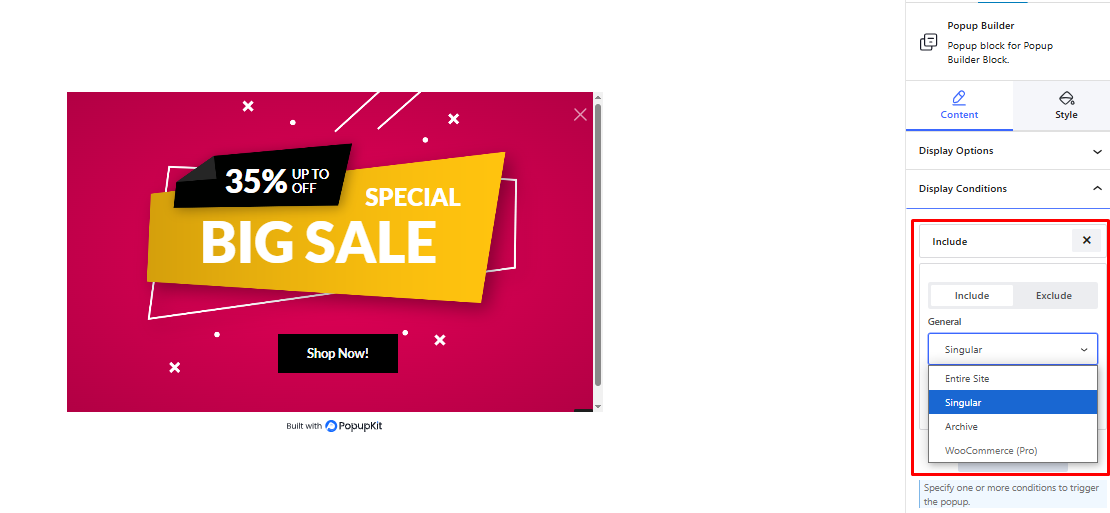
Suppose you select Singular. From there, go to > Singular > Front Page, you popup will show up on the Front Page of the site.
You may also select a particular Page, Child Page or even Posts. The popup will appear on a post if you select the latter one.
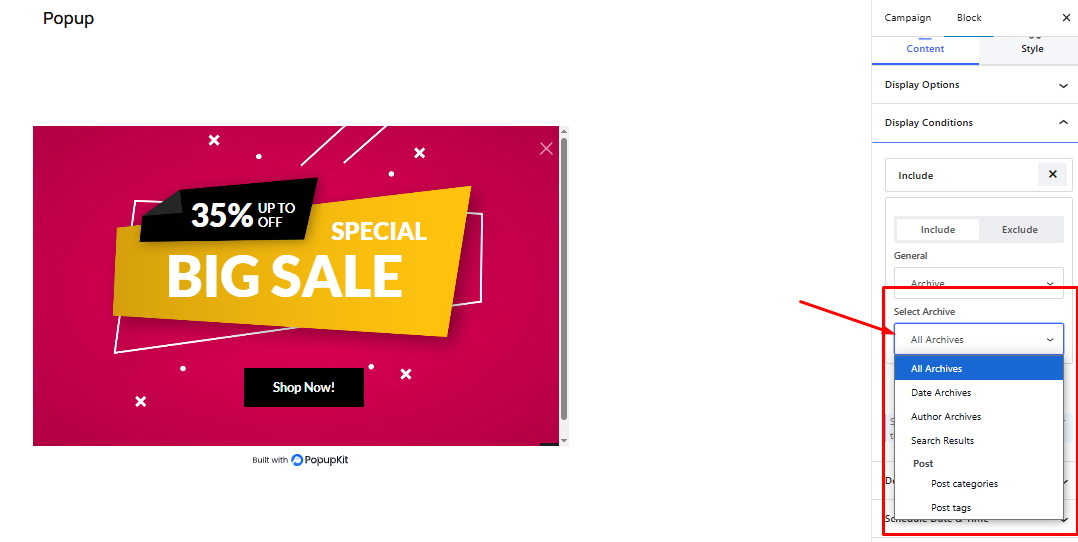
You also apply the option アーカイブ from Content > Display Condition > Add Condition > Include > General > Archive. You will options like Date Archives, Author Archives, Search Results, Post Categories, and Post tags to set the display rules.
These parameters apply to all the templates that you use or create.
Grab a copy of PopupKit today and create amazing popups!


