


ShopEngine は、Elementor 用のエンドツーエンドの WooCommerce ショップ ビルダーです。完全な WooCommerce ストアを構築するために必要不可欠で便利なウィジェット、モジュール、テンプレートがすべて含まれています。さらに重要なのは、シンプルで使いやすいプラグインであり、ユーザーはコーディングの知識を必要としないことです。
Quick Overview
This documentation will guide you through the process of adding product comparison feature to your shop or WooCommerce pages. For that, you will need to get ShopEngine free and pro, along with two freemium plugins such as WooCommerce and Elementor.
Needed tools: WooCommerce (free), Elementor (free), and ShopEngine (free & pro)
Now, enable ShopEngine’s Product Comparison module and set up a shop page template. After that, edit your template and add a product list widget. Thus, your product will be visible along with the comparison icon. Whenever someone clicks the comparison icon, he/ she will see a clear WooCommerce product comparison table.
製品比較モジュール: #
It’s shoppers’ tendency to always compare similar products online before making a purchase. Usually, they have to open multiple tabs to compare these products. But ShopEngine made things easy for your customers with the WooCommerce 製品比較 module. With this module, shoppers can click the product comparison icon placed on the bottom left side of the product.
ショップページで、比較したい商品を選択し、各商品の商品比較アイコンをクリックします。これにより、選択したすべての商品が新しいウィンドウに表示され、購入者は価格、在庫状況、色などのさまざまなパラメータを比較できます。
モジュールを有効にして展開する方法: #
ダッシュボードからモジュールを選択します。
まず、管理パネルのダッシュボードに移動し、サイドバーで ShopEngine を見つけます。ShopEngine にマウスを移動し、アイテムのリストから「モジュール」を選択します。
ダッシュボード => ShopEngine => モジュール

製品比較モジュールを選択して有効にします。
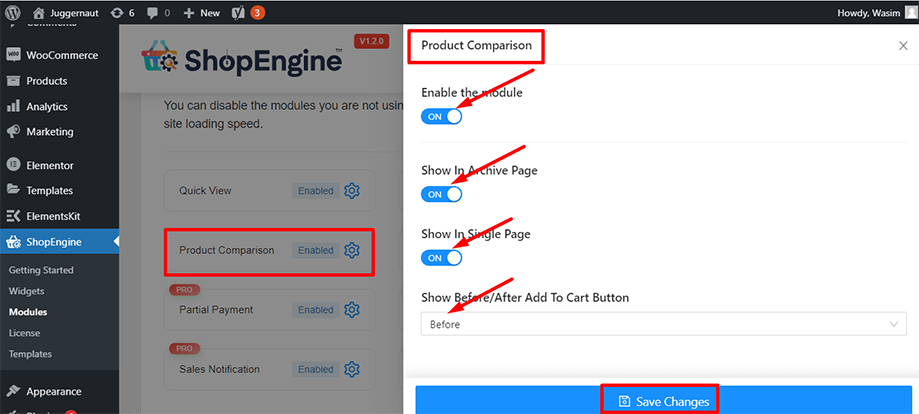
From the list of modules, find and click the WooCommerce Product Comparison module. Enable the module clicking the settings icon showing up on the module button.
また、単一ページとアーカイブ ページの両方の切り替えボタンをオンにすると、アーカイブ ページと単一ページの両方に商品が表示されます。モジュール アイコンを「カートに追加」ボタンの前または後に配置することも選択できます。
新しいテンプレートを追加します:
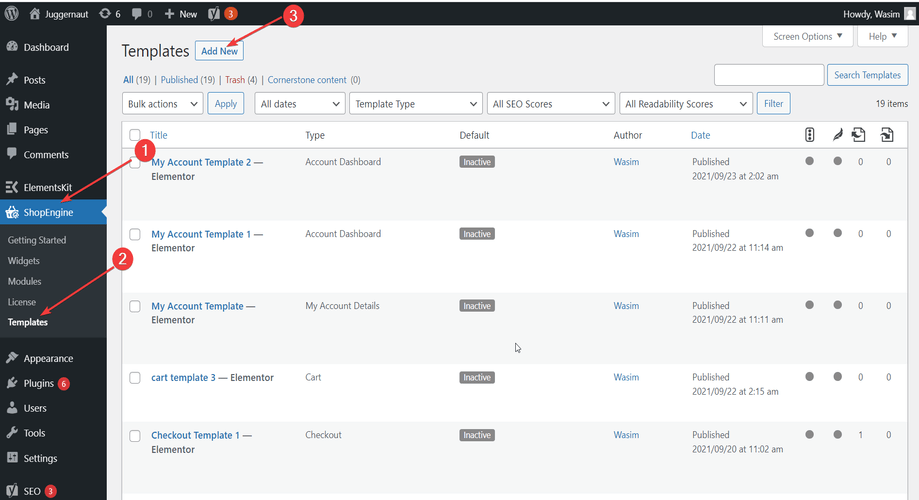
次に、管理パネルのダッシュボードに移動し、アイテムリストからShopEngineを見つけます。ShopEngineをクリックし、ドロップダウンメニューからテンプレートを選択します。次に、「新しく追加する右上のテキストの横にある「」ボタンテンプレート”。
ショップページのテンプレートを設定する:
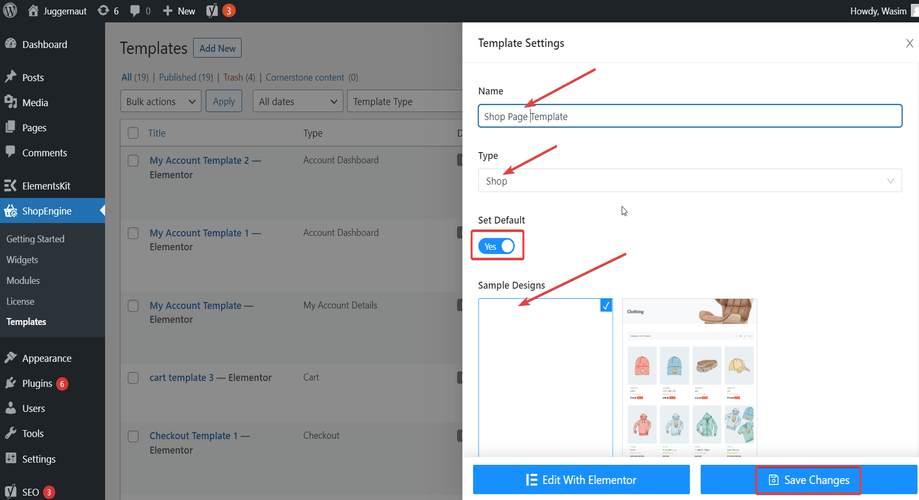
その直後、テンプレート設定用のポップアップウィンドウが表示されます。テンプレート名を 名前 フィールドでタイプ「ショップ」を選択します。目標は製品比較モジュールを使用することです。
また、デフォルトのサンプル デザインを選択することも、最初からデザインを開始することもできます。最後に「」を押します。変更内容を保存" ボタン。
Elementorで編集をクリックします。
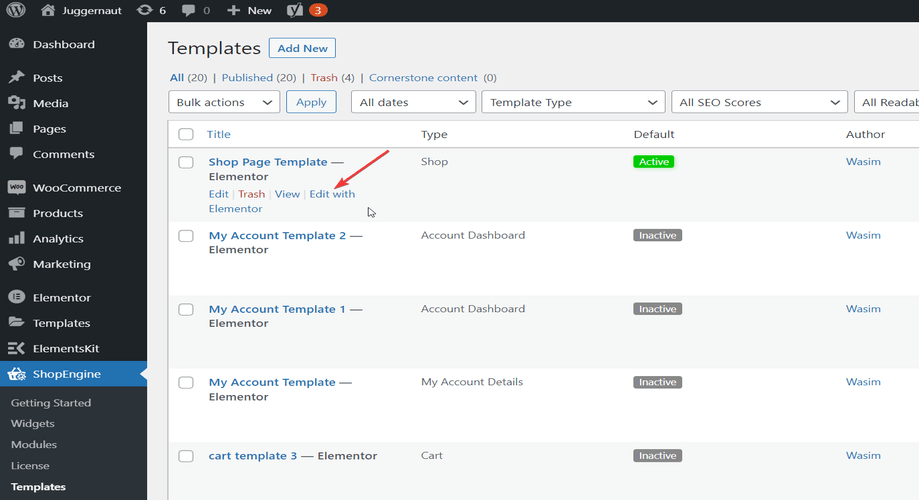
テンプレートが作成され、リストの一番上に表示されます。ここで、「」をクリックしてください。Elementorで編集する」をクリックしてElementorウィンドウに切り替えます。
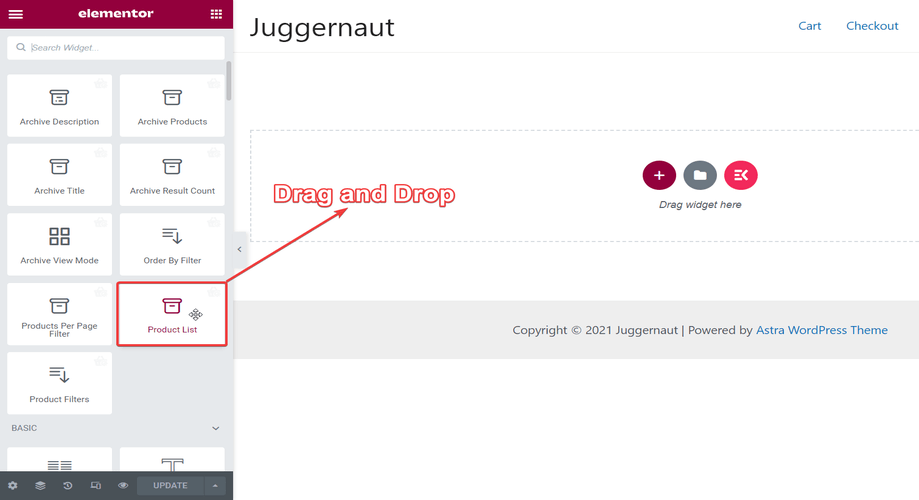
ドラッグアンドドロップ製品リストウィジェット:
このステップでは、左側に ShopEngine ウィジェットのリストがあるサイドバーが表示されます。ShopEngine 製品アーカイブ セクションの下にある製品リスト ウィジェットを見つけて、下のスクリーンショットに示すように、指定された領域にドラッグ アンド ドロップします。
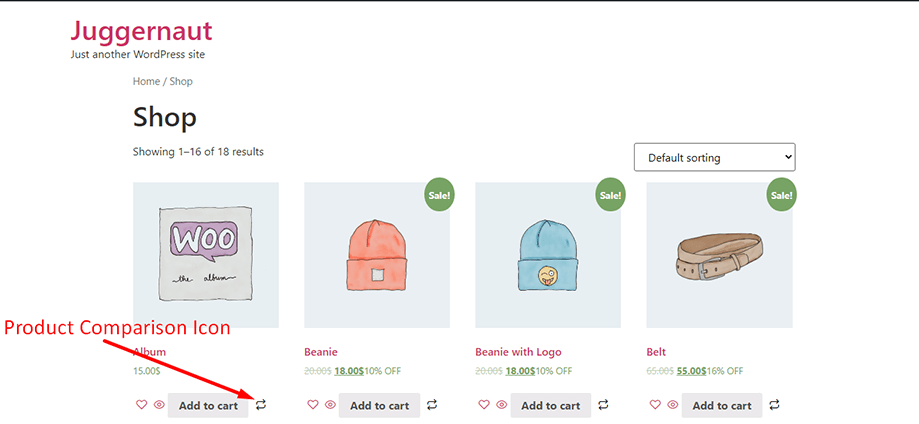
製品画像の下に表示される製品比較アイコン:
製品リスト ウィジェットをドロップするとすぐに、必要なすべての詳細を含む製品リストがページに表示されます。以下の GIF に示すように、各製品画像の右下にある製品比較アイコンを確認できます。

ショップページで製品比較アイコンを表示します。
下のスクリーンショットからわかるように、商品比較アイコンがショップページに表示されます。アイコンをクリックして類似商品を選択し、ポップアップウィンドウですべての詳細を表示して商品を比較できるようになりました。
類似製品がポップアップウィンドウに表示されます:
Now, get a glimpse of how similar products look like on the shop page after you hit the product comparison icon. You can see from the gif how products show up with items and parameters like image, name, stock, SKU, price, color, and logo in WooCommerce product comparison chart.
このように、製品比較モジュールを使用して、可能な限り最善の方法で製品を比較し、より良い購入決定を下すことができます。


