


Logging in shouldn’t feel like solving a riddle every time. For most users, remembering another username and password is just one more headache.
That’s why making the login process simpler is a smart move in terms of user experience. And, one of the effective ways is to add a one-click login with Google.
It lets users sign in instantly with their Google account without traveling to their memory lane for a username and password.
If you run a WordPress site, here is the guide to add a one-click Google login option in the easiest way possible.
Why add a one-click WordPress login with Google?
Integrating WordPress login with Google does more than just save users a few clicks. Yes, it gives your users a fast, familiar way to sign in without juggling another password. But at the same time, it strengthens security since Google’s authentication is built to protect accounts.
And what’s in it for website owners? When logging in feels effortless, people are more likely to stay engaged and keep coming back.
- Improved user experience: Fewer login steps make access faster and smoother.
- Higher conversion rates: One-tap login cuts the usual signup hassle and helps reduce cart drop-offs.
- Enhanced security: You get Google’s built-in protections like 2FA and fraud checks without extra work.
- Reduced password fatigue: People don’t have to create or remember another password.
- Simplified user data management: You get basic, verified info from Google to personalize the experience.
- Increased user retention: A quick, easy login makes visitors more likely to come back.
How to add one-click WordPress login with Google
Setting up your website login with Google in WordPress is a straightforward process with the right set of tools.
In this tutorial, we will use the WP Social plugin for login in WordPress. This social login plugin supports 8+ platforms, including the popular ones like Facebook, LinkedIn, Twitter, Dribbble, GitHub, and obviously Google.
You can show the social login button next to the WordPress login, register pages, as well as the WooCommerce login, register, and even billing pages.
So let’s get started.
Step 1: Create a Google Cloud App
To let visitors log in with their Google account, you’ll first need to create a Google App. Once your Google App is ready, you will get an App ID and App secret key that you will use to connect your WordPress site with this App.
To create a Google Cloud app:
- Head over to https://console.developers.google.com/apis/
- Log in with your Google account if you aren’t already logged in.
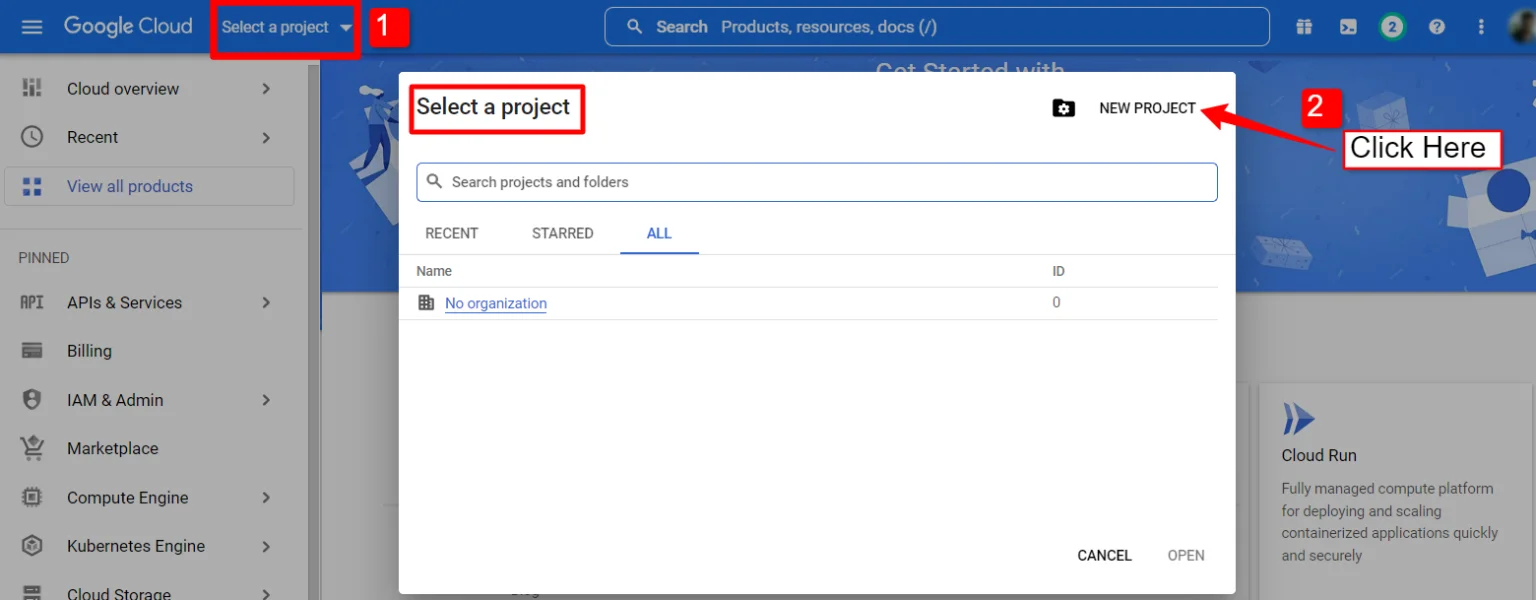
To begin, simply click on Select a project dropdown and click on the Nuovo progetto opzione.
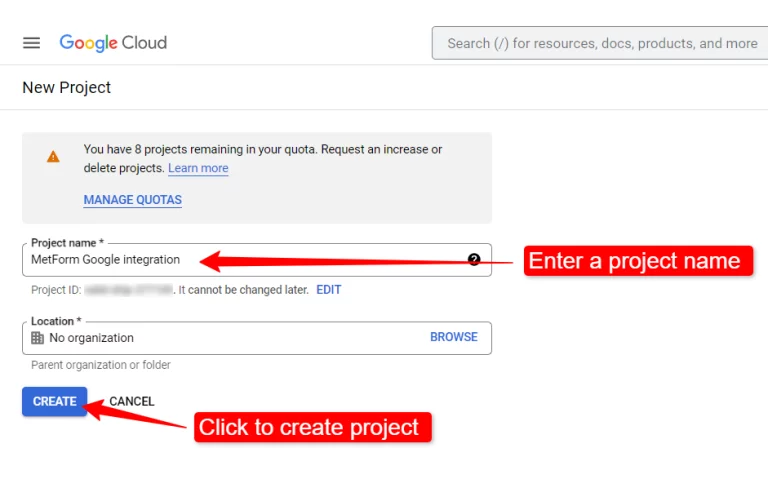
Now, to create a new project, first, type in a Nome del progetto E posizione for your project, then click the Pulsante Crea. As soon as the project is created, you’ll be taken straight to the pannello di controllo, where all your tools and settings are ready for you.
Step 2: Get the OAuth credentials
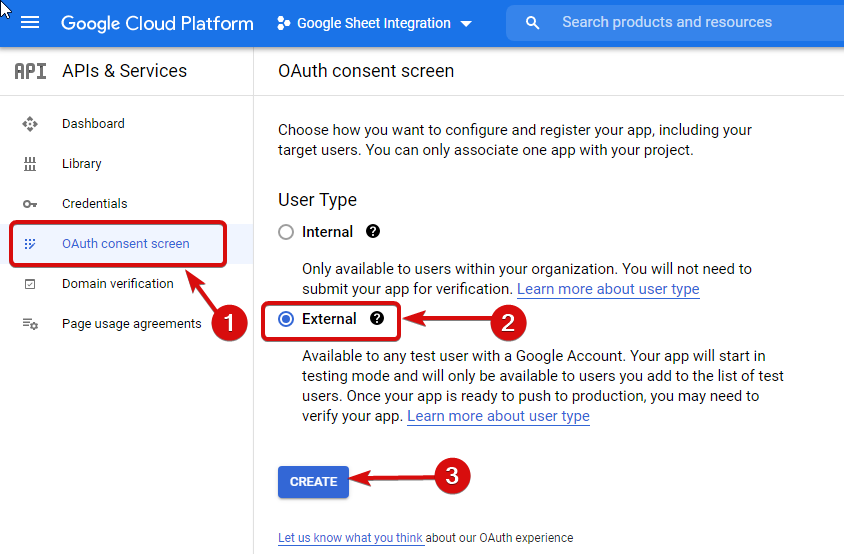
Alright, let’s move on. On the left-hand menu, click on the Schermata di consenso OAuth. This is where we’ll set up the basic info for your app.
First, pick the user type that fits your needs for the following options:
- Internal
- Or, External.
For this project, set the user type to External, hit Creare andare oltre.
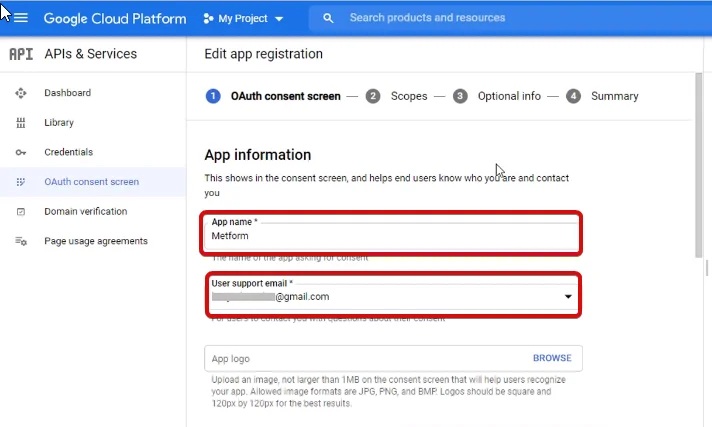
Next, enter the App informations like application name, user support email, and a logo. In the App Name field, type in a name for your app. This is what users will see, so choose something clear and recognizable. Also provide an E-mail di supporto utente where the user can contact for any kind of issue. If you want, you can add an logo for this application.
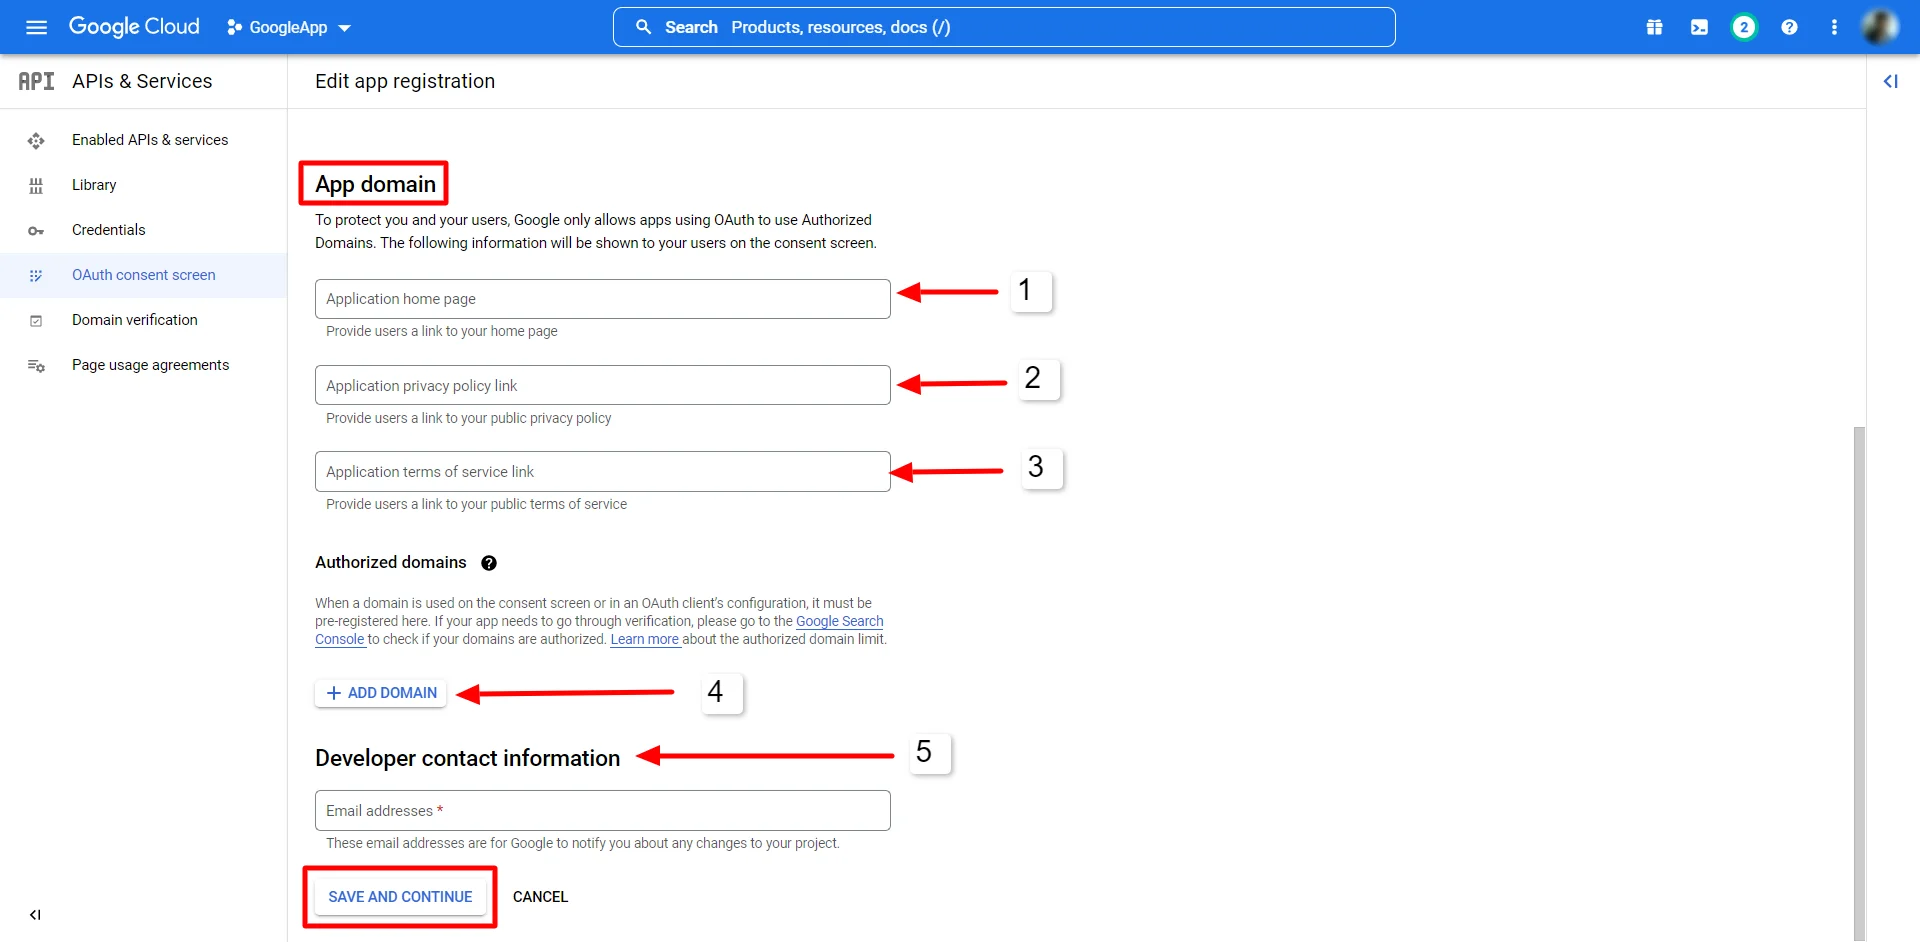
Now, fill in the rest of the details like, Domini autorizzati, Application Homepage link, and politica sulla riservatezza link. Don’t worry if you don’t have a privacy policy yet. You can easily generate one online.
Once everything looks good, click Salva.
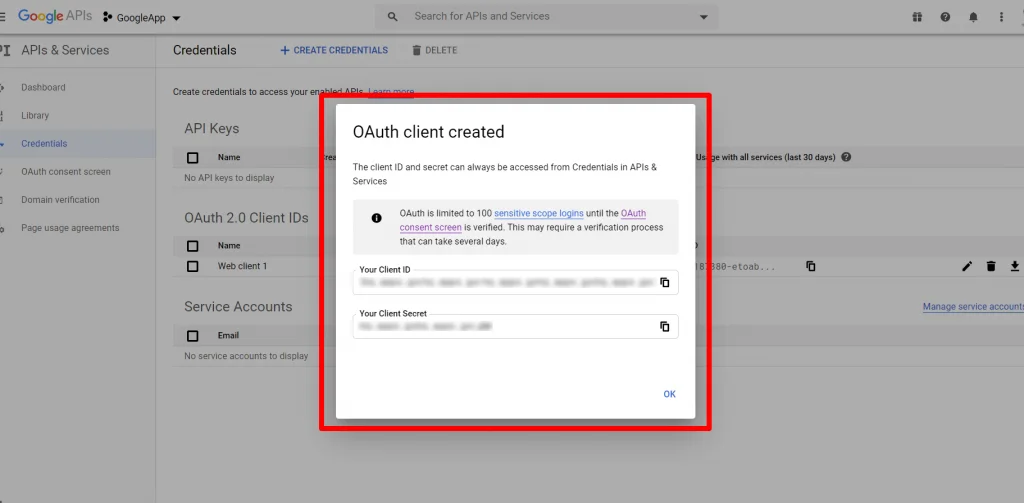
After that, head over to Credentials → Create Credentials → OAuth Client ID. Select Applicazione web as the application type and fill in the URL di reindirizzamento autorizzati. You can get these redirect URLs from the WP Social plugin by clicking its Iniziare button for Google login.
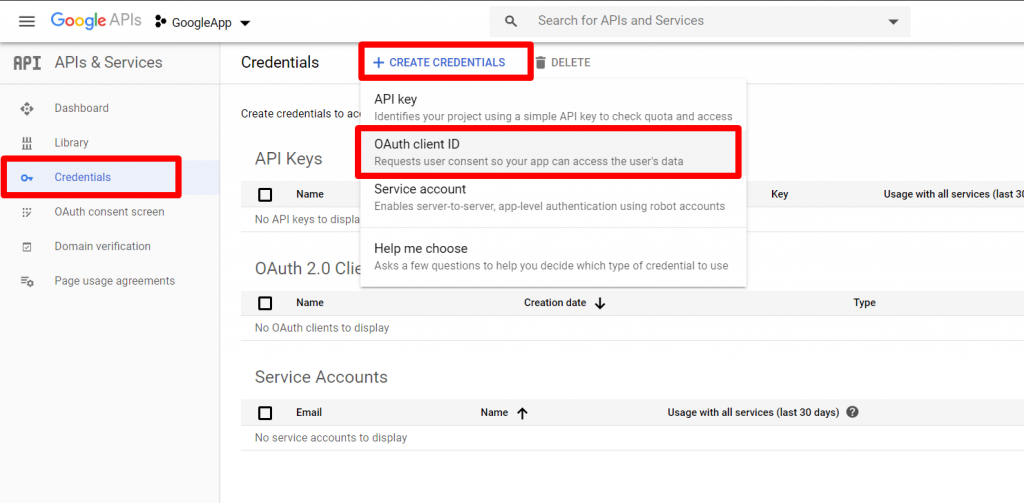
Finally, you will get your ID dell'app E App Secret key. Copy them to your clipboard for further use.
Step 3: Connect the Google project with WordPress
Once you’ve successfully created your Google app, the next step is to connect it to your WordPress site so users can start logging in seamlessly with their Google accounts. To do this, just log in to your WordPress dashboard, then:
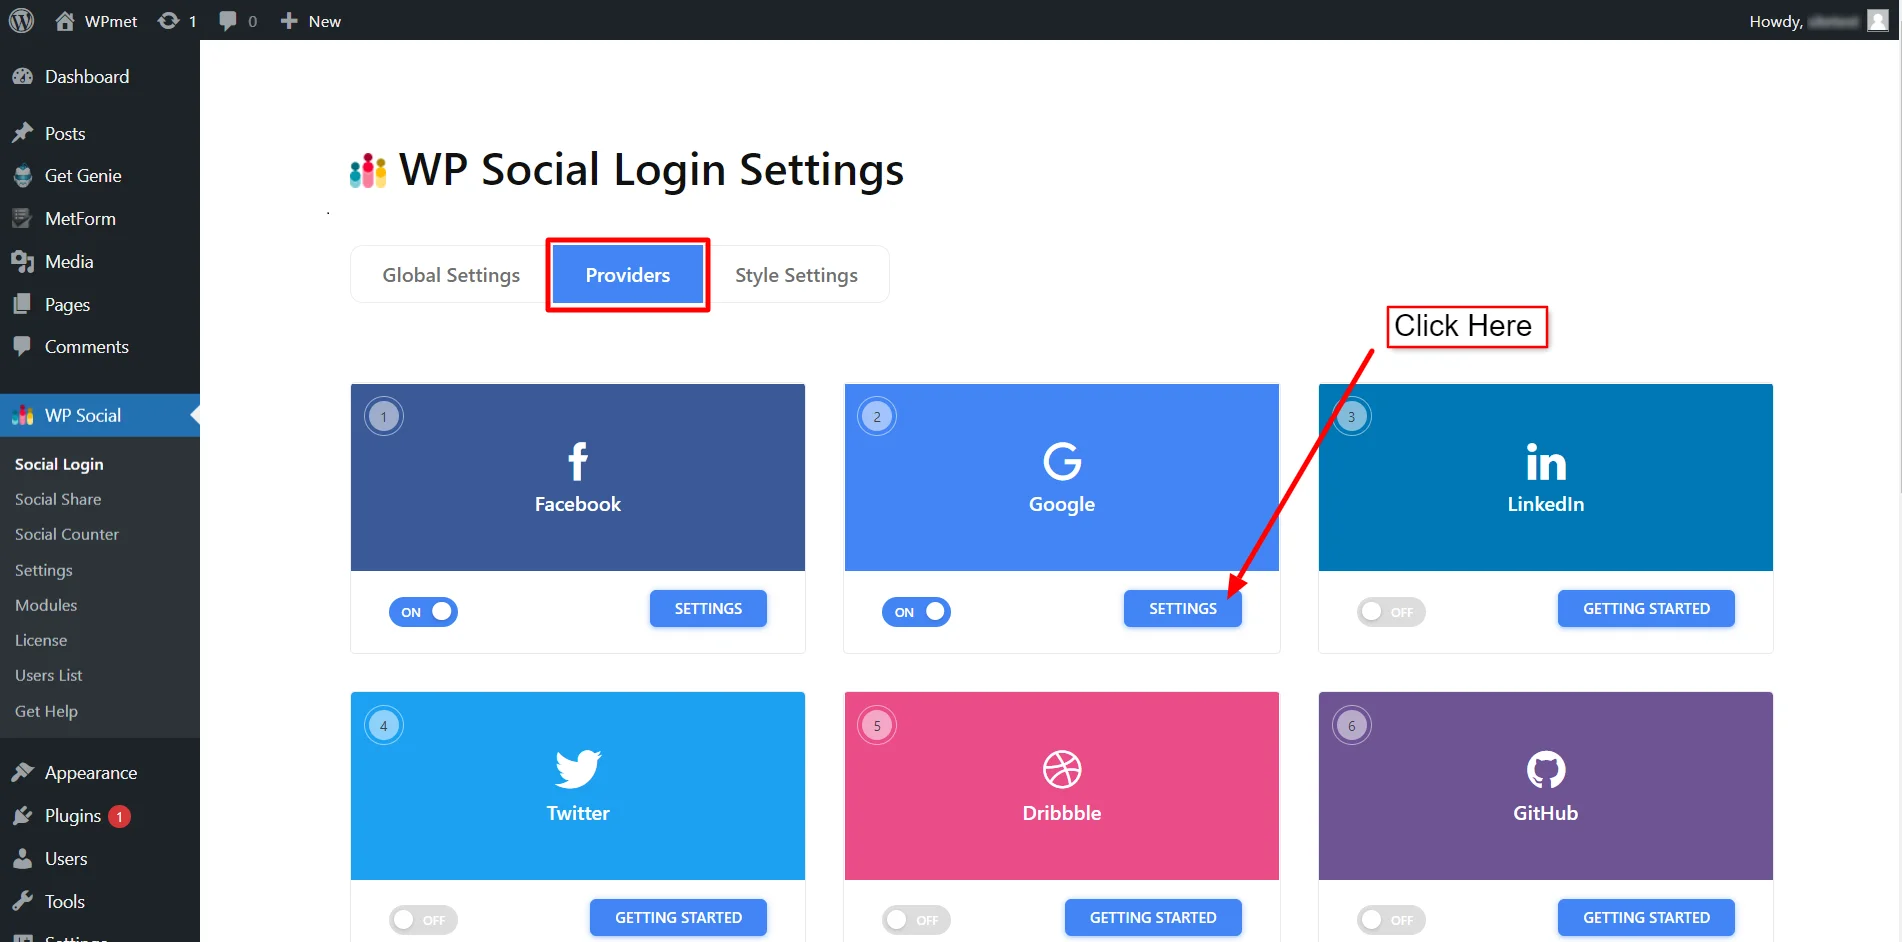
- Navigate to WP Social → Social Login: From your WordPress dashboard, find WP Social in the menu and click on Social Login. This is where all your social login options are managed.
- Switch to the Providers tab: At the top, you’ll see different tabs. Click on Providers to see a list of all the social platforms you can connect to your site.
- Click Settings under Google: Find Google in the list and click on Settings. This will open a pop-up where you can add the credentials from your Google app.
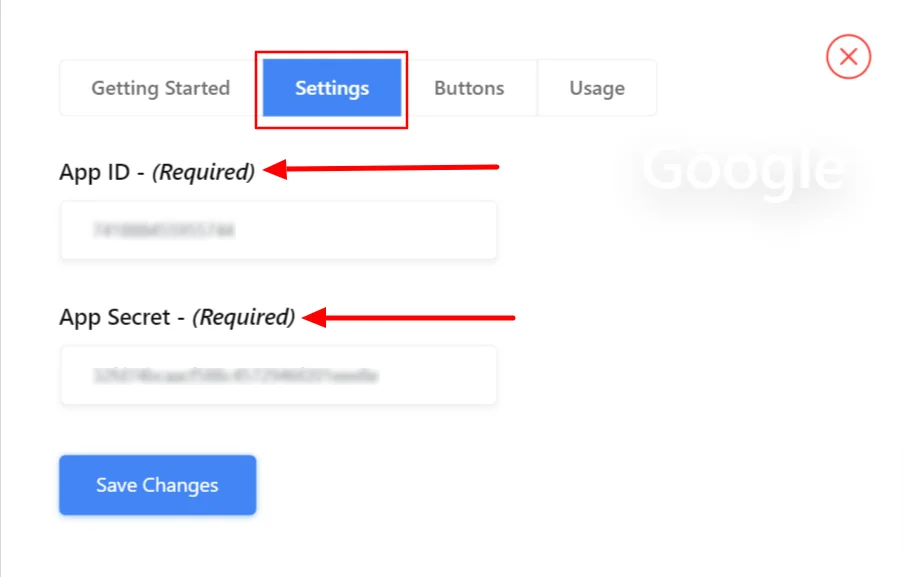
- Go to the Settings tab in the pop-up: Once the pop-up opens, make sure you’re on the Settings tab. This is where you’ll enter your App ID and App Secret.
- Enter your App ID: Copy the App ID from your Google app and paste it into the App ID field. This tells your site which Google app to use.
- Enter your App Secret: Do the same for the App Secret. This is the secure key that lets your site communicate with Google safely.
- Click Save Changes: Finally, hit the Save Changes button to apply everything. Now your site is ready to let users log in with their Google accounts effortlessly!
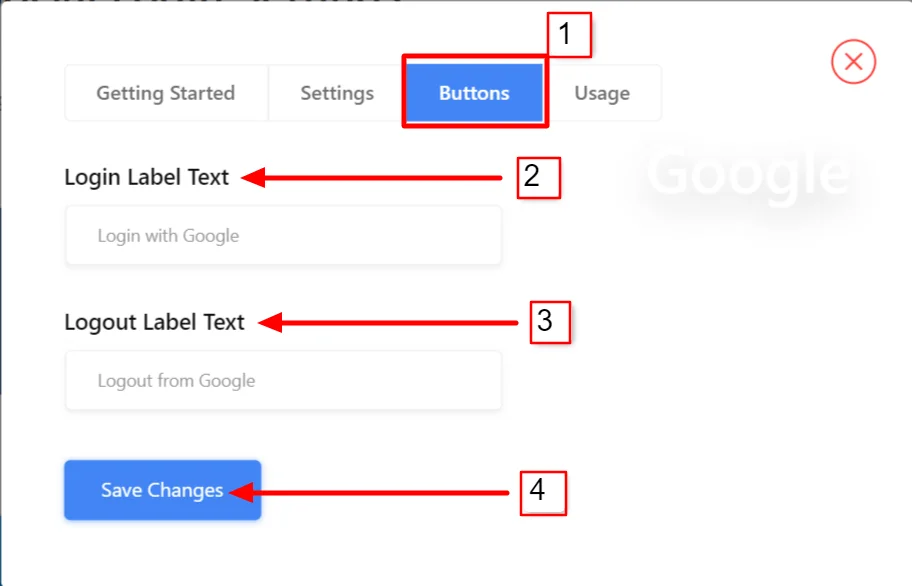
You can easily add a Google login button to WordPress and customize the button labels.
- Vai a Buttons tab.
- Enter your preferred text label for the Login button.
- Do the same for the Logout button.
- Finally hit Salvare le modifiche.
With WP Social, you can easily show the Google login button to your WordPress homepage, login, and registration page.
To add the login button to WordPress’s login and registration page,
- Vai a WP Social → Social Login dalla dashboard di WordPress.
- Sotto il Global Settings tab, enable the following options:
- Mostra il pulsante alla pagina di accesso wp
- Mostra il pulsante nella pagina di registrazione wp
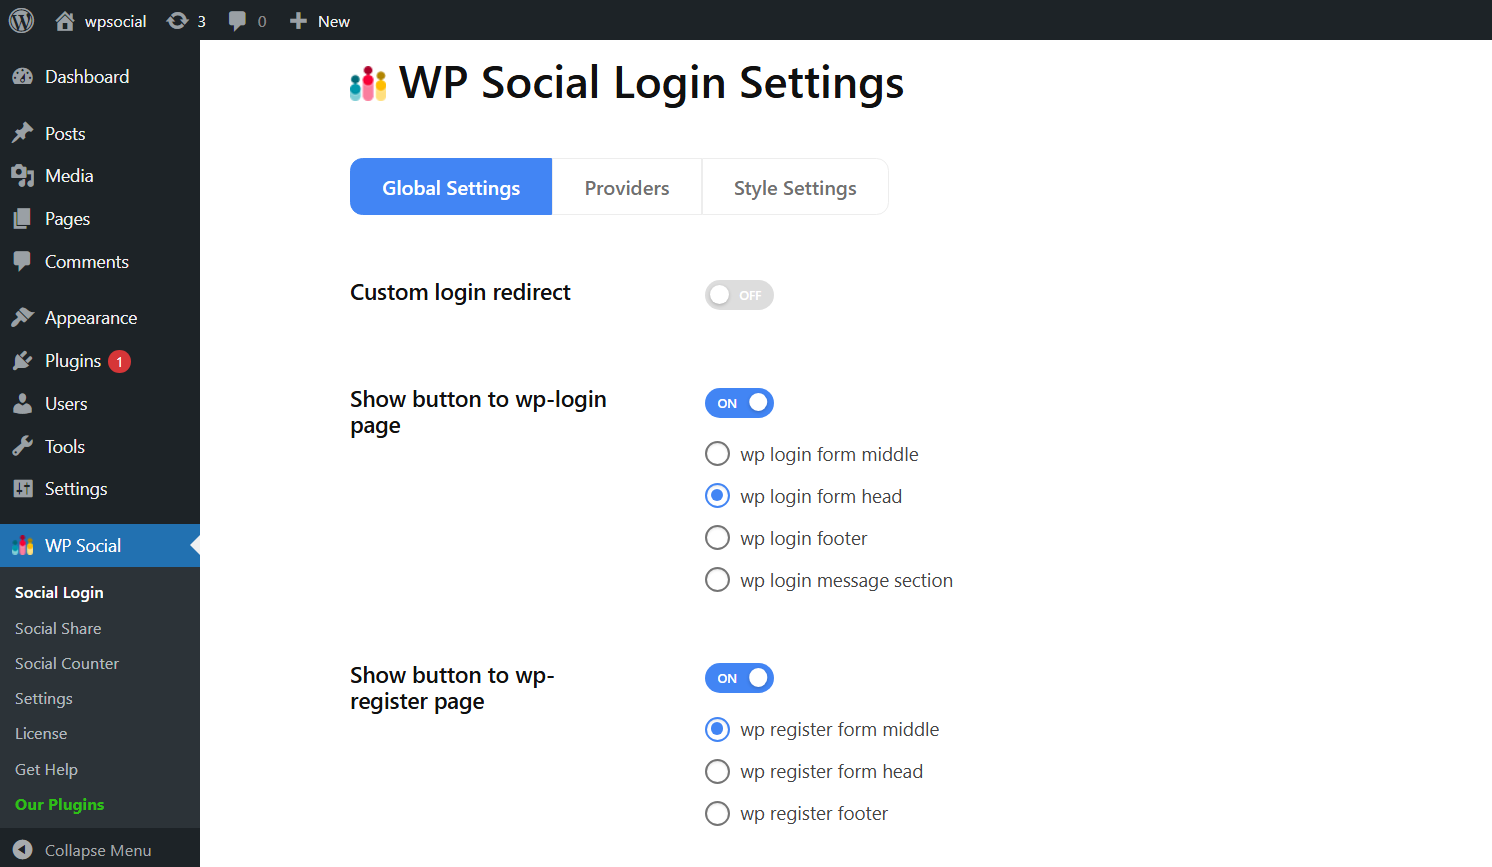
Once you switch the respective toggle buttons to ON, you can choose where to place the login button from the following options: wp login/register form middle, wp login/register form head, wp login/register footer, and wp login message section.
Why use WP Social to add a One-Tap Google login on WordPress sites?
While there are multiple ways to set up Google login manually, WP Social makes the process quick and user-friendly. Instead of dealing with code and complex redirects, you get:
- A simple dashboard to manage everything.
- Support for multiple social platforms beyond Google (like Facebook, LinkedIn, Twitter).
- WooCommerce and membership site compatibility.
- Customization options so the login button matches your branding.
It’s basically all the power of Google login, minus the headache of manual setup.
Avvolgendo
Adding a one-tap Google login isn’t just about convenience; it’s about making your WordPress site more user-friendly, professional, and conversion-focused. By using WP Social, you can connect Google with WordPress in just a few steps, customize the login flow, and even style the button to match your site’s branding.
If you want fewer abandoned signups and a smoother user experience, it’s time to let your visitors log in with just one tap.
Lascia un commento