GutenKit Mailchimp è un bloccare that helps you to create easy signup forms for engaging email campaigns. Questo blocco consente di includere testo, immagini, pulsanti e altri elementi.
Consulta la documentazione e impara a usare il blocco Mailchimp GutenKit.
Come puoi usare Mailchimp #
Abbiamo illustrato il procedimento in semplici passaggi.
FASE 1: Abilitazione del blocco #
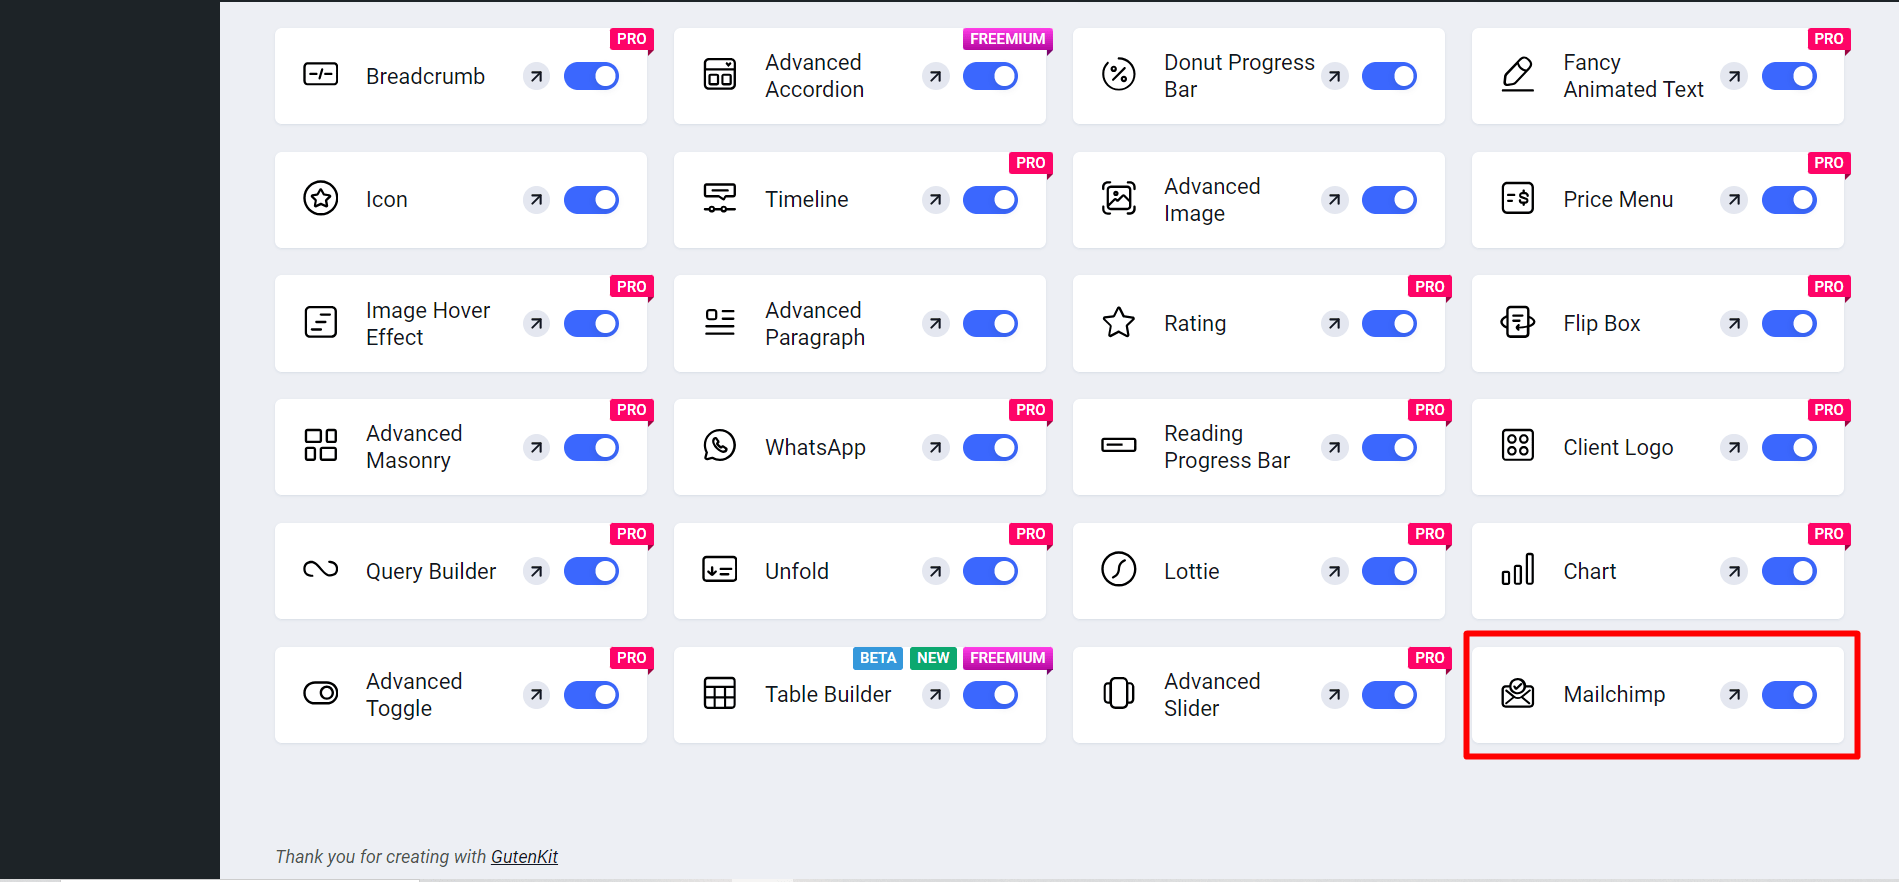
Accesso alla dashboard di WordPress > Vai a GutenKit > Moduli > Trova Mailchimp > Attiva il pulsante per attivarlo
Ora,
- Trovare Pagine/Articoli > Aggiungi nuova pagina/Articolo oppure inizia a modificare una pagina esistente con l'editor a blocchi.
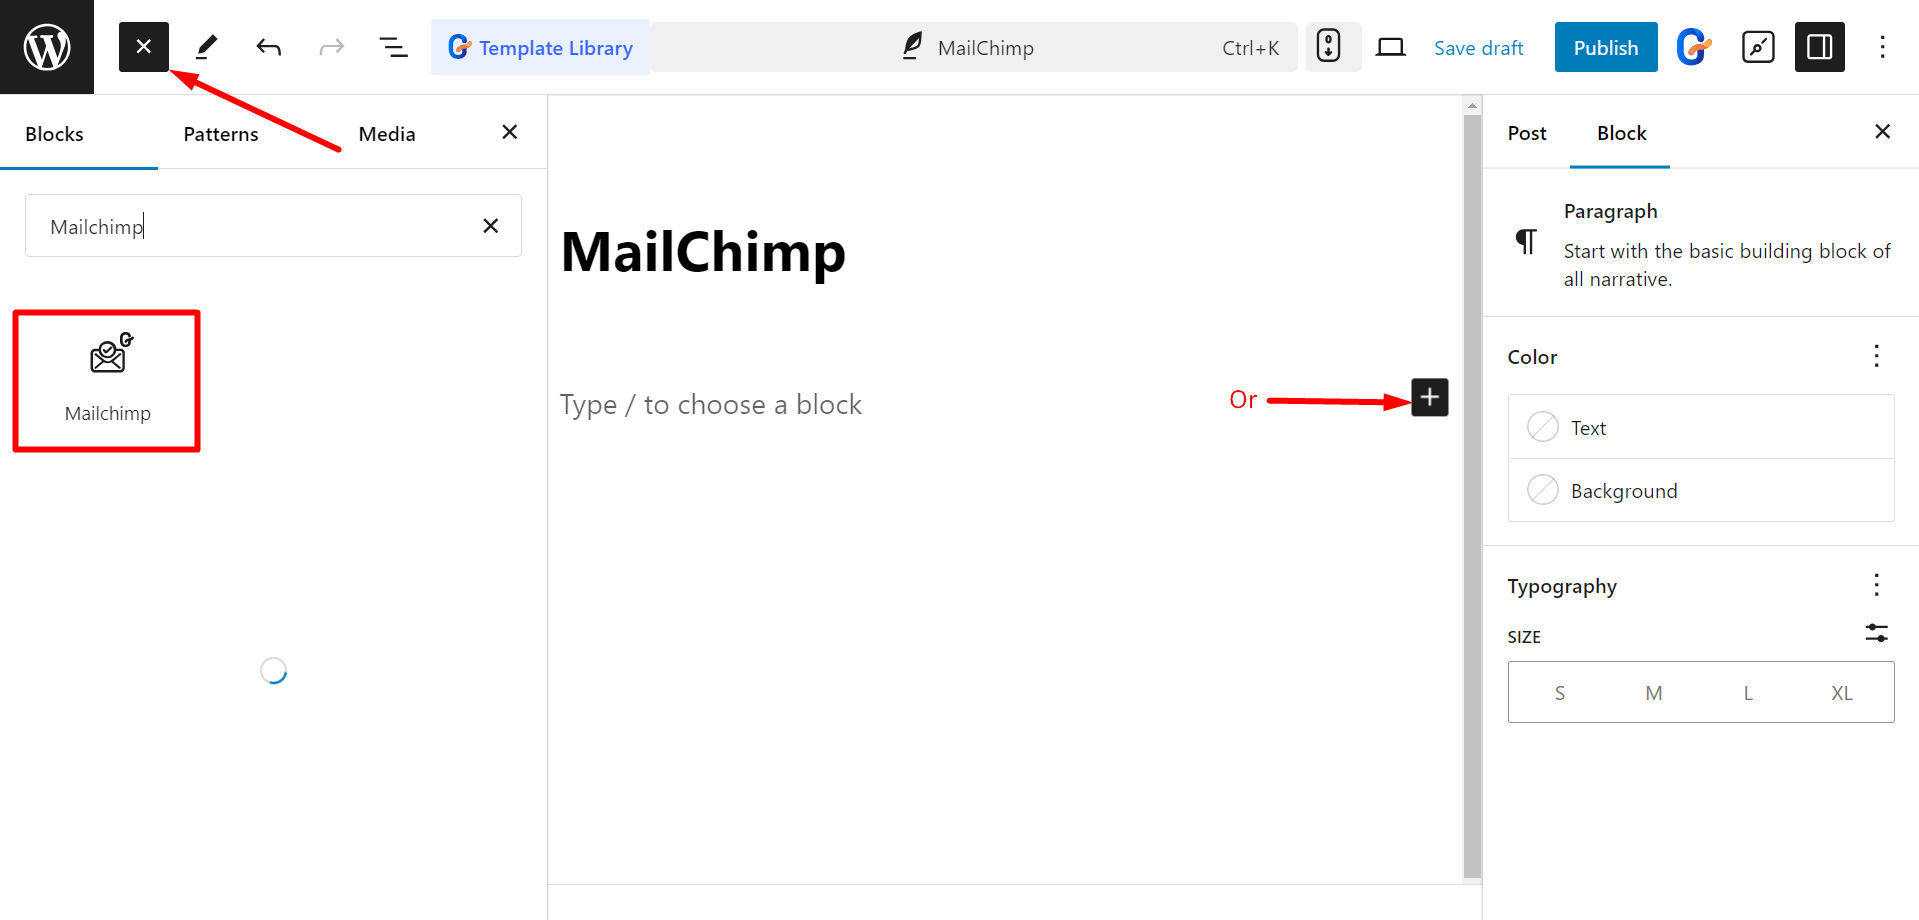
- Cerca il “+" sul lato destro o nella parte superiore della schermata dell'editor. Cliccalo.
- Apparirà un menu a blocchi, cerca "Mailchimp”.
- Quando lo vedi, fai clic su di esso o trascinalo e rilascialo nella schermata dell'editor dei blocchi.
Modifica della parte del contenuto #
Qui potrai modificare Campi modulo e pulsante.
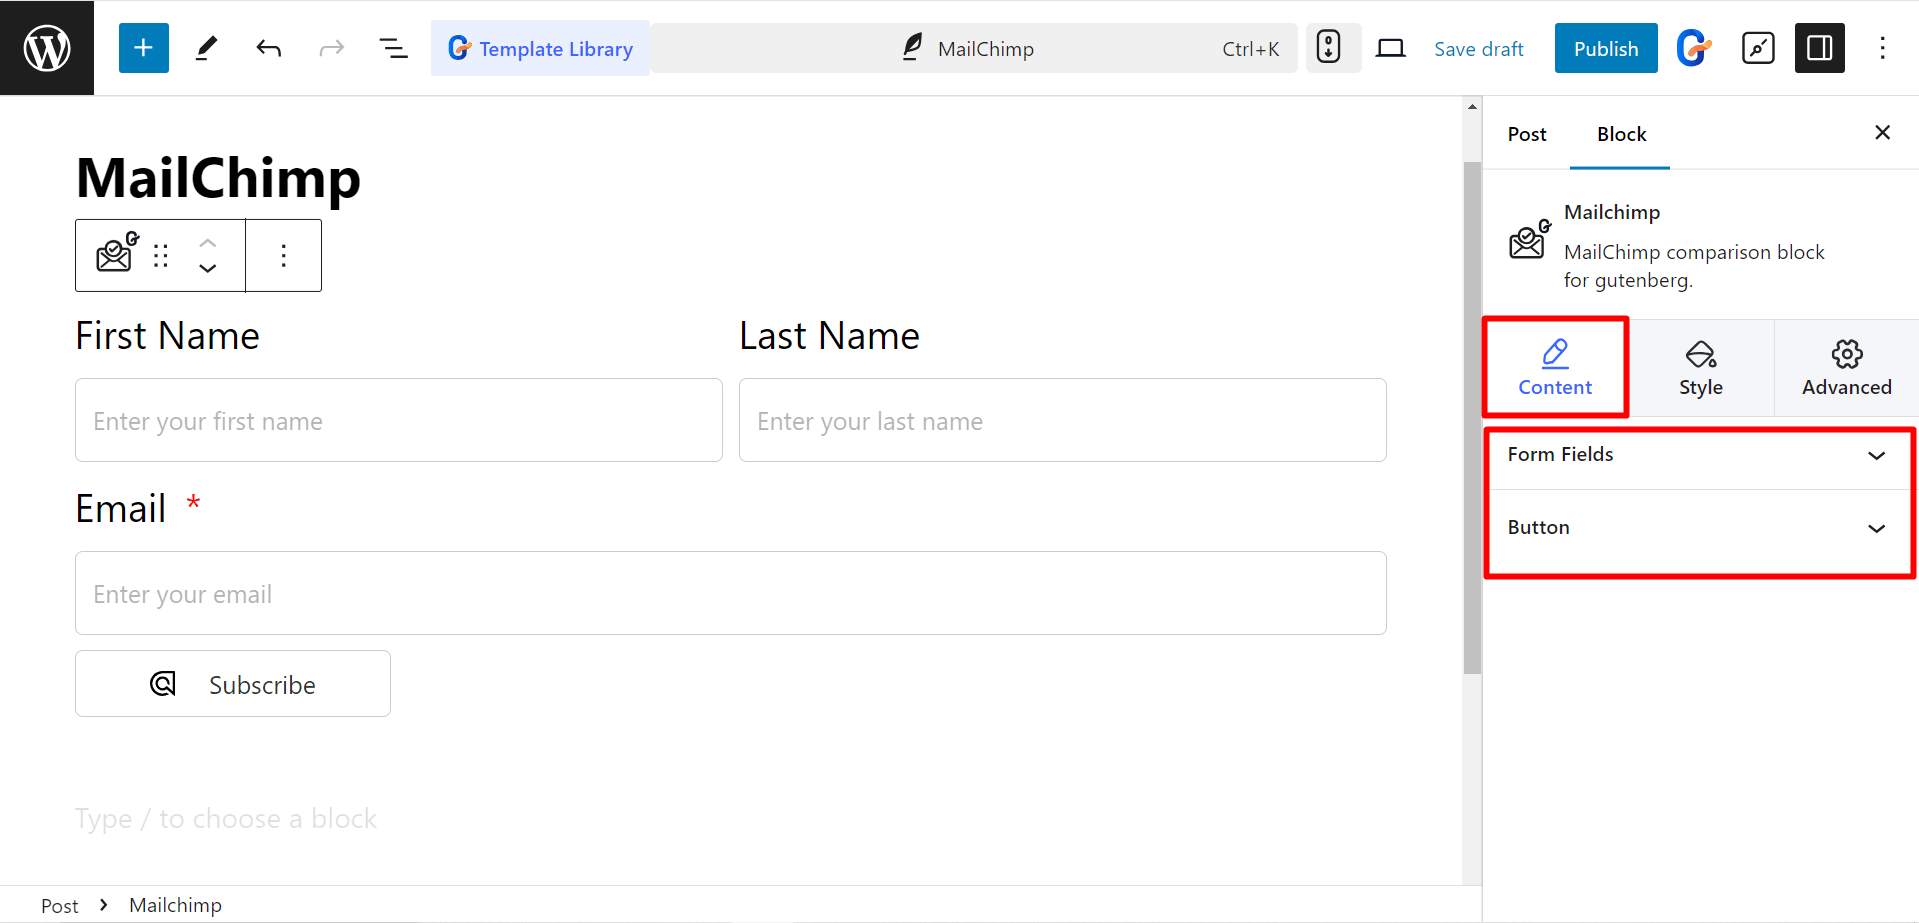
Quando tu espandi Campi modulo, noterai una nota che ti chiede di aggiungere una chiave API per eseguire la tua campagna di email marketing.

FASE 2: Genera la chiave API #
Quindi, visita il Sito Mailchimp e accedi al tuo account. Dopodiché,
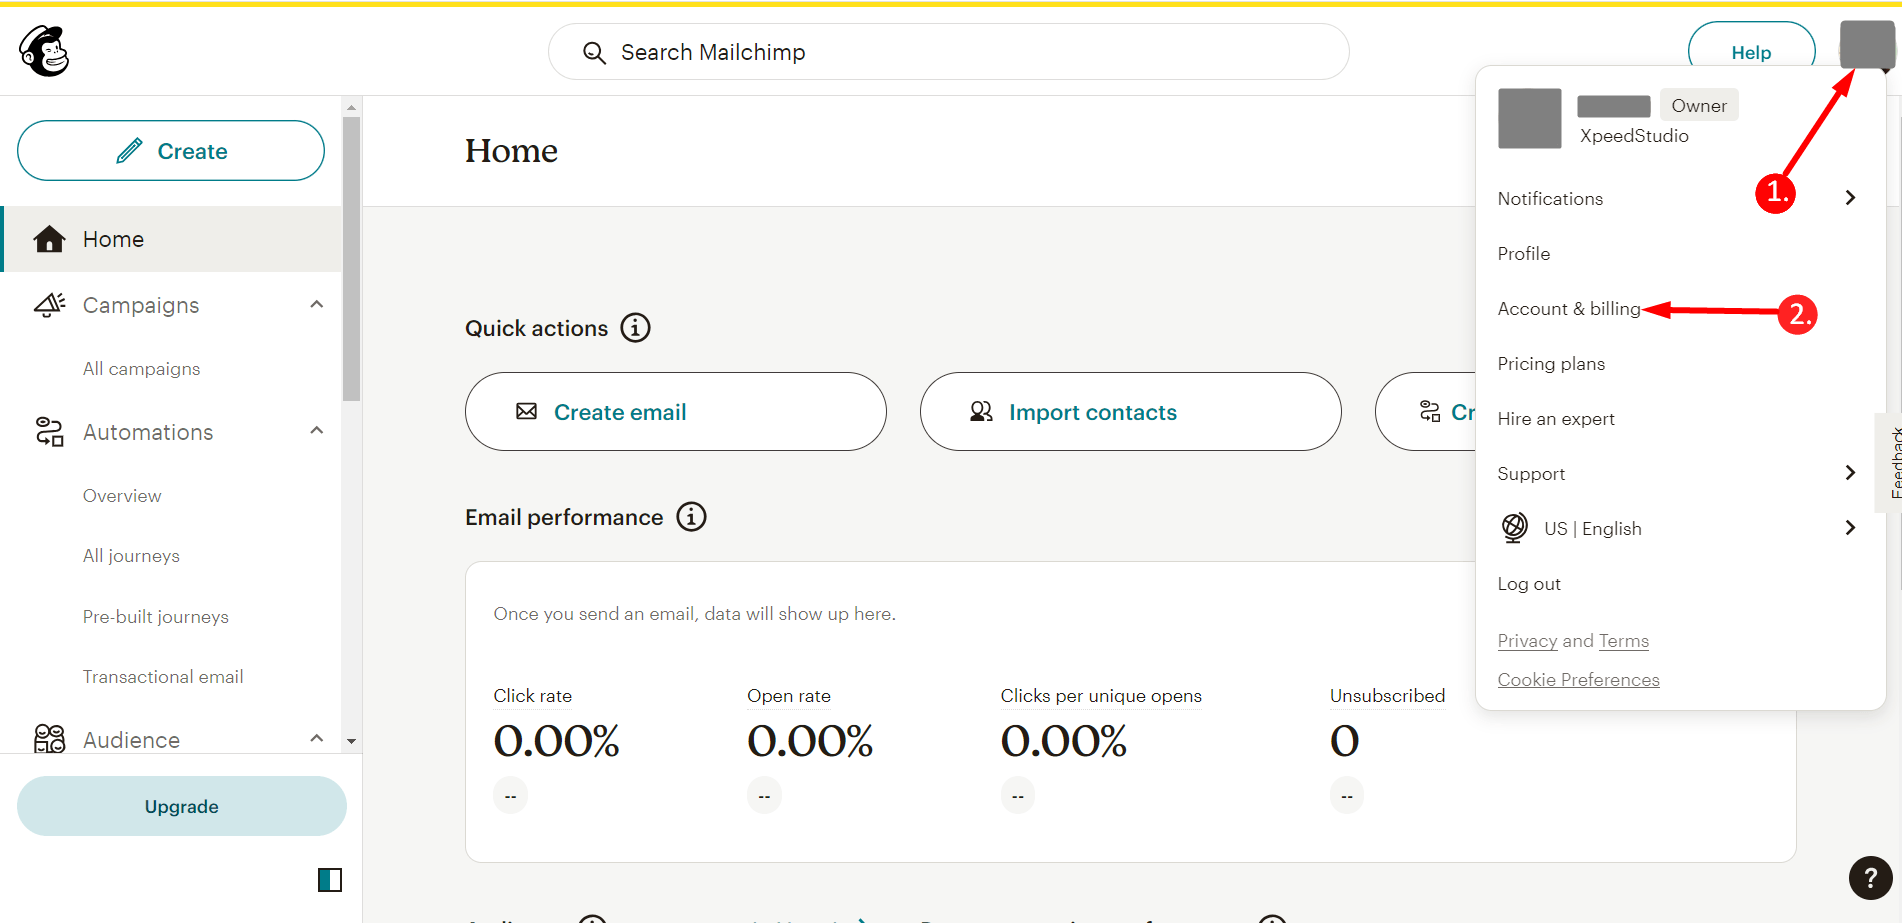
1. Clicca sul tuo profilo
2. Vai su Account e fatturazione
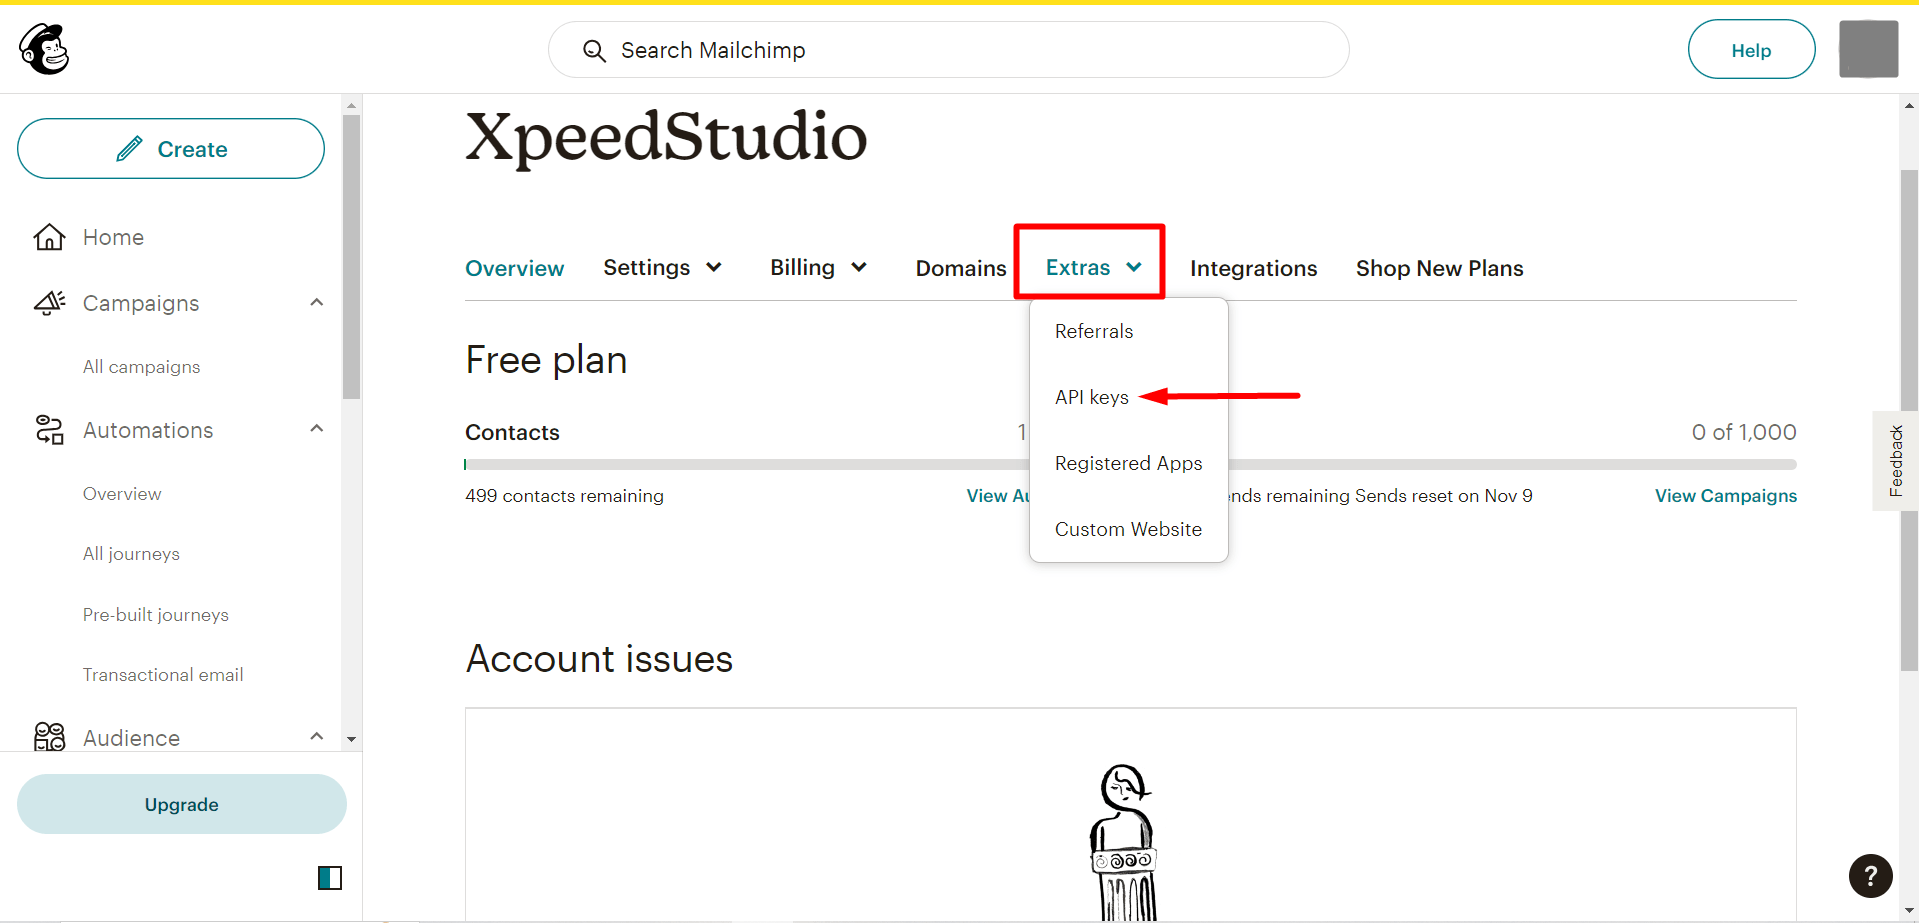
Trova Extra e clicca sulle chiavi API.
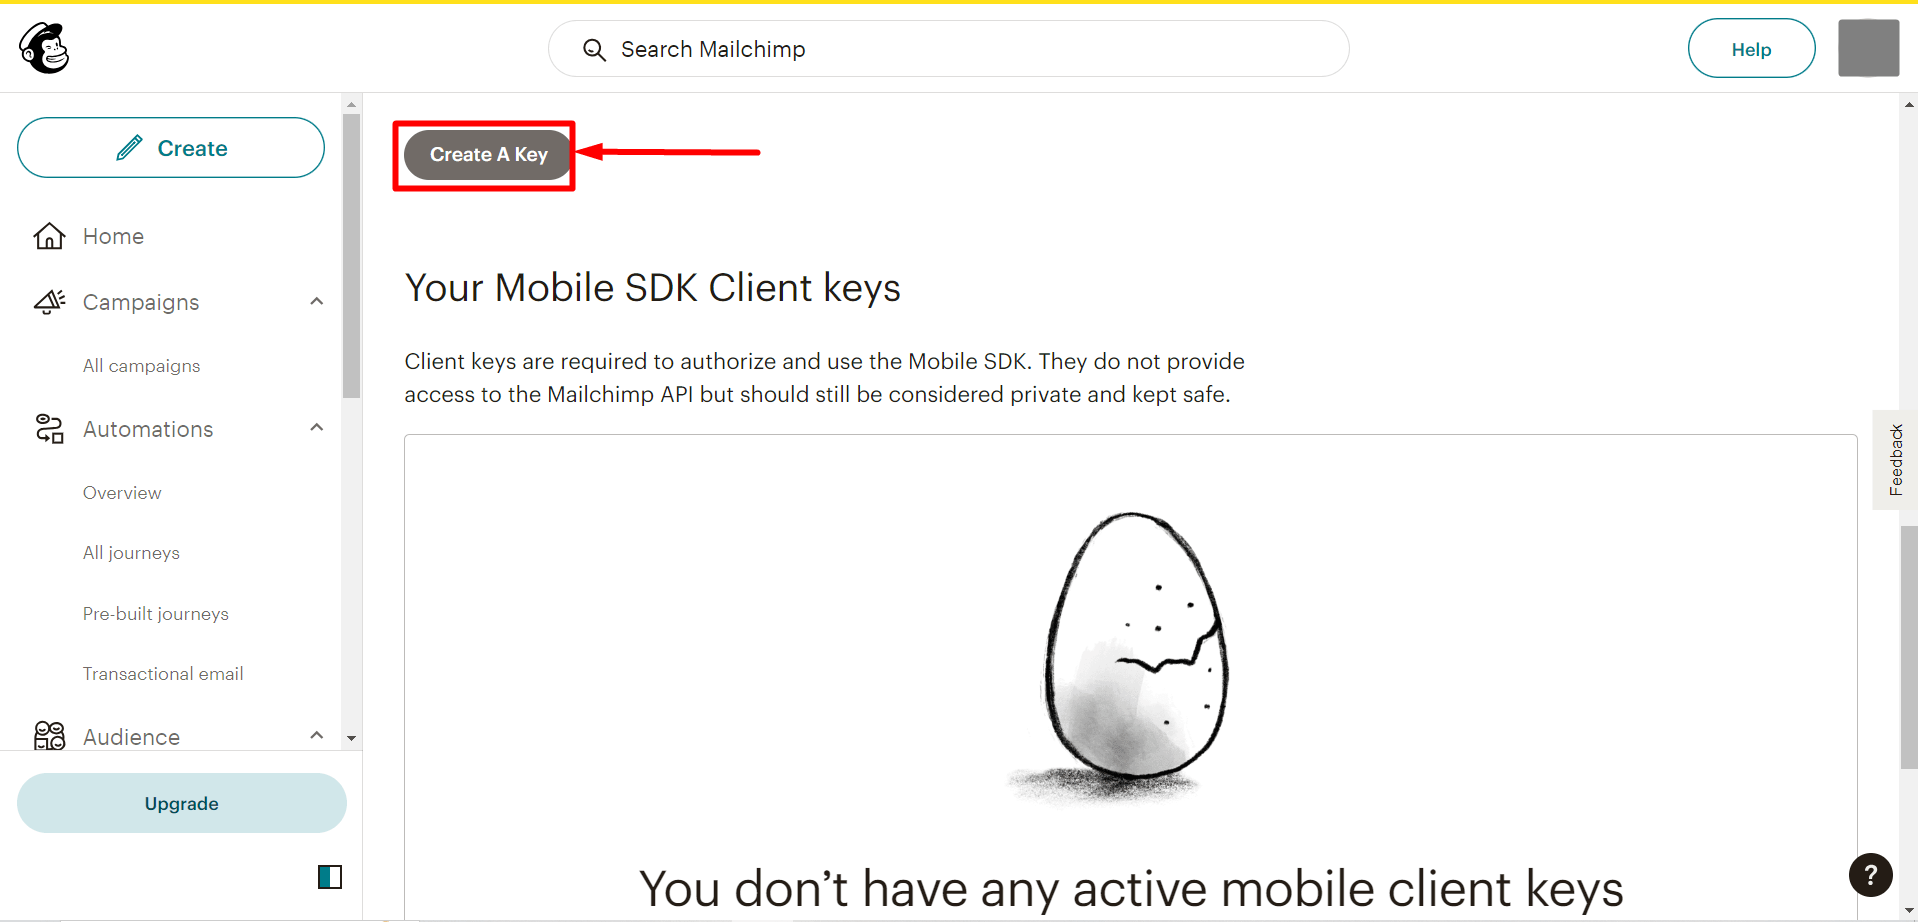
Prossimo, clicca il Pulsante Crea chiave API per generare la chiave API.
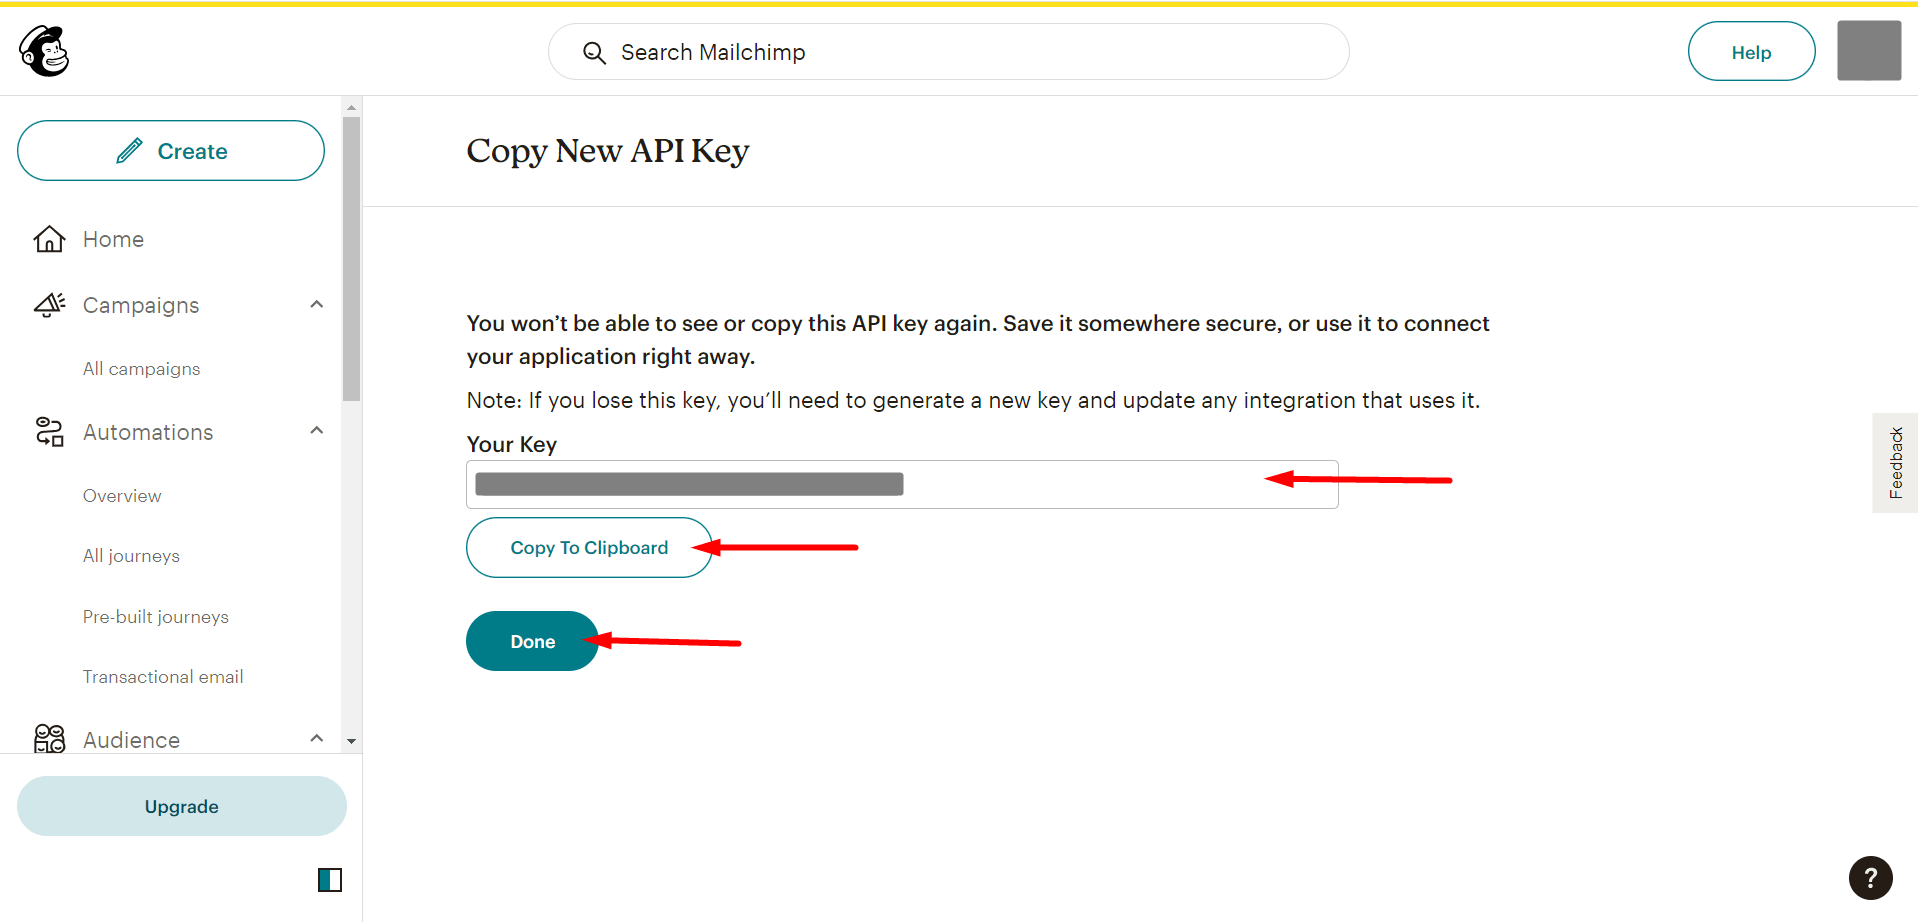
Copia la chiave API generata e fai clic sul pulsante Fine
Now, you have to go to your WordPress dashboard:
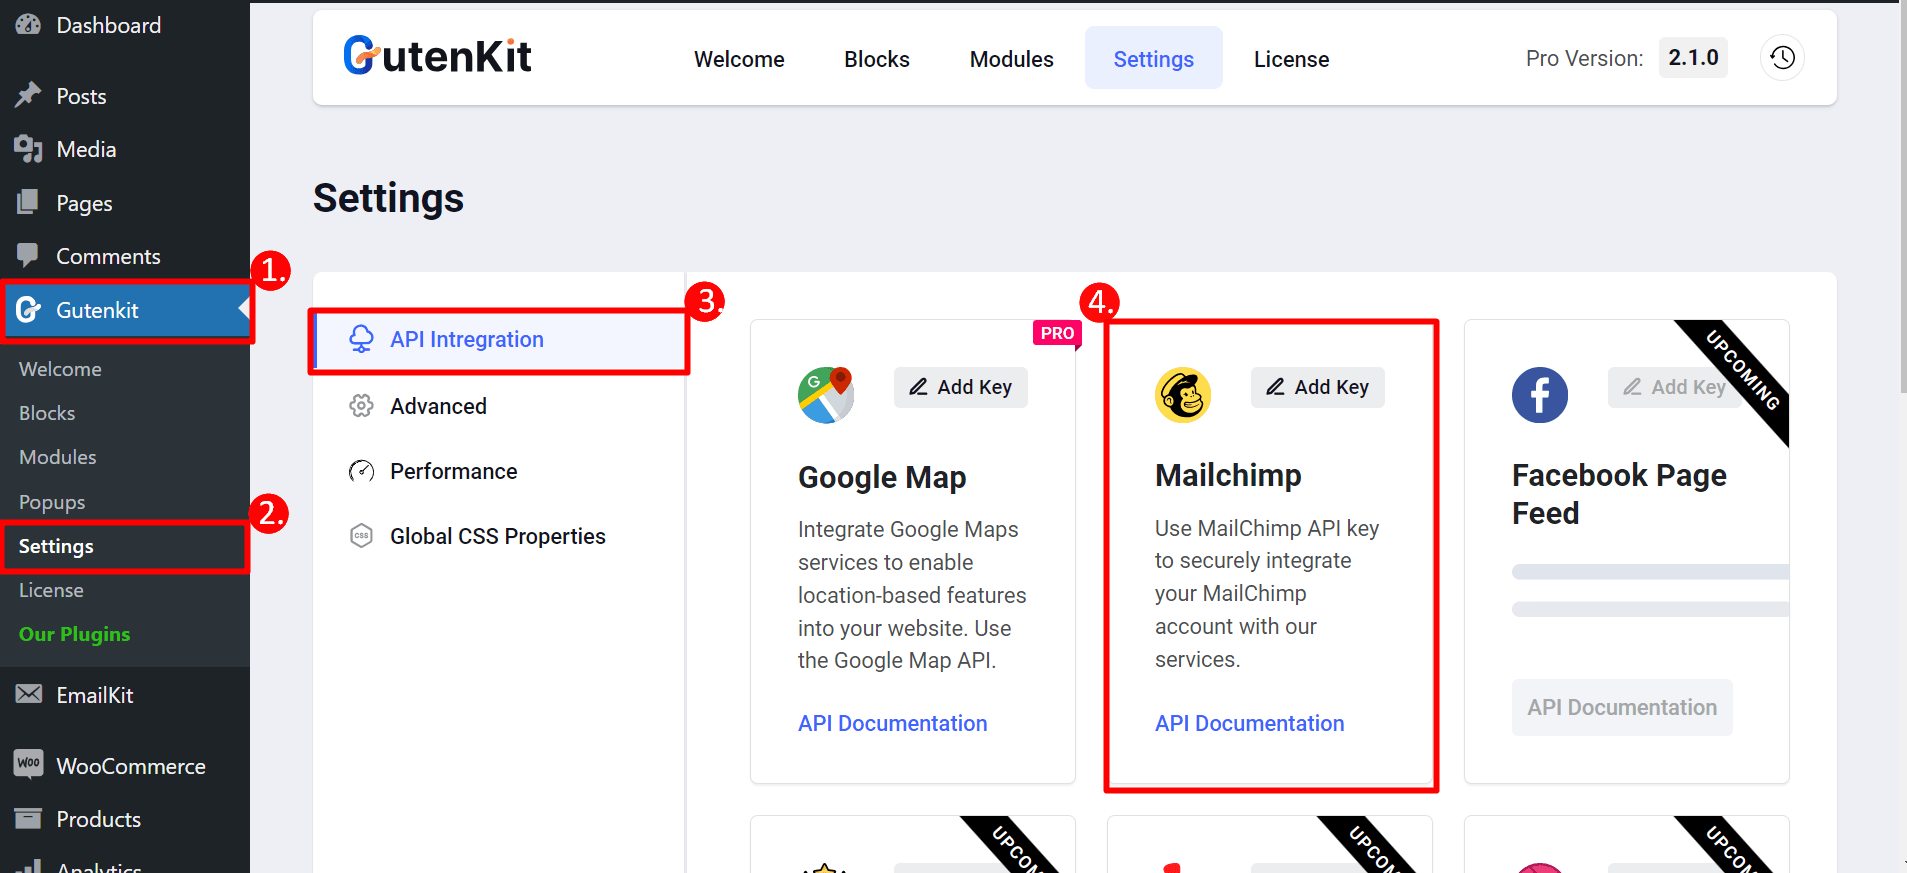
- Trova GutenKit
- Impostazioni
- Integrazione API
- Trova Mailchimp e premi l'opzione Aggiungi chiave per incollare la chiave API copiata
PASSO 3: Torna alla pagina #
Ora puoi selezionare il modulo dal menu a discesa.
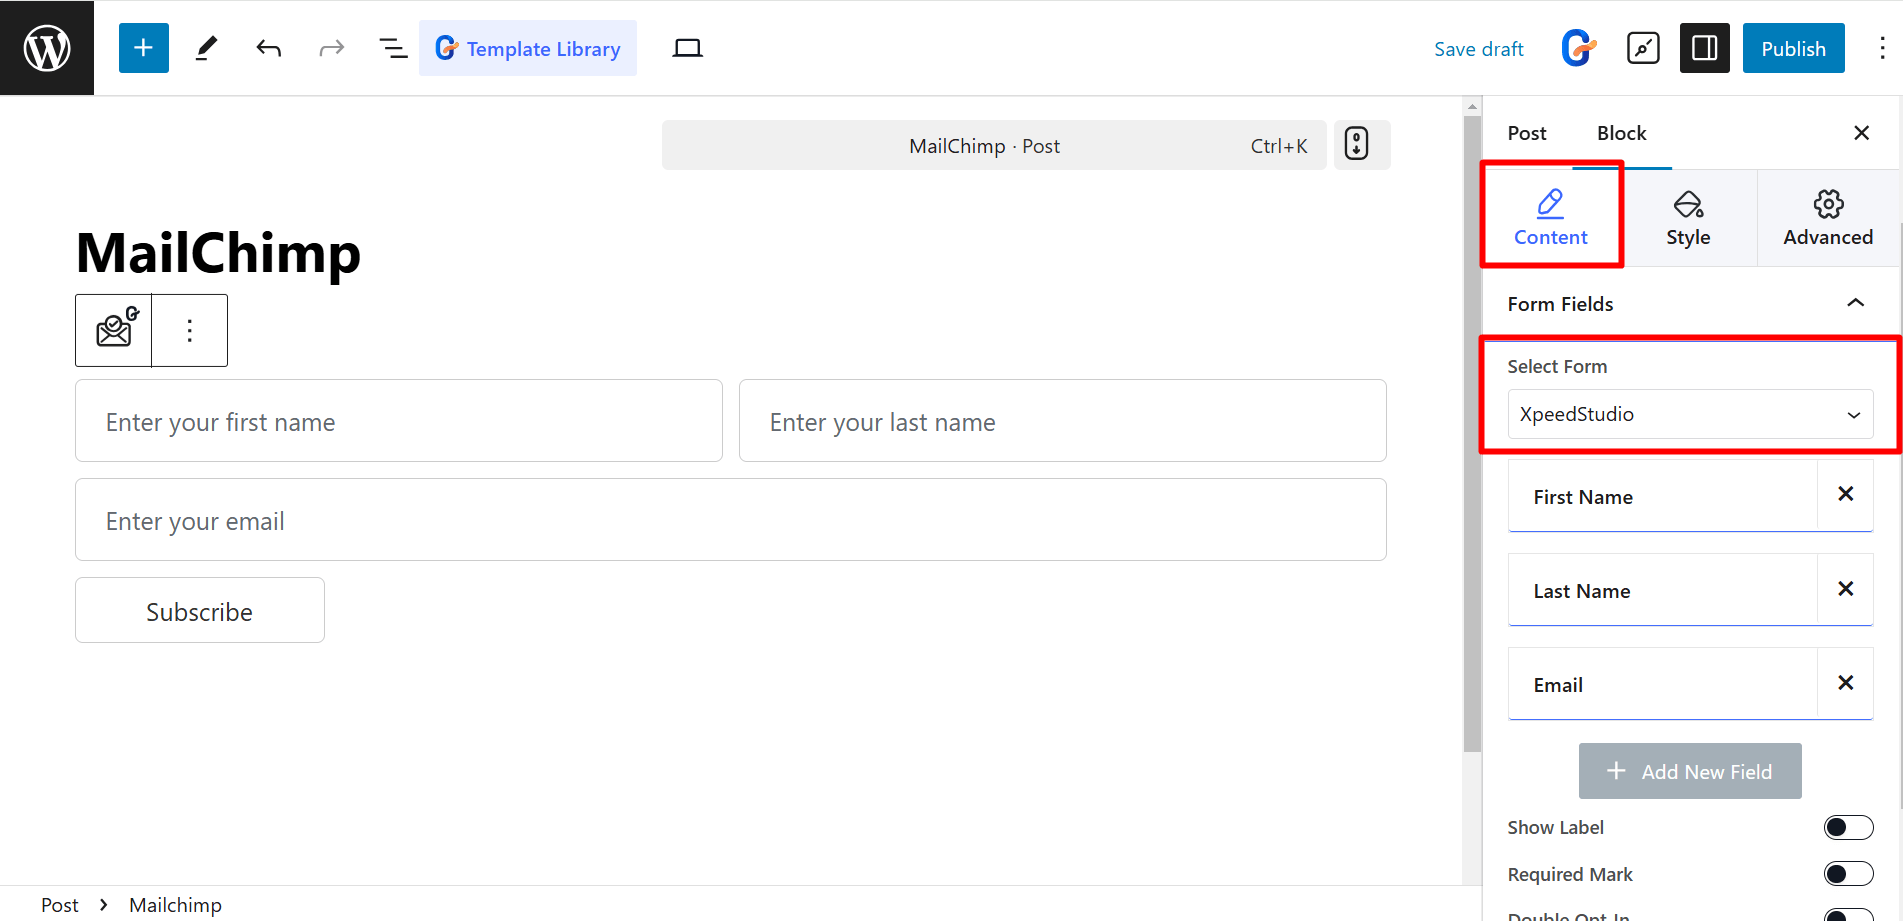
Nella parte del contenuto, i controlli in Campi del modulo Sono:
- Elementi - Aggiungi elementi in base alle tue esigenze, come Nome, Cognome, Email, ecc.
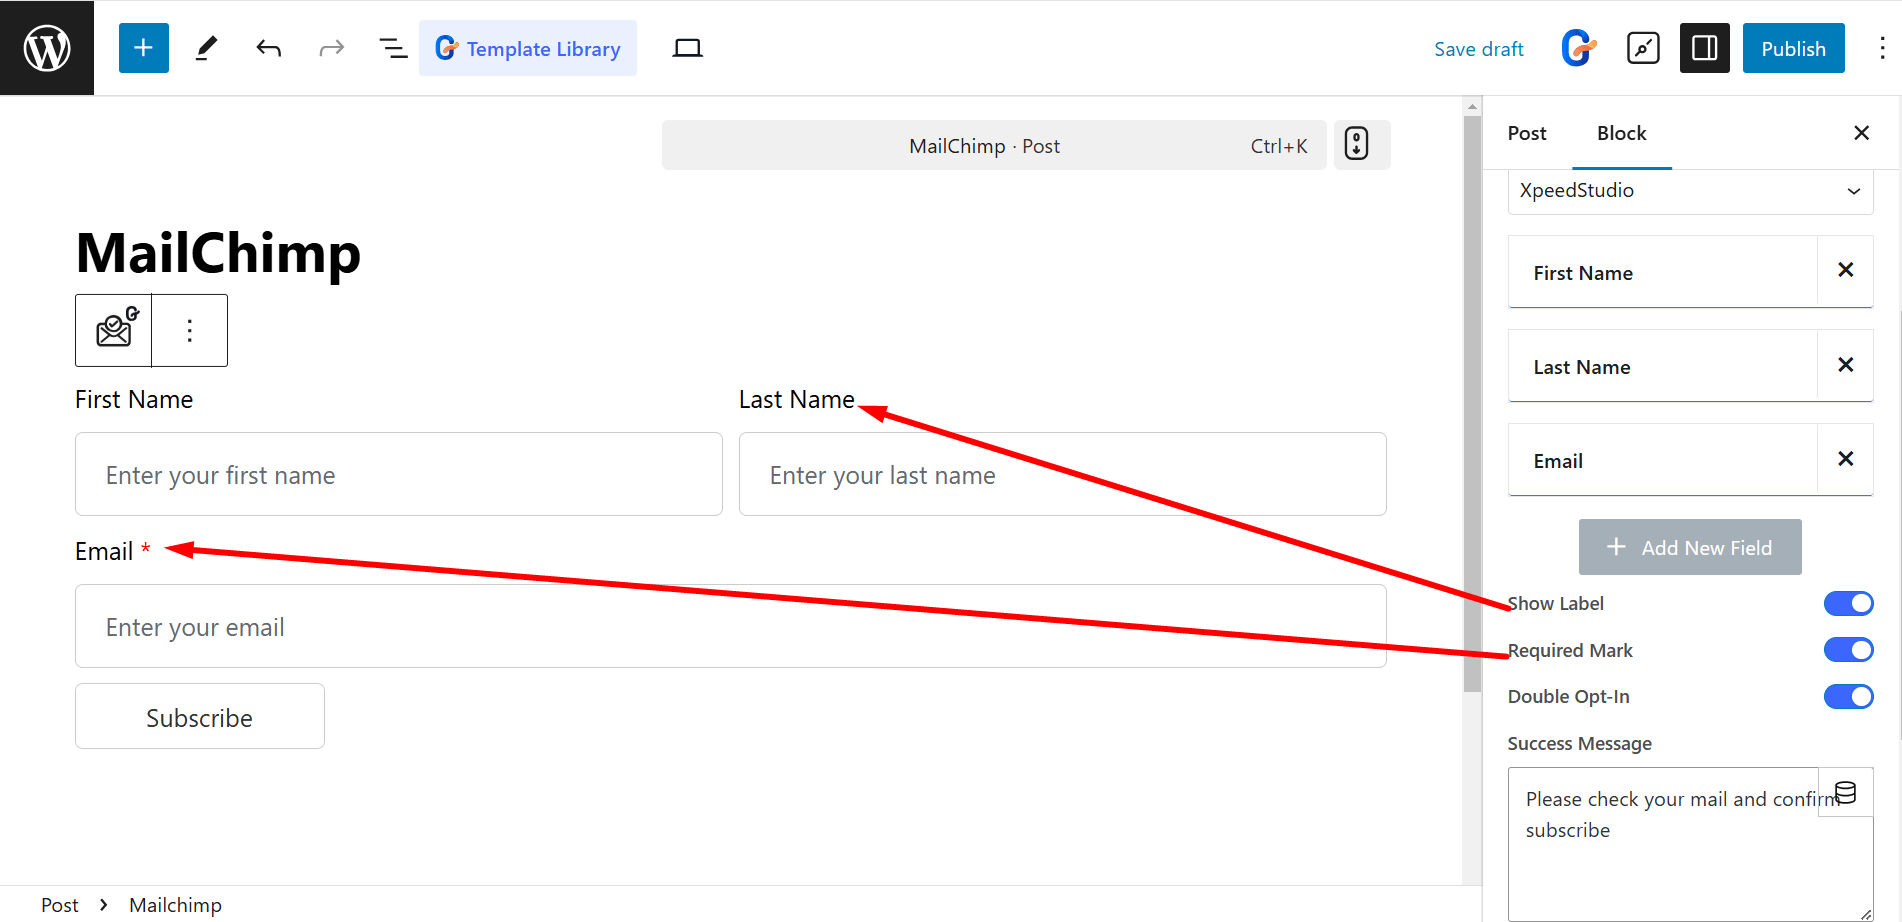
- Mostra etichetta – Visualizza il nome di un'etichetta sopra il campo di input.
- Segno obbligatorio – Indica un campo obbligatorio.
- Doppio Opt-In – Richiede un'email di conferma per l'iscrizione.
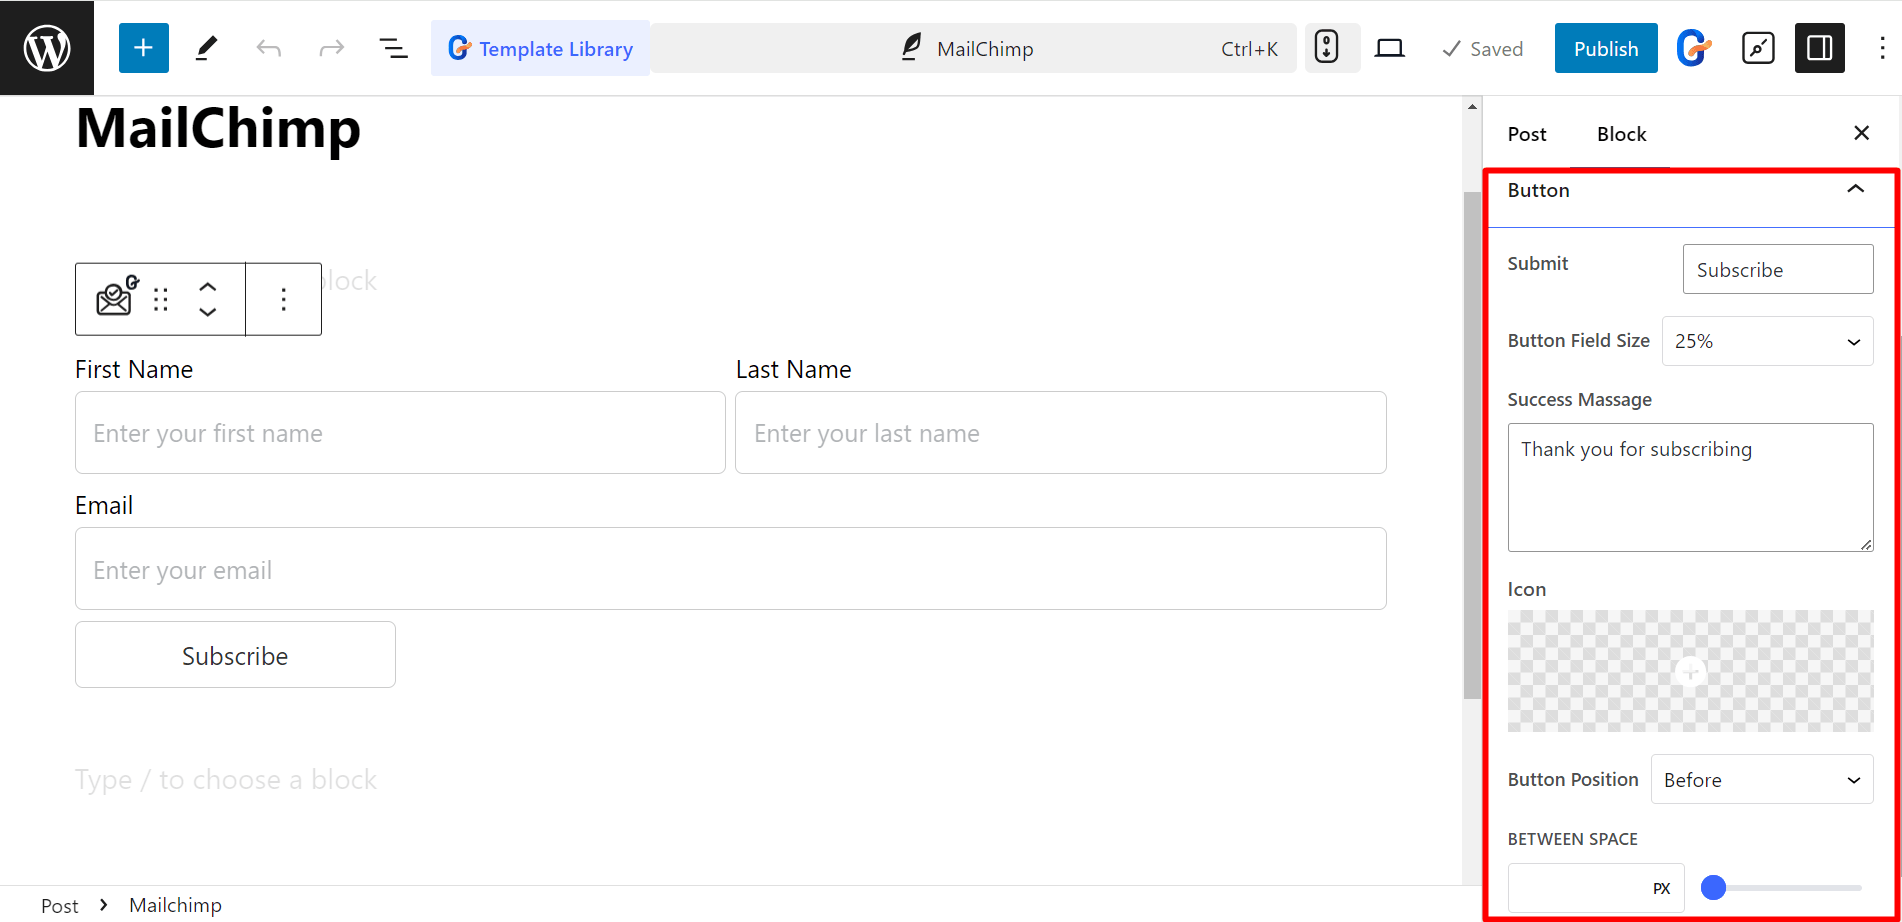
I controlli nel pulsante sono:
- Invia: Scrivi nel campo qualsiasi cosa che attivi l'invio del modulo.
- Dimensione campo pulsante: Controlla la dimensione del campo del pulsante (predefinito, 20%, 50%, 100%, ecc.).
- Messaggio di successo: Visualizza un messaggio in caso di invio riuscito.
- Icona: Aggiunge un'icona al pulsante dalla libreria oppure puoi caricare SVG.
- Pulsante Posizione: Determina la posizione dell'icona (prima o dopo il testo).
- Tra lo spazio – Regola la spaziatura tra il testo del pulsante e l'icona.
Imposta lo stile del modulo Mailchimp #
- Modulo - È possibile definire lo stile del modulo modificando la distanza tra le colonne, la distanza tra le righe, le etichette, i colori, ecc.
- Campo - Per i campi è possibile modificare il colore del testo e dello sfondo, la tipografia, il bordo, la spaziatura, ecc.
- Pulsante – Qui puoi impostare la posizione del pulsante, il colore del testo e dello sfondo, il colore dell'icona, il margine, la spaziatura, ecc.
- Messaggi – Per scrivere un messaggio più gradevole, puoi cambiare la tipografia, il colore del messaggio di successo, il colore del messaggio di errore, ecc.
Ecco come funzioneranno i moduli