Il blocco GutenKit Post Grid ti consente di visualizzare i tuoi post in un layout a griglia visivamente accattivante. Offre una varietà di opzioni di personalizzazione, tra cui il numero di colonne, la dimensione delle immagini e la quantità di spaziatura tra i post.
In questa documentazione imparerai a usare il blocco Page Grid GutenKit. Cominciamo!
Come si usa il blocco Post Grid? #
Accesso alla dashboard di WordPress –
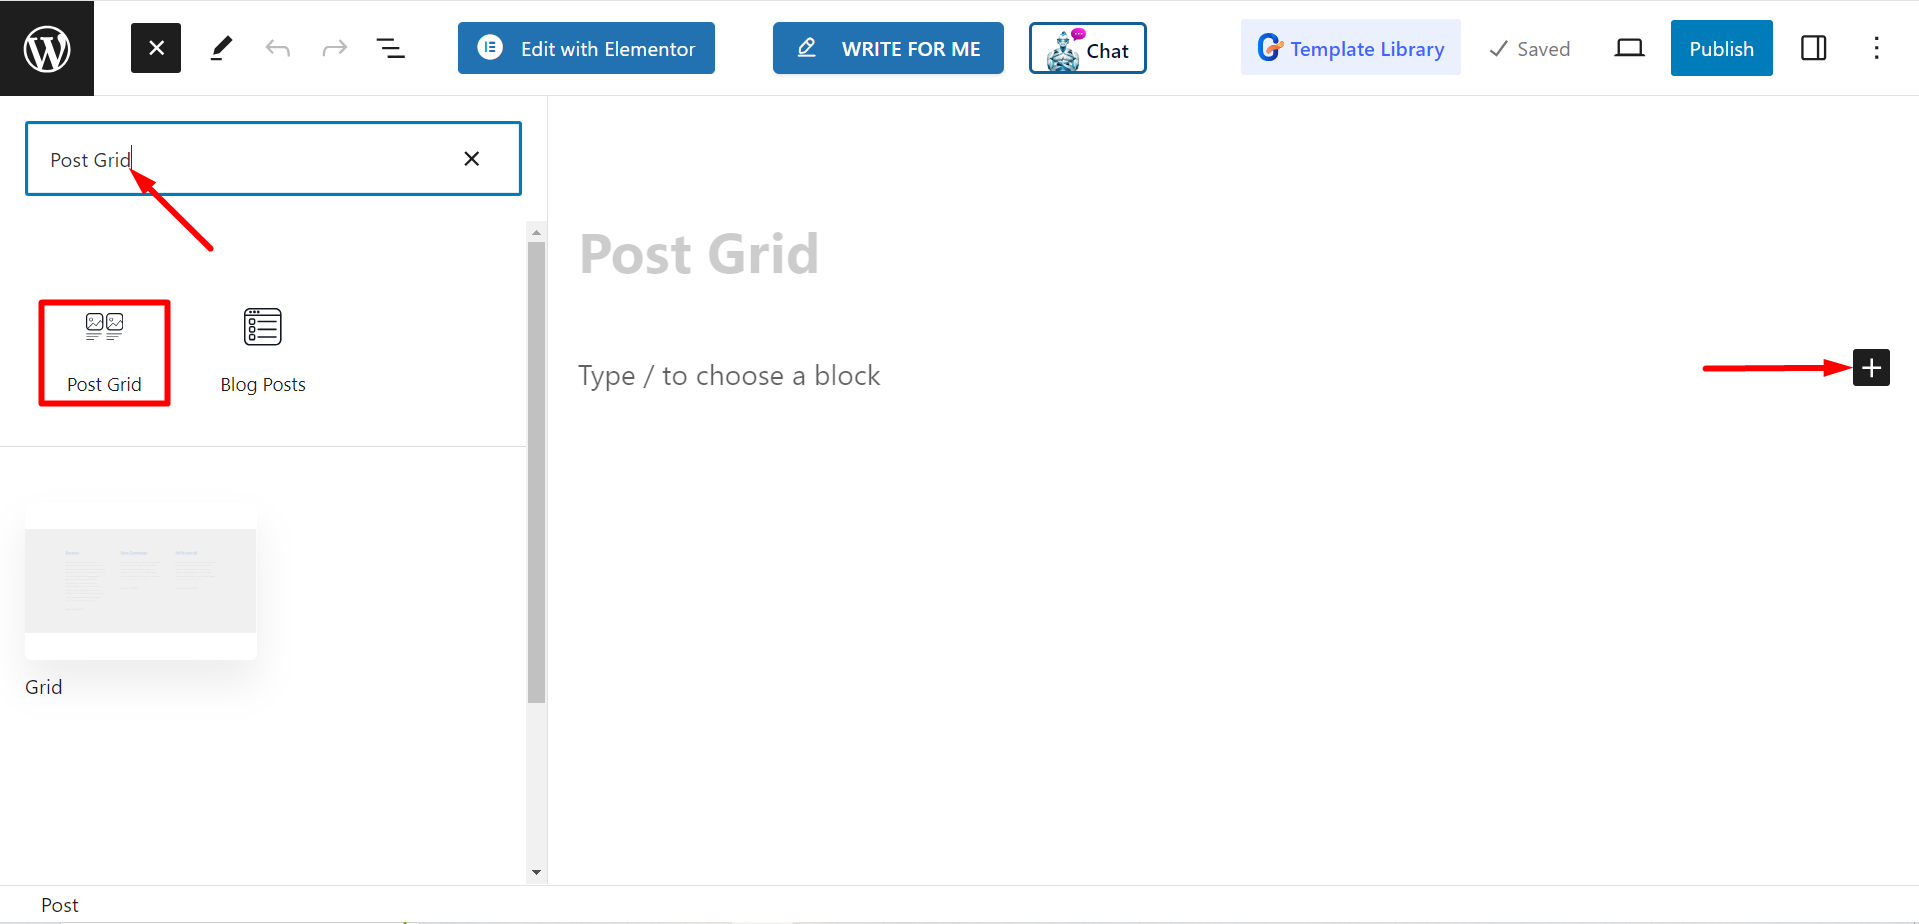
- Trovare Pagine/Articoli > Aggiungi nuova pagina/Articolo oppure inizia a modificare una pagina esistente con l'editor a blocchi.
- Cerca il “+" sul lato destro o nella parte superiore della schermata dell'editor. Cliccalo.
- Apparirà un menu a blocchi, cerca "Griglia di posta”.
- Quando lo vedi, fai clic su di esso o trascinalo e rilascialo nella schermata dell'editor dei blocchi.


Modifica della parte del contenuto #
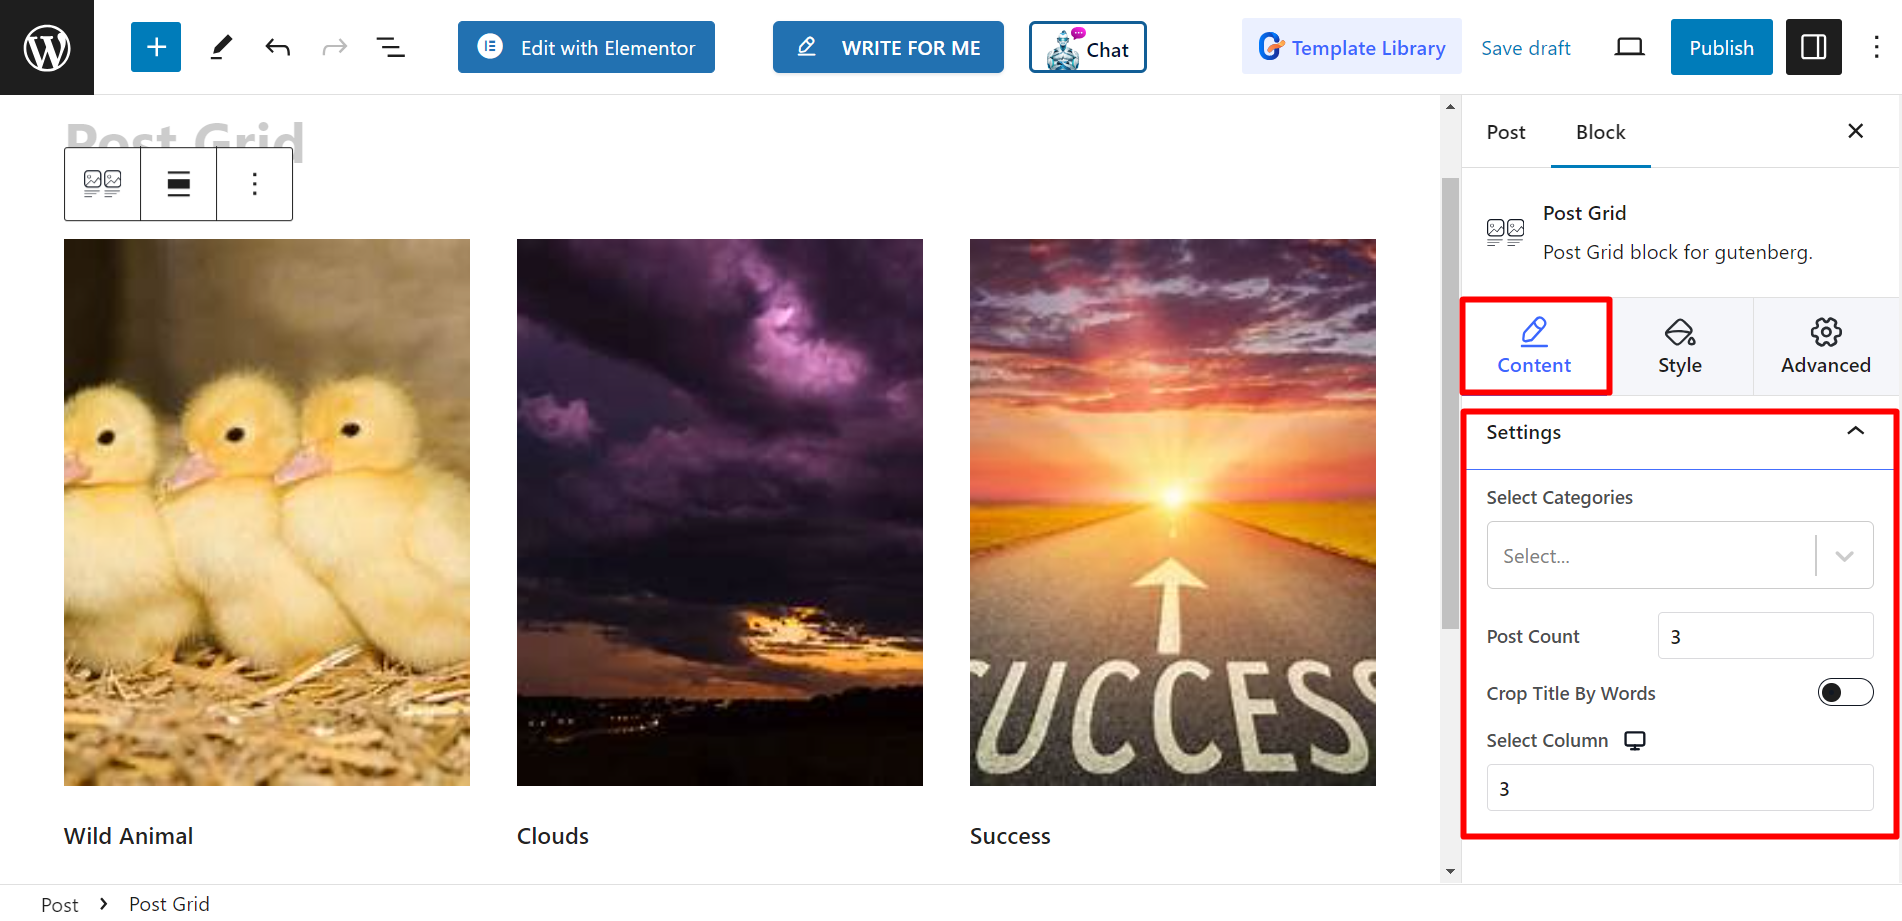
Dalla sezione delle impostazioni vedrai:
- Seleziona categorie: Da qui puoi selezionare le categorie dei post.
- Numero di post: Qui puoi impostare il numero di post che vuoi visualizzare.
- Ritaglia il titolo per parole: Se necessario, puoi mantenere titoli di post brevi. Se attivi il pulsante, ti consentirà di regolare il numero di parole che vuoi ritagliare.
- Seleziona colonna: Con questa opzione puoi impostare il numero di colonna.


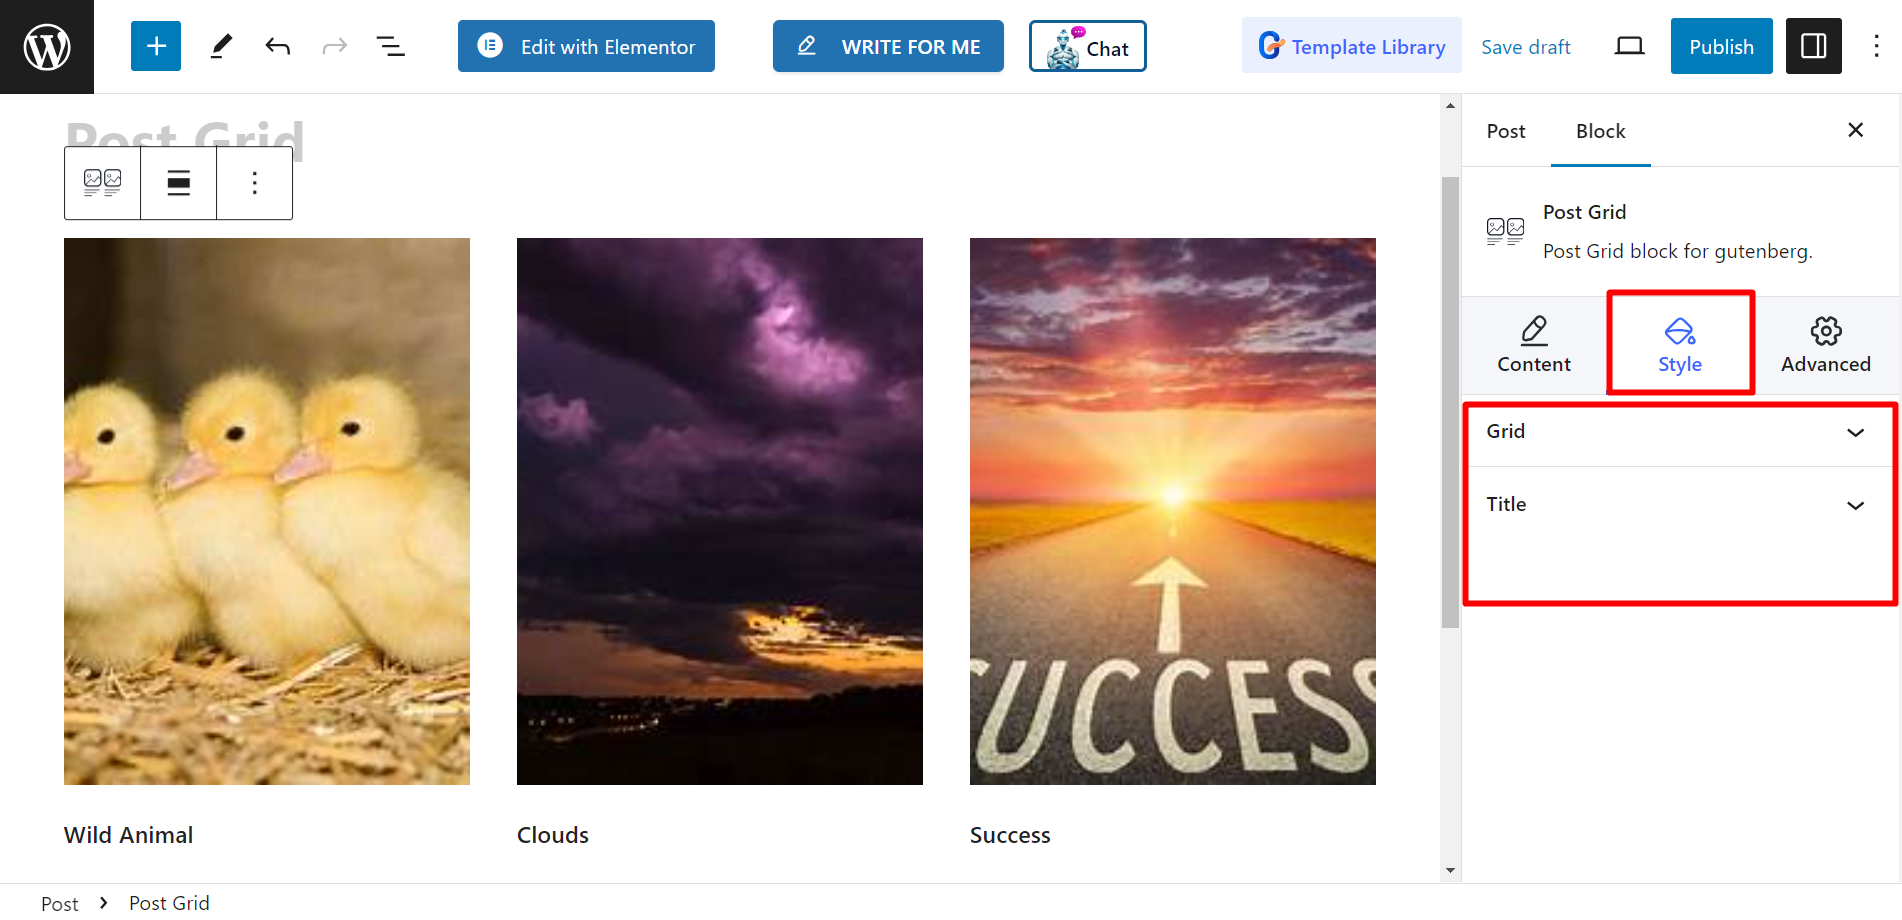
Stile #
Griglia - Qui troverete le barre per regolare l'altezza e lo spazio e potrete regolarle di conseguenza.
Titolo – Le opzioni di stile sono Tipografia, Colore, Colore passaggio del mouse e MARGINE.


Ora completa questi passaggi e personalizza la griglia dei post in base alle tue preferenze.


