Mostra in modo dinamico i contenuti sul tuo sito web con un visual query loop builder per Gutenberg. Consente agli utenti di progettare visivamente layout in WordPress che mostrano contenuti dinamici dal sito web, come post di blog, tipi di post personalizzati e anche pagine.
GutenKit ha portato il Blocco Query Builder nell'editor Gutenberg con capacità estese.
Vediamo come funziona il blocco.
Prerequisito #
Per utilizzare il generatore di query avanzato in Gutenberg, è necessario installare il plugin GutenKit Pro sul tuo sito web WordPress.
Generatore di loop di query GutenKit #
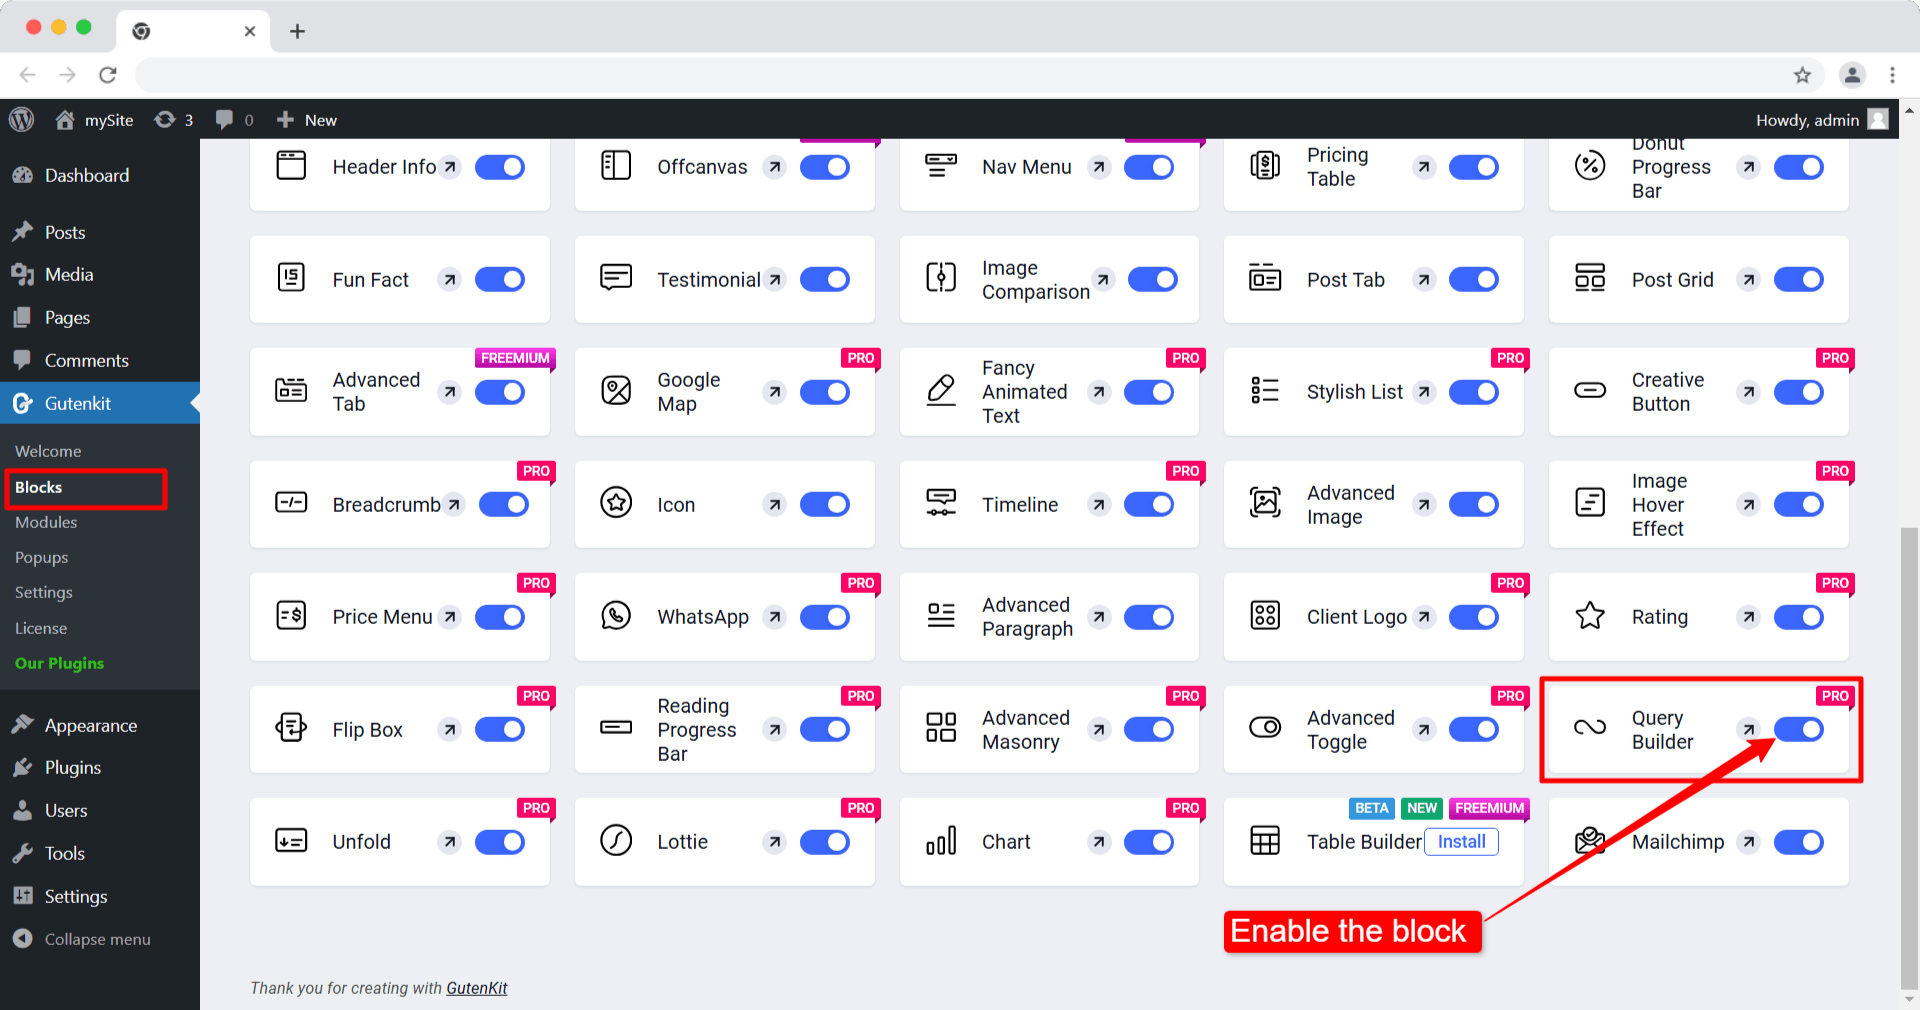
Dopo aver installato il plugin GutenKit Pro, è necessario abilitare il blocco Query Builder.
- Vai a GutenKit -> Blocchi.
- Trova il blocco Query Builder nell'elenco.
- Attivare il pulsante di attivazione per abilitare il blocco.
Aggiungere il blocco Query Builder all'editor #
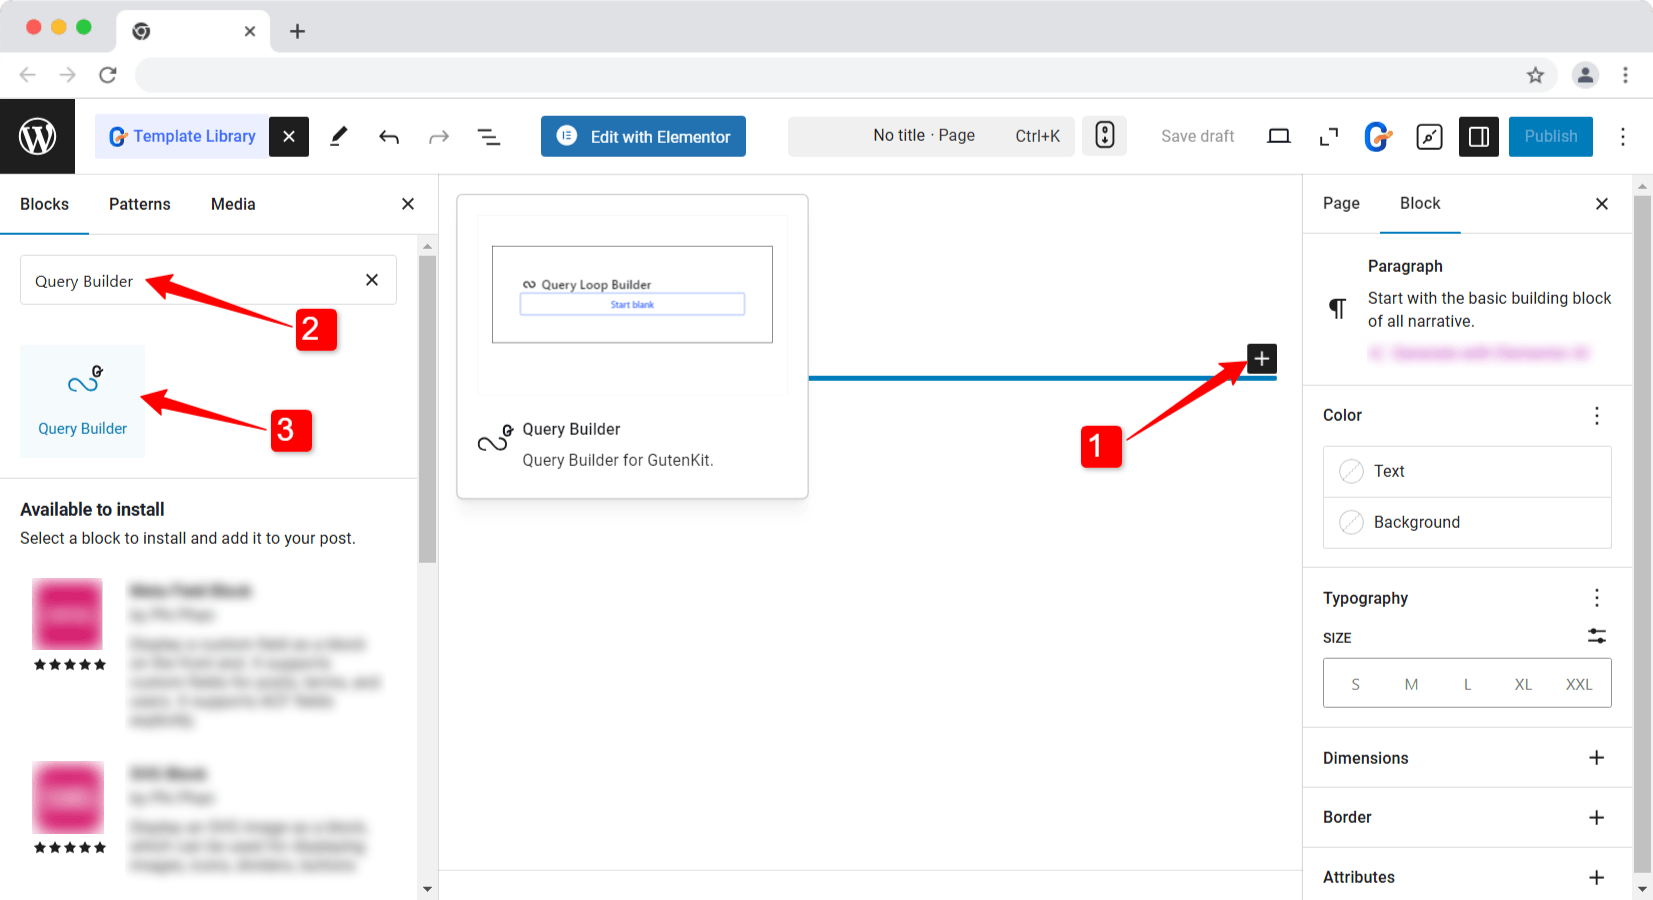
Dalla dashboard di WordPress apri la pagina/post in cui desideri utilizzare il generatore di query.
Ora cerca e basta fare clic/trascinare e rilasciare il blocco GutenKit Query Builder.
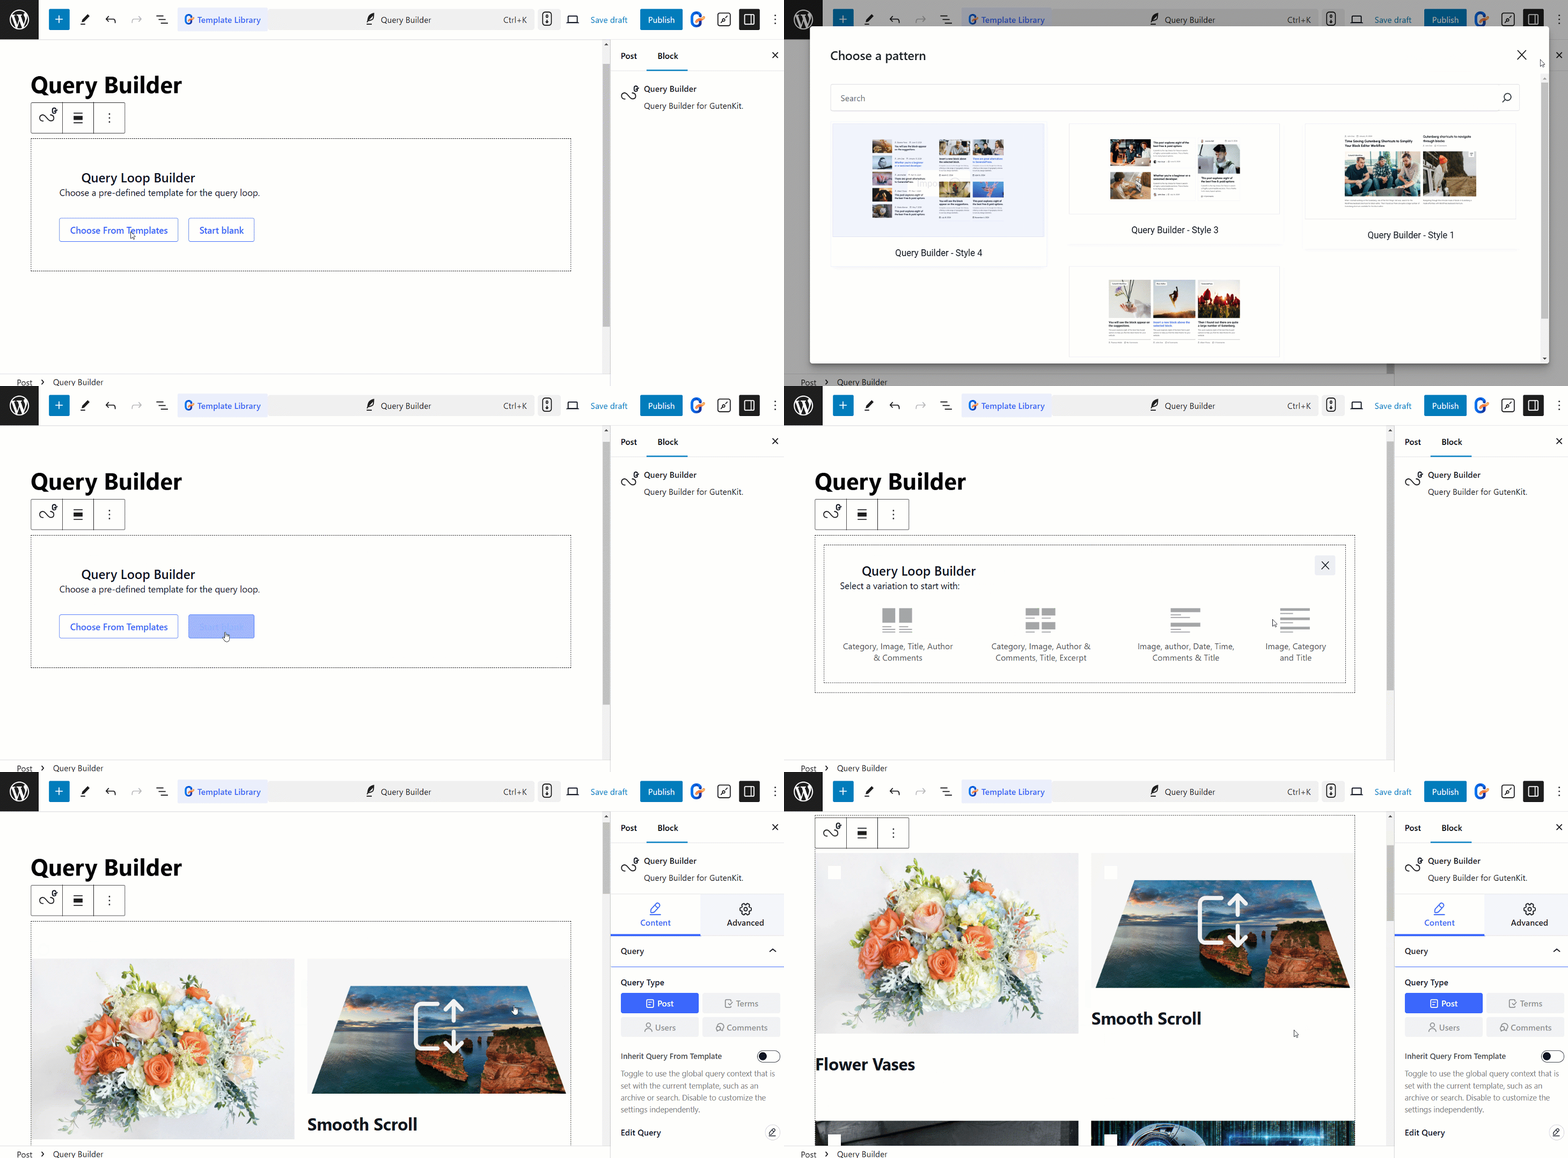
Scegli un modello vuoto predefinito per il ciclo di query dalle varianti.
Modifica della parte del contenuto #
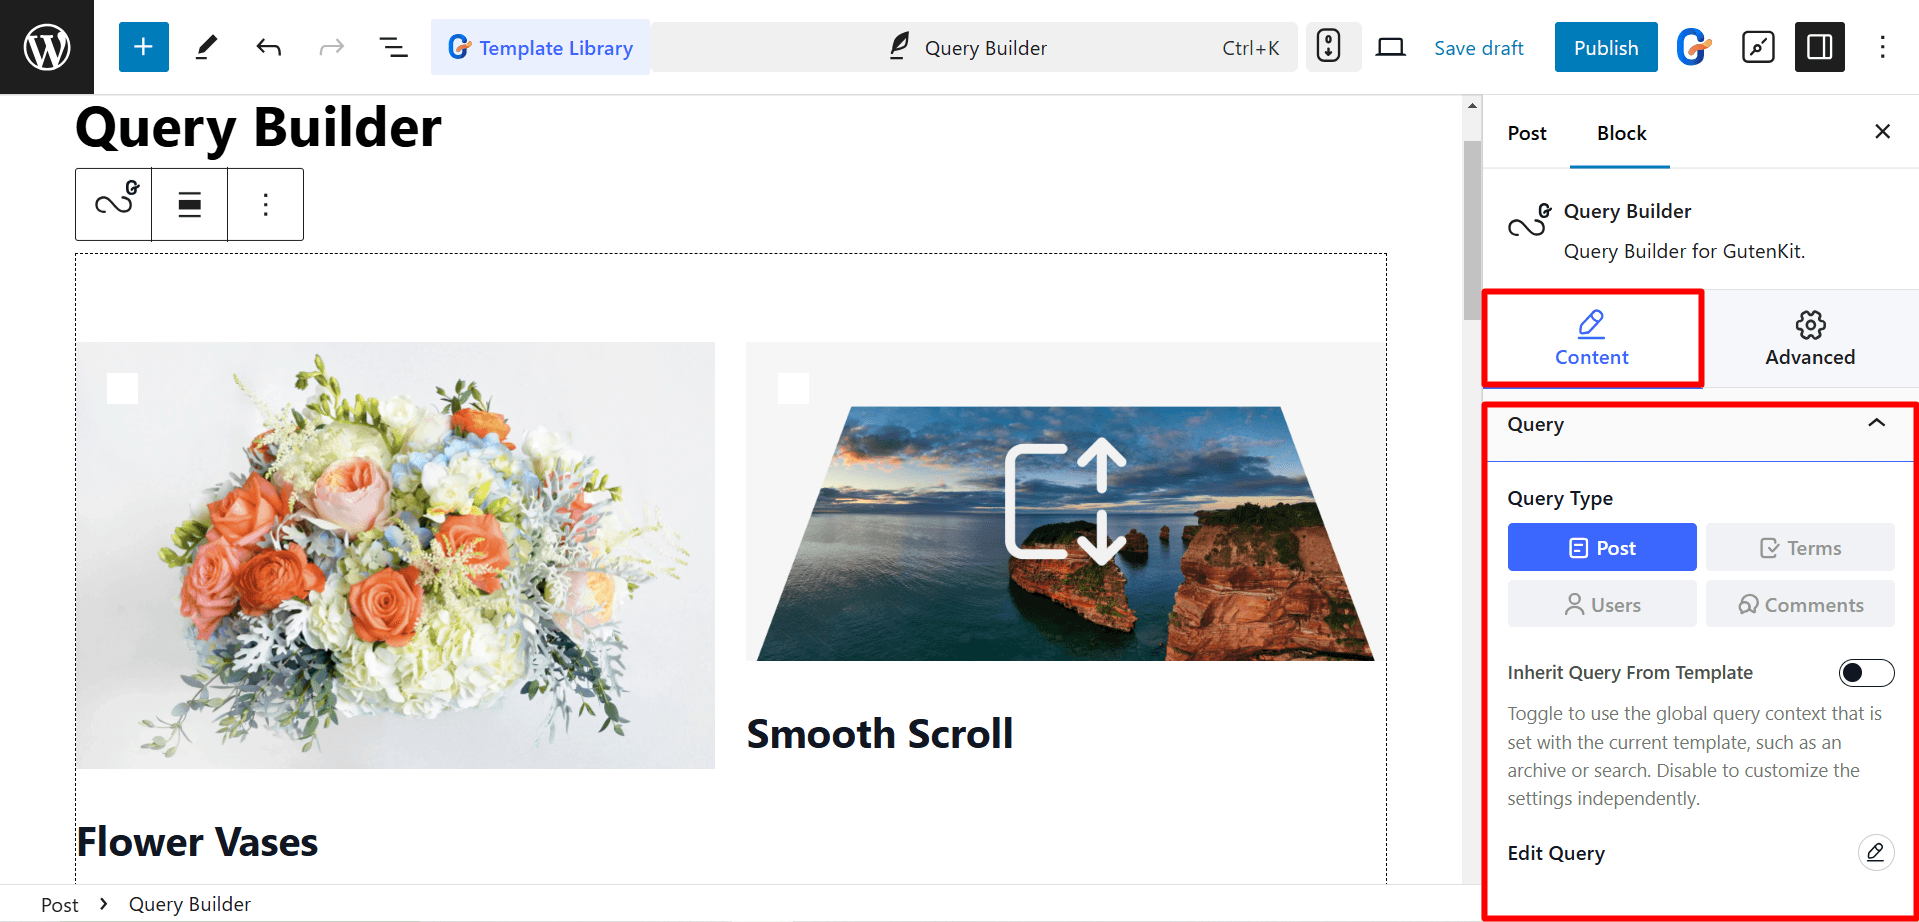
Dopo aver espanso la scheda Query, vedrai:
- Tipo di query: Qui puoi selezionare il tipo di post come post.
- Eredita query dal modello: Puoi usare il contesto di query globale abilitando questo pulsante di attivazione/disattivazione. Altrimenti, disabilita l'opzione per personalizzare le impostazioni in modo indipendente.
- Modifica query: Se disabiliti “Eredita query dal modello” puoi modificare le query tramite menu con diversi filtri di query, disponibili in Query Post Editor.
Query Post Editor (Filtri query) #
When you click on the Edit Query option, you can customize the queries with filters like Post query, Taxonomy query, Meta query, Date query, and more. Let’s break them down step by step:
☑️ Post #
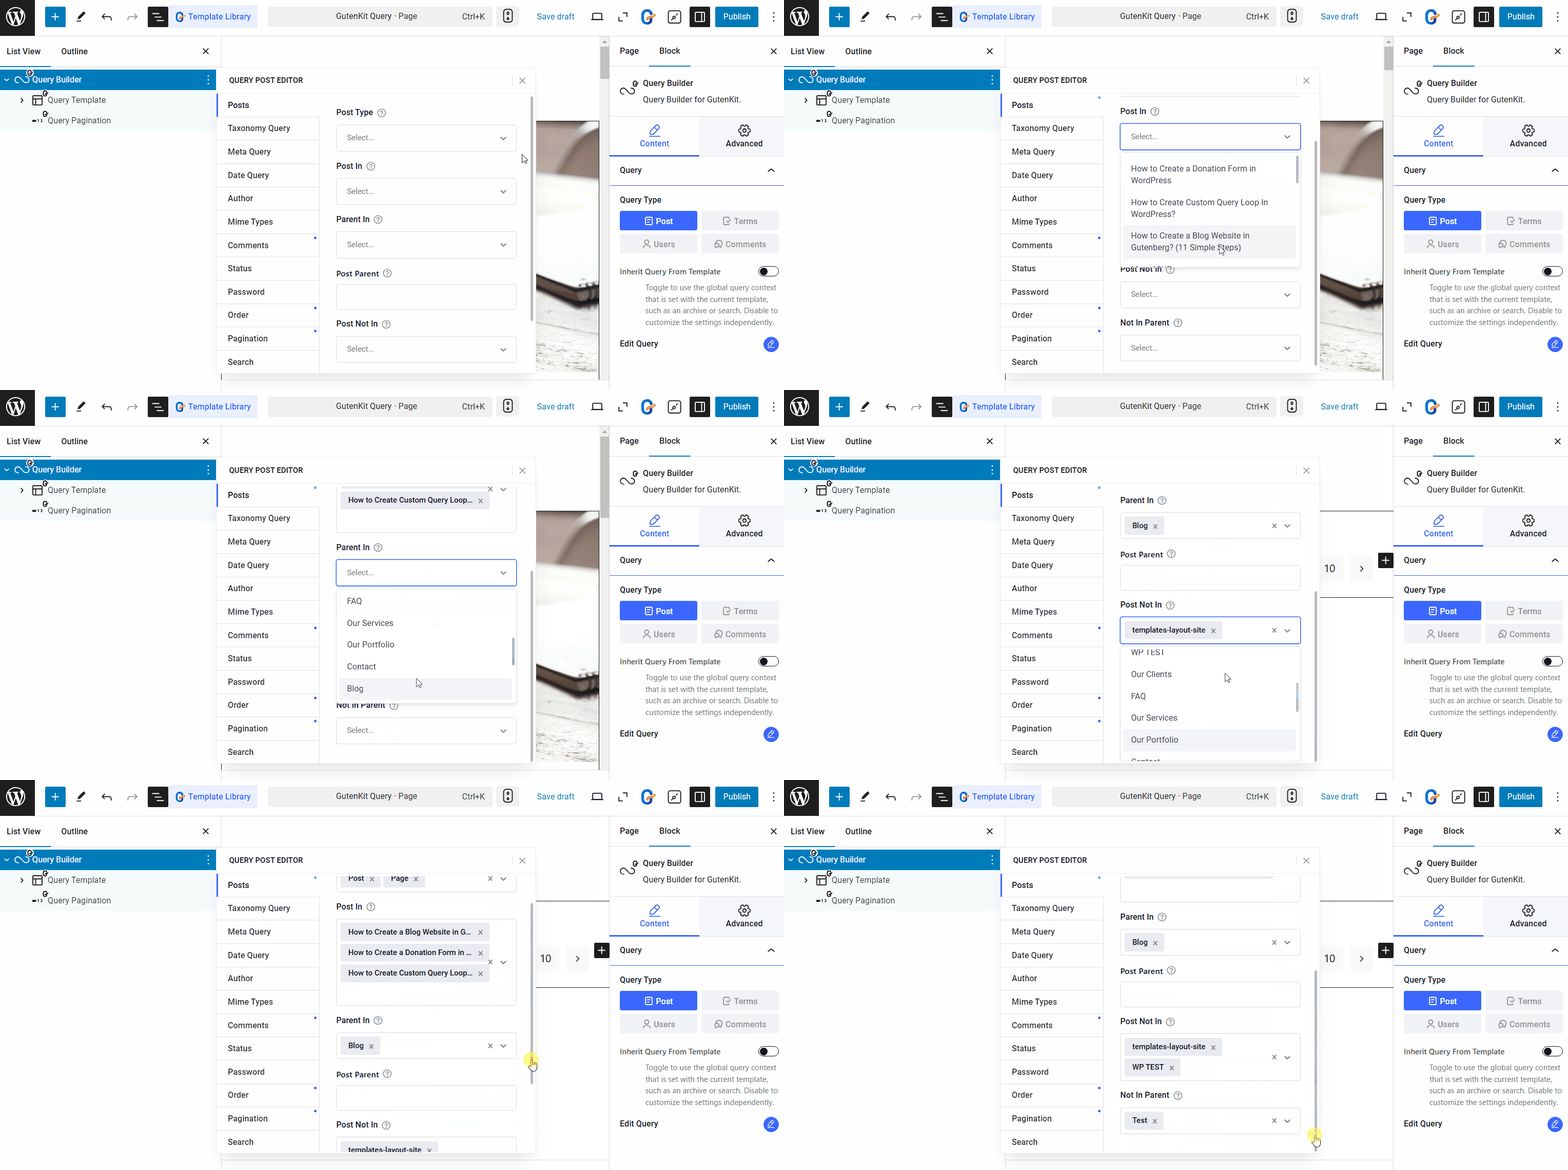
È possibile personalizzare le query dei post con i seguenti controlli.
- Tipo di post: Seleziona il tipo di contenuto che vuoi mostrare. Puoi mostrare Post, Pagine, Media o qualsiasi tipo di post personalizzato con il generatore di query.
- Posta in: Dopo aver selezionato il tipo di post, se desideri mostrare contenuti specifici (ad esempio un post specifico, una pagina o altri contenuti), puoi includerli nel campo "Post in".
- Genitore in: Per le pagine, è possibile visualizzare le pagine sotto specifiche pagine padre.
- Post Genitore: To show the pages under specific parents.
- Post non presente: Se vuoi escludere post o pagine specifici, puoi elencarli nel campo "Post non presente".
- Non nel genitore: Per escludere specifiche pagine padre dalla visualizzazione nel ciclo di query.
☑️ Tassonomia #
Con il blocco GutenKit Query Builder, puoi aggiungere più query di tassonomia e impostare la loro relazione utilizzando la logica AND-OR. Cliccando su '+ Aggiungi articolo' pulsante puoi aggiungere query di tassonomia.
For each taxonomy item you have the following options:
- Tassonomia: Seleziona la tassonomia, ad esempio Categorie, Tag, Gruppi e altre.
- Includi bambini: Show the posts under children taxonomies, such as child categories or tags.
- Termini: Based on the taxonomy you can choose their terms. For example, if you choose ‘Categories’ as taxonomy, you can choose specific categories.
- Operatore: L'operatore definisce la relazione tra i termini della tassonomia. (Per semplificare la comprensione, useremo "Categorie" come esempio e spiegheremo come funzionano gli operatori in base a questo.)
- IN: Per visualizzare i post che appartengono a una qualsiasi delle categorie selezionate.
- NON IN: Per escludere i post nelle categorie selezionate.
- E: Mostra solo i post che appartengono contemporaneamente a tutte le categorie selezionate.
- ESISTE: Per mostrare i post presenti in almeno una delle categorie selezionate.
- NON ESISTE: To display posts that do not exist in any of the selected categories.
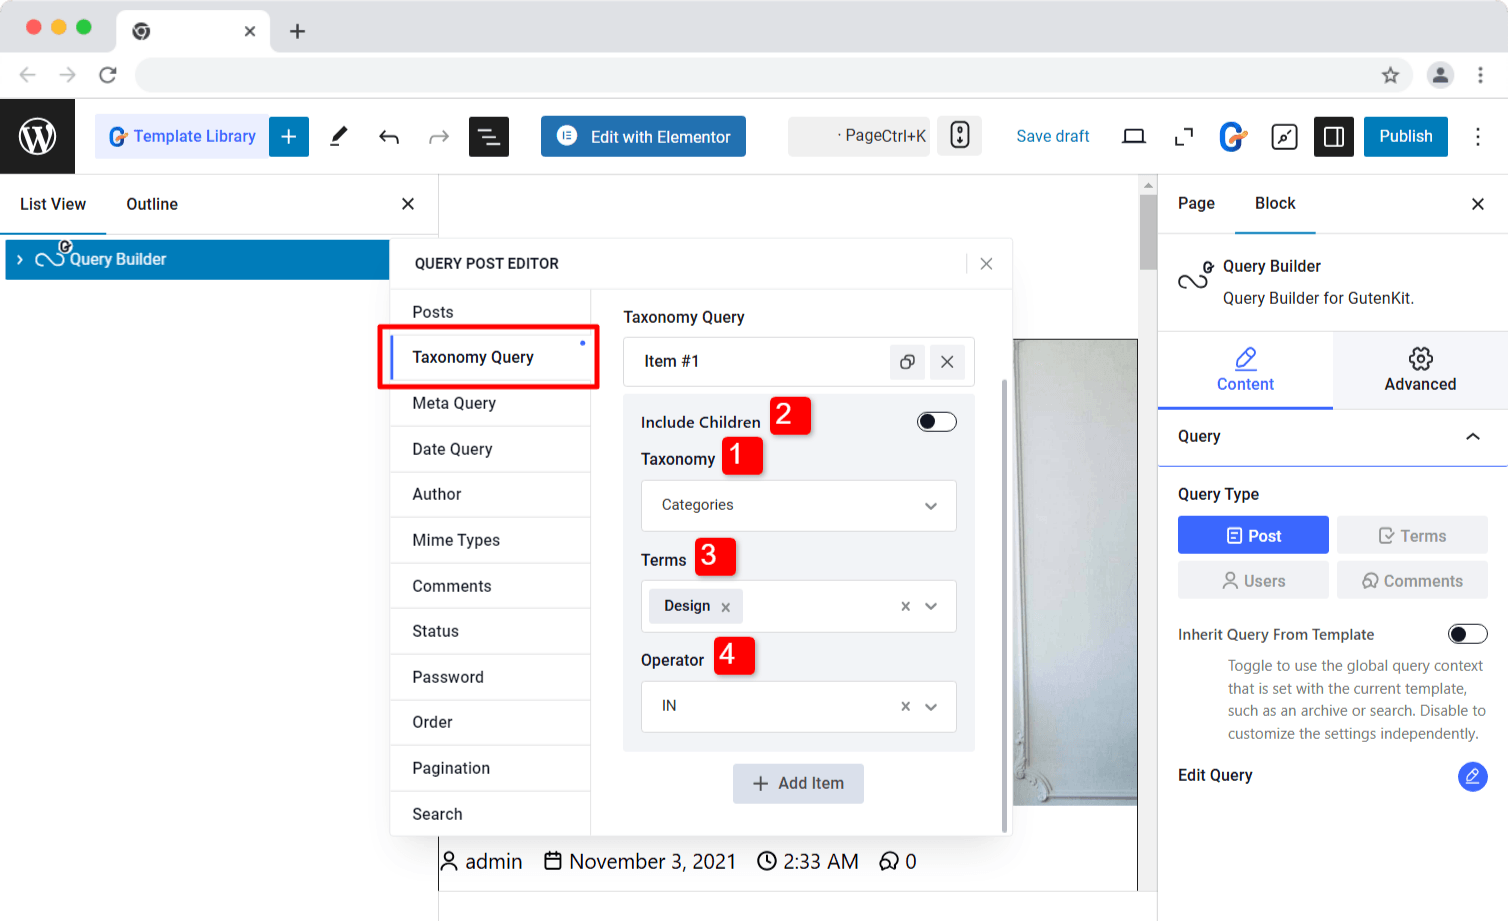
Tutti questi operatori funzionano allo stesso modo per altre tassonomie come tag, schede o qualsiasi altra categoria personalizzata.
Relazioni:
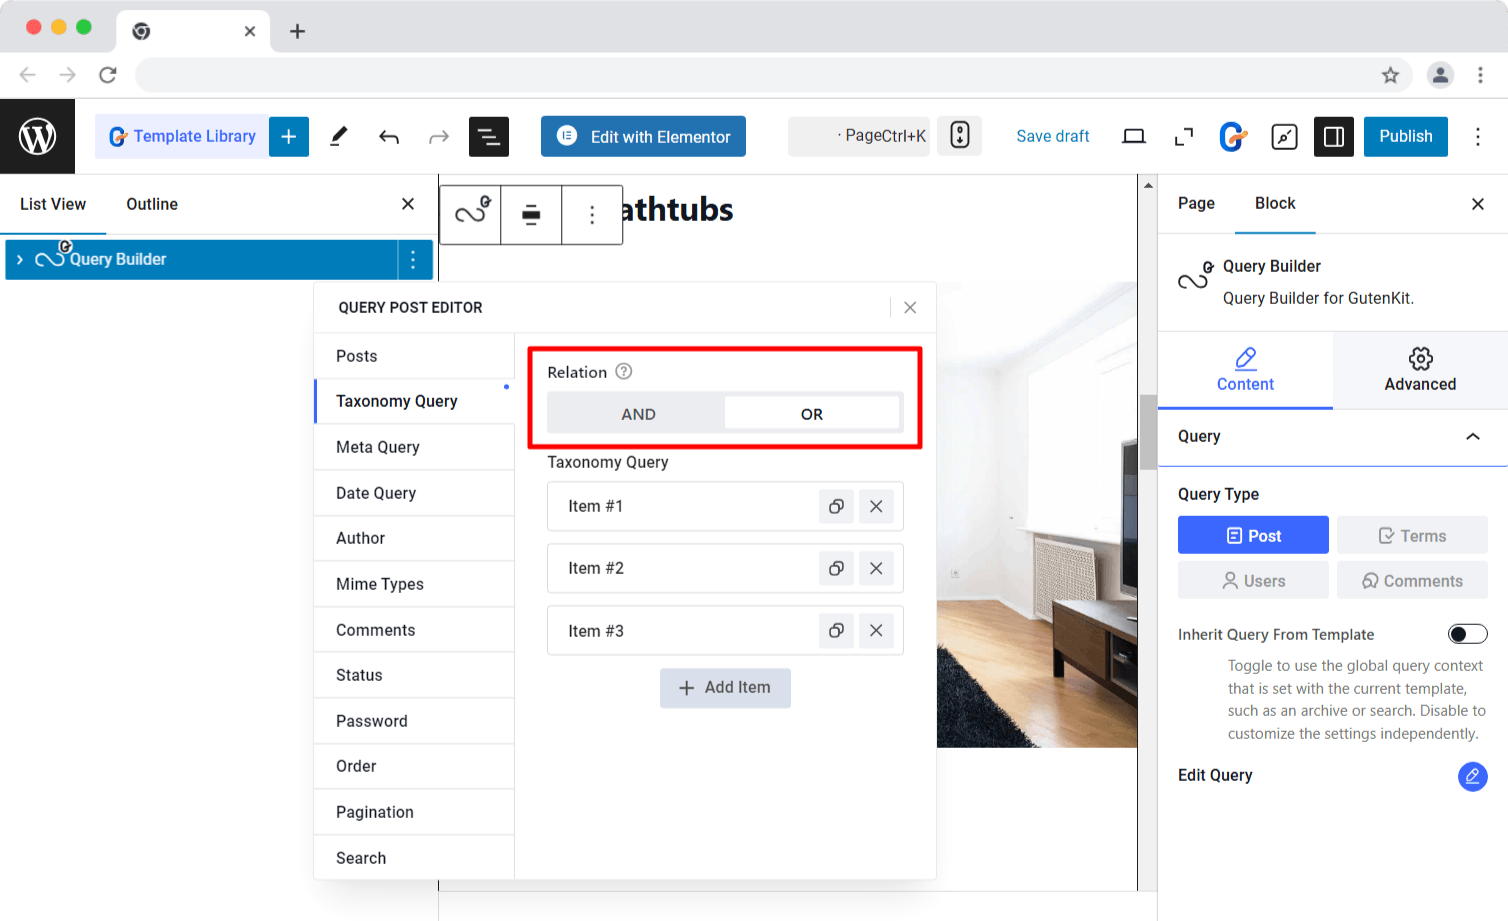
Come accennato in precedenza, è possibile aggiungere più elementi per le query di tassonomia e definire la loro relazione utilizzando Relazione operatore.
- E: Il post apparirà nel ciclo di query solo se soddisfa le condizioni di Tutto voci della tassonomia specificate.
- O: Il post apparirà nel ciclo di query se soddisfa la condizione di almeno uno elemento della tassonomia specificato.
☑️ Meta Query #
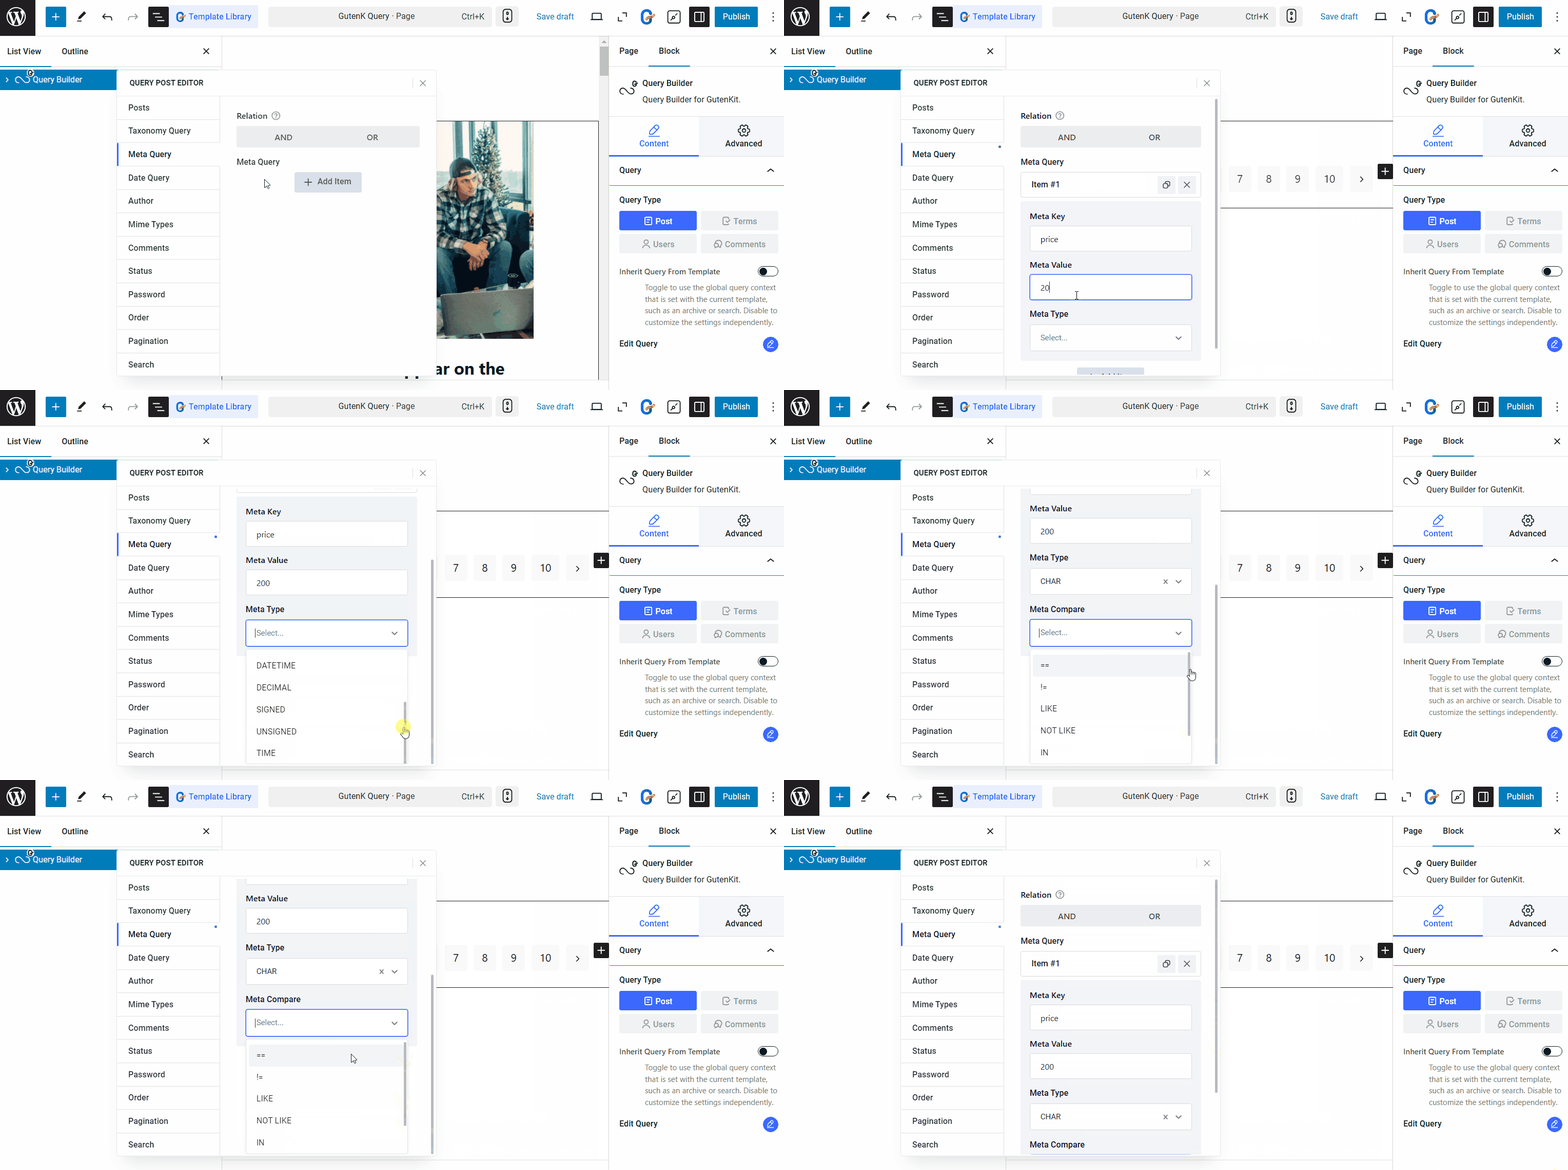
GutenKit’s Query Builder also supports custom meta fields. Just add a meta key and meta value, choose a comparison operator, and define the meta type to display posts based on custom metadata.
To add meta query, you can start by clicking on the ‘+ Aggiungi articolo‘ button. After that,
- Meta Key
- Meta Value
- Meta Type
- Meta Compare
☑️ Date Query #
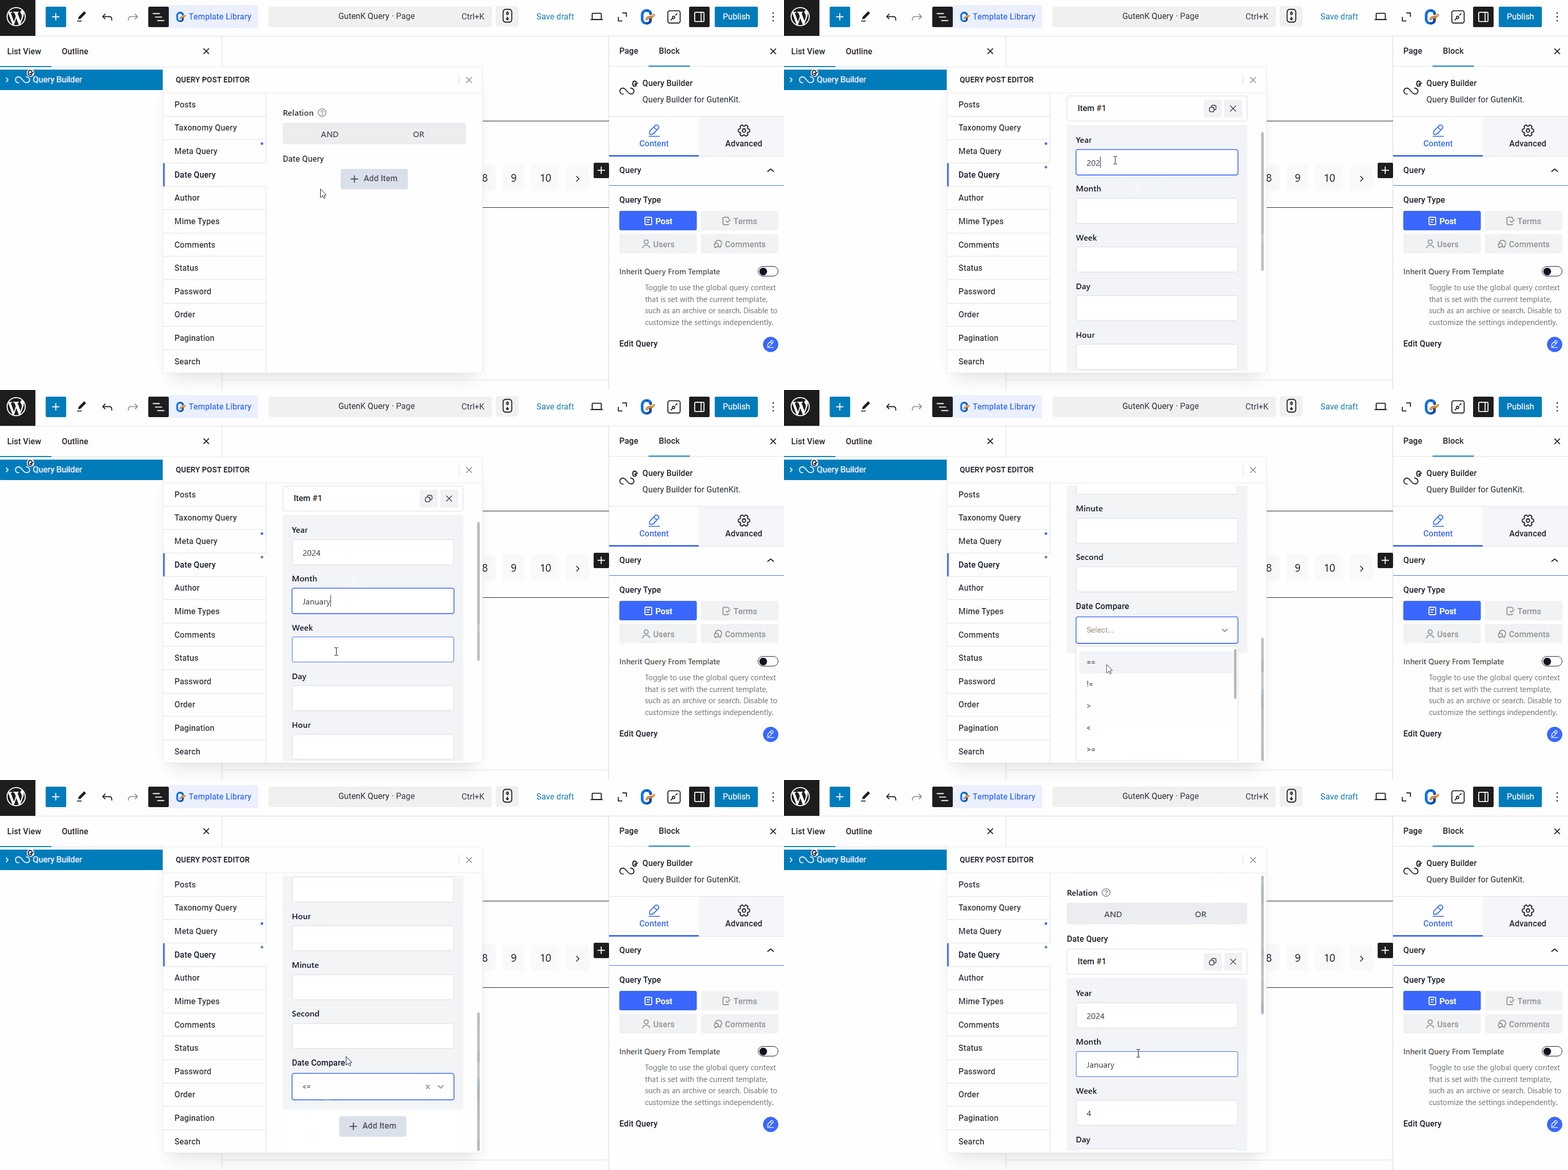
Move to the next tab to filter posts by Data with the following options:
- Year
- Month
- Week
- Giorno
- Hour
- Minute
- Second
Plus, you can set up comparisons between the queries.
- Date Compare: Set the operator to decide how the action will occur for the given date. For example, if you select the == operation, that means only the post published on the given date will be shown. Again, if you select the <= operator, this means the post published on or before that given date will be shown on the query loop.
☑️ Author #
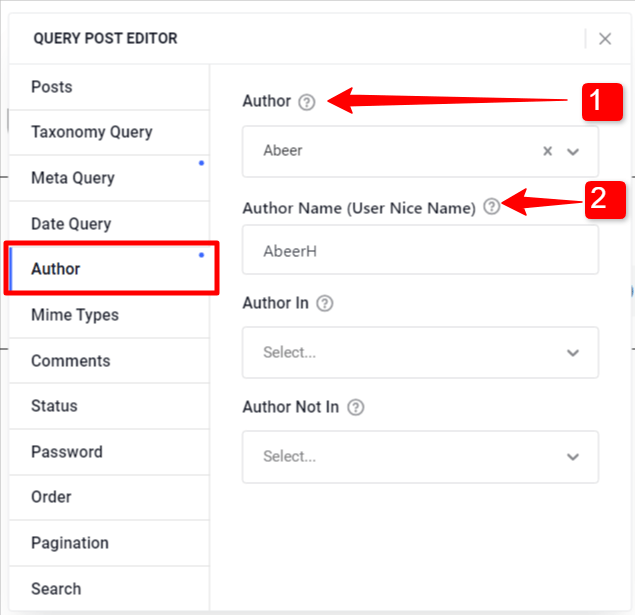
Highlight posts by specific authors. You can show posts from a single author or multiple selected authors.
1. Autore: Select a single author to show his/her post on the web page.
2. Author Name (User Nice Name): You can enter a display name for that author you have just selected.
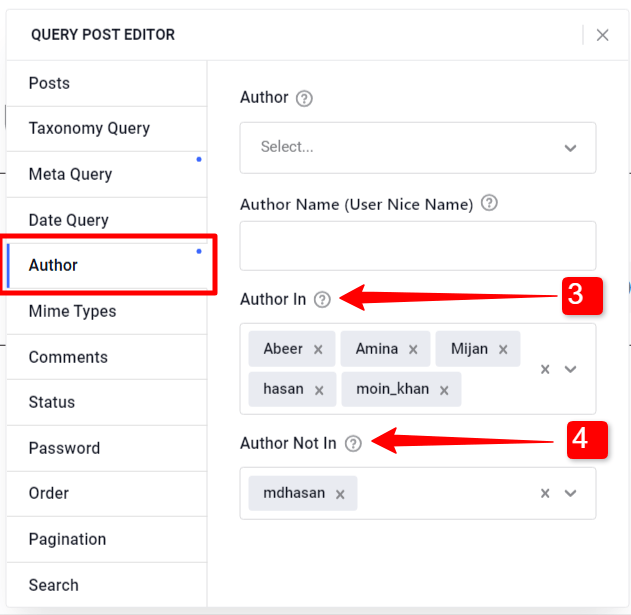
3. Author In: Otherwise, you can show posts from multiple authors by selecting authors in this field.
4. Author Not In: You can hide posts from specific authors by adding their names in this field.
☑️ Mime Types #
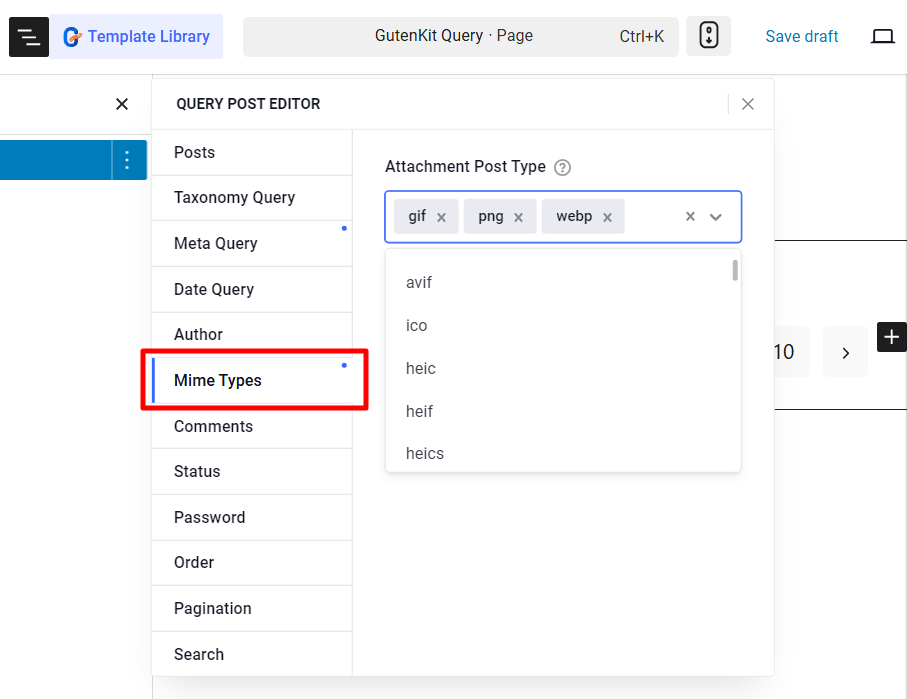
With GutenKit Query Loop Builder block you can show posts with specific types of media files. Under “Mime Types” you can select the media file type from the 90+ given options.
For example, if you select the ‘webp’ type, every post that has a ‘webp’ file will be shown on the query loop. The same goes for other mime types as well.
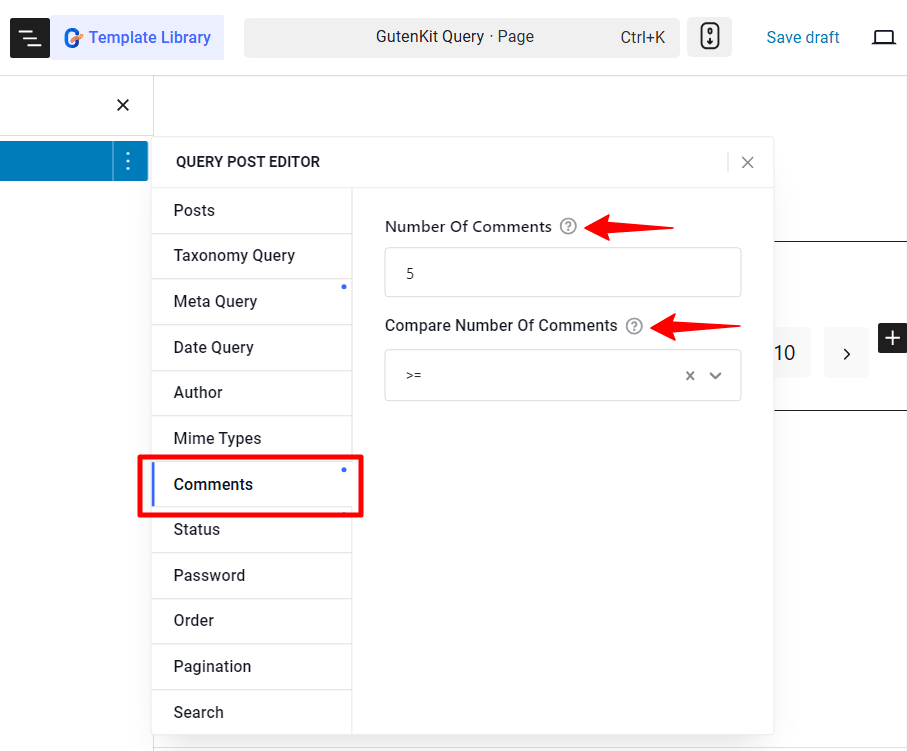
☑️ Comments #
Posts can also be shown based on the number of comments they have. Just set the comment count (Number of Comments) and adjust the conditions in the ‘Compare Number of Comments‘ field.
For example, if you set the number of comments to 5, and select the >= as operator (compare number of comments), the posts that have more than 5 comments will be on display.
☑️ Status #
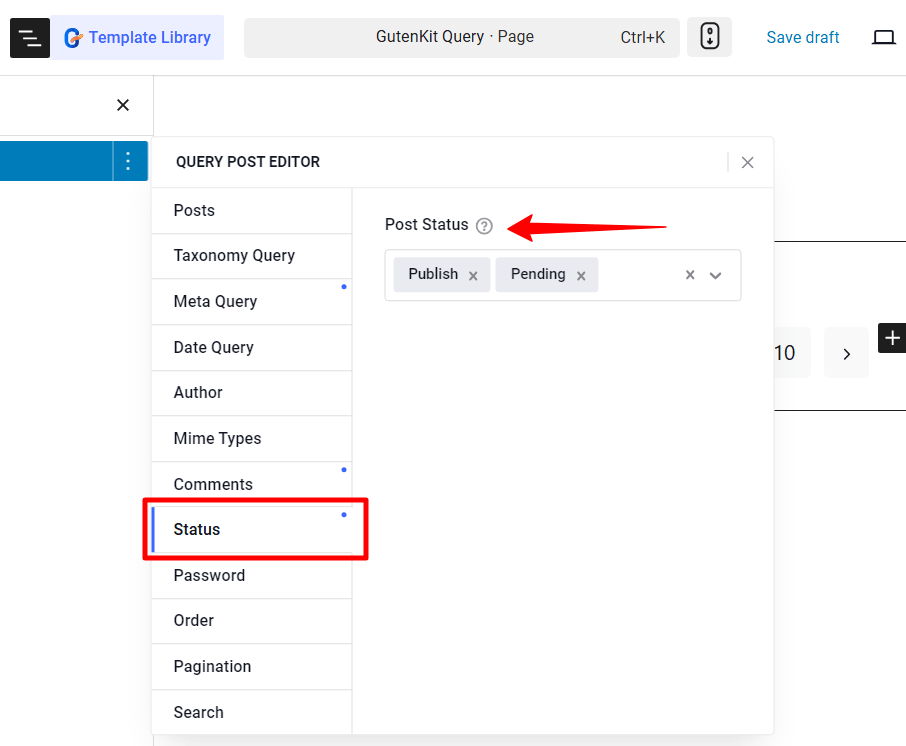
Next up, control the post-visibility based on their status. This means whether you want to show the published posts, pending posts, or posts that will be published in future.
GutenKit’s Query Builder block for Gutenberg has the following post status available:
Pubblicare, In attesa di, Draft, Future, Private, Trash, O Any status.
☑️ Password #
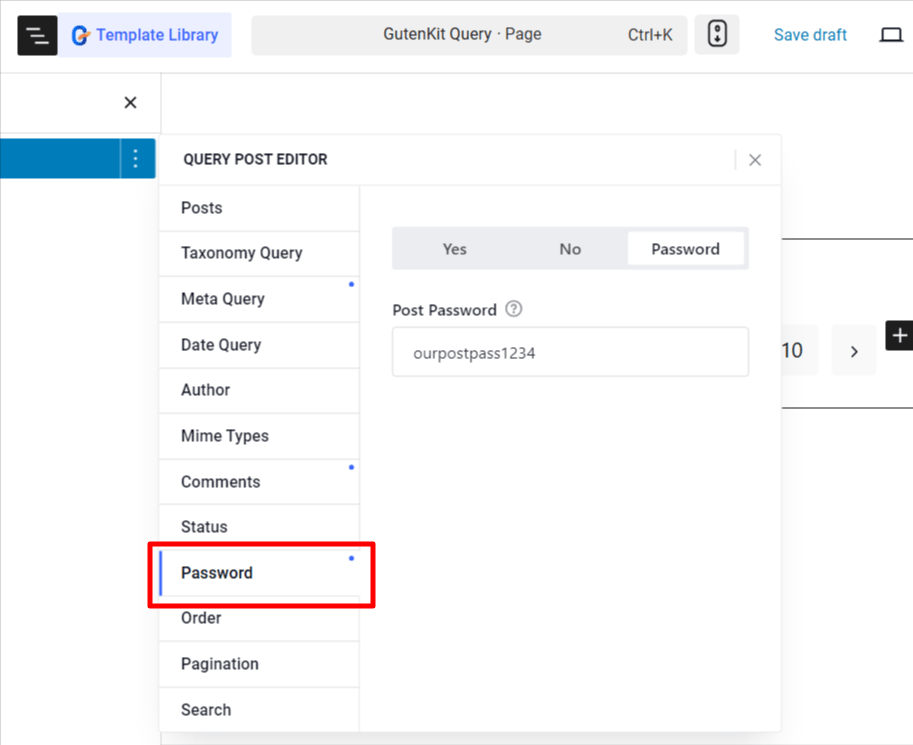
Filter password-protected posts:
- Yes: Show all password-protected posts.
- No: Display only non-password-protected posts.
- Parola d'ordine: Display posts with a specific password.
☑️ Order #
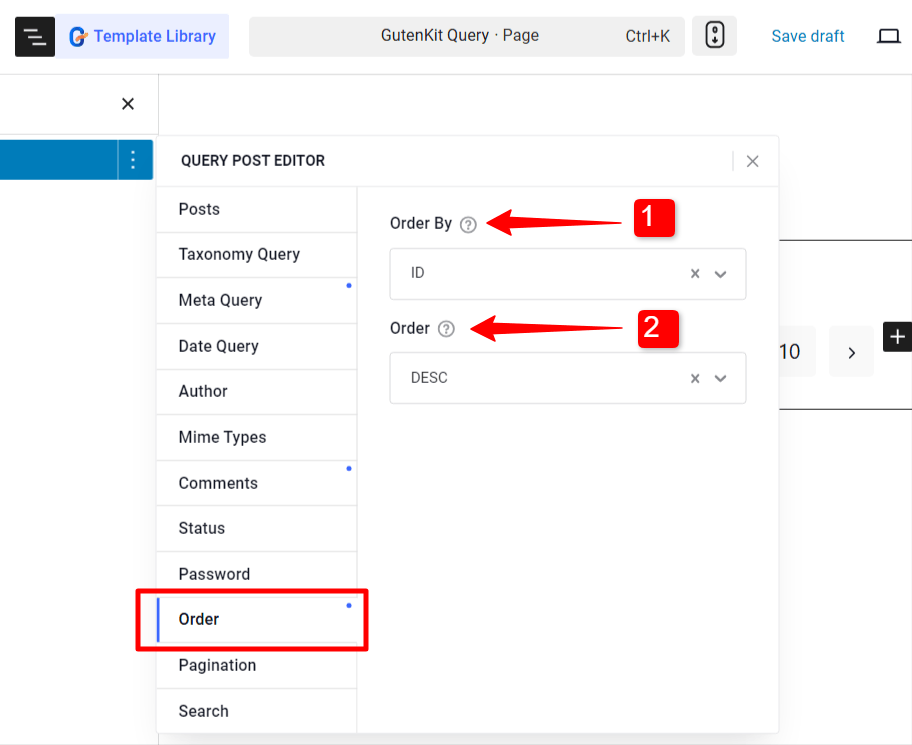
When it comes to ordering post, you have options to sort by Post ID, Author, Title, or Name, in ascending or descending order.
- Ordinato da: Sort posts by post ID, Author, Title, name, or none.
- Ordine: Choose ascending or descending order.
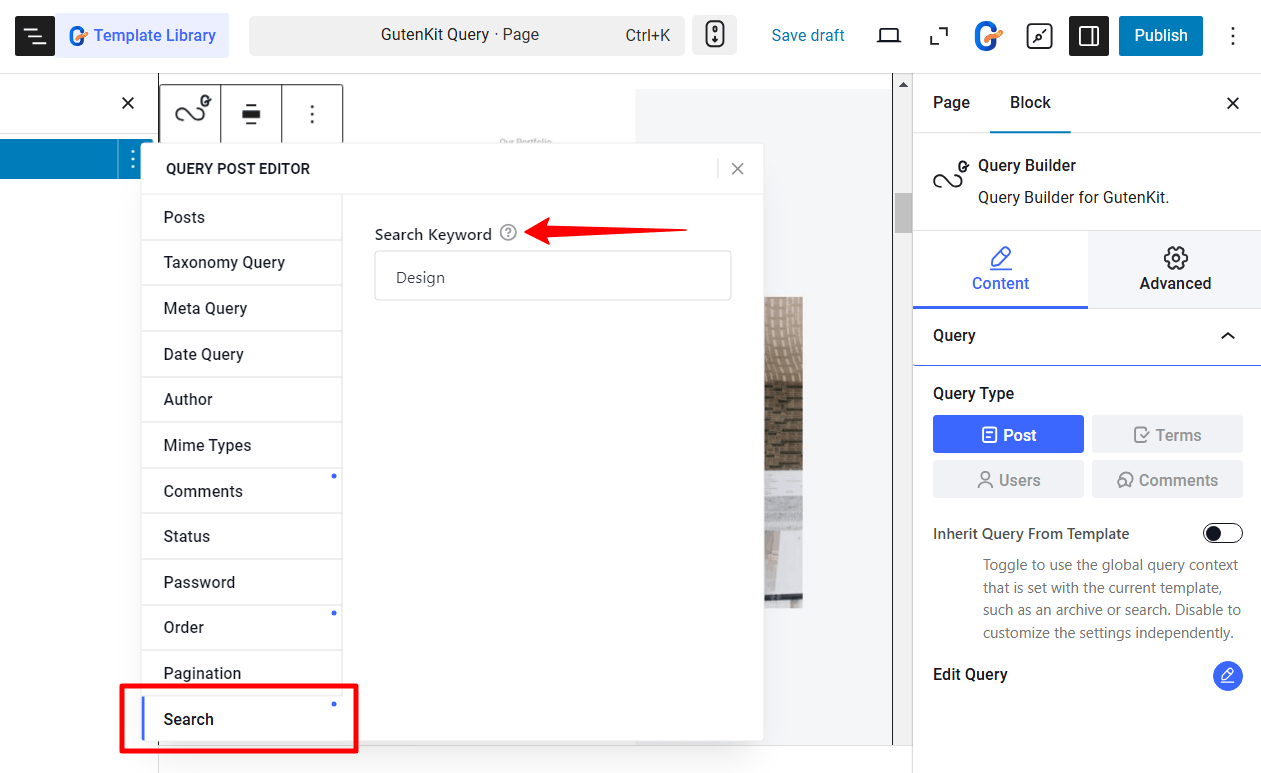
☑️ Search #
Simply show posts that have a specific search keyword in them, by adding that Keyword under the Search tab.
☑️ Pagination #
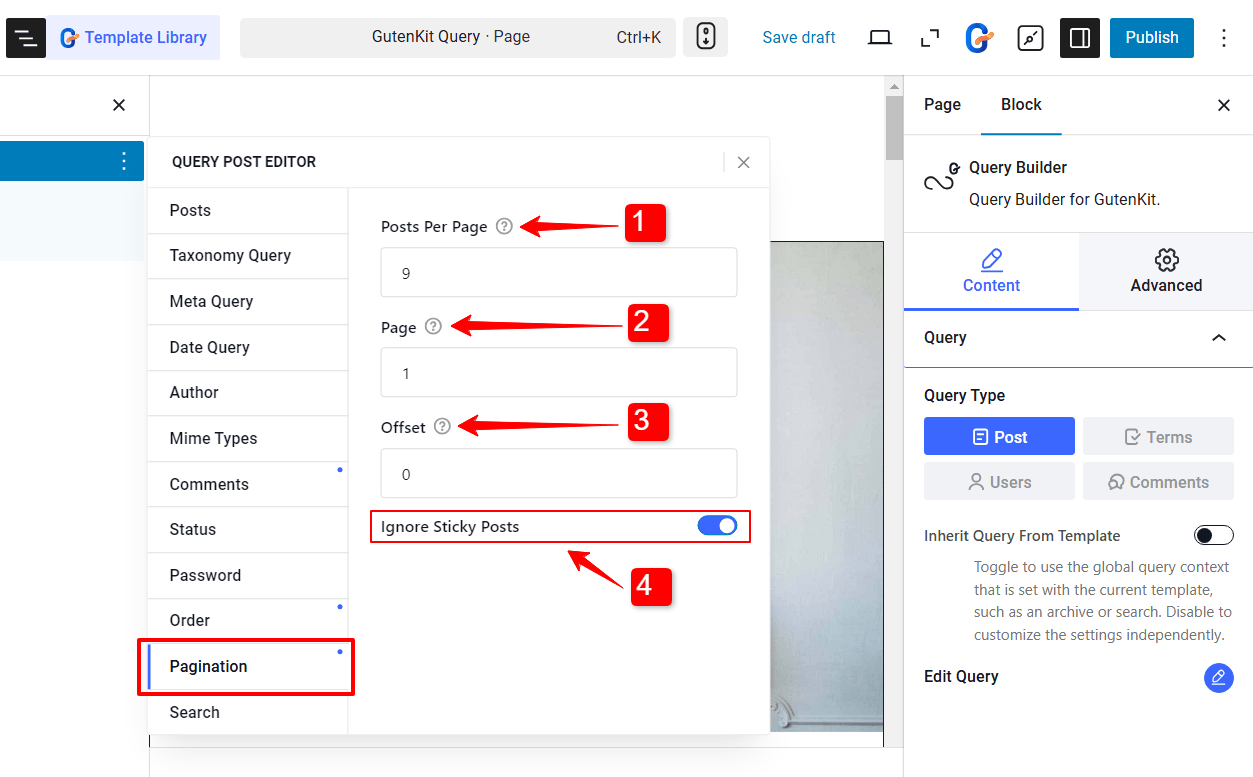
Configure the pagination for the query loop.
- Posts Per Page: Decide the number of post to show on a single page.
- Page: Set which page to start from.
- Offset: Select the default page number in pagination.
- Ignore Sticky Posts: By enabling this option you can hide the WordPress sticky post.
After you are done with editing query post filters, you can move on to customizing the appearance of the query template.


