


PopupKit provides a flexible and clean playground. Using this editor, you can easily customize branded popups for your WordPress websites. Whether you use a pre-made template or start from scratch, PopupKit enables you to do a lot of customization and play with various settings within a drag-and-drop visual popup builder interface.
Let’s see how to get started with the PopupKit editor interface.
Overview of PopupKit Editor Interface #
Follow the steps below, and by the time you’re done, you’ll be familiar with every part of the PopupKit interface.
Step 1: Access to PopupKit Editor Interface #
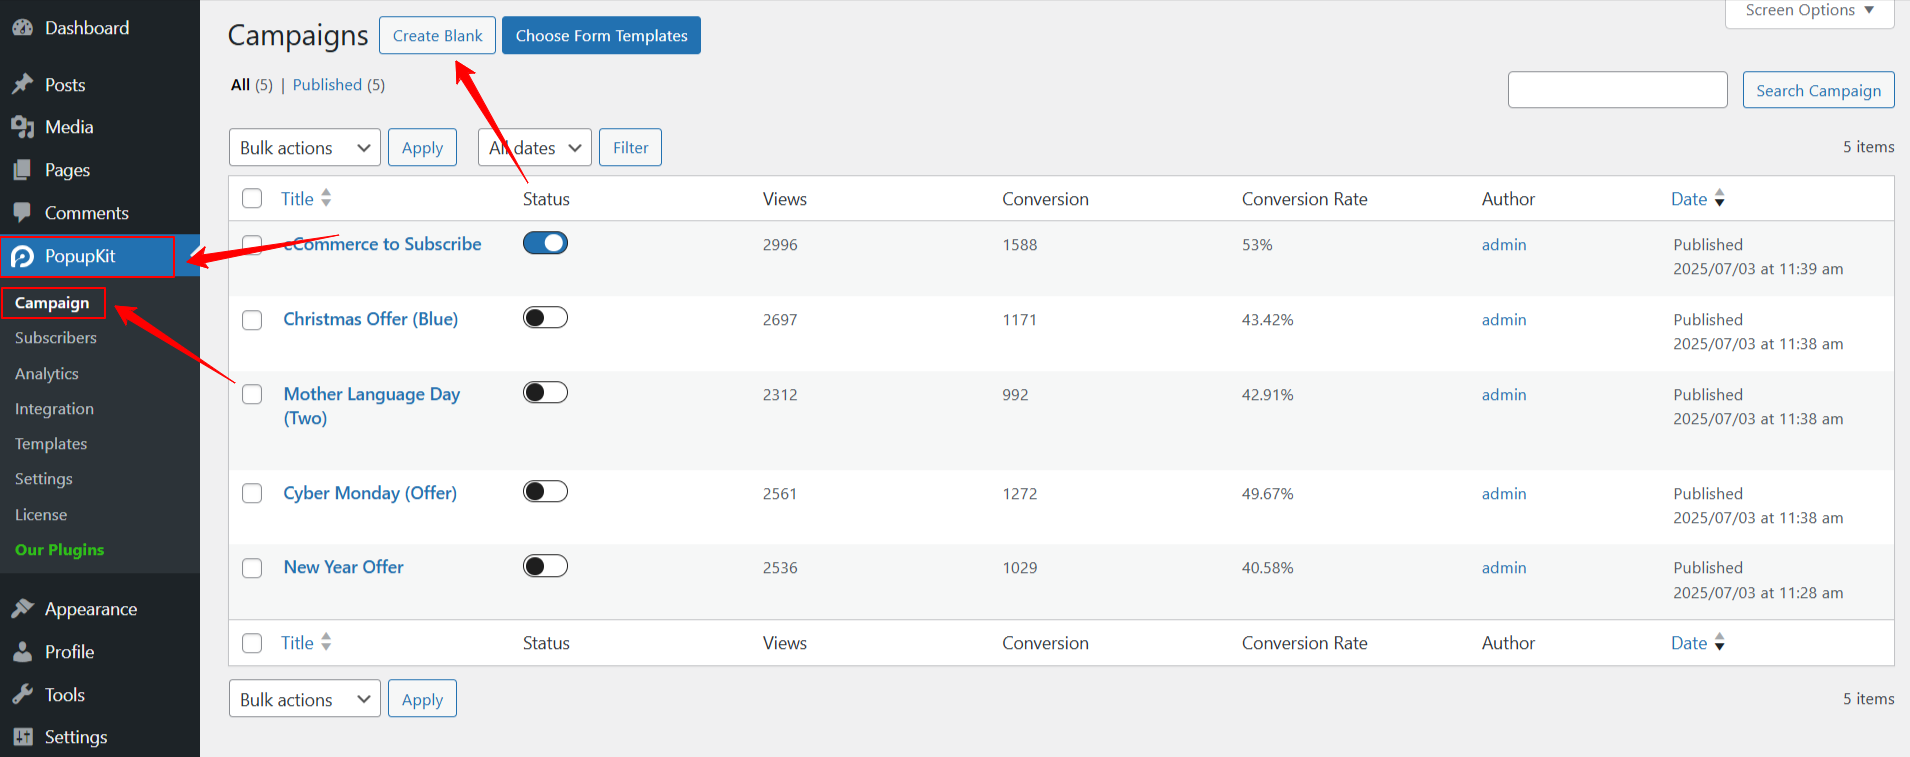
To access the PopupKit editor interface, navigate to PopupKit > Campaigns from your WordPress dashboard. At the top of the campaign page, you will see two buttons: “Create Blank” & “Choose From Templates”.
Hit a button based on your preferred way of creating popup. Clicking the “Create Blank” option will load the PopupKit editor interface on your screen.
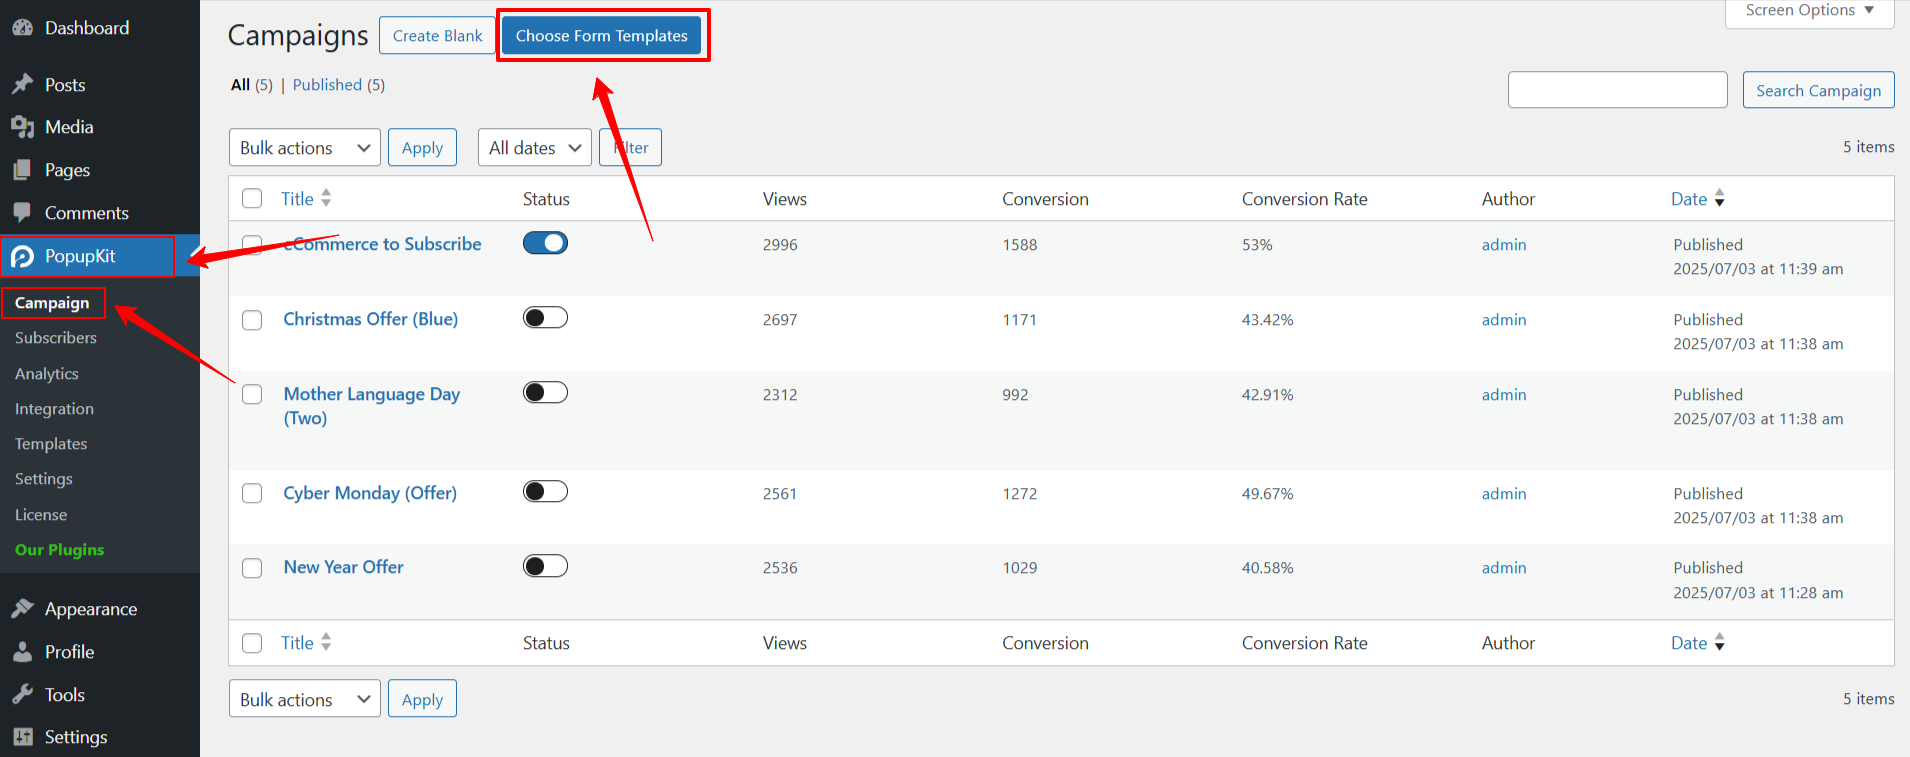
However, if you consider the “Choose From Templates” option, at first, you’ll see the template page.
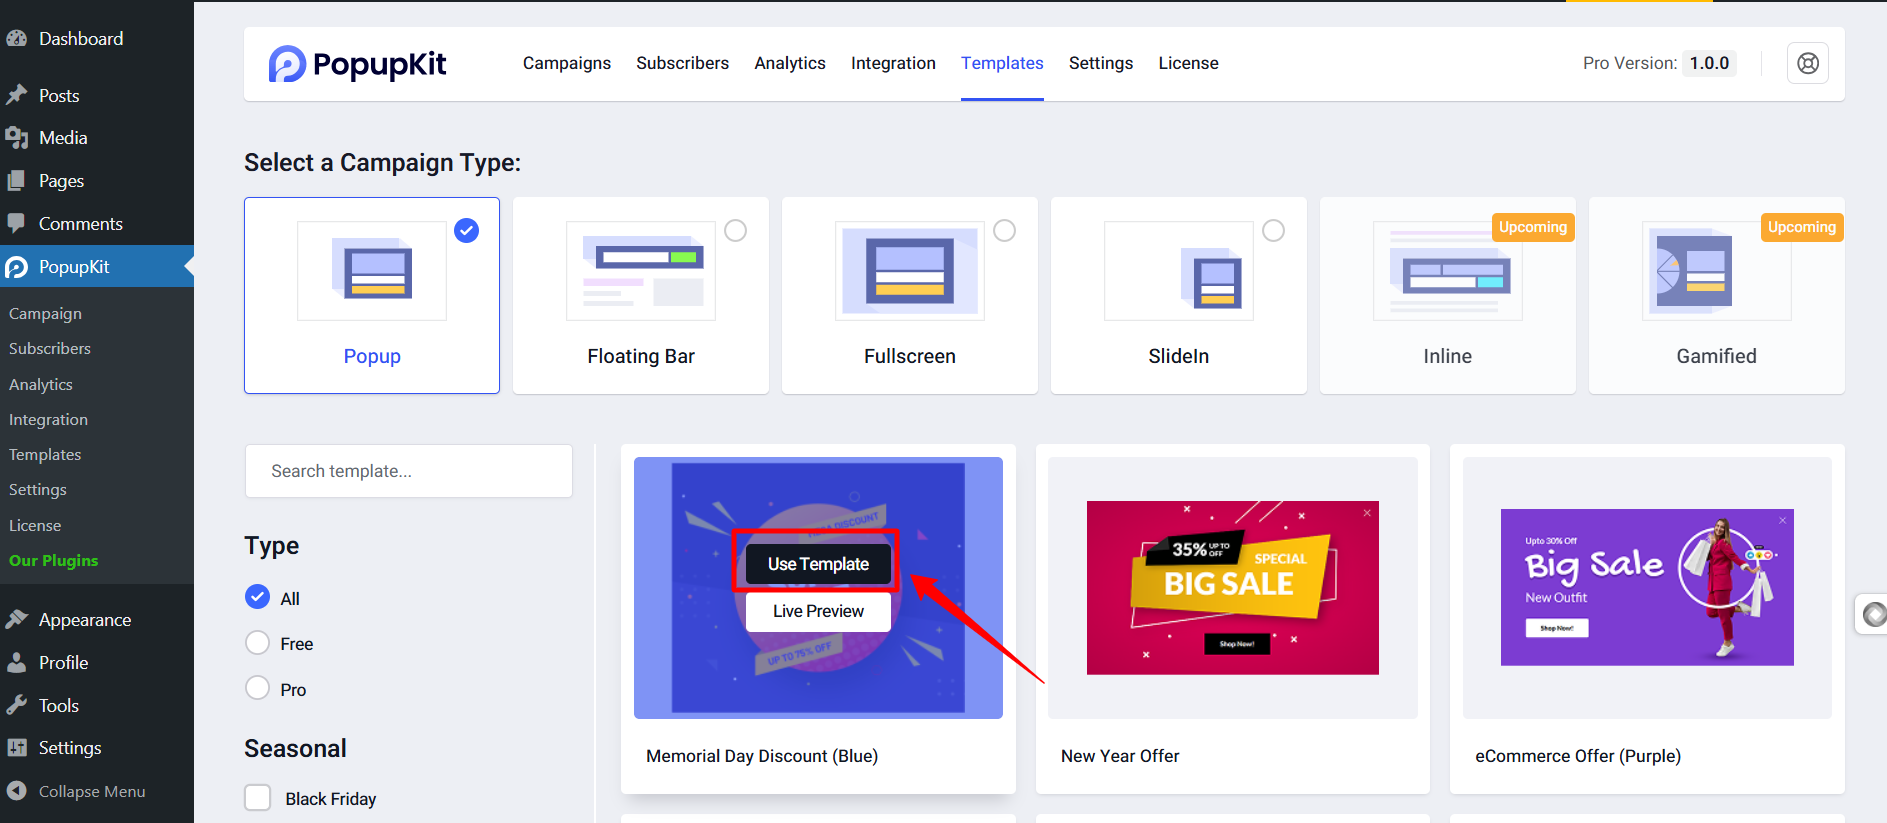
After you select a template and click on the “Use Template” button, you will be asked to give a name for your campaign.
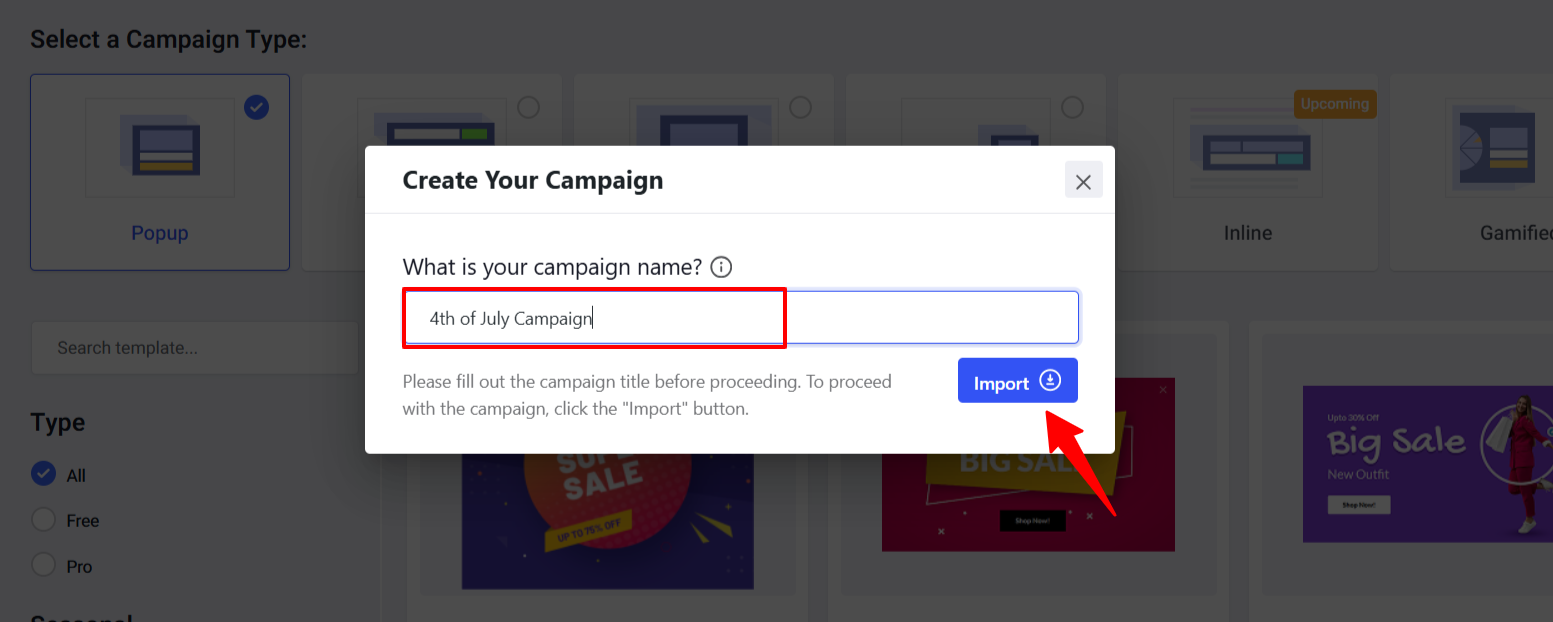
Ensuite, frappez le "Importer" button, and the PopupKit interface will appear on your screen loaded with the template.
Step 2: Insert Popup Builder Blocks #
After getting into the PopupKit editor dashboard, the first thing you’ll do is add a popup builder block. If you’re familiar with the Gutenberg block editor, congratulations, and you can skip this step.
Now, to insert a block, there are two options:
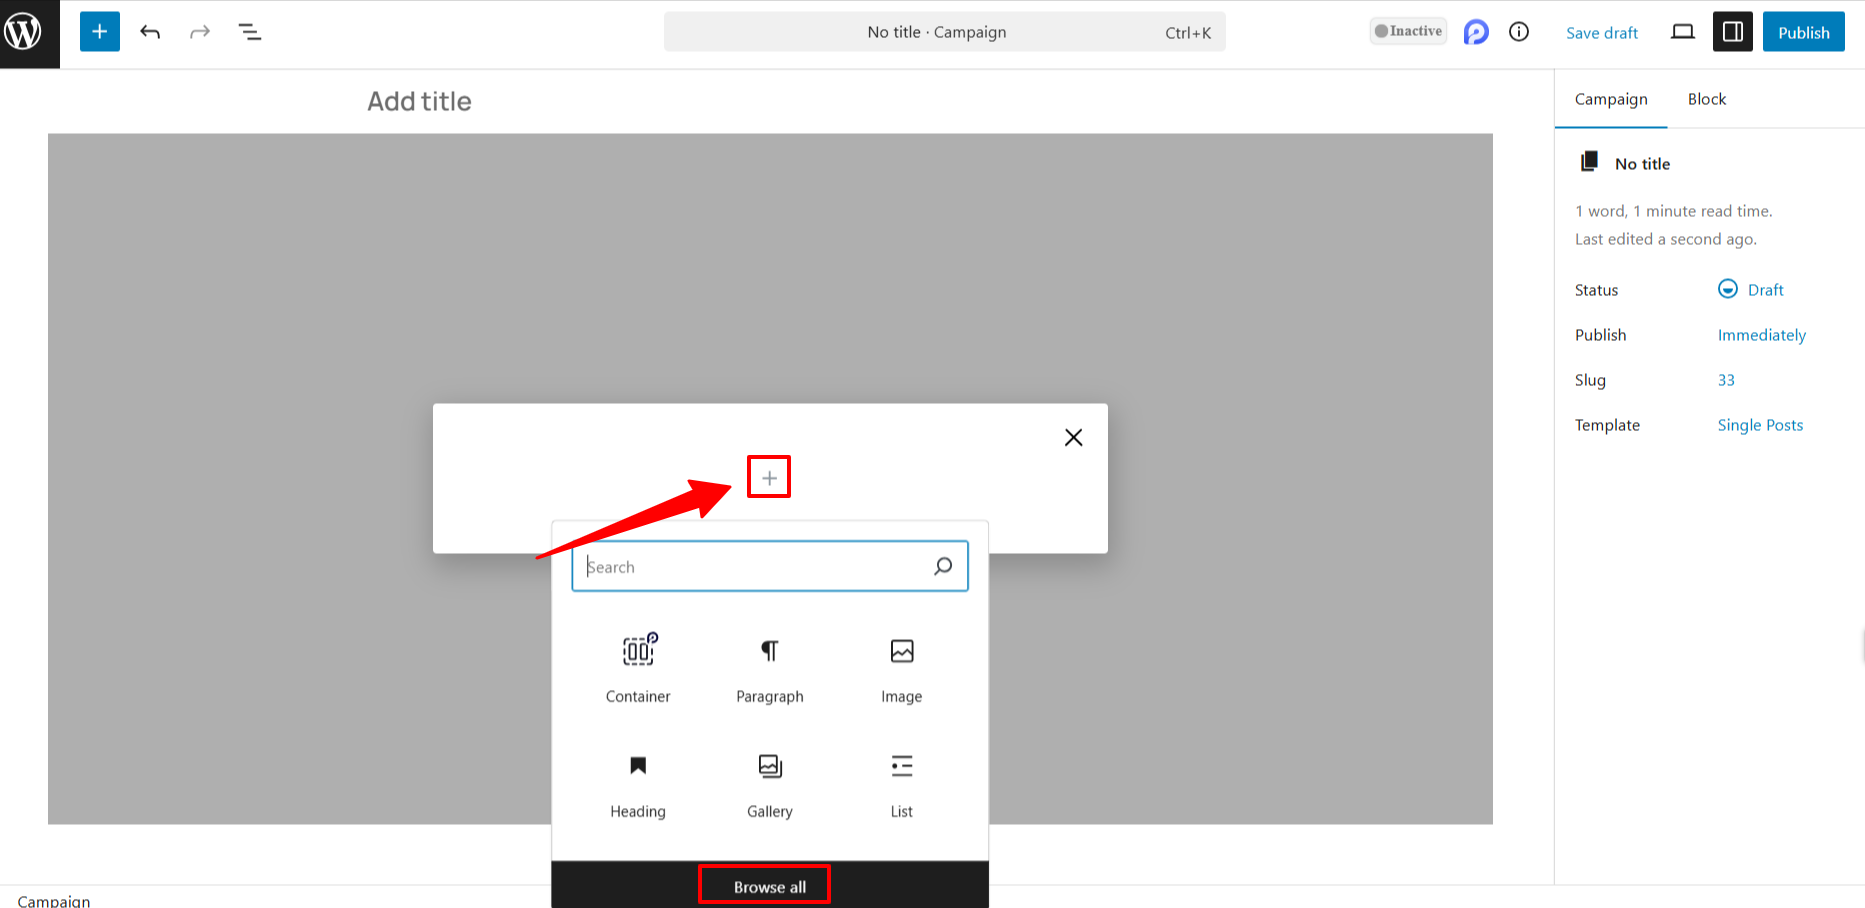
First way: to insert a block, look for the “+” icon in the middle of the screen, then click it when you see it. Doing this will reveal a popup-like screen with all the available blocks. Scroll down or search for your preferred one. And when you see your preferred one, click it to put it on your dashboard.
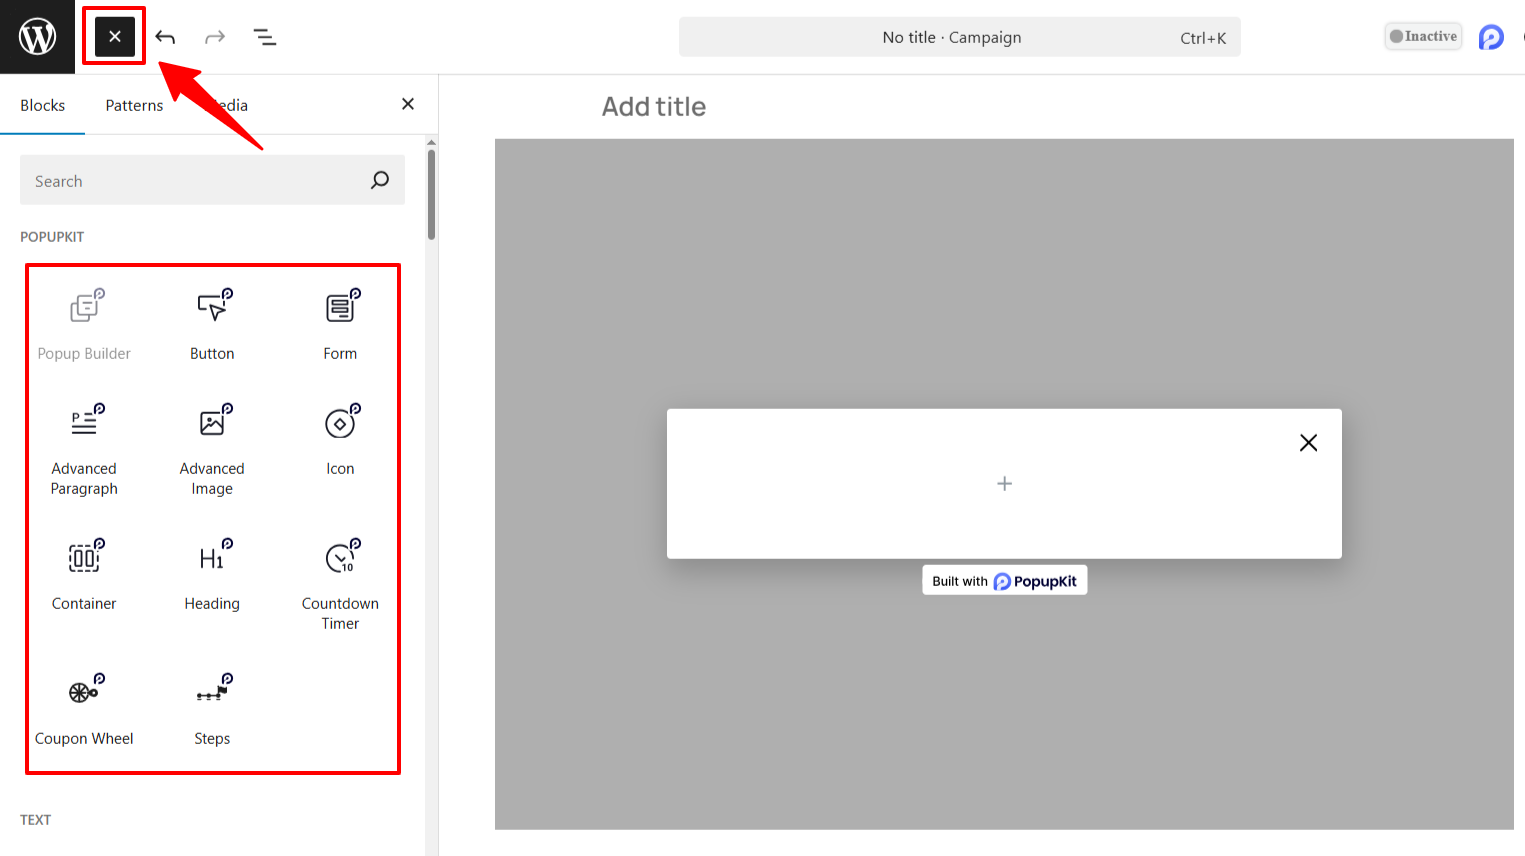
Another way is to click the “+” (Block Inserter) icon at the top left of your screen. Clicking it will open up the block library bar. At first, you’ll see PopupKit in-built browser blocks and other conventional Gutenberg blocks, followed by. Simply, drag and drop a block to the dashboard.
And when you click on a block, all its styling options will show up on the right sidebar of your screen.
Step 3: Configure PopupKit Builder Interface #
Now you know how to access the PopuKit dashboard and how to insert its block. Let’s see how to use its other settings options:
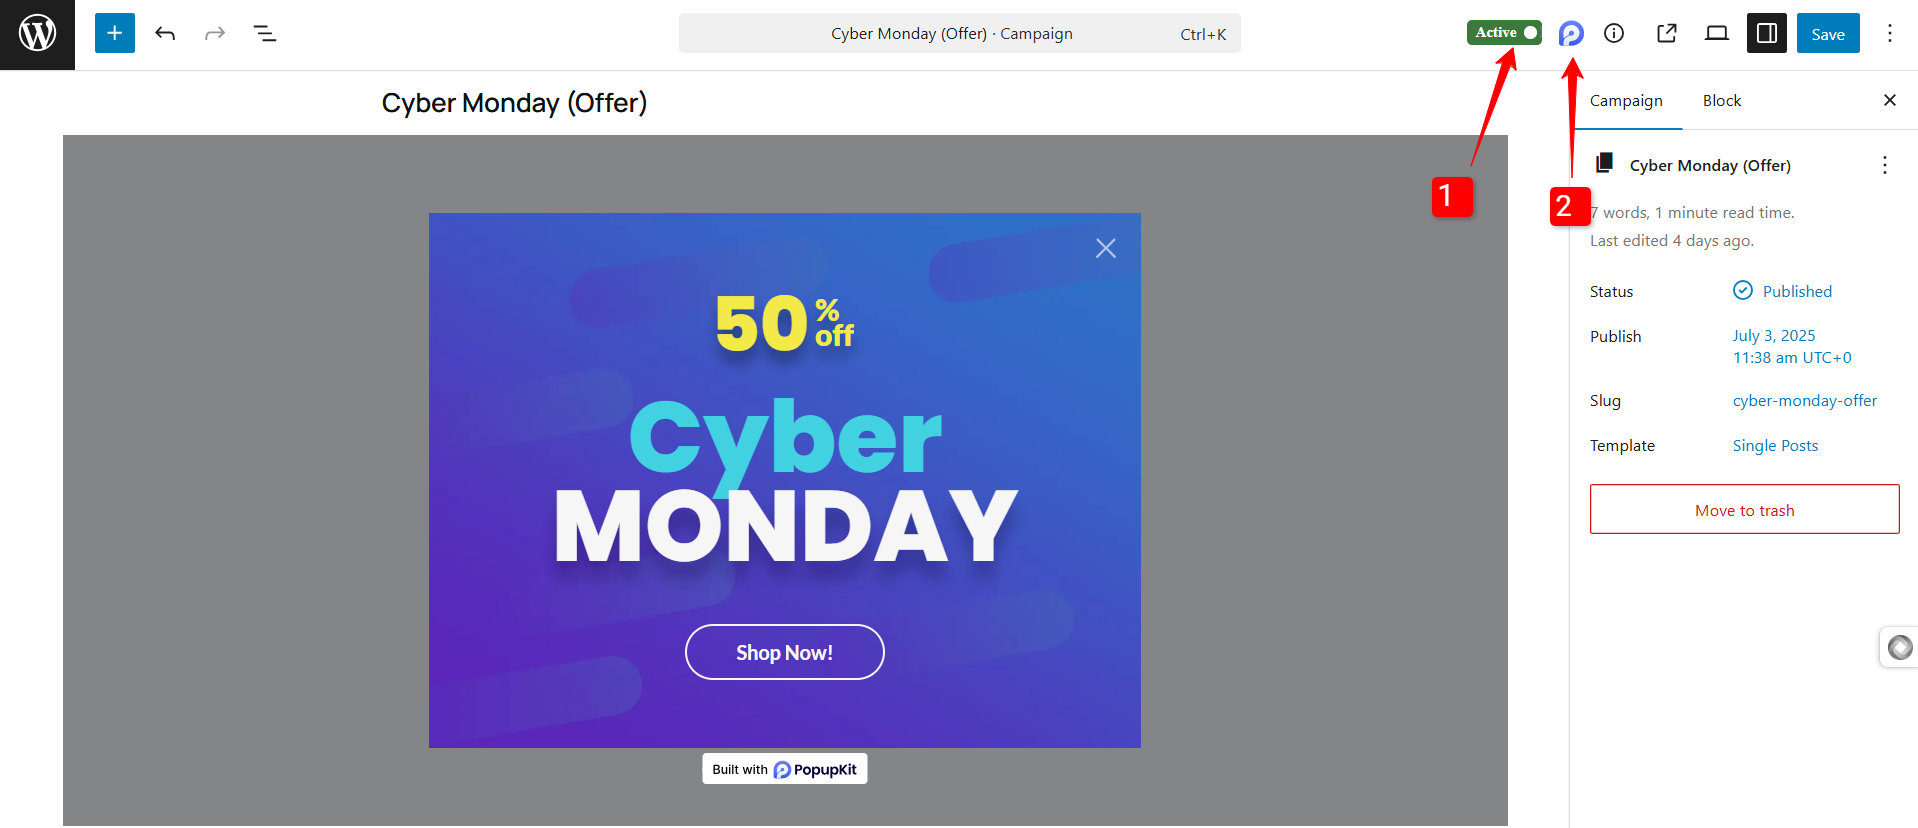
- Active/Inactive: This button allows you to launch and hold a campaign right inside the dashboard.
- Logo Icon: The PopupKit logo at the top-right of the builder interface is a very smart option. It’s an easy one-click option to insert in the PopupKit builder settings. Once you click on it, all the crucial settings like: Display Options, Trigger Types, Display Conditions, Device Visibility, Schedule Date & Time, Frequency Settings, Styling options, etc.
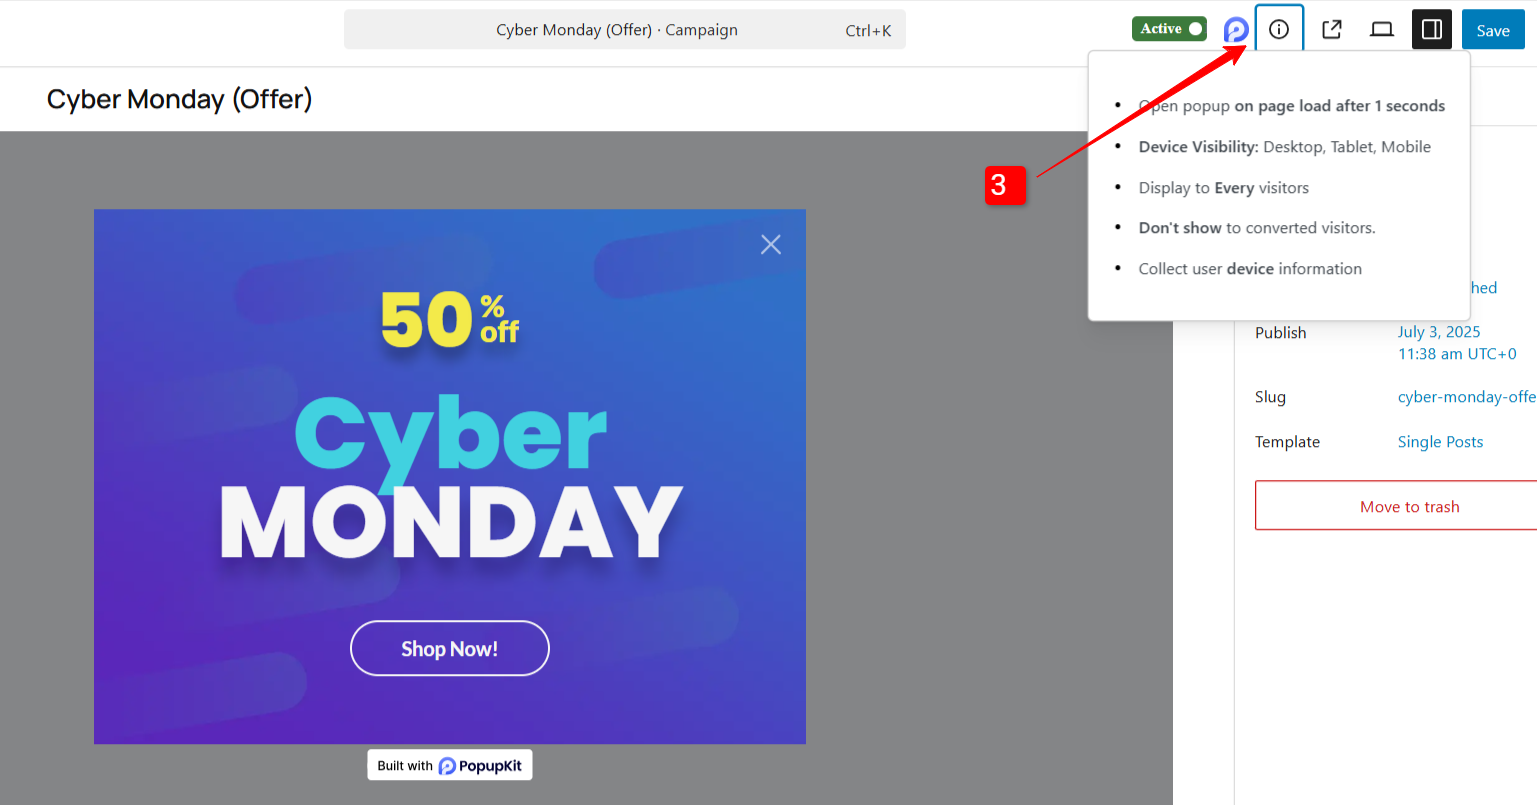
3. Info Icon: It’s a super helpful part of this playground. Clicking this info button will show a card to offer a snapshot of your campaign details. Like, what trigger types you’ve used, frequency settings, visitor type, rules on device, etc.
Next, you’ll see other helpful options like your conventional dashboard. For example, you can see the preview of the popup you’re currently customizing, saving & publishing options.
Hopefully, now you have a clear overview of the PopupKit editor interface. And, you’re ready to create your first campaign.


