Vous pouvez facilement créer un tableau de prix descriptif et époustouflant avec diverses options de style.
Voyons comment créer un tableau de prix dans l'éditeur Gutenberg sur votre site Web WordPress.
Votre site WordPress doit avoir le plugin GutenKit installé. Ensuite, suivez les étapes ci-dessous :
Comment utiliser le tableau des prix GutenKit #
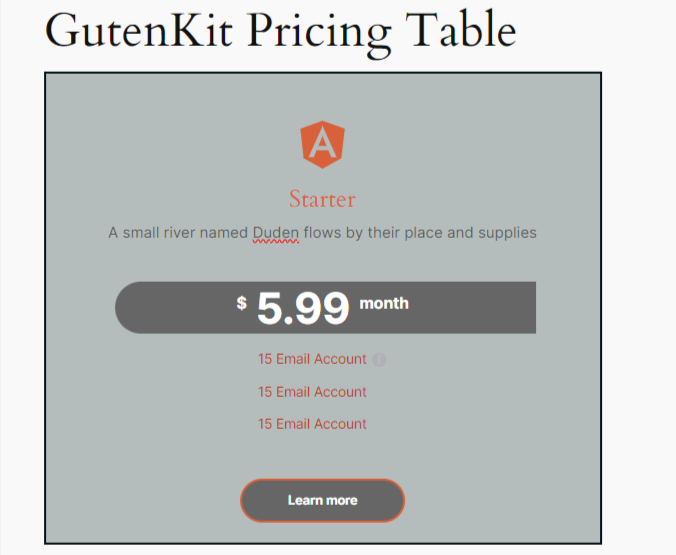
Étape 1 : ajouter le bloc de tableau de prix #
Commencez à modifier une page existante ou ajoutez une nouvelle page et cliquez sur «+icône » > Rechercher le Tableau des prix dans la bibliothèque de blocs > Faites glisser et déposez le bloc sur l'écran de l'éditeur.
Étape 2 : Ajouter le contenu du tableau des prix #
Ouvrez les paramètres du bloc et accédez à l'onglet Contenu. Dans un premier temps, nous allons saisir le nom du tableau de prix et des informations supplémentaires.
Entête: #
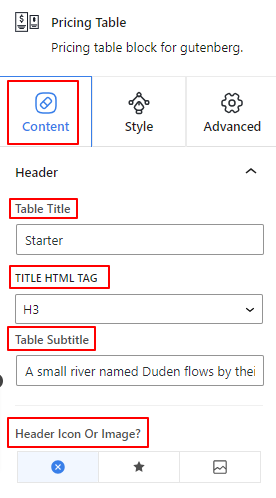
- Titre du tableau:Entrez le texte du titre de l'en-tête de votre tableau.
- Balise HTML de titre:Sélectionnez la balise HTML du titre sur H1-H6, Div, Span ou Paragraphe.
- Sous-titre du tableau:Utilisez cette case pour écrire le sous-titre du tableau des prix.
- Icône ou image d'en-tête:Ajoutez une icône ou une image pour l'en-tête du tableau. Vous pouvez également choisir de n'en afficher aucune.
Étape 3 : saisir les informations de tarification #
Étiquette de prix: #
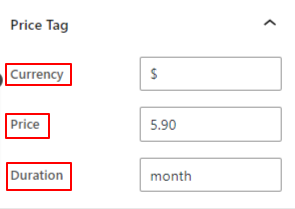
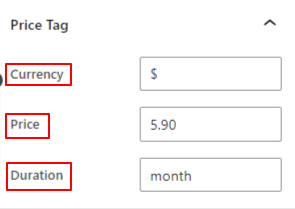
- Devise:Ajoutez un signe ou un mot pour indiquer l’étalon monétaire.
- Prix:Entrez une valeur pour le prix.
- Durée:Entrez le texte pour afficher la durée du package.
Étape 4 : Ajouter les détails du package #
Depuis la zone des paramètres des fonctionnalités, vous ajouterez les détails de votre package.
Caractéristiques: #
- Caractéristiques Style:Sélectionnez un style dans la liste déroulante pour afficher la fonctionnalité entre un paragraphe ou une liste.
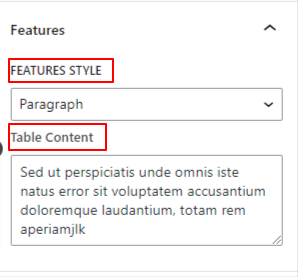
- Table des matières: Si vous choisissez le style de paragraphe, cette option apparaît. Entrez les détails du package dans la case.
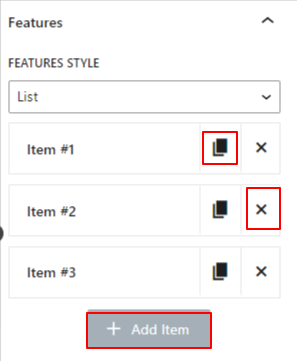
- Liste: La sélection de l'option Liste ouvrira les paramètres permettant d'ajouter une liste de fonctionnalités. Pour ajouter un élément, appuyez sur le bouton + Ajouter un article bouton. Vous pouvez également copier un élément en cliquant sur le bouton «Cloner un élément" icône et supprimez-en une avec le bouton "X" icône. Cliquez maintenant sur l'un des éléments et les options suivantes s'afficheront.
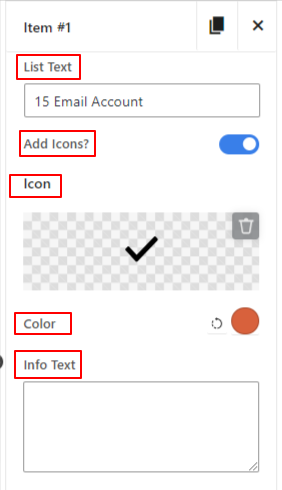
- Texte de la liste: Saisissez du texte pour la fonctionnalité ou le package.
- Ajouter des icônes:Activez ce bouton bascule pour afficher une icône avec la fonctionnalité.
- Icône:Sélectionnez une icône dans la bibliothèque ou téléchargez-la depuis votre appareil.
- Couleur:Sélectionnez une couleur pour votre icône.
- Texte d'information: Ajoutez des informations spéciales sur la fonctionnalité dans cette case. Cela activera une icône d'information.
Étape 5 : Ajouter un bouton de tableau de prix #
En utilisant cette zone de paramètres, vous pouvez ajouter un bouton dans le tableau des prix
Bouton: #
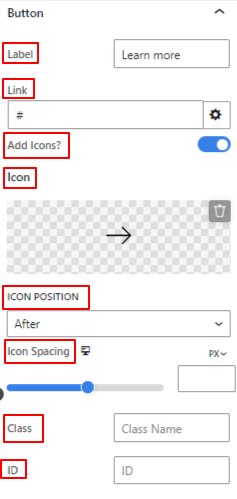
- Étiquette: Saisissez le texte de votre bouton.
- Lien:Entrez l'adresse du lien de la page Web vers laquelle vous souhaitez que le visiteur se rende.
- Ajouter une icône:Afficher une icône avec le texte du bouton.
- Icône:Choisissez une icône dans la bibliothèque ou téléchargez la vôtre.
- Position:Placez l'icône avant ou après le texte.
- Espacement des icônes:Utilisez le curseur pour définir l’écart entre le texte du bouton et l’icône.
- Classe et identifiant:Ajoutez une classe et un ID spécifiques dans ces cases pour cibler le CSS personnalisé à partir de la feuille de style.
Étape 6 : Configurer l’ordre des éléments #
Commande personnalisée : #
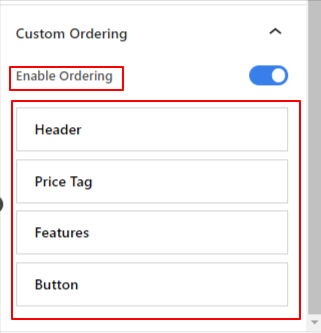
- Activer la commande: Activez ce bouton bascule pour définir l'ordre des éléments. Faites glisser un élément vers le haut ou vers le bas pour le placer à l'emplacement de votre choix.
Étape 7 : Zone de contenu de style #
Maintenant, nous allons nous concentrer sur le style du contenu textuel de l'histoire des prix. Vous devez saisir le «Onglet Style».
Organisme de tarification : #
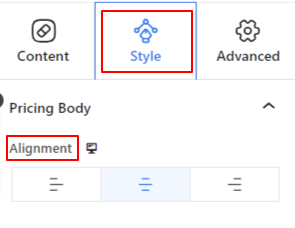
- Alignement: Définissez la position horizontale du tableau des prix à gauche, au centre ou à droite.
Ensuite, il y aura les options Titre du tableau et Sous-titre. Les deux paramètres ont des paramètres similaires.
Titre du tableau : #
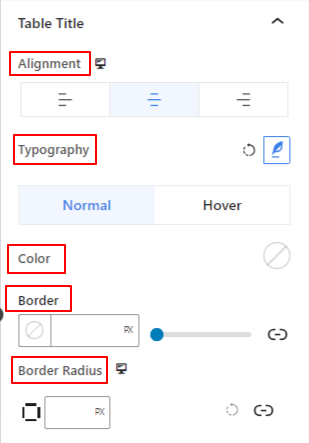
- Alignement:Alignez le titre du tableau à gauche, au centre ou à droite.
- Typographie:Ouvrez cette zone de paramètres pour obtenir toutes les personnalisations typographiques du titre du tableau.
Les options suivantes s'appliquent aux options normales et de survol.
- Couleur:Utilisez le sélecteur de couleurs pour choisir une couleur pour le titre.
- Frontière:Obtenez toutes les personnalisations de bordure comme la couleur, le style et l'épaisseur.
- Rayon de frontière:Définir la rondeur de la bordure.
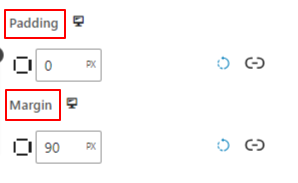
- Rembourrage:Ajoutez des espaces autour du titre.
- Marge:Définissez la distance du titre avec les autres éléments.
Étape 8 : Personnaliser les informations de tarification #
Étiquette de prix: #
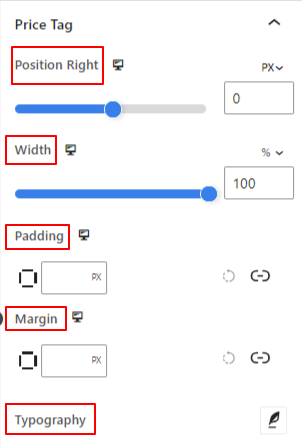
- Position à droite: Ajustez la position gauche/droite de l'arrière-plan de l'étiquette de prix.
- Largeur:Utilisez le curseur pour étendre ou réduire la largeur de l'arrière-plan.
- Rembourrage:Ajoutez un espace intérieur à l’étiquette de prix.
- Marge:Ajustez la distance de l'étiquette de prix avec d'autres éléments.
- Typographie:Ouvrez ce paramètre pour styliser la typographie de l'étiquette de prix.
Durée:
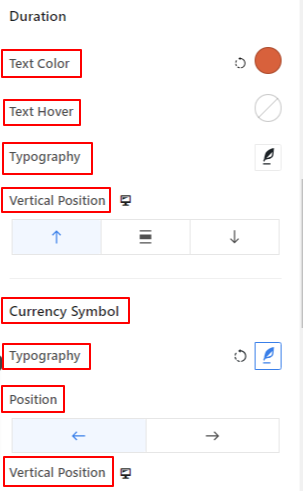
- Couleur du texte: Choisissez une couleur pour le texte de durée pour l'état normal.
- Survol du texte: Définissez la couleur du texte au survol comme dans l'option précédente.
- Typographiey : Obtenez toutes les options typographiques pour le texte de durée.
- Position verticale: Définissez la position verticale du texte de durée dans l'étiquette de prix. (Haut, Milieu, Bas)
Symbole de la monnaie:
- Typographie: Styliser le texte de la devise.
- Position:Placez le symbole monétaire avant ou après le numéro de prix.
- Position verticale: Définissez le positionnement vertical du symbole monétaire.
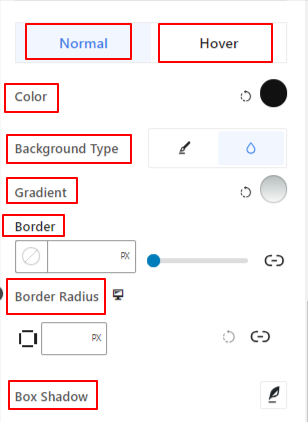
- Couleur:Sélectionnez une couleur pour afficher votre devise.
- Type d'arrière-plan:Ajoutez un type d'arrière-plan entre la couleur unie et le dégradé.
- Frontière: Définissez l'épaisseur, la couleur et le style de la bordure.
- Rayon de frontière:Entrez une valeur pour mesurer la rondeur de la bordure.
- Boîte ombre: Embellissez cette partie avec un effet d'animation d'ombre de boîte.
Étape 9 : Personnaliser les détails du package #
Caractéristiques #
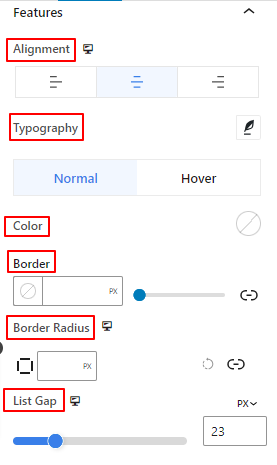
- Alignement:Alignez le texte du paragraphe ou la liste des fonctionnalités à gauche, au centre ou à droite.
- Typographie: Modifiez le style du texte de la fonction, la famille de polices, le poids, la transformation, l'espacement, etc.
Les fonctionnalités de style suivantes peuvent s'appliquer aux options normales et de survol.
- Couleur: Choisissez une couleur pour le texte de la fonction.
- Frontière:Personnalisez le style, la couleur et l'épaisseur de la bordure.
- Rayon de bordure : Ajustez la rondeur de la bordure.
- Liste des lacunes: Cette option n'apparaît que lorsque vous sélectionnez l'option de liste dans le paramètre des fonctionnalités de l'onglet Contenu. Utilisez ce curseur pour définir l'écart entre tous les éléments de la liste.
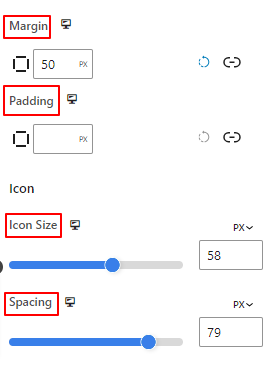
- Marge:Ajoutez des espaces autour de la zone de texte de la fonction.
- Rembourrage: Développez l'espace autour de la zone de texte de la fonction en saisissant une valeur dans cette case.
Icône:
- Taille de l'icône : utilisez ce curseur pour mesurer la taille de l'icône de la liste.
- Espacement : Définissez l’espace entre l’icône et le texte de la liste.
Étape 10 : bouton Personnaliser le tableau des prix #
Bouton: #
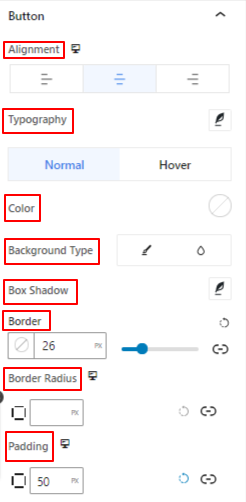
- Alignement: Placez le bouton à gauche, au centre ou à droite.
- Typographie:Obtenez diverses options de style pour le texte du bouton.
- Couleur:Donner une couleur au texte du bouton.
- Type d'arrière-plan:Choisissez un type d'arrière-plan classique ou dégradé.
- Boîte ombre:Donnez un effet d'ombre à votre bordure.
- Frontière: Définissez l’épaisseur, le style et la couleur de la bordure.
- Rayon de frontière: Ajustez la rondeur de la bordure.
- Rembourrage:Augmenter l'espace à l'intérieur de la bordure du bouton.
Étape 11 : Configurer les paramètres avancés #
Dans l'onglet Paramètres avancés, vous pouvez configurer la disposition du bloc Accordéon, l'arrière-plan, les styles de bordure et contrôler sa visibilité.
Mise en page: #
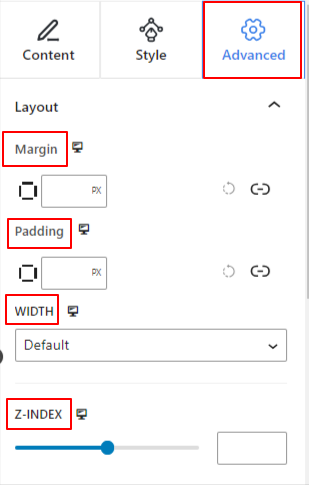
- Marge: Définissez l'espace autour de la disposition des blocs. Cela aide à définir l’écart entre un autre bloc.
- Rembourrage: saisissez une valeur pour définir l'espace autour du bloc dans sa disposition.
- Largeur: En plus de conserver la largeur de mise en page par défaut.
- Pleine largeur: En sélectionnant cette option, la mise en page s'étendra sur toute la largeur de l'écran.
- En ligne (auto): Son application aura la même largeur que l'élément de bloc.
- Coutume: Choisir cette option fera apparaître un curseur pour définir l'espace horizontal de la disposition des blocs.
- Indice Z: utilisez le curseur pour spécifier l'ordre de pile du bloc avec d'autres blocs.
Position: #
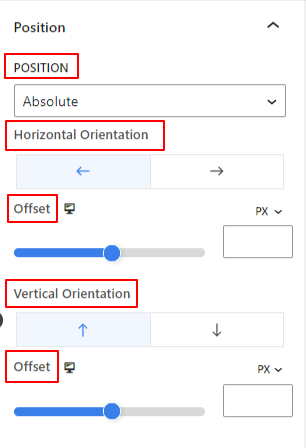
Sous la liste déroulante, vous verrez trois options : Défaut, Absolu, et Fixé.
- Absolu: La sélection de cette option vous donnera une position absolue du bloc, ce qui signifie que les éléments rentreront dans leur conteneur.
- Fixé: L'option Position fixe permettra à l'élément de s'adapter à la totalité de la fenêtre ou de l'écran.
Les options Absolue et Fixe ont des paramètres similaires comme ci-dessous :
- Orientation horizontale: Choisissez la direction de positionnement entre gauche et droite.
- Compenser: Utilisez le curseur ou mettez une valeur manuellement pour ajuster le positionnement horizontal du bloc.
- Orientation verticale: Sélectionnez la direction de positionnement entre le haut et le bas.
- Compenser: Utilisez le curseur ou mettez une valeur manuellement pour ajuster le positionnement vertical du bloc.
Arrière-plan: #
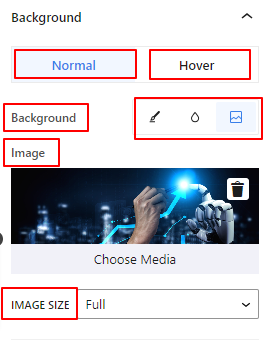
- Arrière-plan: Choisissez une option d’arrière-plan entre couleur unie, dégradé ou image.
Sous l'option Survol :
- Image: Si vous choisissez l'option image, les options suivantes s'ouvriront :
- Image: Choisissez une image dans la médiathèque ou téléchargez la vôtre.
- Taille de l'imagee : Sélectionnez la taille de l'image entre Vignette, Moyenne, Grande ou Complète.
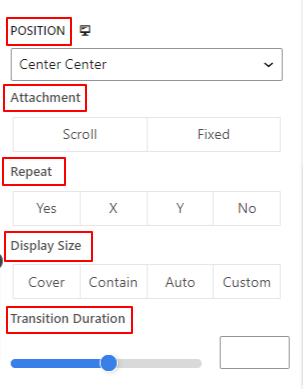
- Position: Sélectionnez la position des 10 options différentes.
- Pièce jointe: Spécifiez la relation de l'image d'arrière-plan fixe ou défilante avec le reste de l'écran du navigateur.
- Répéter: sélectionnez une option pour définir la manière dont les images d'arrière-plan sont répétées.
- Taille d'affichage: Sélectionnez une taille d’affichage parmi quatre options différentes.
- Durée de la transition: Utilisez le curseur pour ajuster la transition d'arrière-plan de l'état Normal à l'état de survol.
Frontière: #
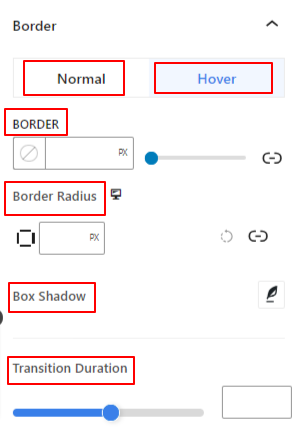
- Frontière: Sous cette option de configuration, vous obtiendrez des options de configuration des bordures telles que la largeur, le style et la couleur.
- Rayon de frontière: Définissez la rondeur de la bordure en saisissant une valeur.
- Boîte ombre: obtenez tous les paramètres tels que la couleur, l'horizontal/vertical, le flou, la répartition, etc. pour donner des effets d'ombre à la bordure.
Sous l'option de survol :
- Durée de la transition: Vous pouvez ajouter une valeur manuellement ou utiliser le curseur pour définir l'heure de modification du motif de la bordure en survol.
Visibilité: #
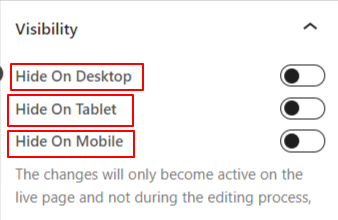
Le module de visibilité vous permet de contrôler l'affichage des conceptions de blocs en fonction du type d'appareil. Il y aura trois options d'appareil (ordinateur de bureau, tablette, mobile) avec un bouton bascule. Activez le bouton bascule pour masquer la conception de bloc de cet appareil.
Cependant, vous pouvez toujours le voir dans la vue de l'éditeur.
Avancé: #
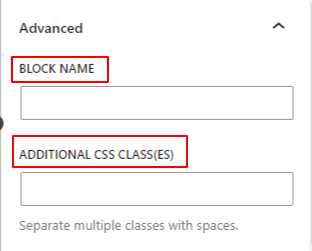
- Nom du bloc: donnez un nom pour identifier ce bloc de manière unique lors de la création de liens ou de scripts pour styliser le bloc.
- Ancre HTML: Ajoutez une URL pour lier une page de site Web.
- Classes CSS supplémentaires: Attribuez des classes CSS supplémentaires au bloc qui vous permettront de styliser le bloc comme vous le souhaitez avec du CSS personnalisé.
N.-B.: Vous pouvez ajouter plusieurs classes séparément avec des espaces.
Et voilà ! Maintenant, c'est votre tour. Créez un tableau de prix incroyable à partir de l'éditeur de blocs sur votre site Web WordPress.


