


You run a growing business online. Potential clients visit your website, drop in, browse around, but not a single inquiry reaches you.
What happened? Maybe you forgot to add a channel where they can inquire about your product or services.
So, instead of getting leads, they just vanish into thin air!
That’s where a quote request form comes in. It helps you collect all the details you need, simplify client communication, and make them your quality leads.
Pourquoi?
À propos 74% of marketers still rely on web forms to capture leads. But there’s a kicker. Forms do not guarantee conversion. Of course, I’m talking about plain-looking forms.
But stunning and user-friendly forms could boost conversion by up to 300%. So, if you are a website owner, this is the right time to invest in a high-converting quote request form.
In this guide, we’ll walk you through how to create a Request a Quote form in WordPress step by step without coding. By the end, you’ll have a fully functional, great-looking form that helps you turn curious visitors into paying clients without the headache.
Ready to turn lookers into serious buyers? Let’s dive in.
Quick Overview
If visitors browse your website but never reach out, you might be missing a simple yet powerful tool, a Request a Quote form.
Tools Used: Elementor and MetForm
Quick Steps:
✅ Install Requirements – Make sure Elementor and MetForm (Pro) are activated on your WordPress site.
✅ Create a New Form – Go to MetForm → Forms → Add New, then choose the ready-made Request a Quote modèle.
✅ Customize the Fields and Style– Edit labels, add or remove fields, and tailor options to match your business needs.
✅ Publish Your Form – Insert it into any page or button, then test it to ensure everything works smoothly.
Why Create a Request Form in WordPress
UN Request a Quote form gives visitors an easy way to inquire about pricing and services without needing to call or email you directly.
Here are a few key benefits of adding one to your site:
- Better lead generation: It encourages potential clients to share details about their project or request.
- Time efficiency: Saves time for both you and your visitors by gathering all necessary details upfront.
- Improved communication: Helps you understand client needs before starting discussions.
- Professional impression: Adds credibility and structure to your inquiry process.
In short, it’s a must-have feature for any business website that wants to convert visitors into customers.
Steps to Create a Request Form in WordPress Using MetForm
Let’s dive into how you can quickly build a quote request form using MetForm. Now, there are two methods to create a request for quote form. One is through a ready-made template, and the other is building from scratch. But since this blog is about the easiest method, we’ll use the ready-made template.
Step 1. Pre-requisites
Before we begin, make sure you have the following:
- UN Site WordPress is set up and running.
- Générateur de pages Elementor is installed and activated. The free version is only what you need.
- Le Plugin MetForm installed and activated. This requires a pro version.
You can install MetForm by going to your WordPress dashboard → Plugins → Ajouter un nouveau, and searching for “MetForm.” Then click Install Now → Activate.
Check out this guide for a detailed steps 👉 Premiers pas avec MetForm
Once everything is ready, we can start building!
Step 2. Create a New Form
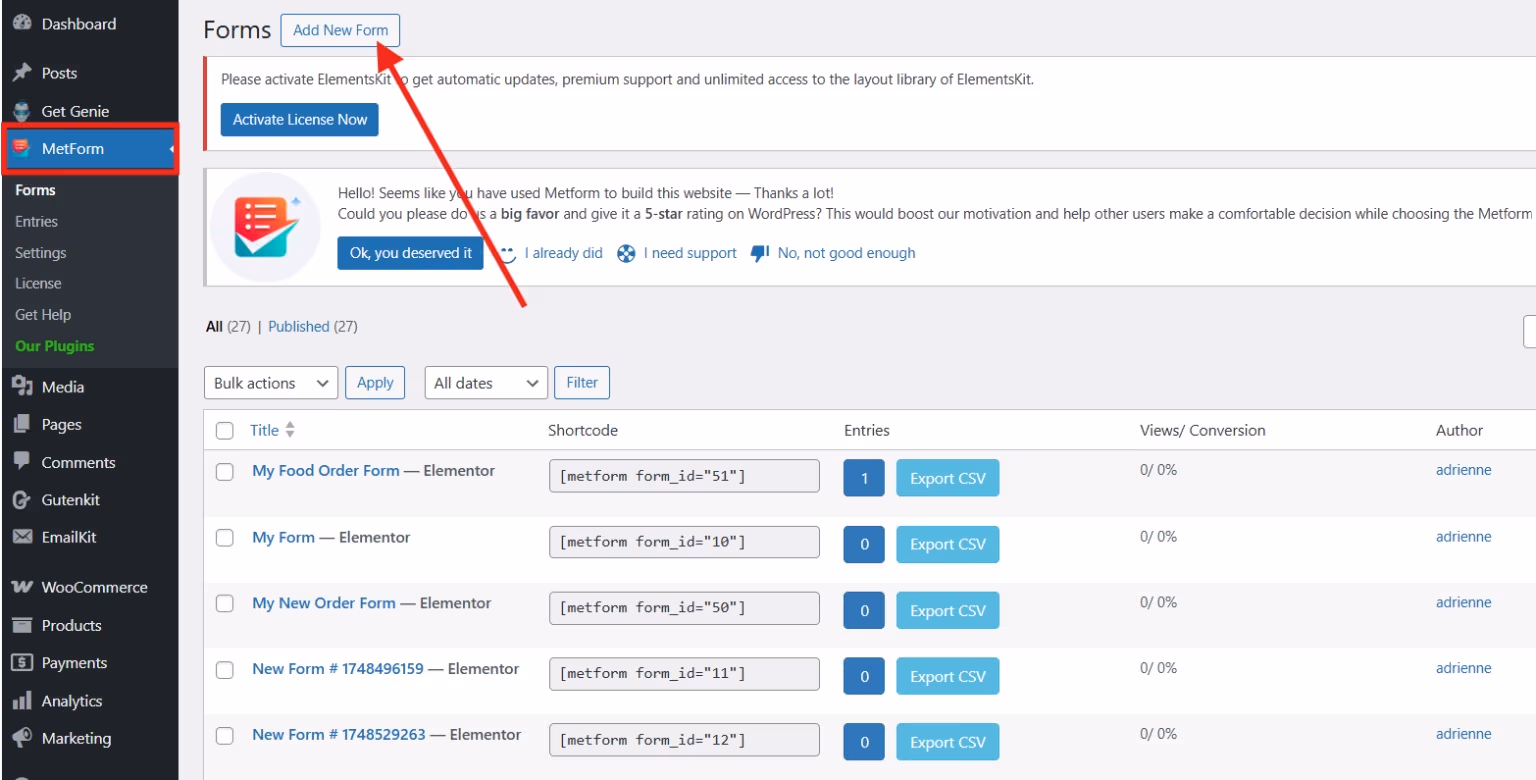
From your WordPress dashboard, go to MetForm → Forms. Click Add New Form and you’ll be redirected to the Elementor editor.
A new window will pop up. Fill out this window with information such as:
- Name of your form
- Select General Form
- Find the Request For Quote Form from the various pre-designed templates.
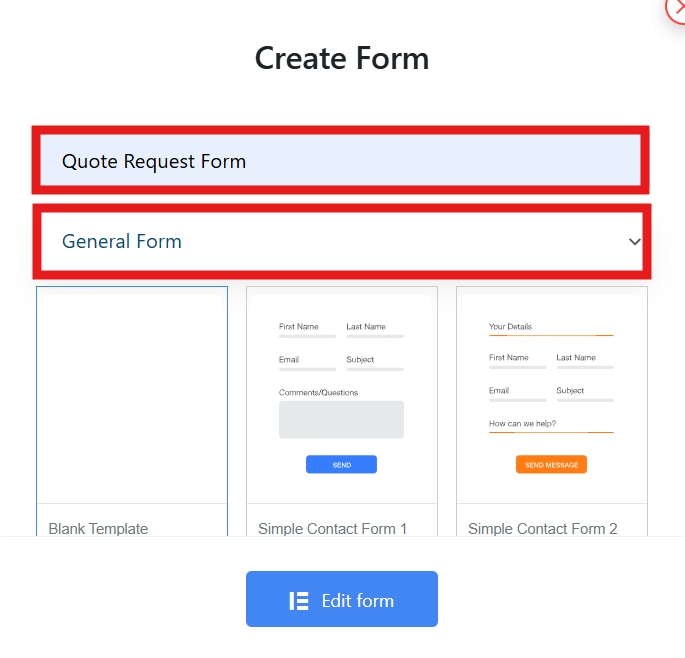
The last step is to click the Edit form button, and it will automatically load into your Elementor canvas, ready for customization.

Step 3. Customize Quote Request Form
Now comes the fun part of the form building. You’ll customize your form fields. This pre-designed template is customized for a travel business. So, if you are not into travel business, still no worries! You can change the text or label and customize it based on the type of your business.
For instance, your business is in line with beauty and care, like a spa. Your form should have these fields:
- Full Name
- Adresse e-mail
- Phone Number
- Preferred Contact Method
- Type of Service Requested
- Duration Preference
- Number of People
- Preferred Date and Time
- Are You Flexible with Date/Time
Customize your form based on the line of your business:
Next, click the field you want to change the text in. On the left side of your Elementor canvas, you can find a toolbar.
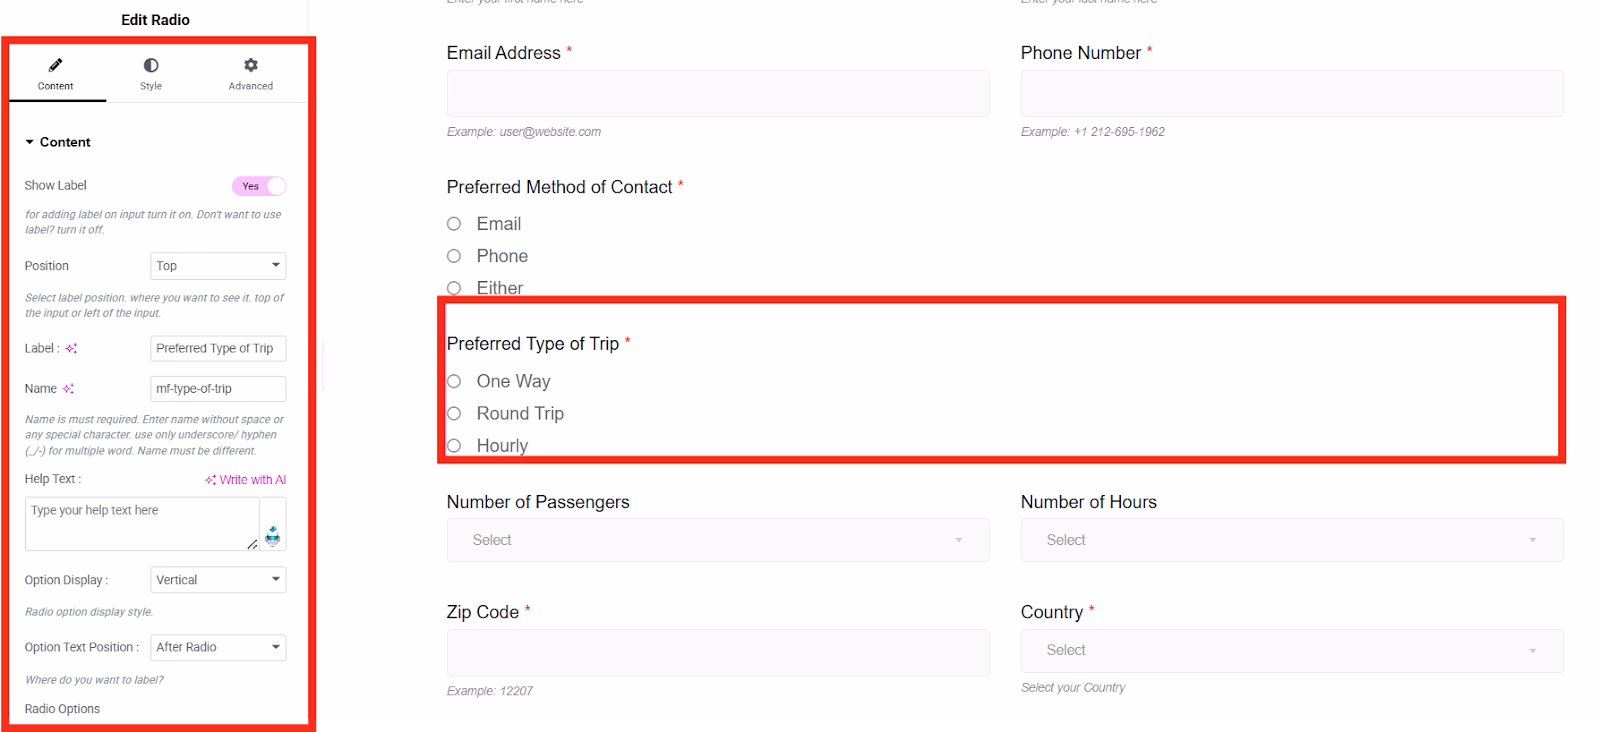
Here are the things you can do:
- Change the text/label
- Select the label position to Top or Left.
- Add help text to guide your clients on what information to fill.
- Choose the position of your item lists from Horizontal or Vertical.
- Add list items for your services.
To change the label, simply proceed to the label box and replace it with your desired text. Don’t forget to change the name.
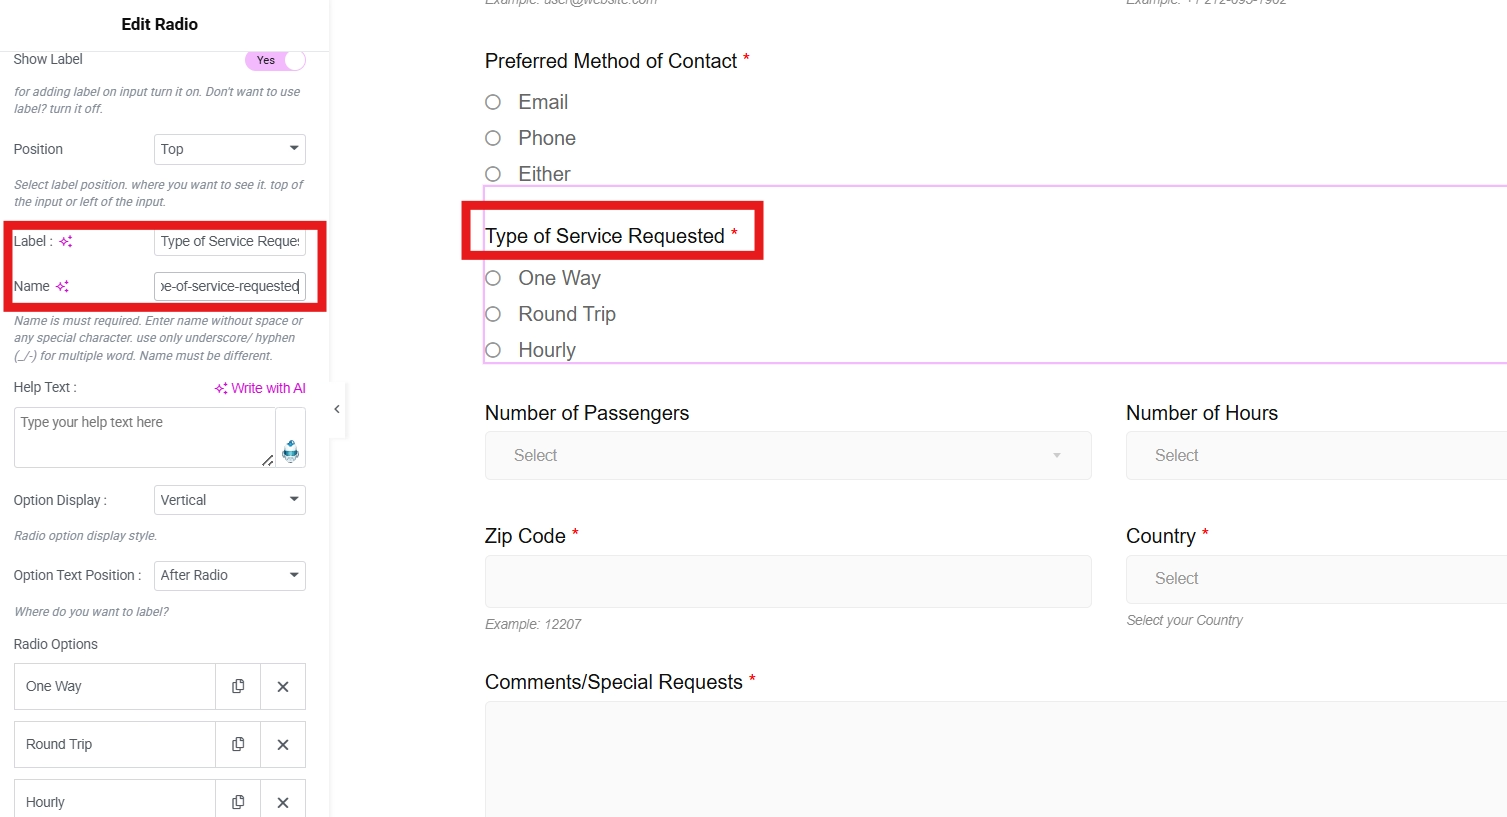
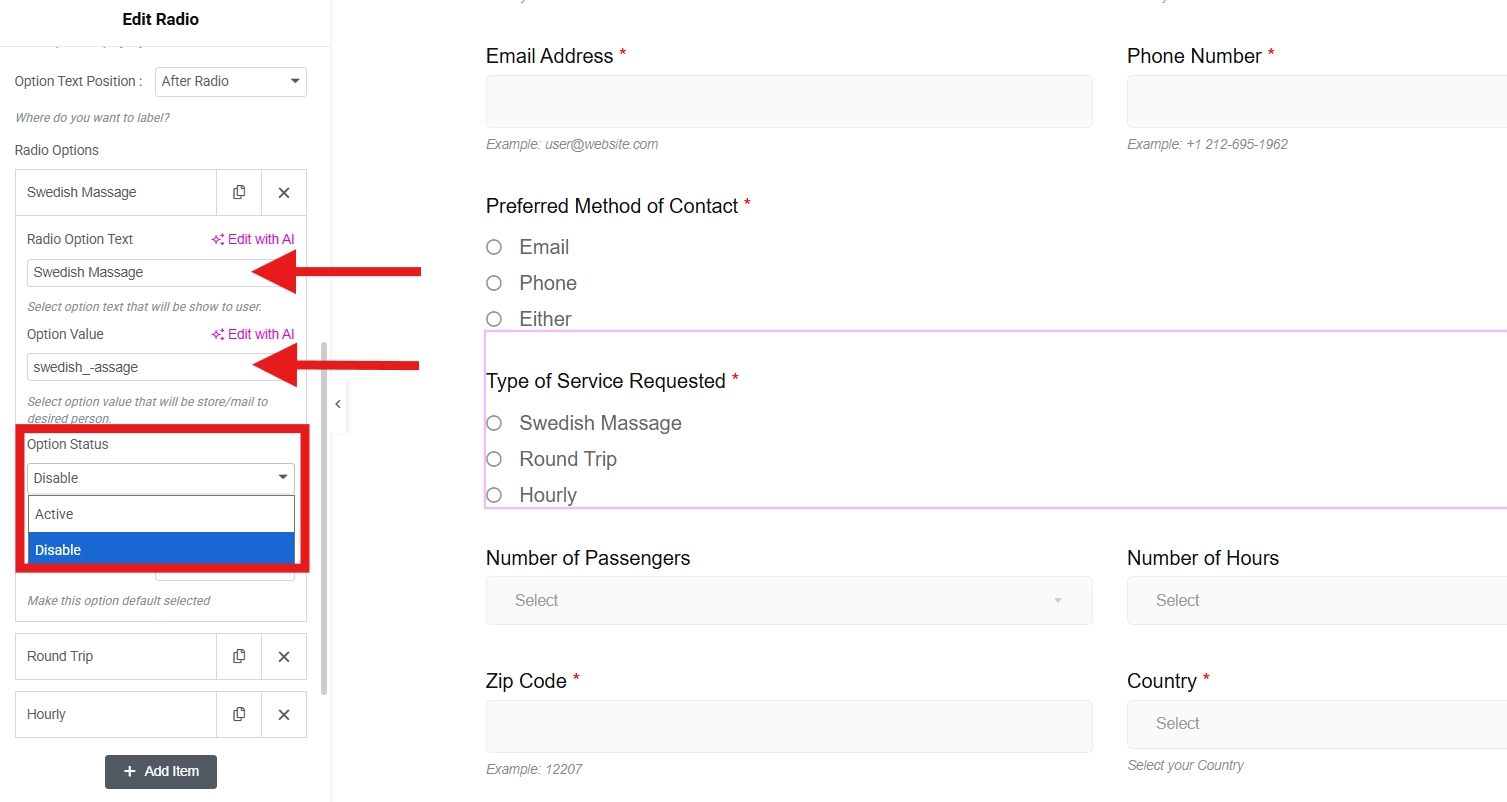
Go to the Radio Options part to add your list of services. Click a list item and enter your label in the Radio Option Text and Option Value. Now, the Option Status is very helpful when your list item is no longer available. You can simply place it to disable so your clients will still see but cannot select it.
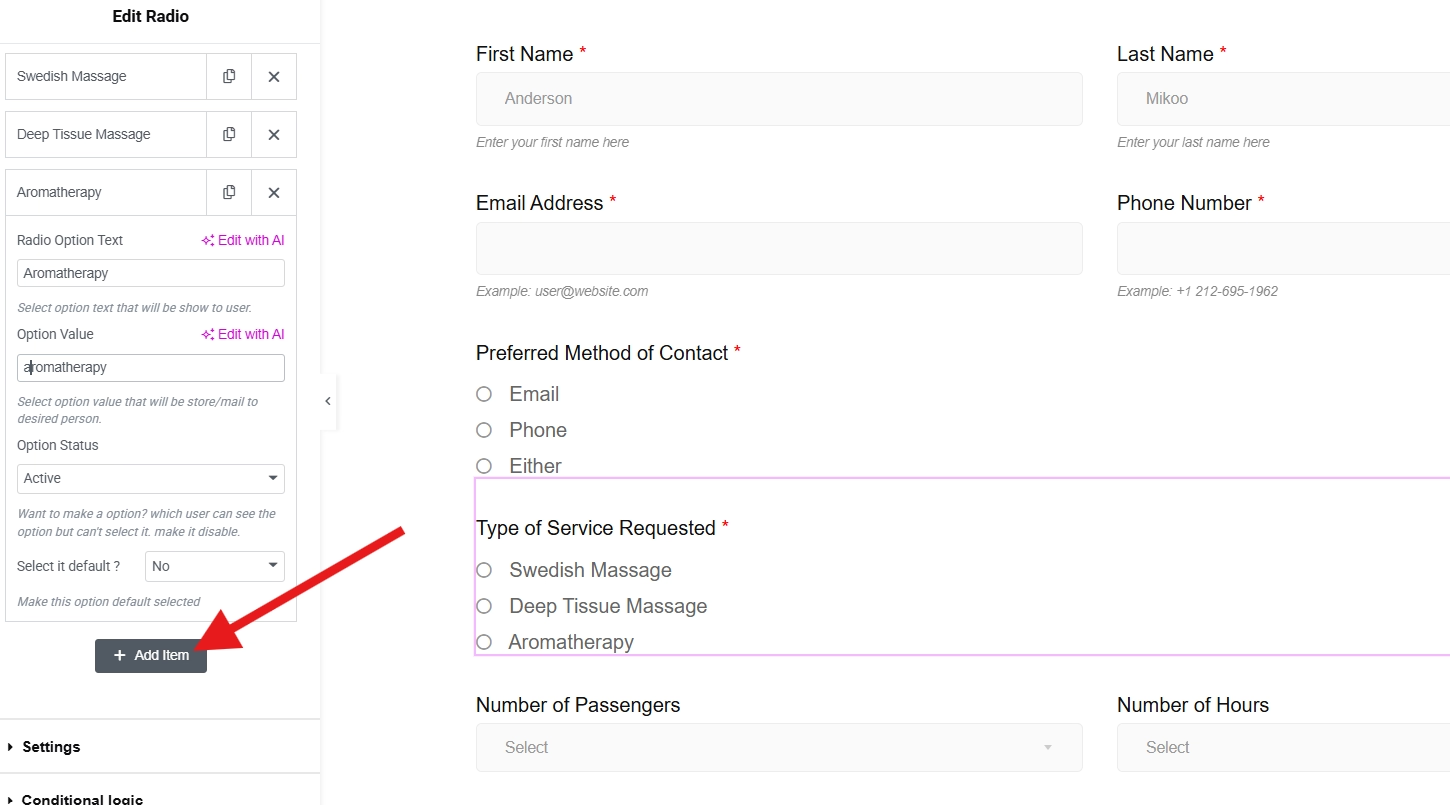
You can add your types of services as many as you want. Click on the Add Item button to add them to the list.
Additionally, you can also put a placeholder and help text in your form fields as a guide for your clients. Help text is usually used for non-dropdown fields and a placeholder for drop-down fields.
Add necessary fields to your form:
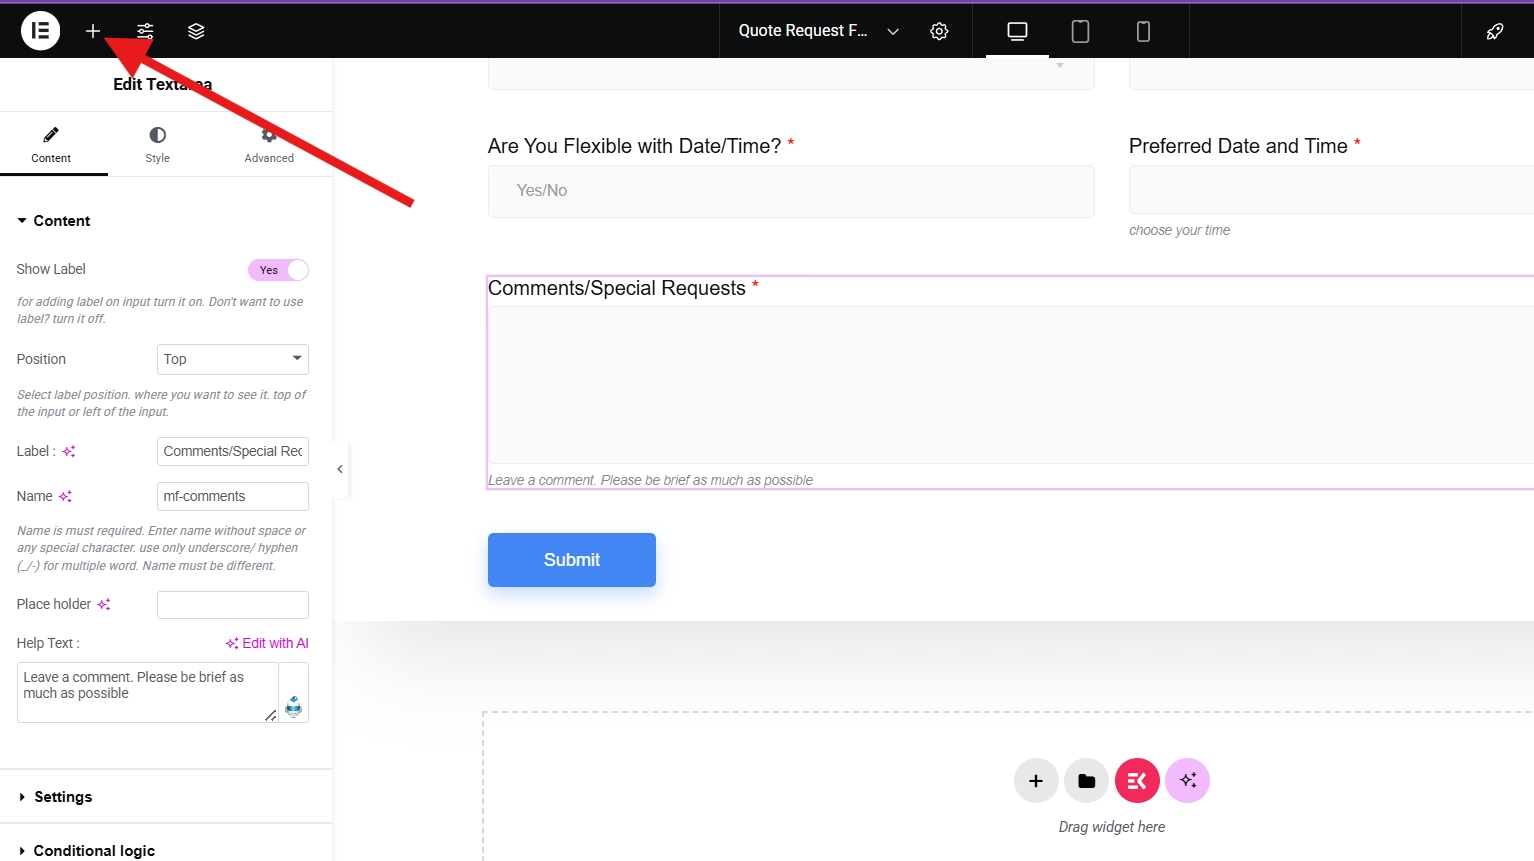
You may add more fields to your form if you wish to. Simply click on the plus (+) icon at the top left corner of your screen to add an element.
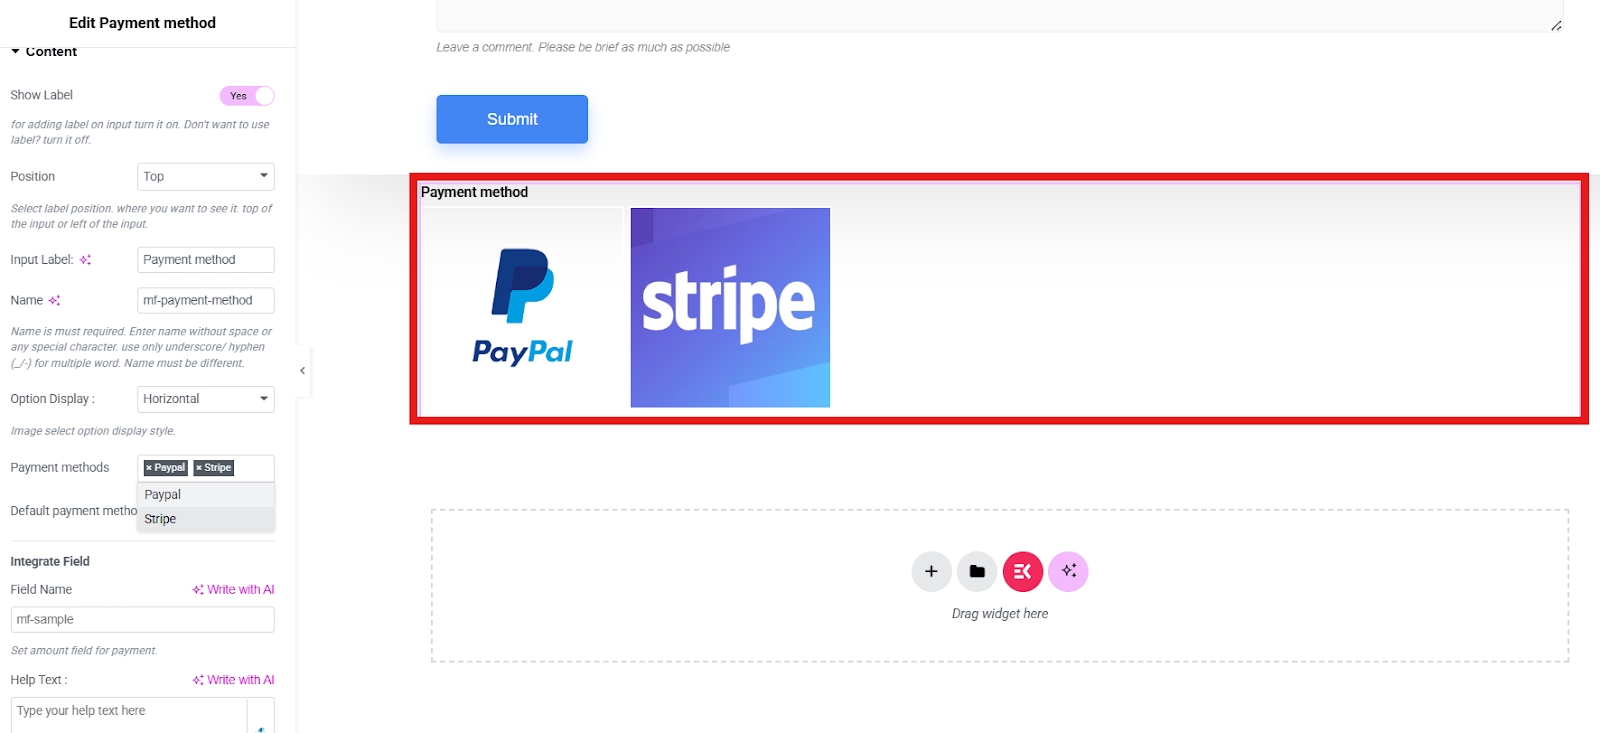
In the sidebar tool, you’ll see all the MetForm widgets you can choose from. For example, you want to add a Payment Method to your form. Find the widget or search in the search bar. Drag it to the center, then drop.
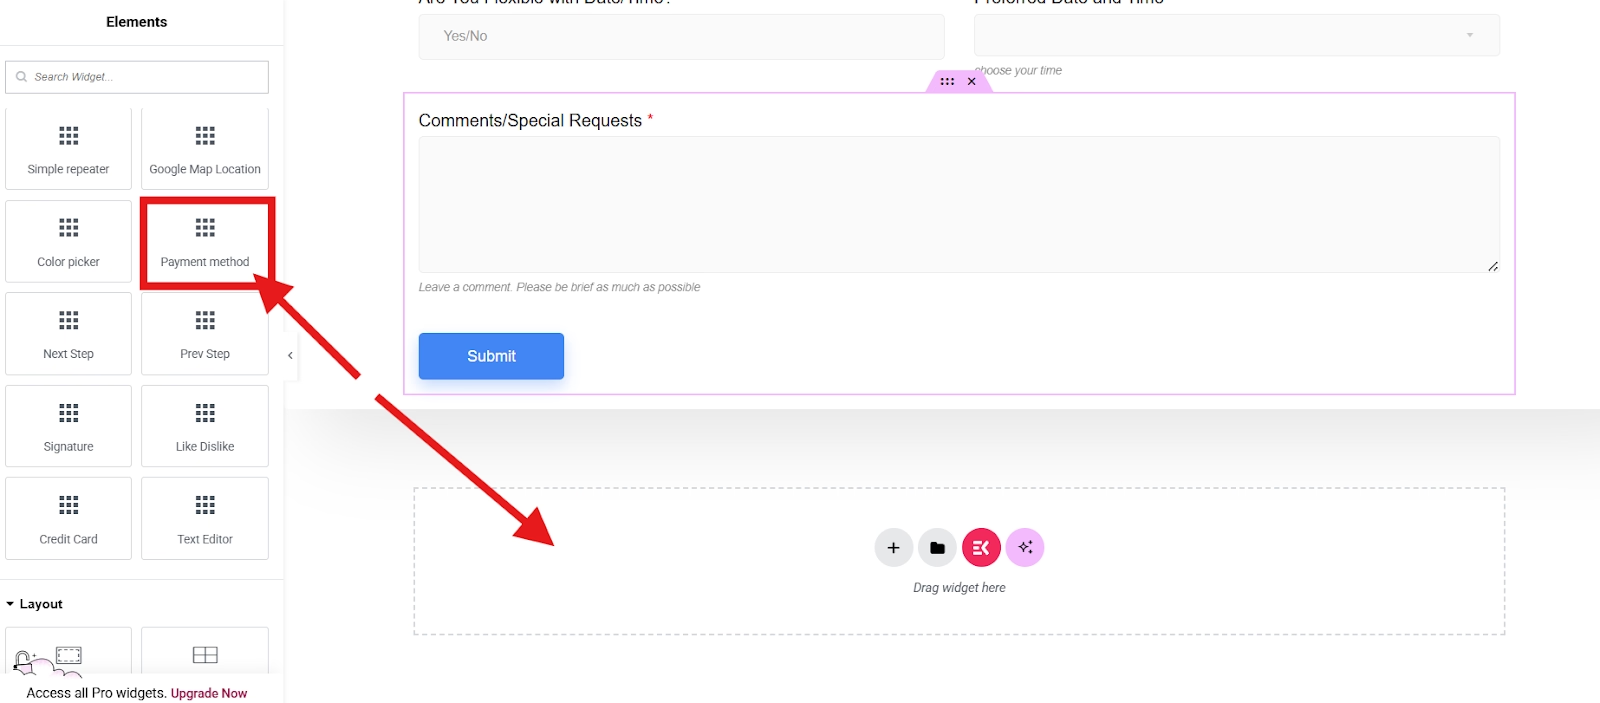
Or you can drag it to which part of your form you want to display in. You can add your payment gateways, such as PayPal or Stripe.
You can enable conditional logic in MetForm to show or hide fields based on user selections. This makes your form dynamic and more user-friendly.
Design your container layout:
Click on the 6 dots to edit a section of your container using the sidebar tool.
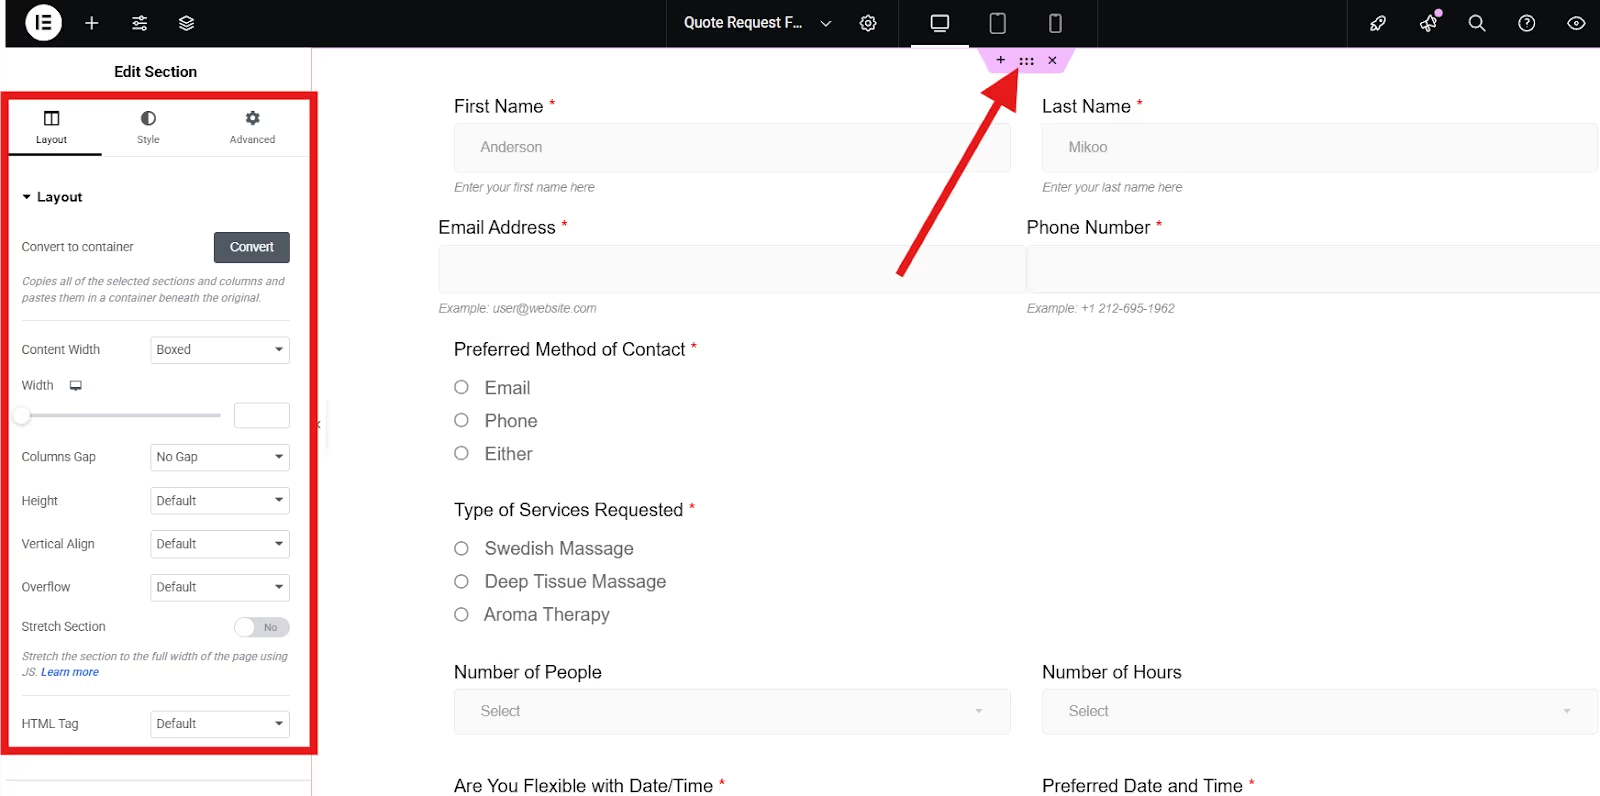
You can select from boxed or full-width for your content. If you select Boxed, you can adjust the width.
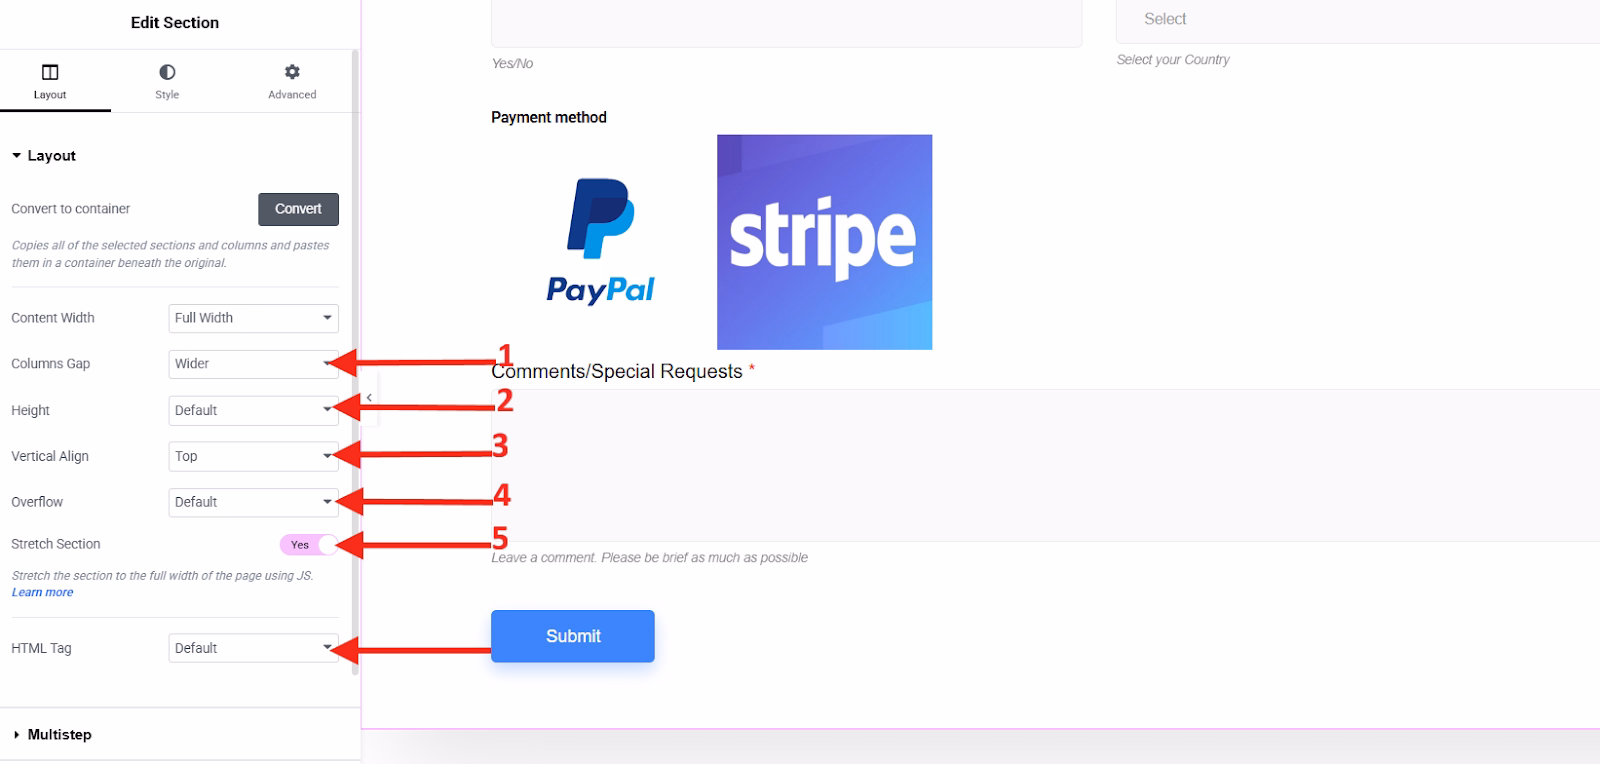
Then, if you want to adjust the gap between columns, you can choose from various options, like wider, narrower, extended, etc. You can also set the height of your container to minimum height, default height, or even fit it to the screen.
Additionally, you can choose its vertical alignment from top, middle, bottom, etc. You may hide the overflow or let it be in a default setting. You may stretch your page to its full width by toggling the button. Furthermore, you have the option to add an HTML tag.
Lastly, to make your request quote form more aesthetic, you can add a background color using the style settings.
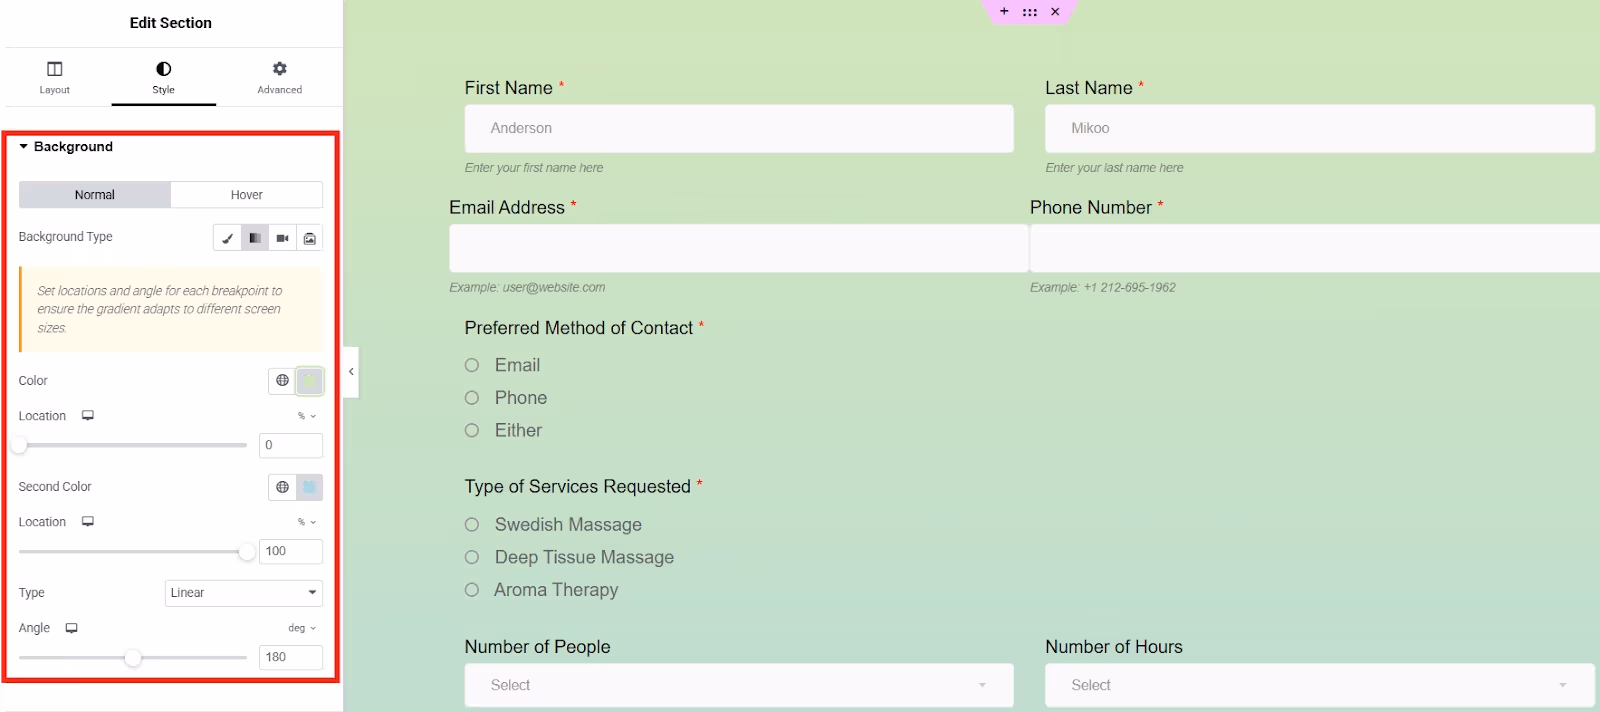
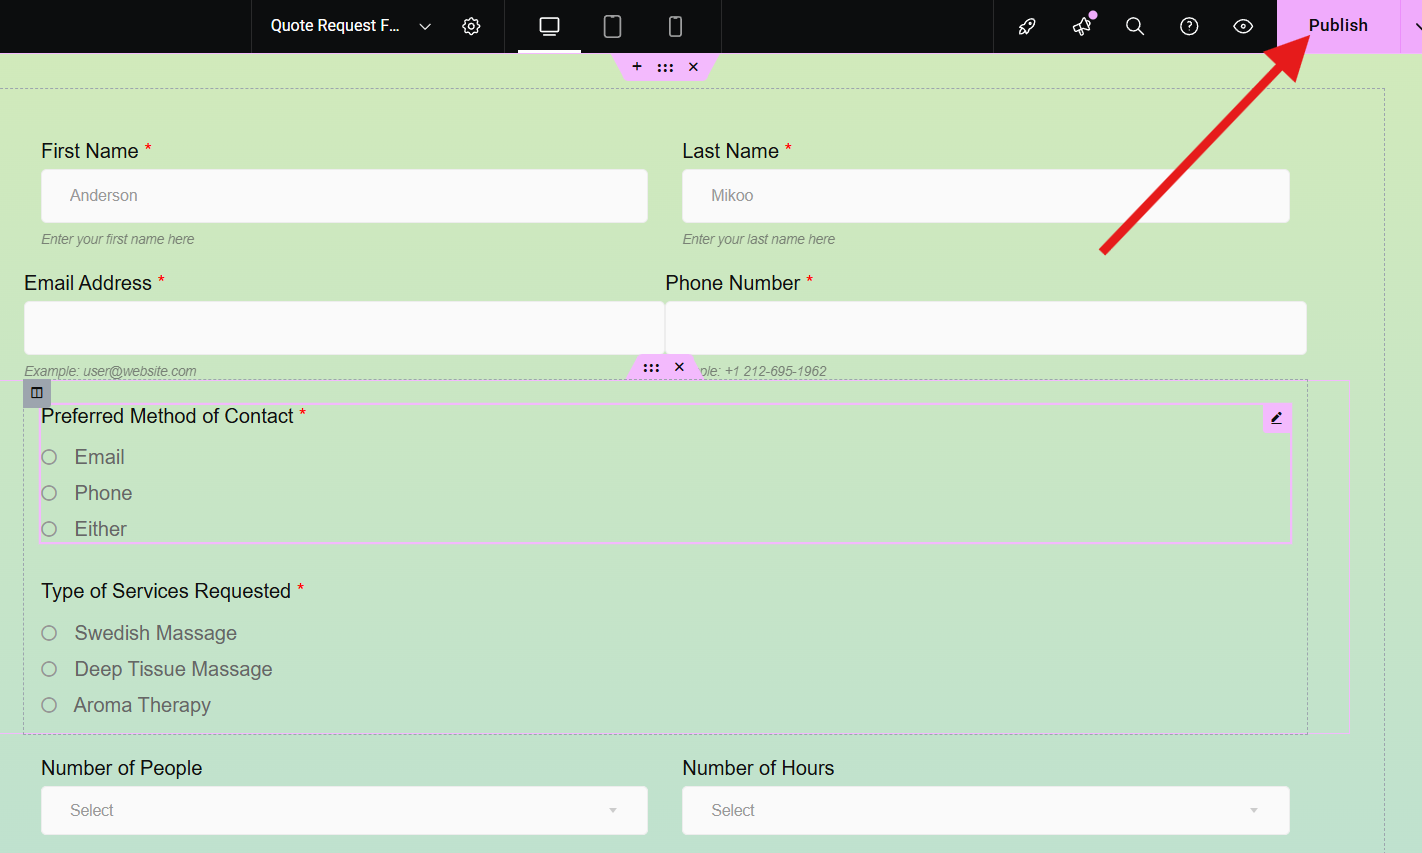
Once your form looks good, click Publish or Update.
4. Test your Form in Live
Now that your form is ready, it’s time to display it on your website. You can add your form link to your landing page or any pages so that when your visitors are interested, they can just click on the appointment button.
If you are using a Gutenberg editor, you can simply add the link to your form in the CTA button within your landing page or any pages.

Then they will be directed to your form and asked to fill in their information.
Your Request a Quote form is now live on your site! But it doesn’t end here. Test your form by filling it out as a visitor would. This will ensure that all fields work correctly and validation messages appear where needed.
Then, check your email if you receive the form submission confirmation email. If something doesn’t work, go back and edit your form with MetForm.
Do you want to know how to send form submission confirmation email? 👉 click ici!
Now, as admin check if you successfully receive an email notification.
To find out if your admin receive an email notification of form submission 👉 click ici!
FAQ
1. Do you need coding skills to use MetForm?
Not at all! MetForm is a no-code form builder that integrates directly with Elementor. Everything works through drag-and-drop.
2. Can you use MetForm for other types of forms?
Yes! MetForm supports contact forms, booking forms, survey forms, feedback forms, and more.
3. Does MetForm work with email marketing tools?
Yes, MetForm integrates with popular email services like Mailchimp, Zapier, and others to help automate your lead management process.
4. Is MetForm free?
MetForm offers both free and premium versions. The free version is great for basic forms, while the Pro version unlocks advanced features and integrations.

Time to Start
Creating a Request a Quote Form in WordPress doesn’t have to be complicated. With MetForm, you can design, customize, and publish a professional-looking form in just a few minutes, all without writing a single line of code.
So, what are you waiting for? Head to your WordPress dashboard, install MetForm, and start collecting high-quality leads with your very own Request a Quote form today!

Laisser un commentaire