


Quick Overview
Creating a calculator form in WordPress is super easy using MetForm et Élémentor. MetForm’s calculation fields will let you apply formulas, test, and publish a form in minutes.
Steps to follow to add calculation form in WordPress:
- Install MetForm and Elementor
- Add a form with a blank template
- Drag-and-drop general and necessary calculation fields
- Set formulas on form fields
- Preview to validate formulas
- Publish to live calculation form
How to Create a WordPress Calculator Form
The ideal and straightforward method to create a calculator form is using a Générateur de formulaire WordPress, MetForm. No coding or advanced knowledge is required. Before adding the WordPress calculation form, keep in mind the following points:
- Use simple field names.
- Add correct fields (Such as Select, Number, Calculation, etc.).
- Preview to check appearance on mobile devices.
- Test calculation form before publishing.
Here are the steps to follow to create a calculation form in WordPress with a friendly solution, MetForm:
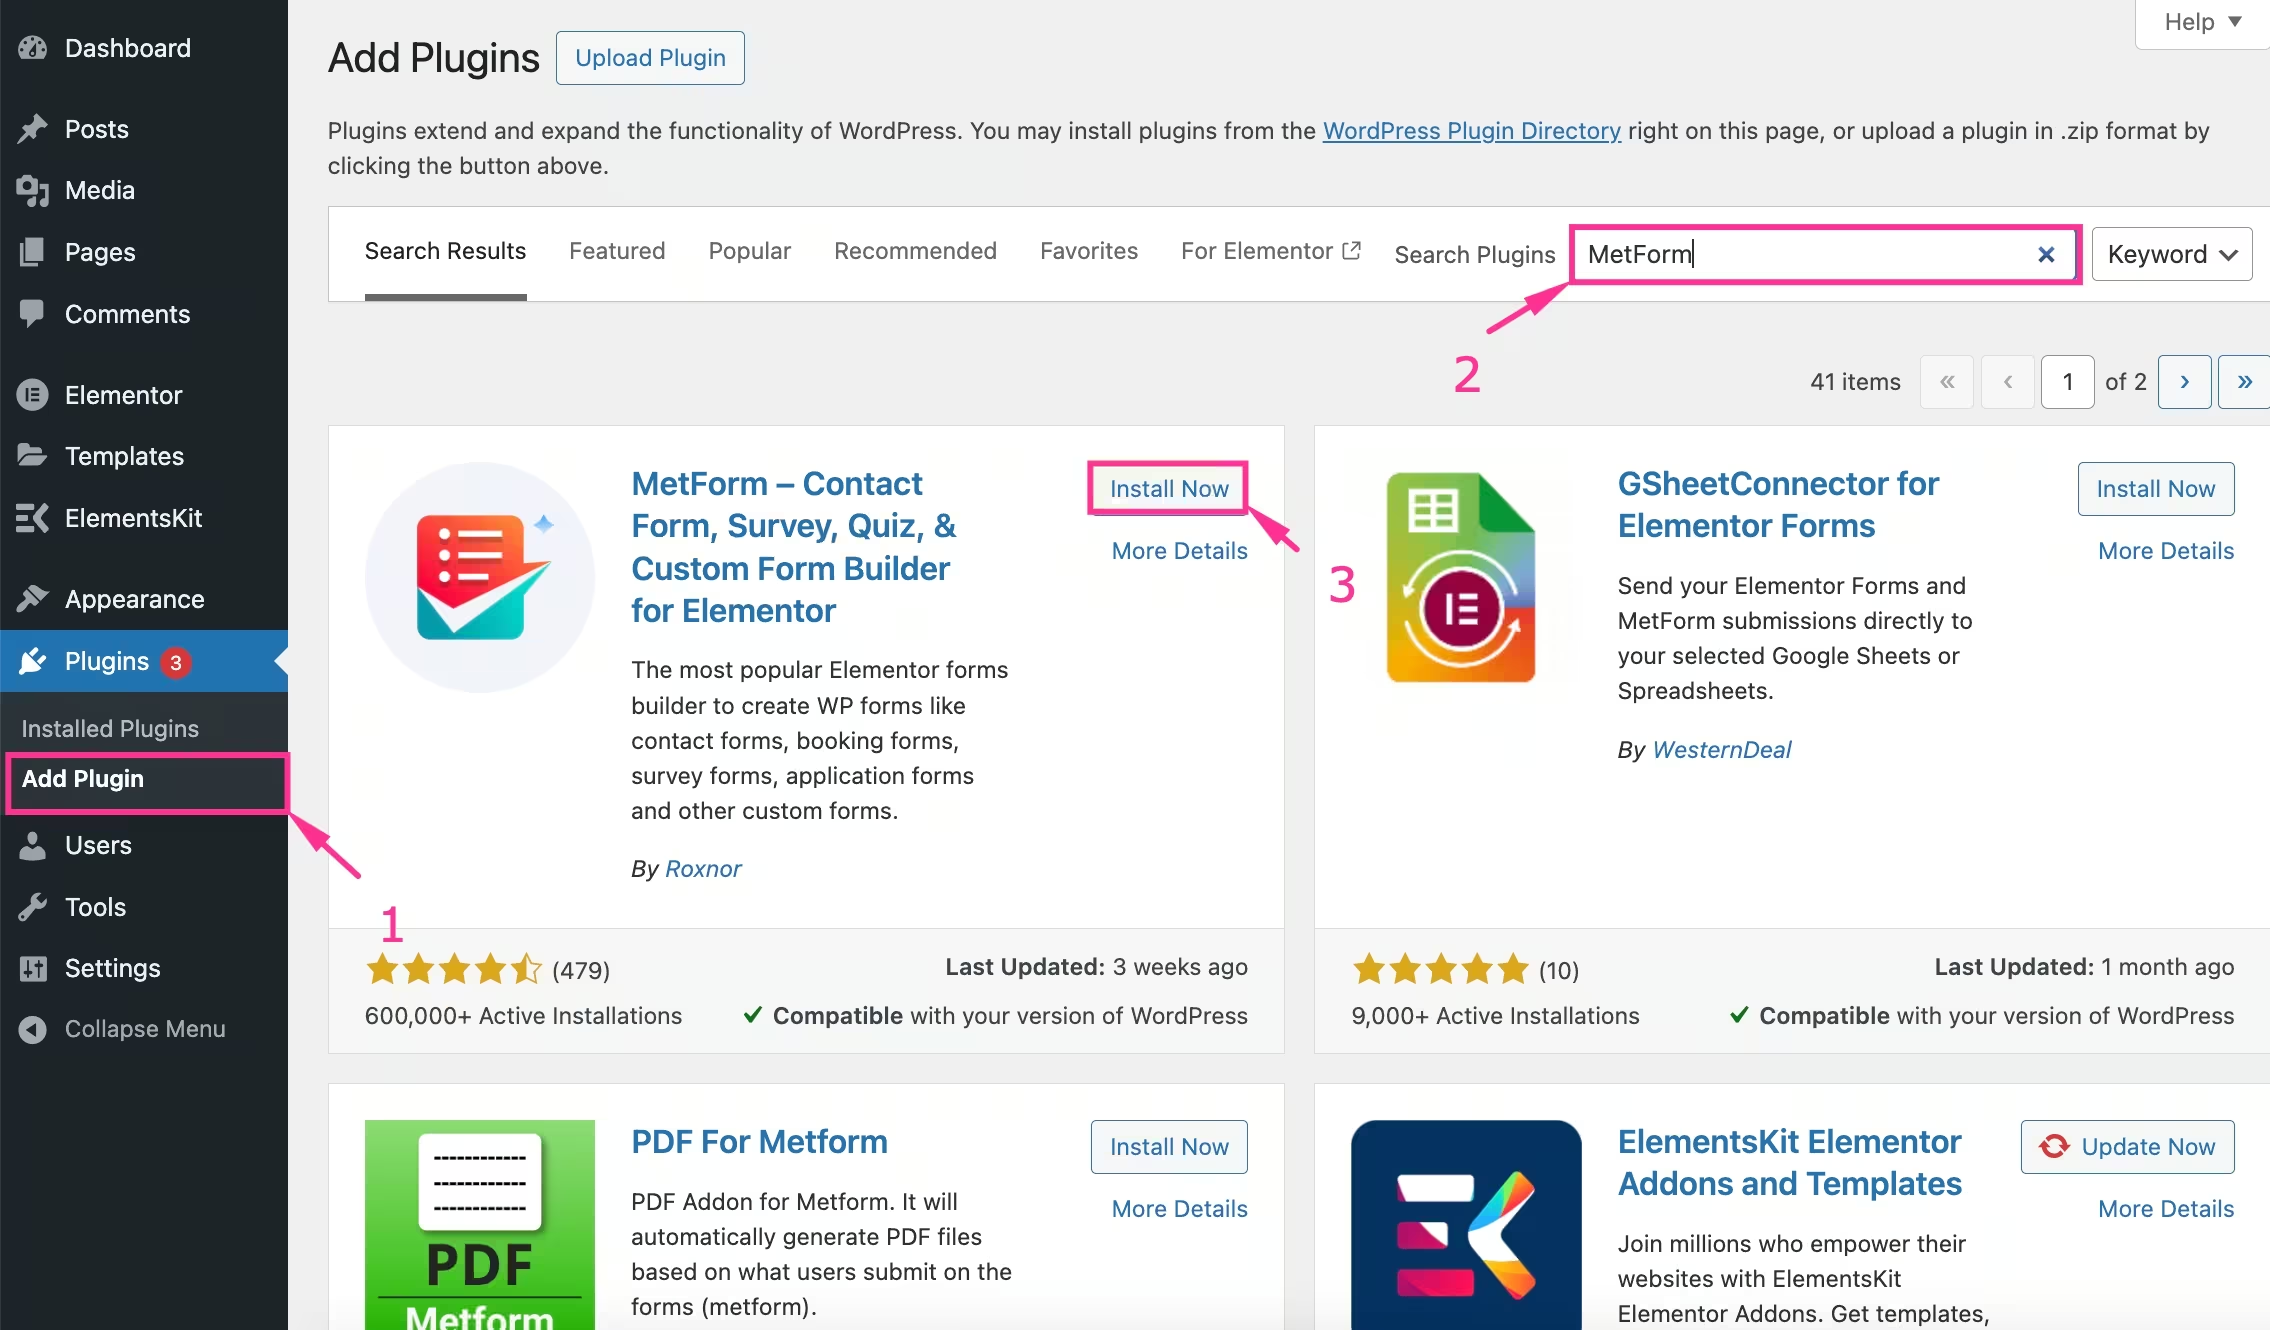
Step 1: Install the WordPress calculator form plugin
First, you have to install and activate a suitable WordPress calculator form solution. For that, take the following measures:
- Visite Plugins → Add Plugin et search for “MetForm”.
- Installer et activer MetForm after finding it.
- Also, install Elementor if you don’t have that installed and activated on the site.
- Alternative way to install the premium version: Install MetFormPro par clicking the “Upload Plugin” bouton.
- Choose a file from your device.

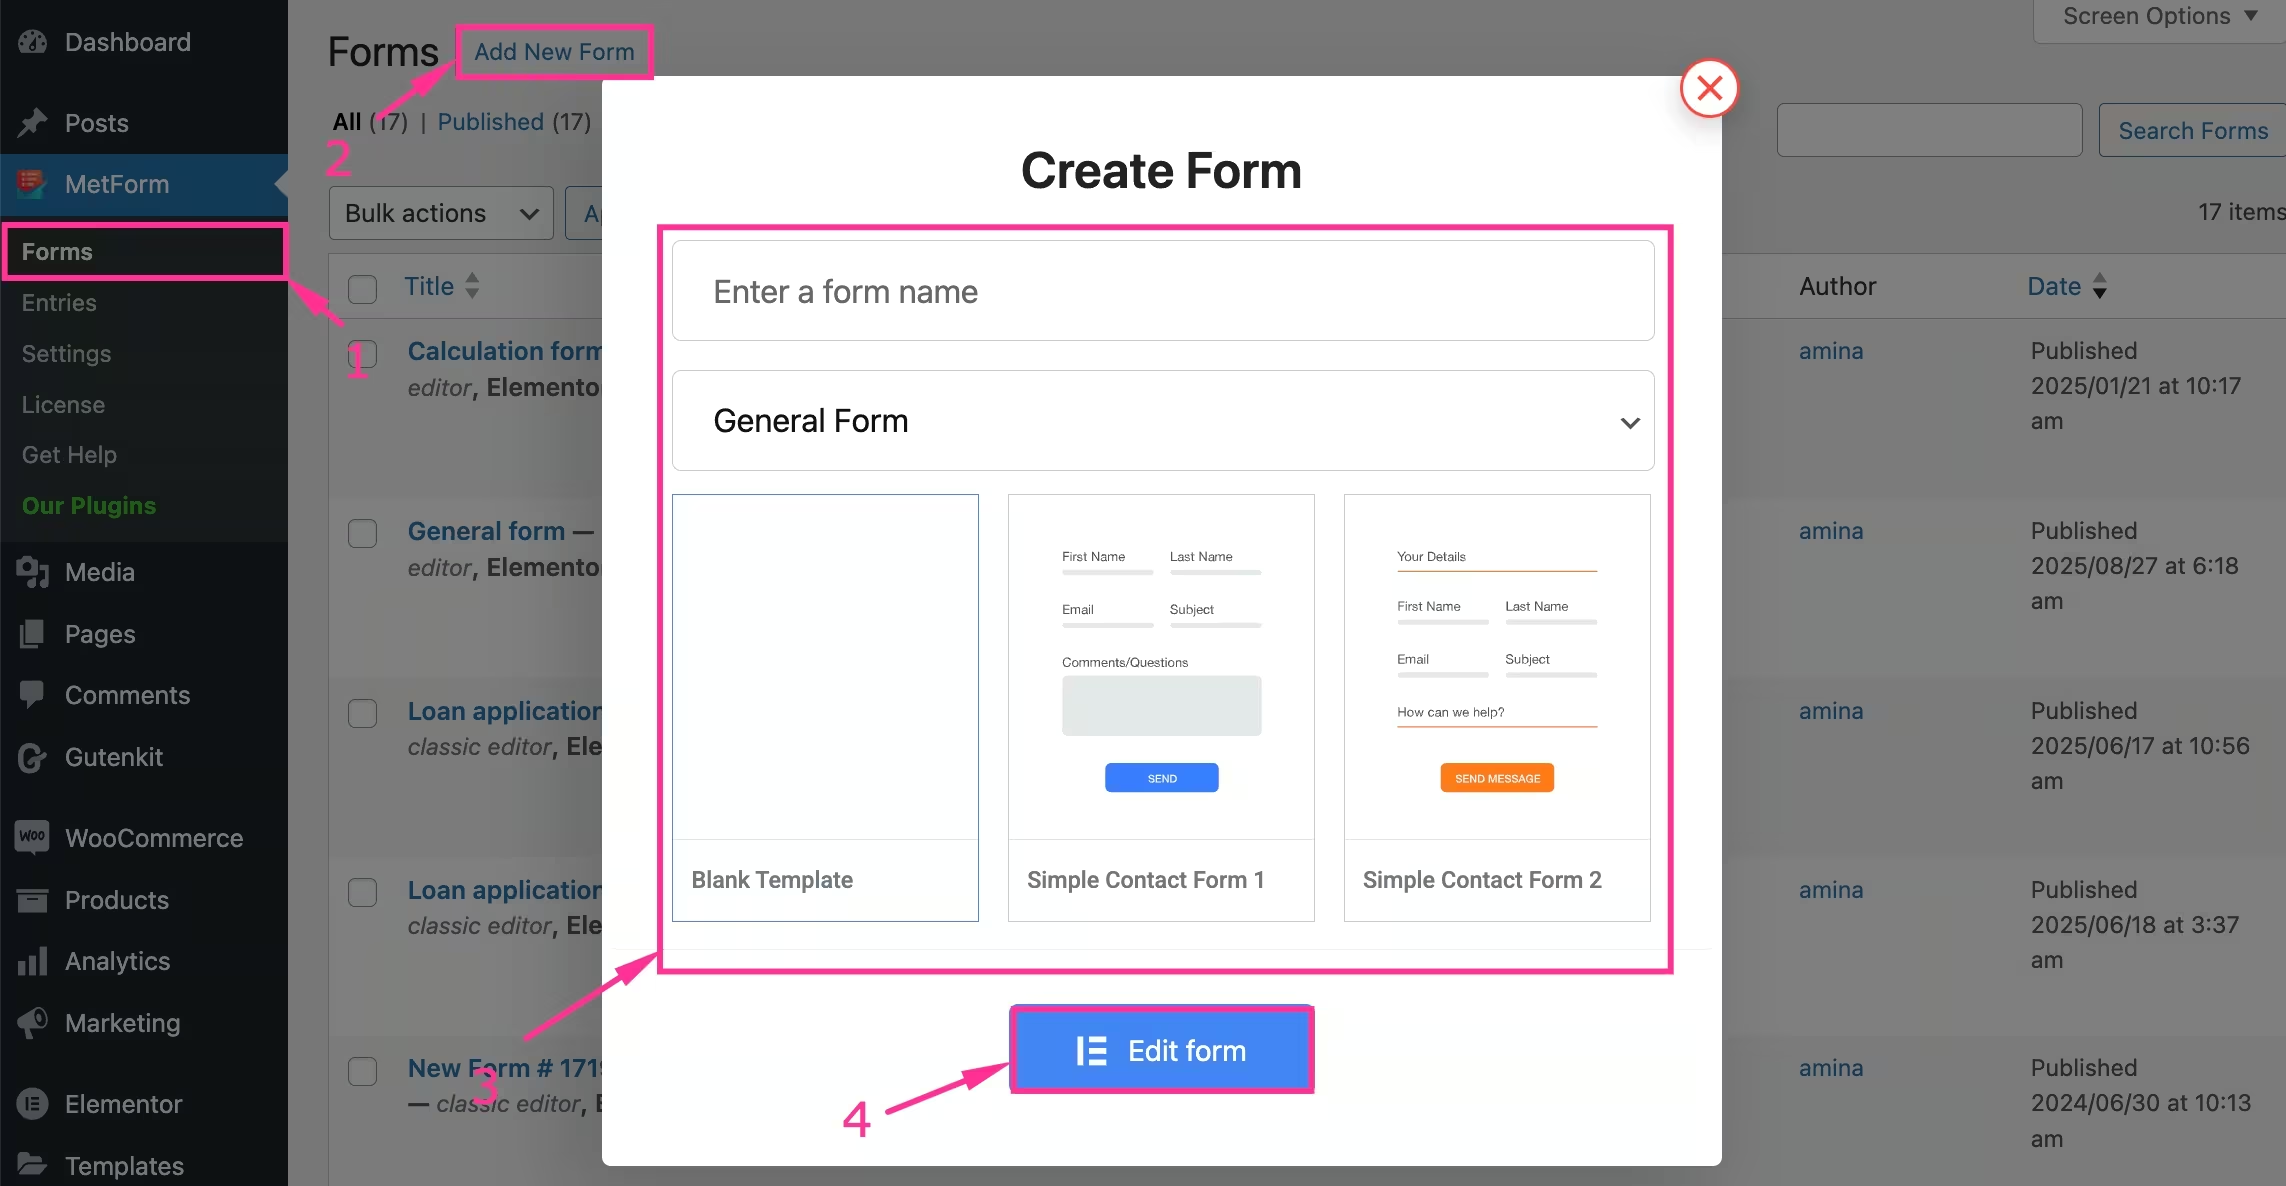
Step 2: Create a form with a blank or pre-built template
Here we’ll create a WordPress calculator form from scratch. You can also select a pre-built calculator form template. Now, to create a form:
- Aller à MetForm → Forms et hit the “Add New Form” bouton.
- Donne un form name and select form type.
- Choose a blank template, or you can scroll down to select a pre-built calculator form template.
- Click the “Edit Form” bouton.
- After navigating to the Elementor editor, press the “+” button and select a grid layout.
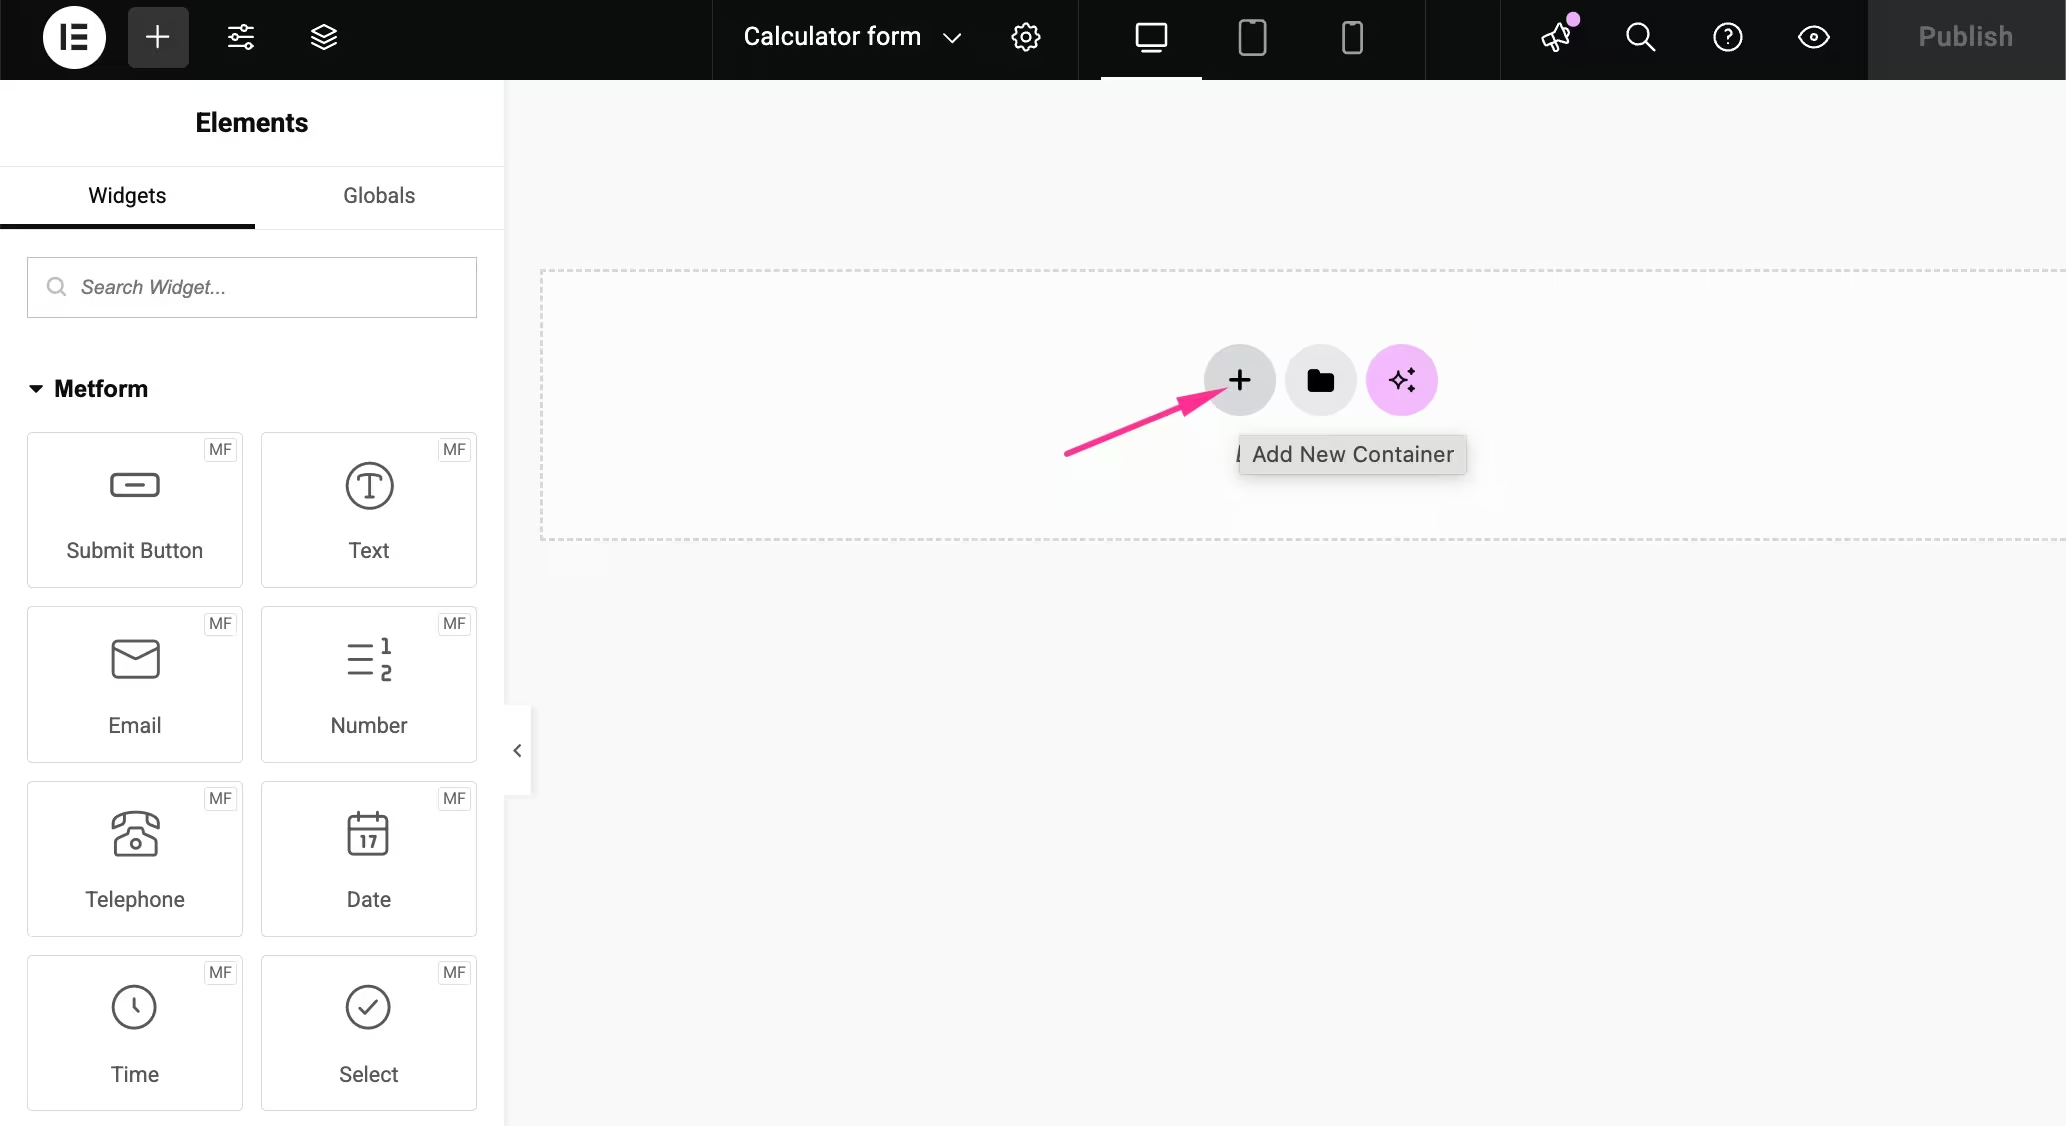
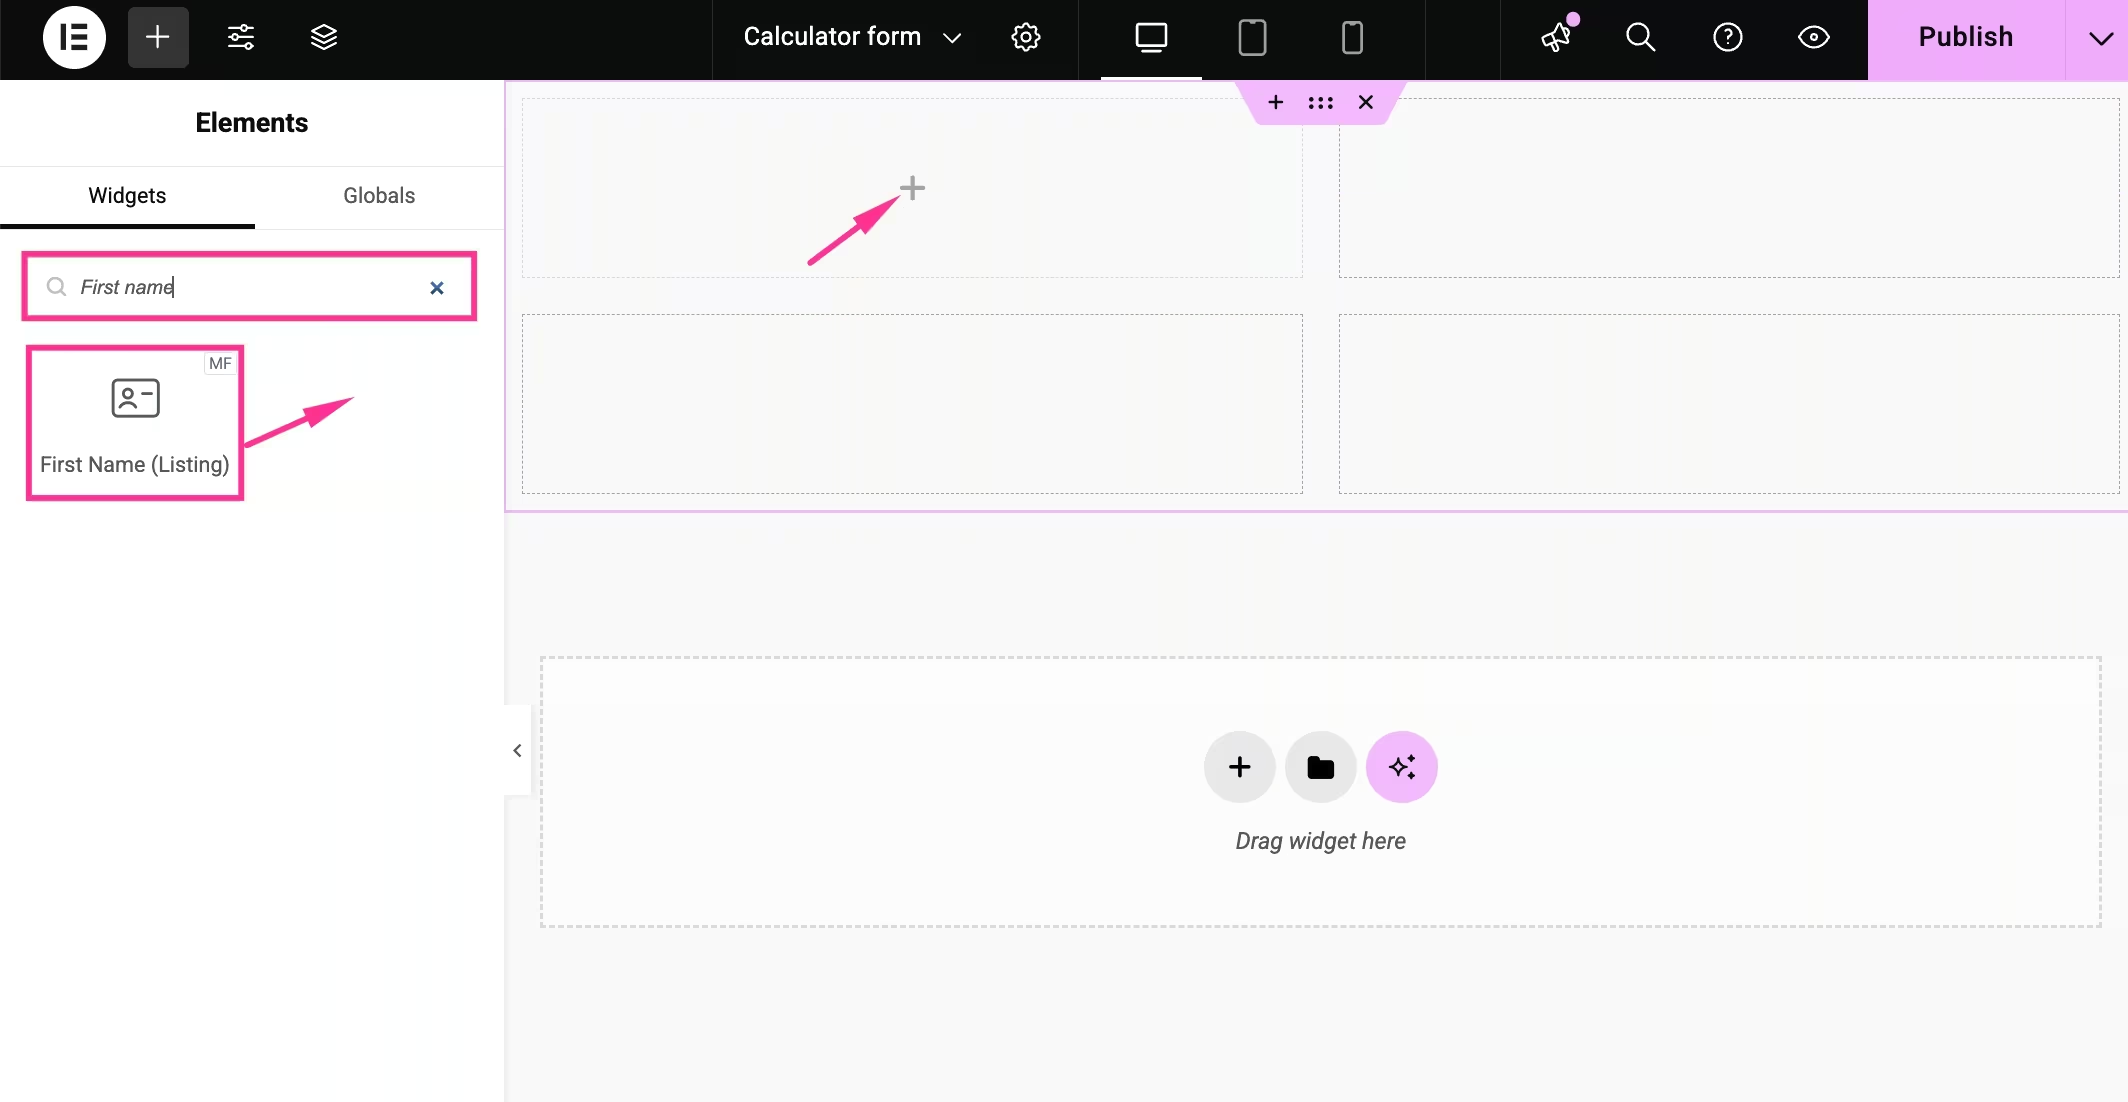
- Search and drag-and-drop general fields like First Name, Last Name, Email Address, Subject, etc., to your calculator form.
Step 3: Add necessary fields
In this step, you have to add the necessary fields for calculation. For that, you have to:
- Search for the “Select” field and drag-and-drop it to the right side.
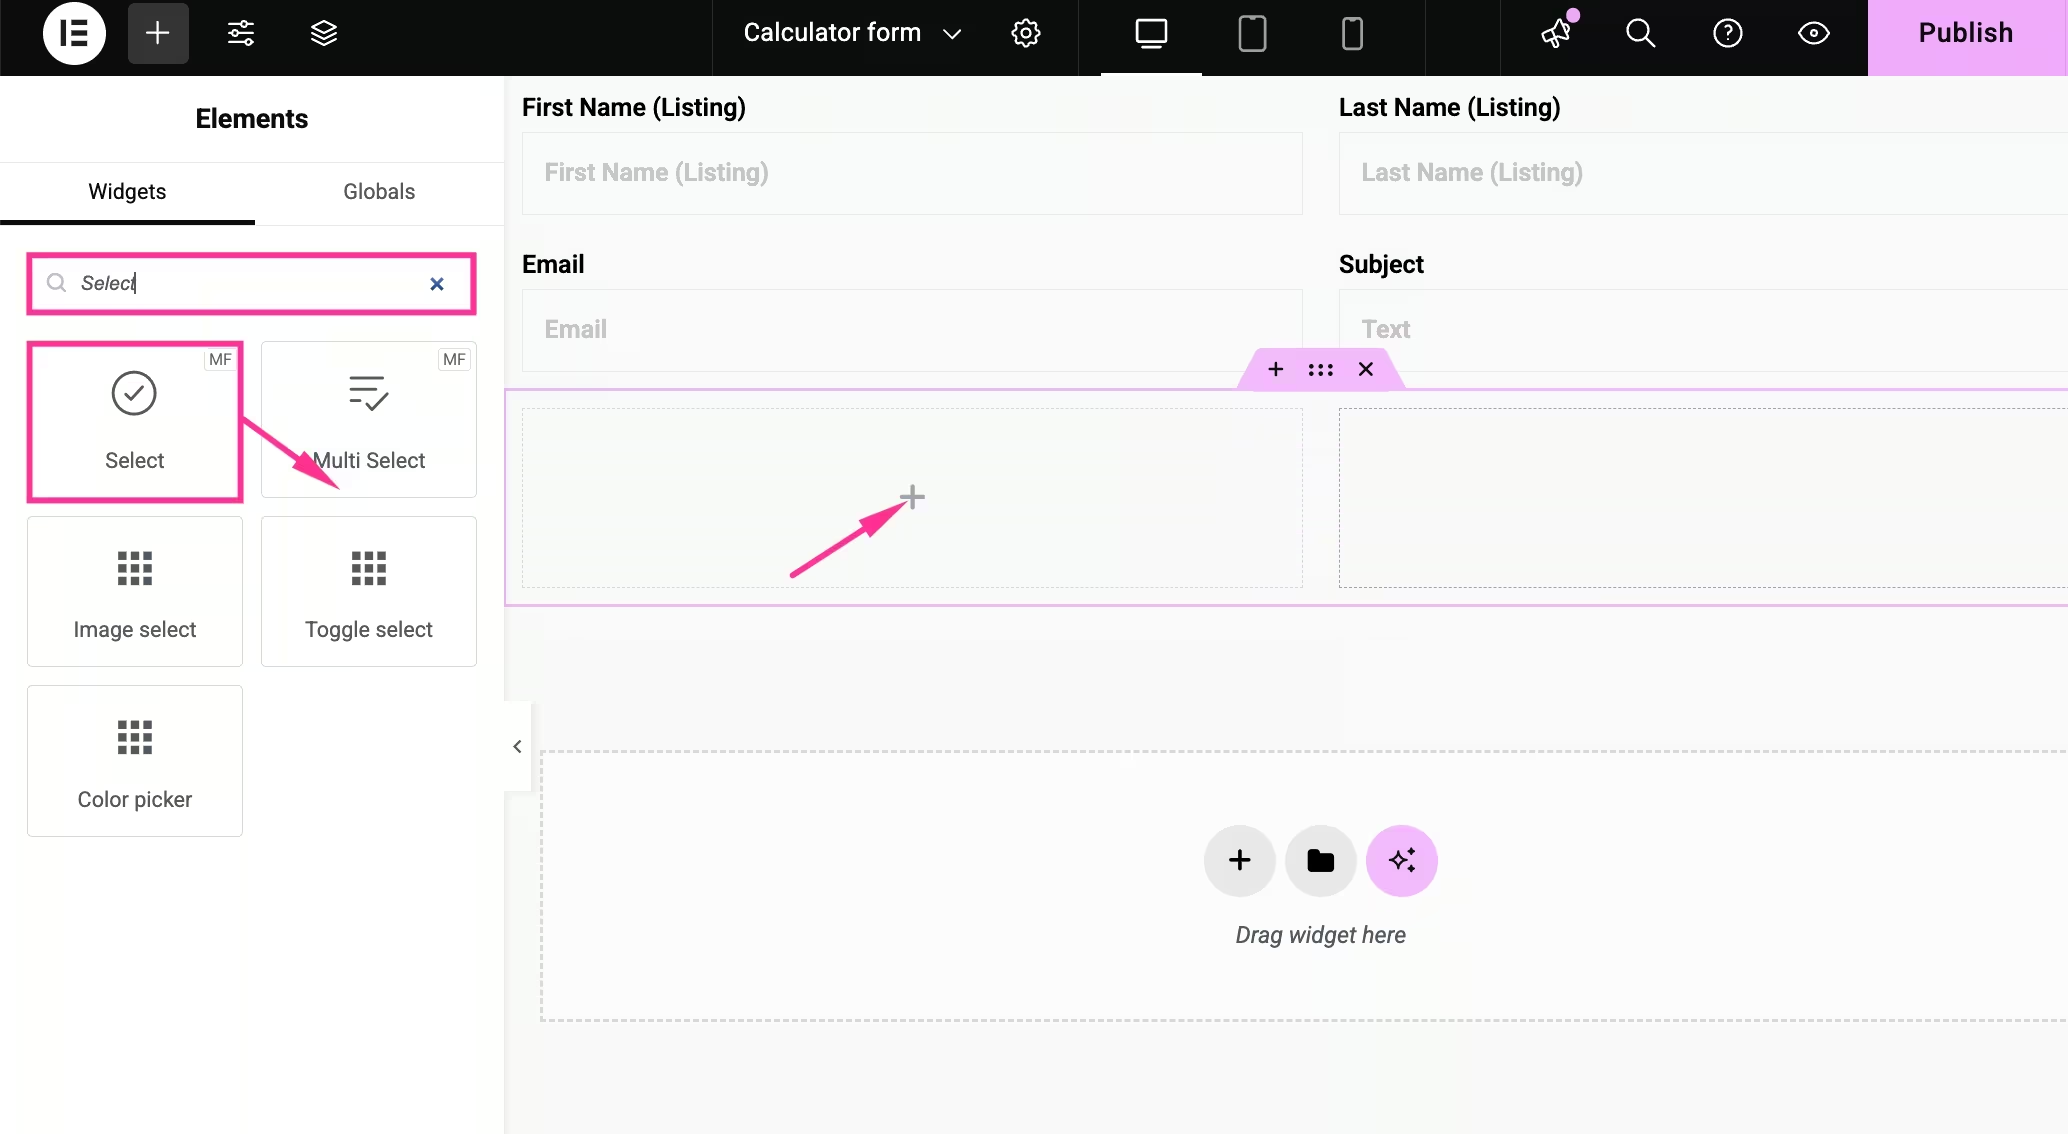
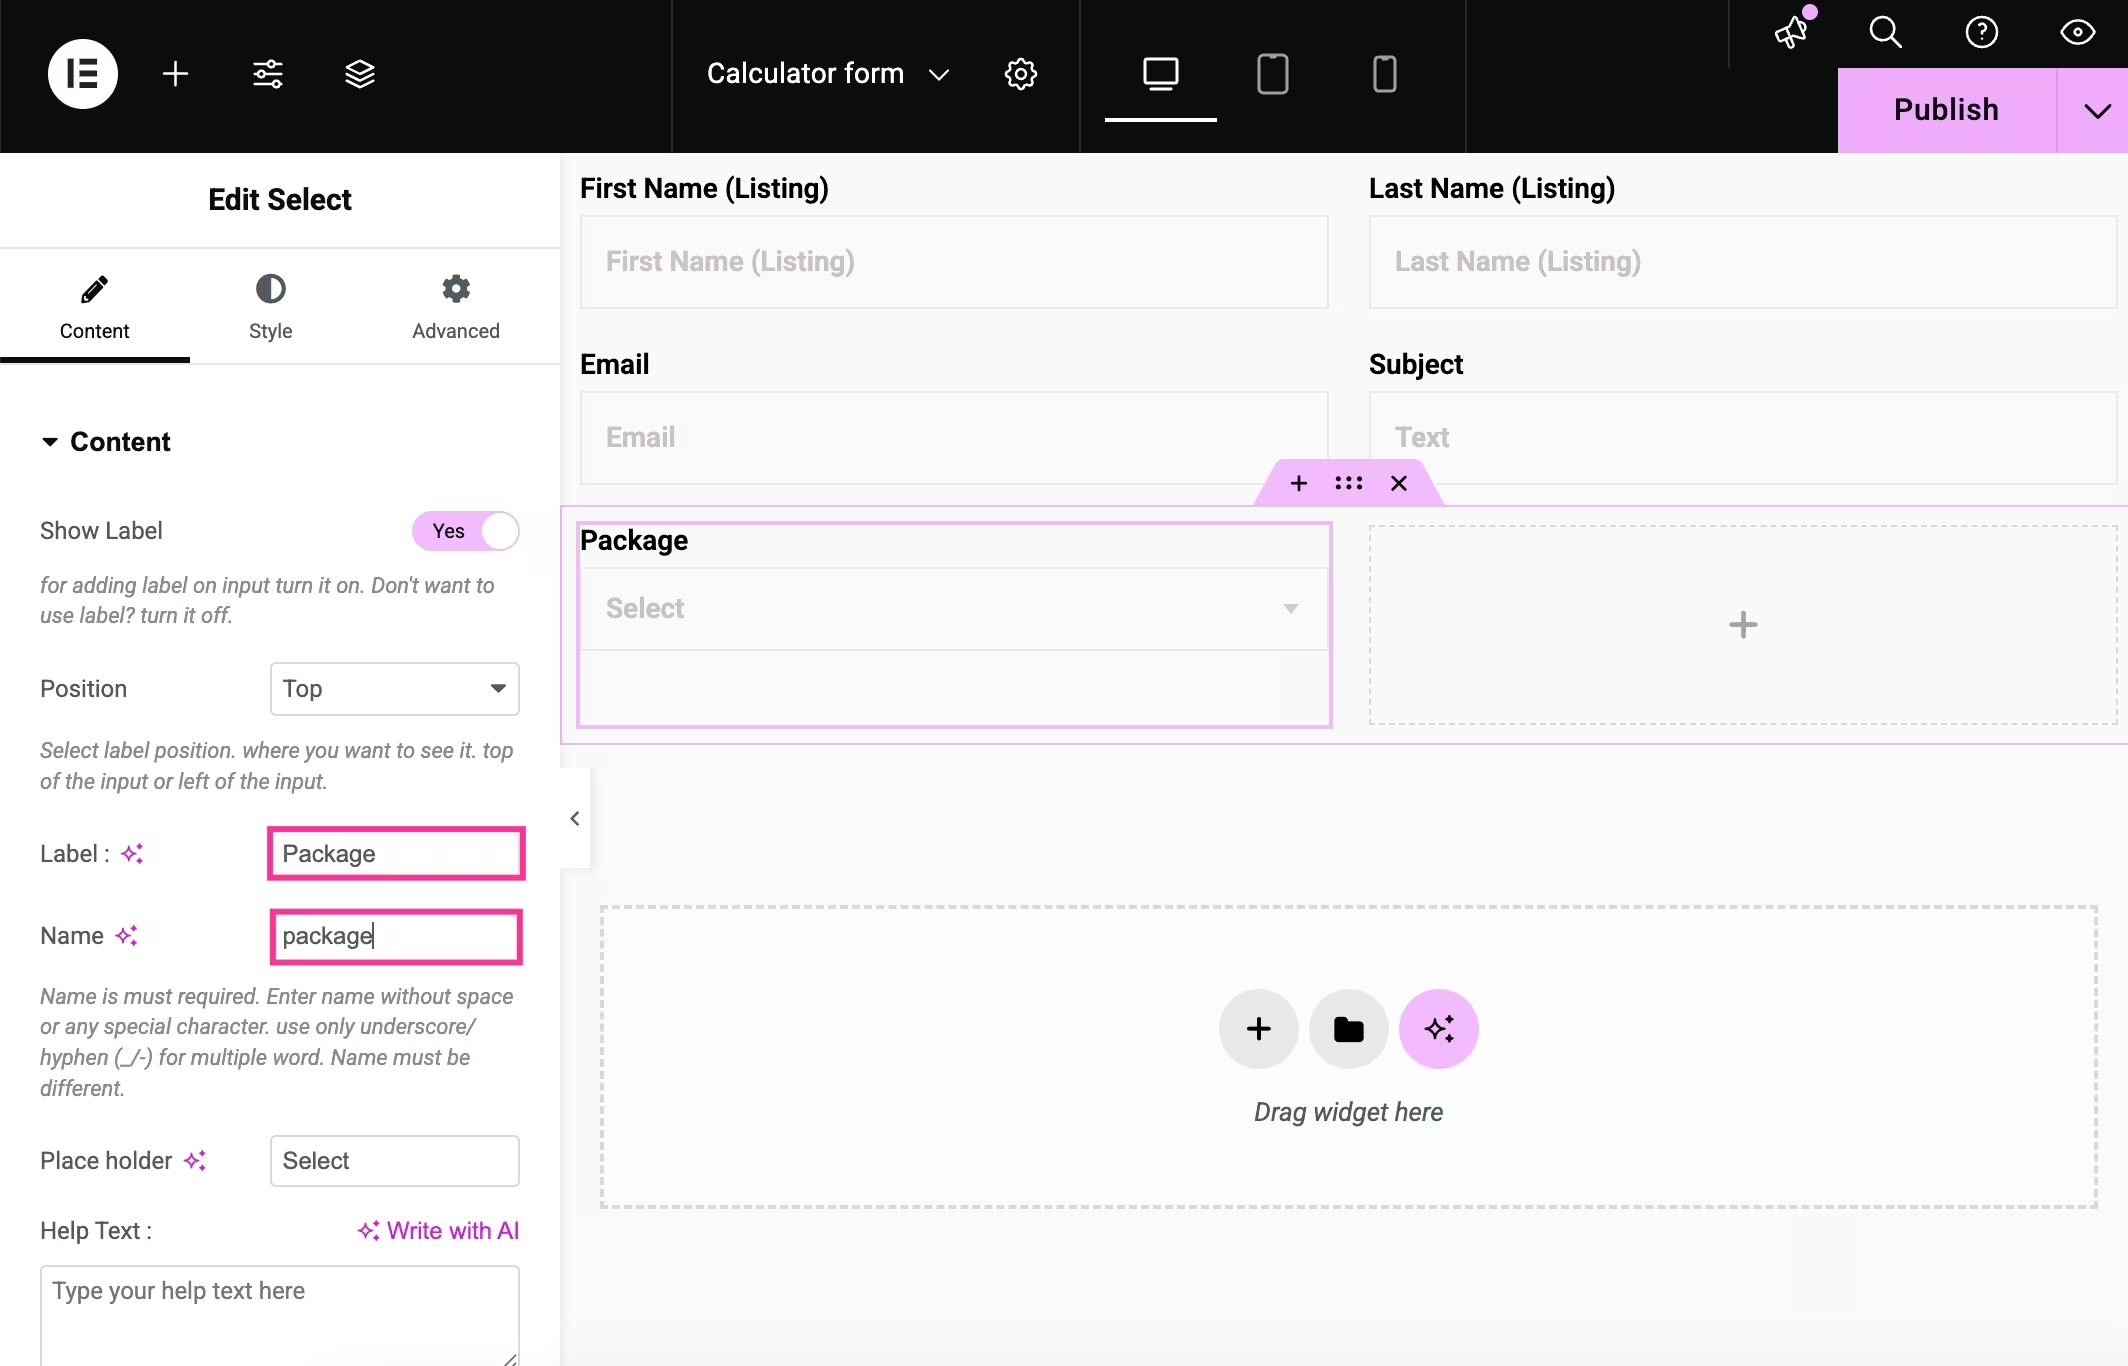
- Click the “Select” field and add the Label and Name for the form field.
- Scroll down and expand the item des champs.
- Add the “Input field text” and “Input field value”. This input field text needs to be the same as the Select field name.
- Add text and value for all the items.
- Also, add more items by clicking the “Add Item” button if needed.
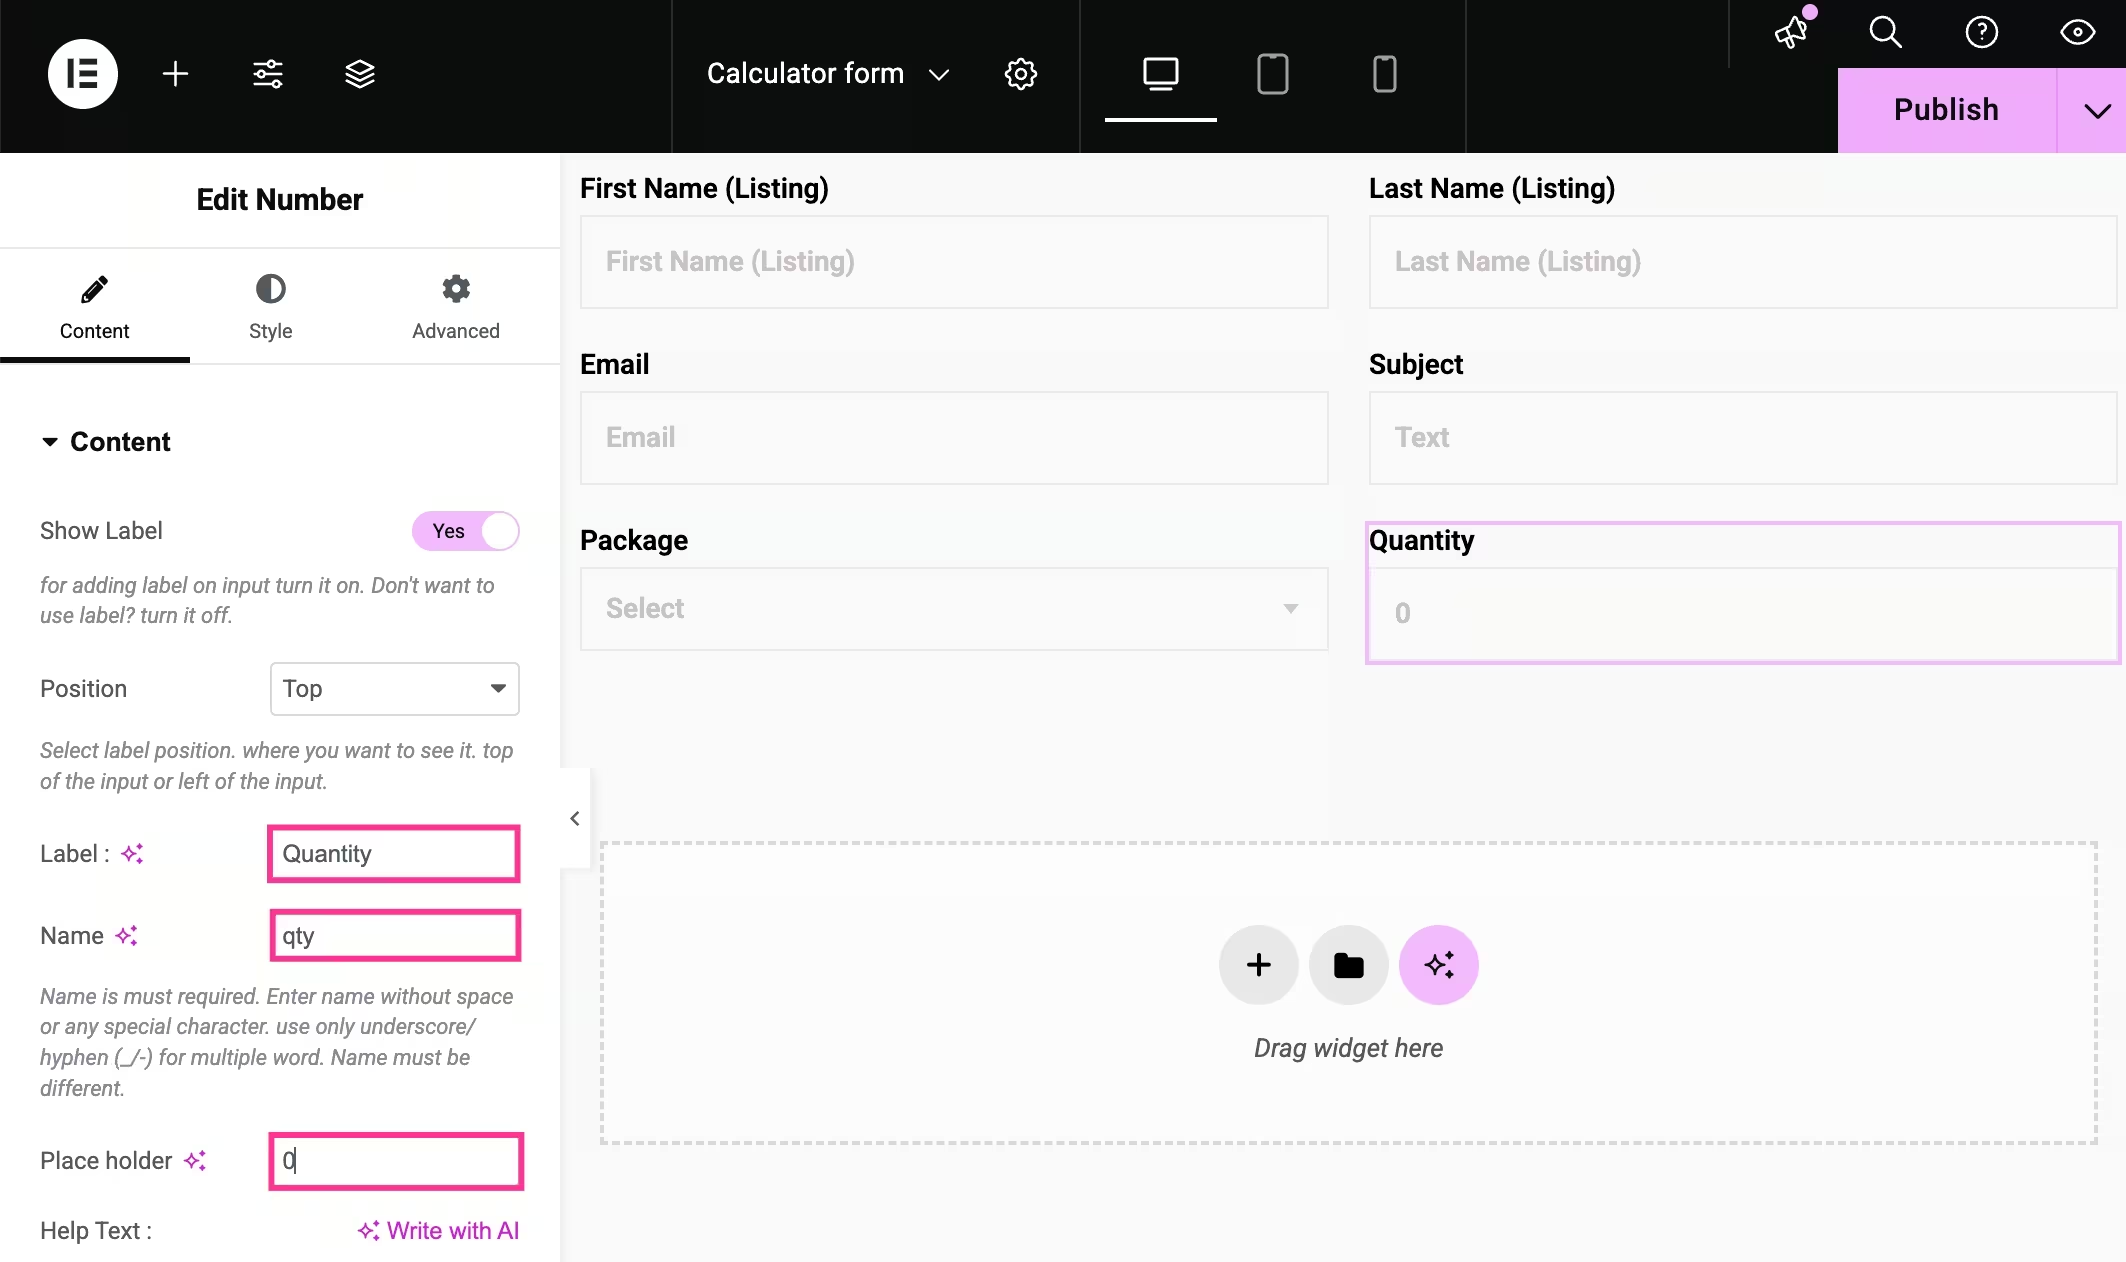
- Search and add the “Number” field to the plus icon.
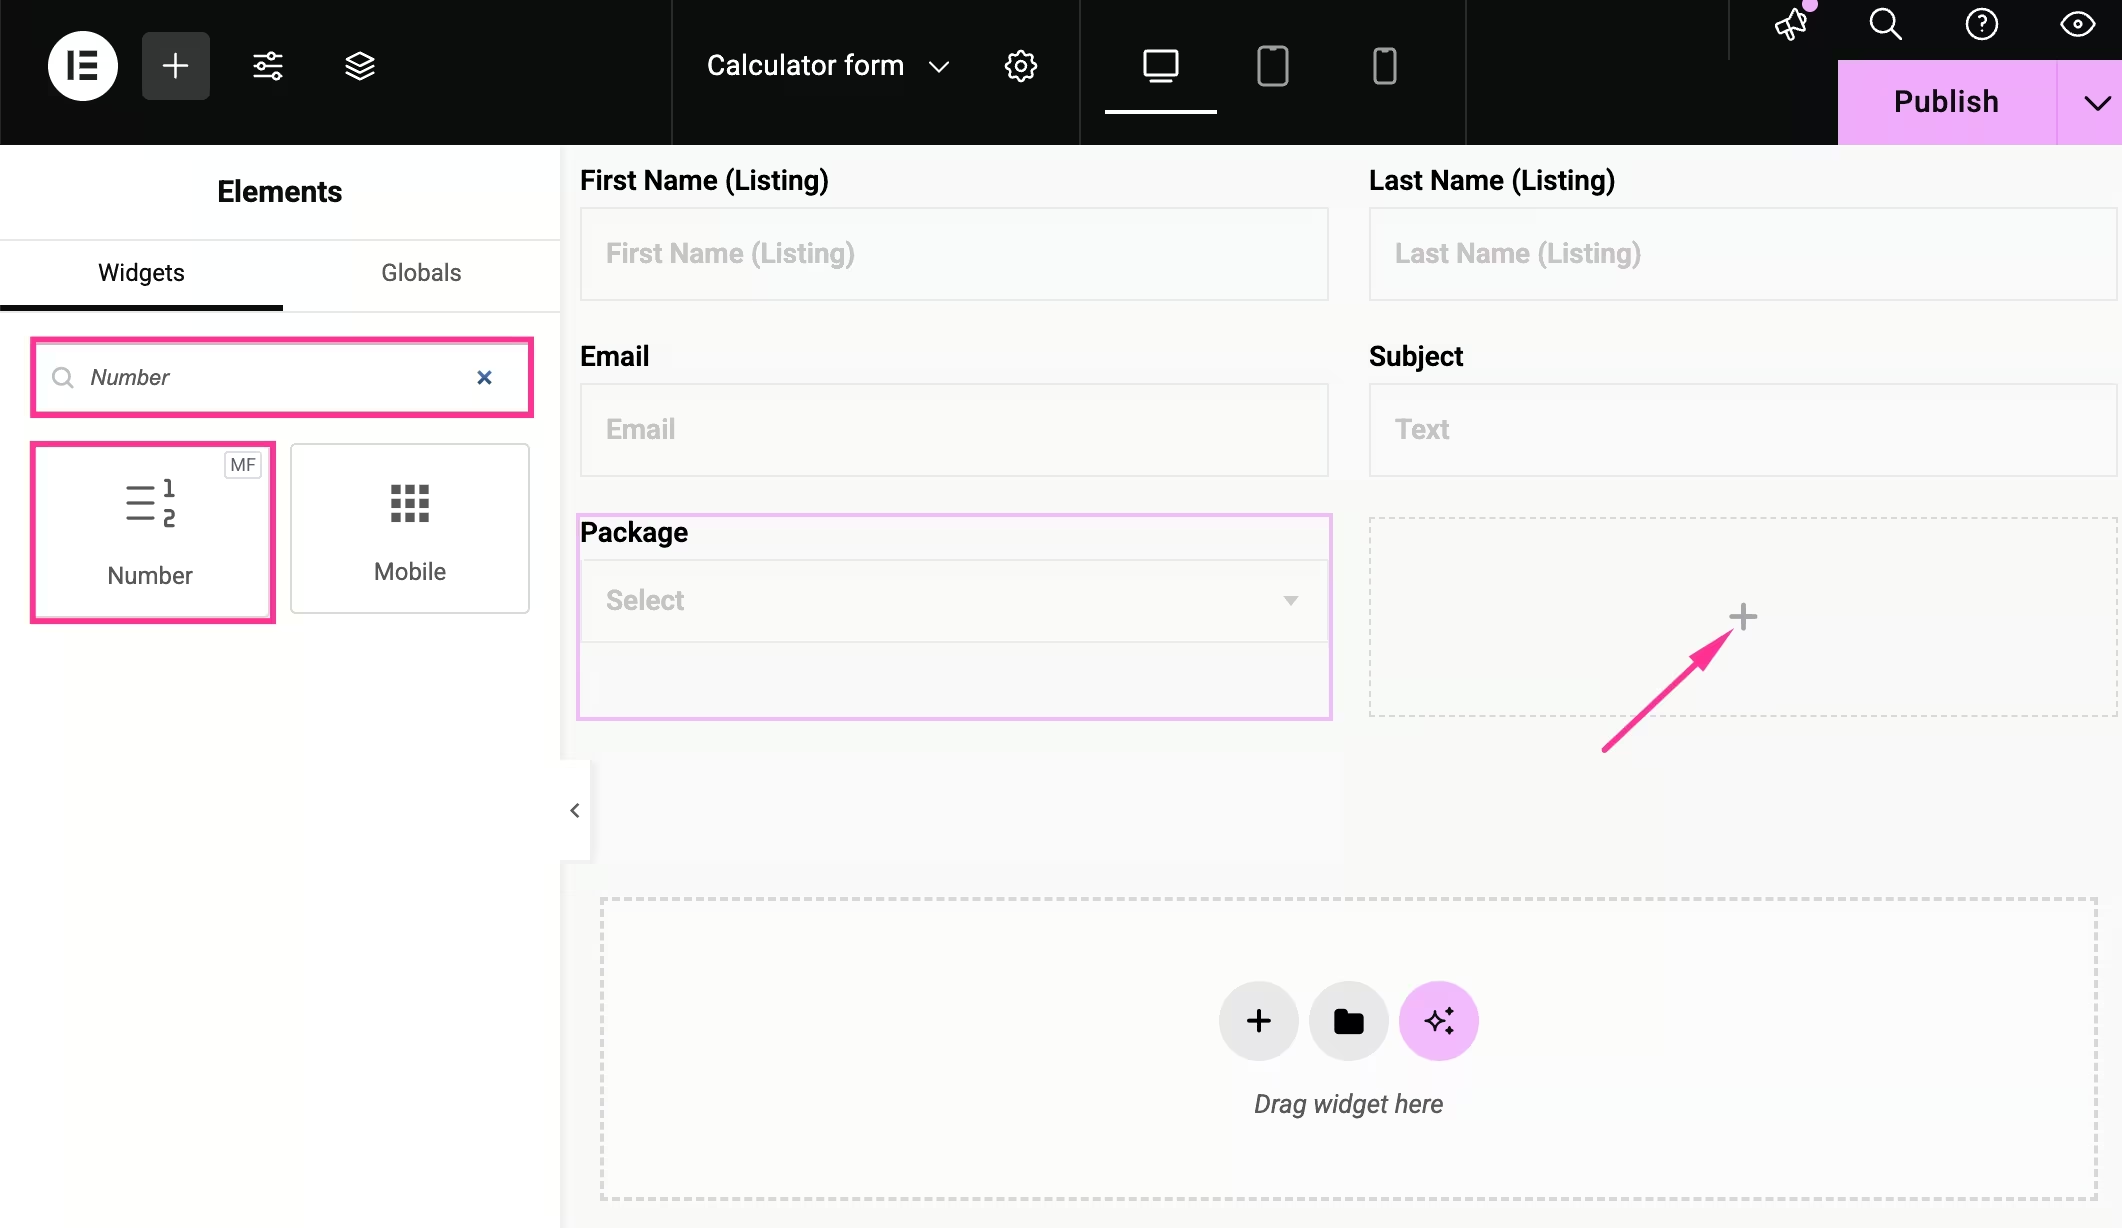
- Entrer le Label, Name, and Placeholder for the Number field.
- Avoid using special characters in the name field. Use hyphen or underscore for multiple words (-/_).
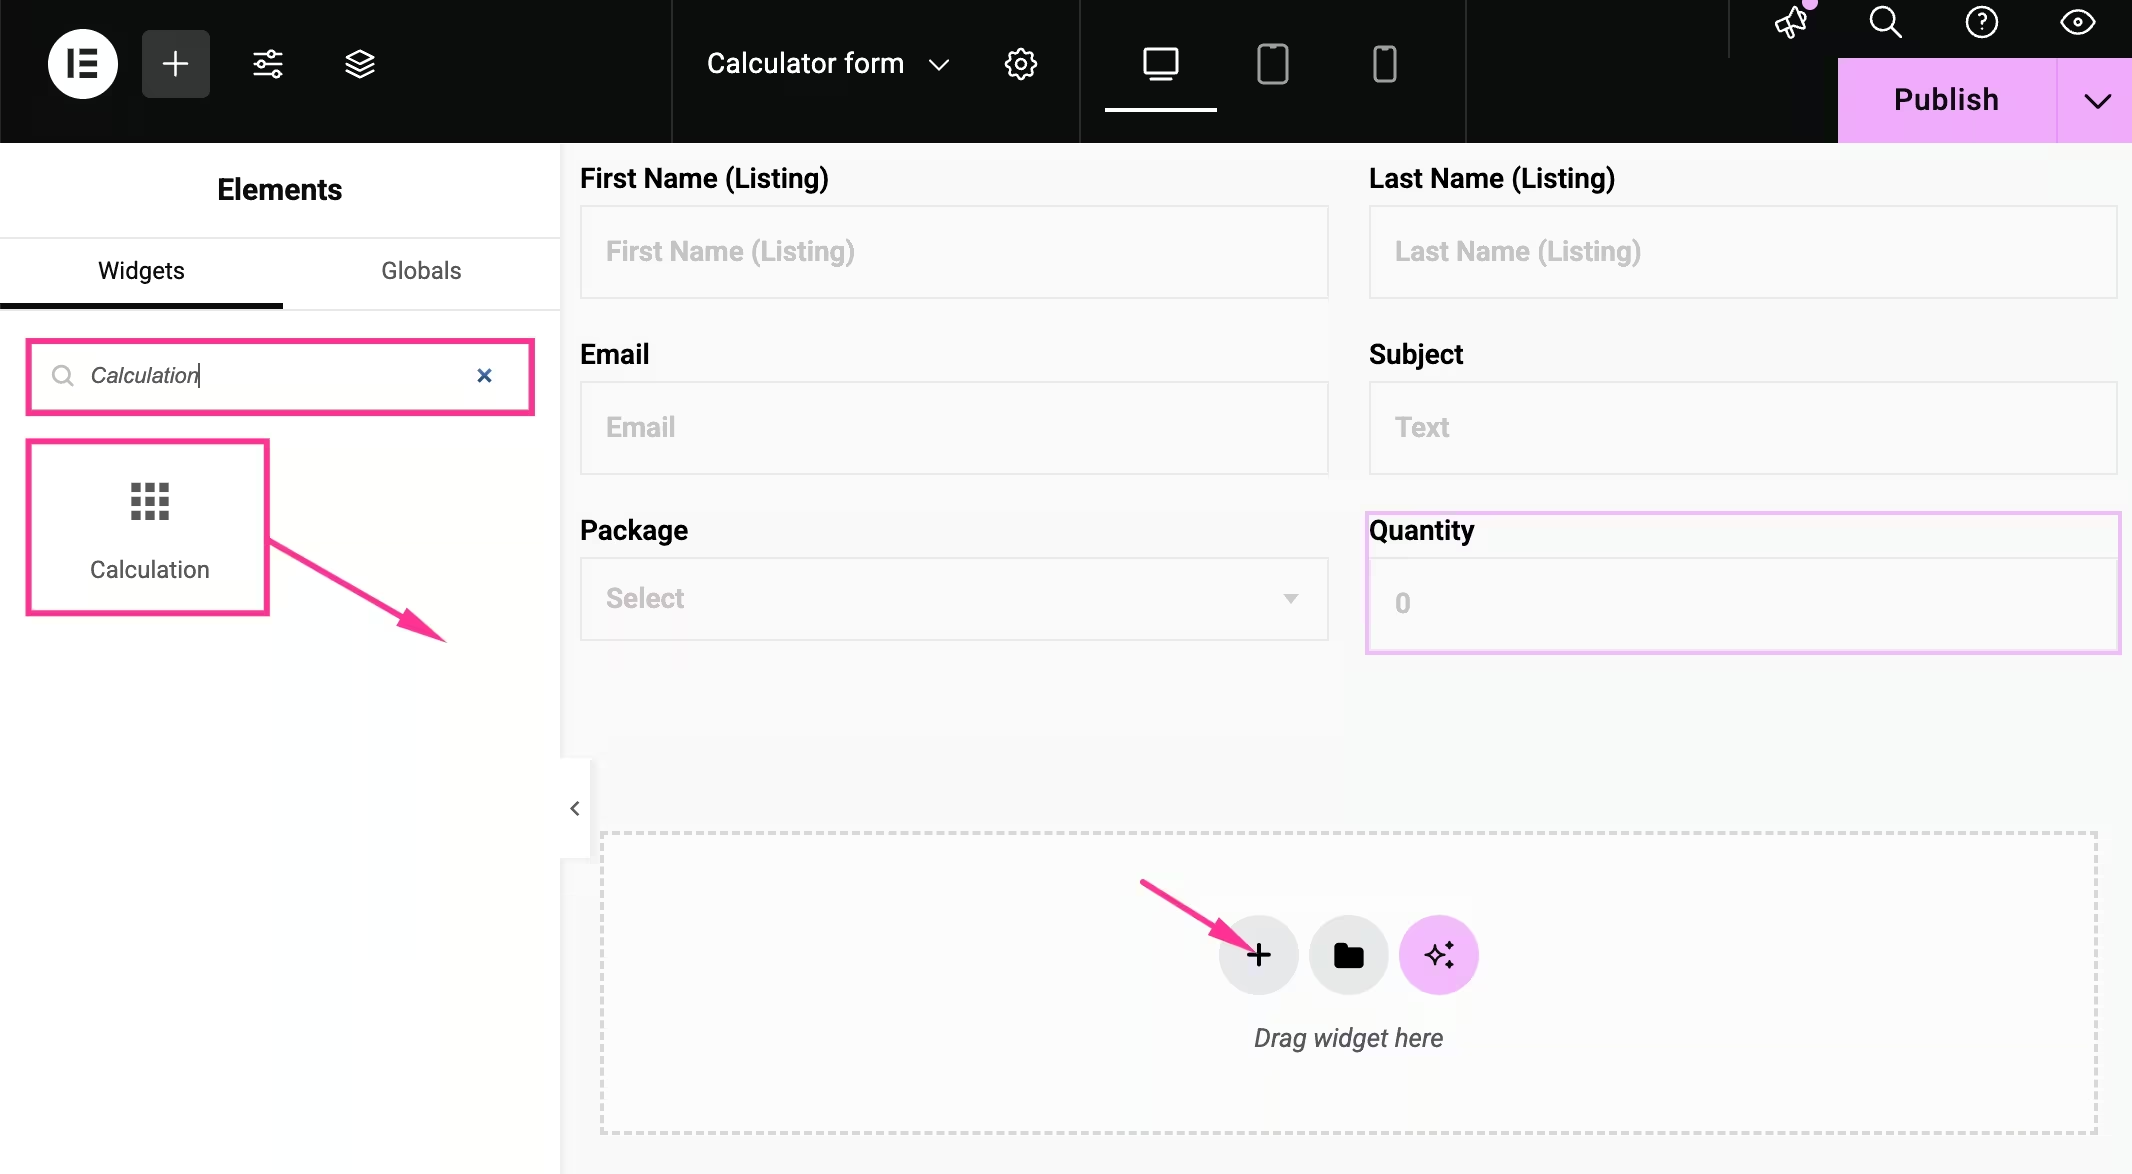
- Search for the Calculation champ.
- Drag-and-drop it to the “+” icon.
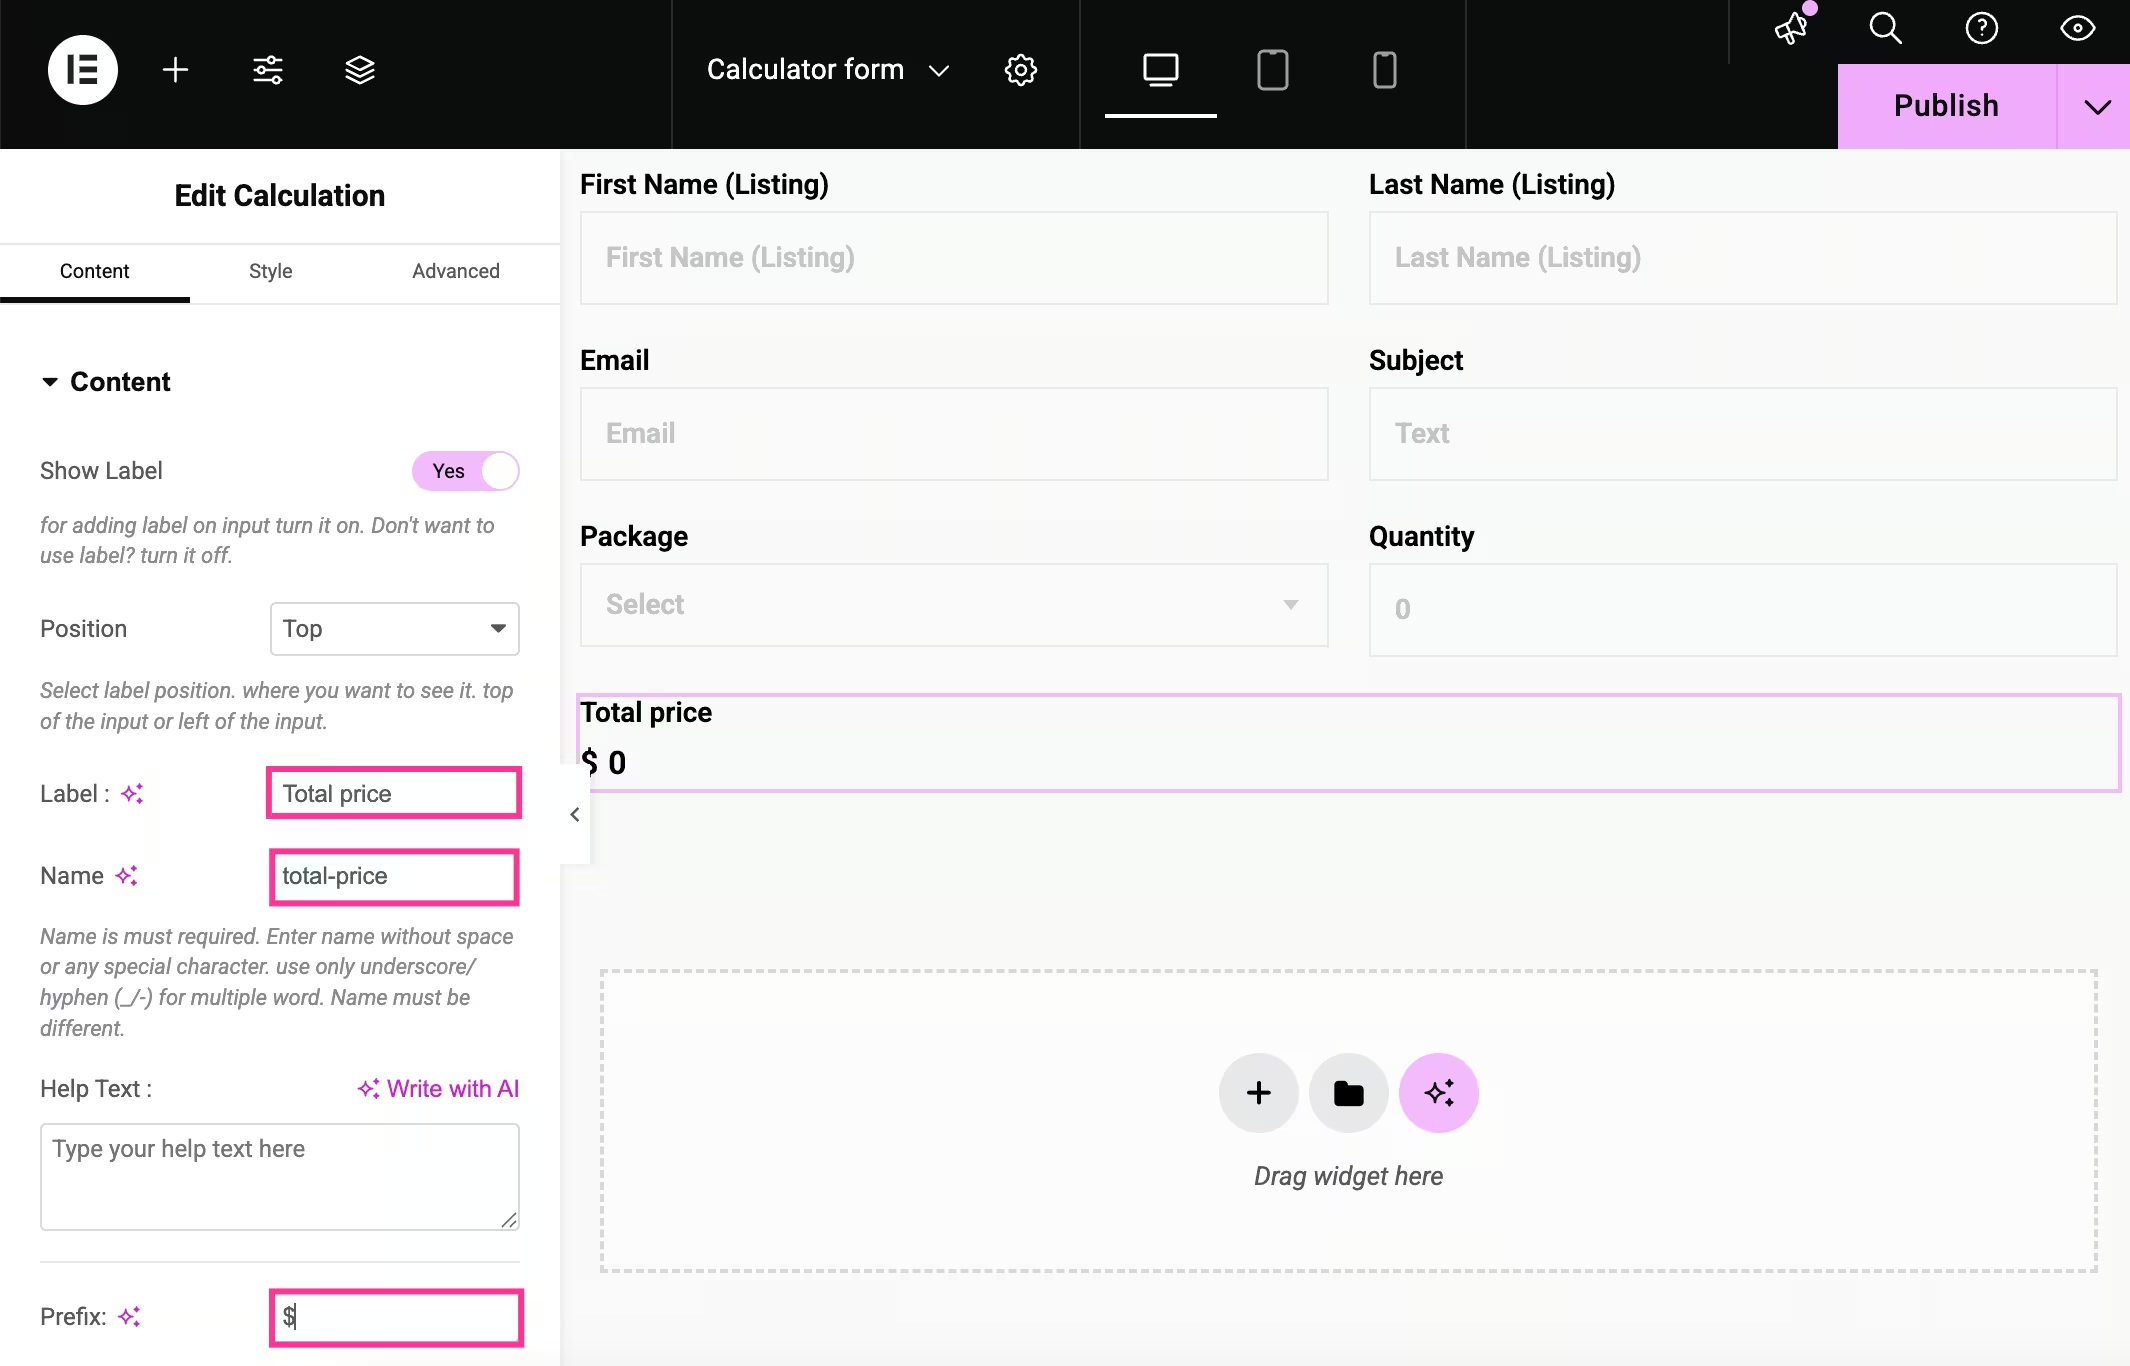
- Add the Étiquette, Nom, Texte d'aide, et Préfixe for this calculation field.
Step 4: Set formulas on calculation fields
In this step, you have to apply formulas to your calculation field. To set a formula, you have to follow the following points:
- Copie the names of the Select and Number fields.
- Choose the Calculation field on the right side and développer les « Paramètres » languette.
- For multiplication, fill the “Expressions with operators and inputs” field with “package * qty”.
- Also, you can apply different formulas by adding the following commands:
- Ajout: colis + quantité
- Soustraction: colis – quantité
- Multiplication: paquet * quantité
- Division: paquet / quantité
- Flotter: flotteur (paquet / quantité, 2)
- Format de nombre: numberFormat (paquet * quantité)
- Sol: étage (paquet / quantité)
- Rond: rond (paquet / quantité)
- Plafond : plafond (paquet / quantité)
Step 5: Test the WordPress calculator form
- Aperçu to test how your WordPress calculator form works on the front end.
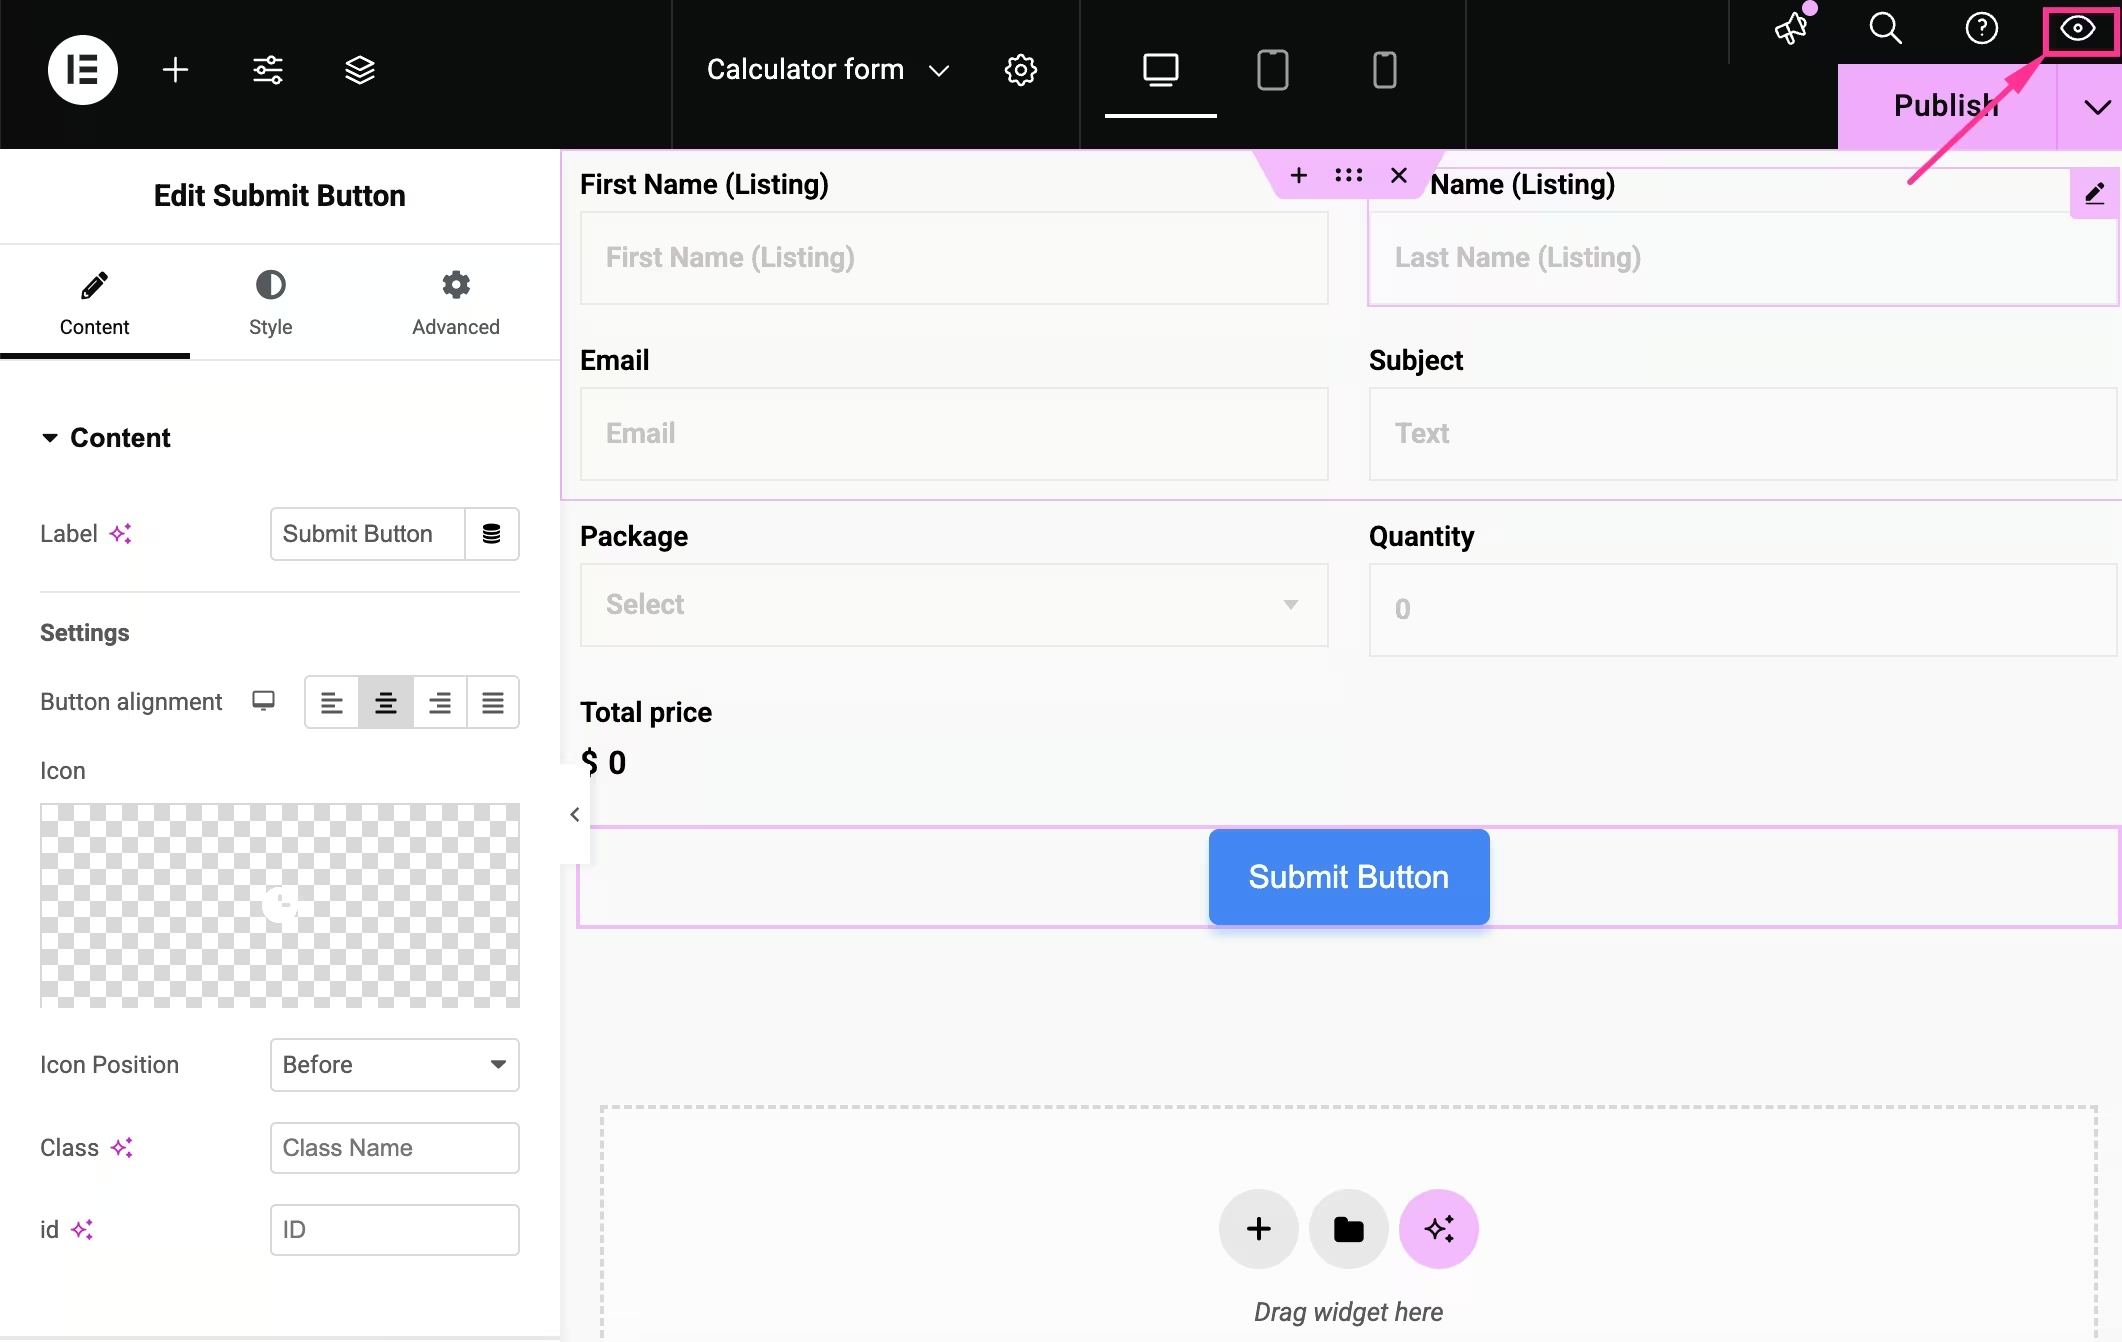
- If it gives the correct result, then go to the next step and live.
- If it’s not, double-check everything and apply the right formula.
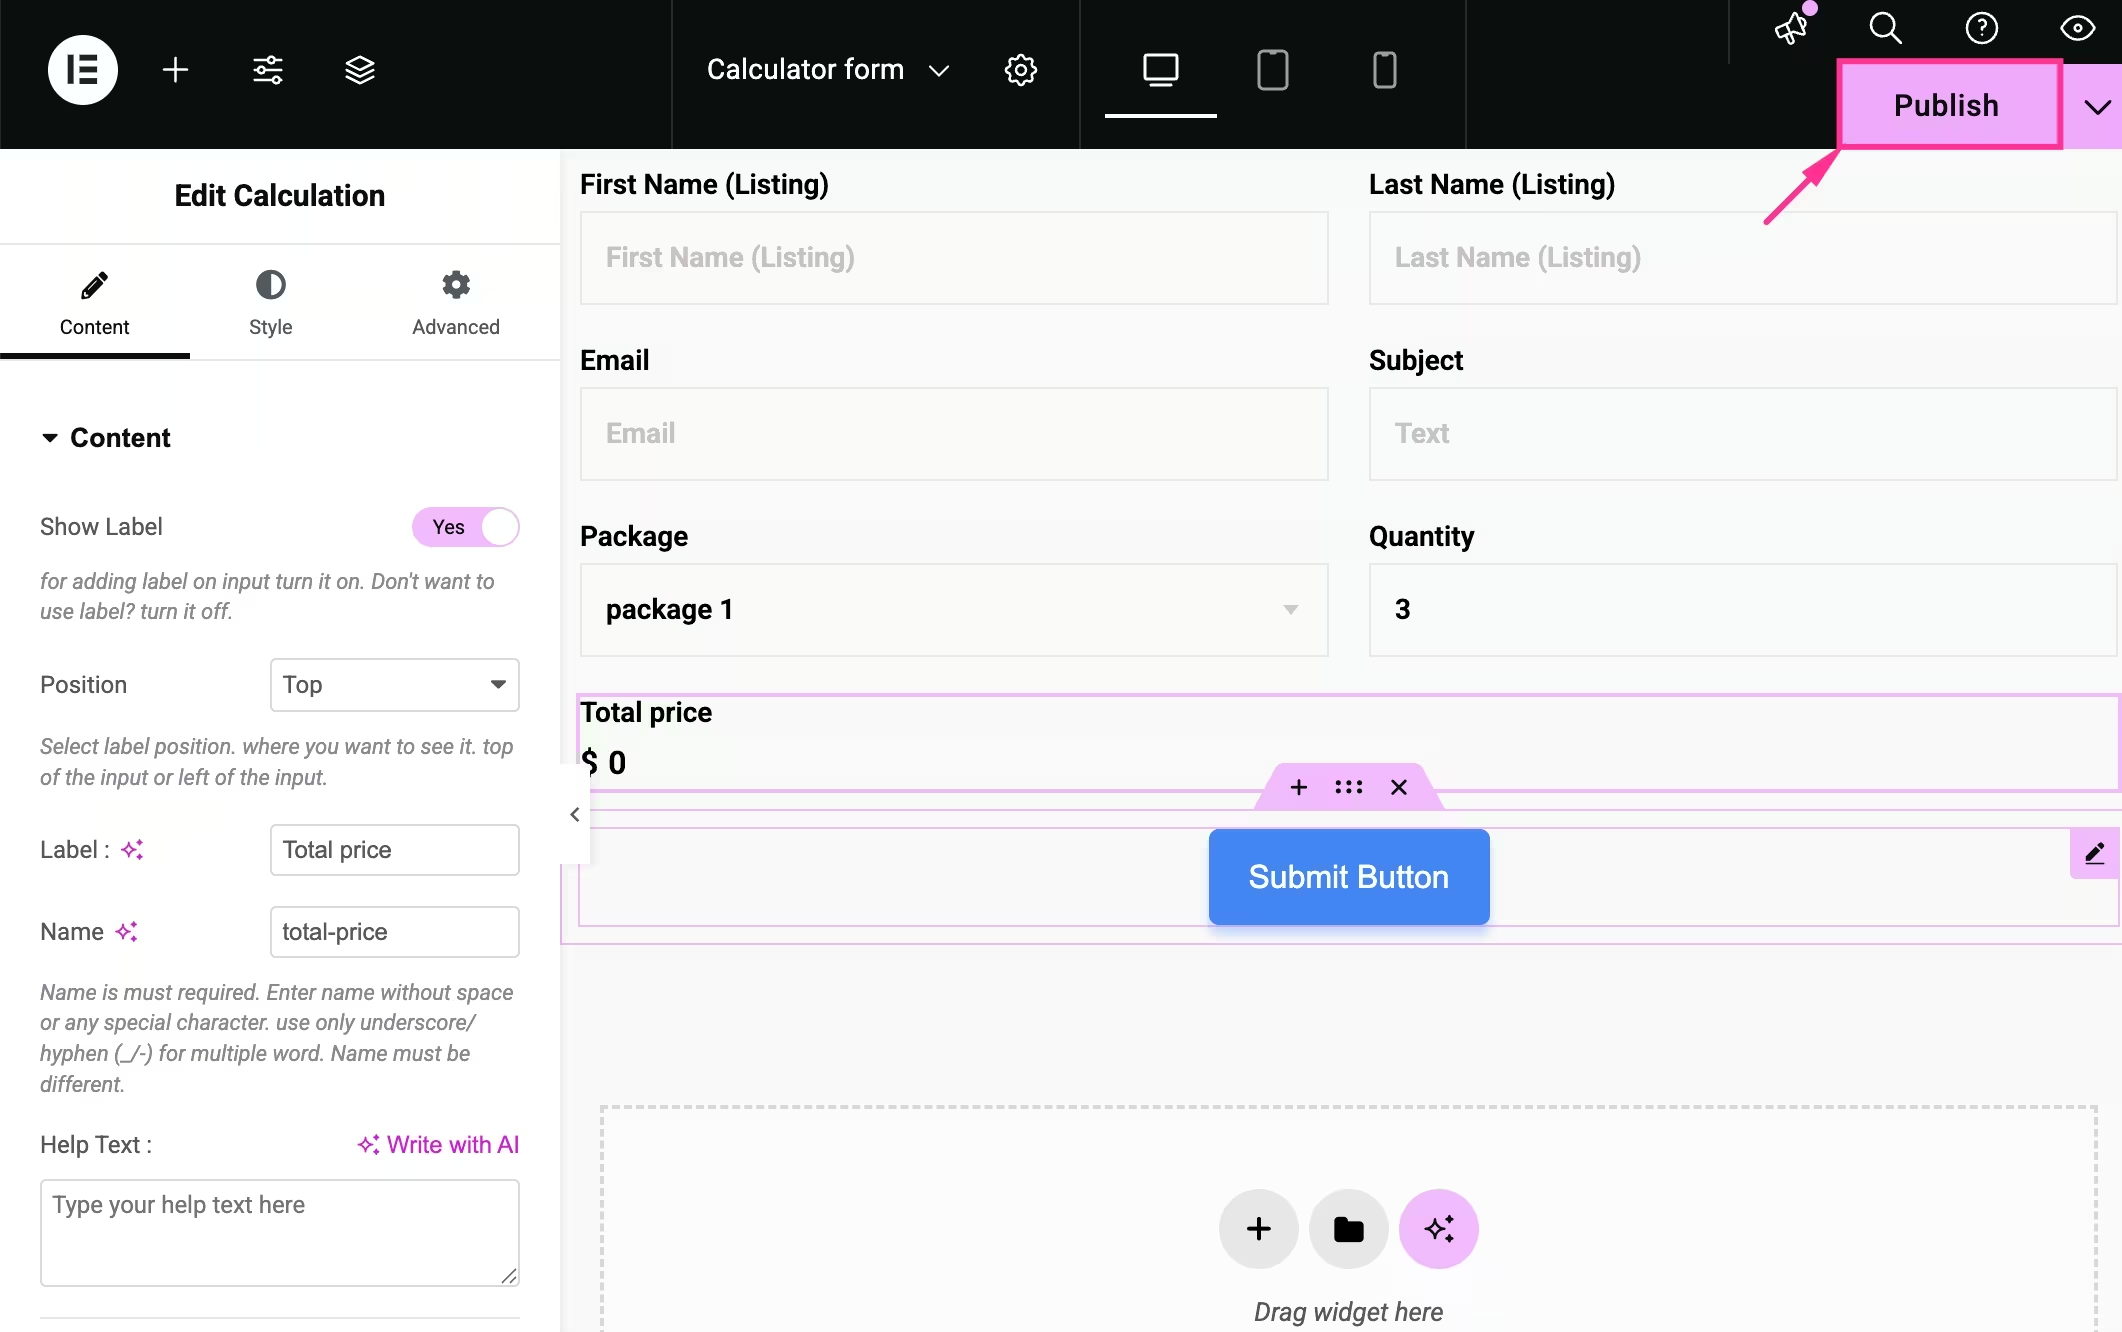
Step 6: Live calculator form
- Enfin, appuyez sur « Publier » button to publish your WordPress calculator form.
Emballer
Creating a calculator form in WordPress is suitable for cost calculators, pricing calculations, and dynamic forms where calculation requires accuracy and seamless form submission. This calculator will remain reliable as long as the field names are consistent, formulas are applied carefully, and tested before publishing with MetForm.
Laisser un commentaire