PopupKit makes Mailchimp integration effortless. Connect your account in minutes and start growing your email list with high-converting popups.
Configurar Mailchimp #
Mailchimp integration is available in PopupKit’s Pro version. Select the plan that aligns best with your goals.
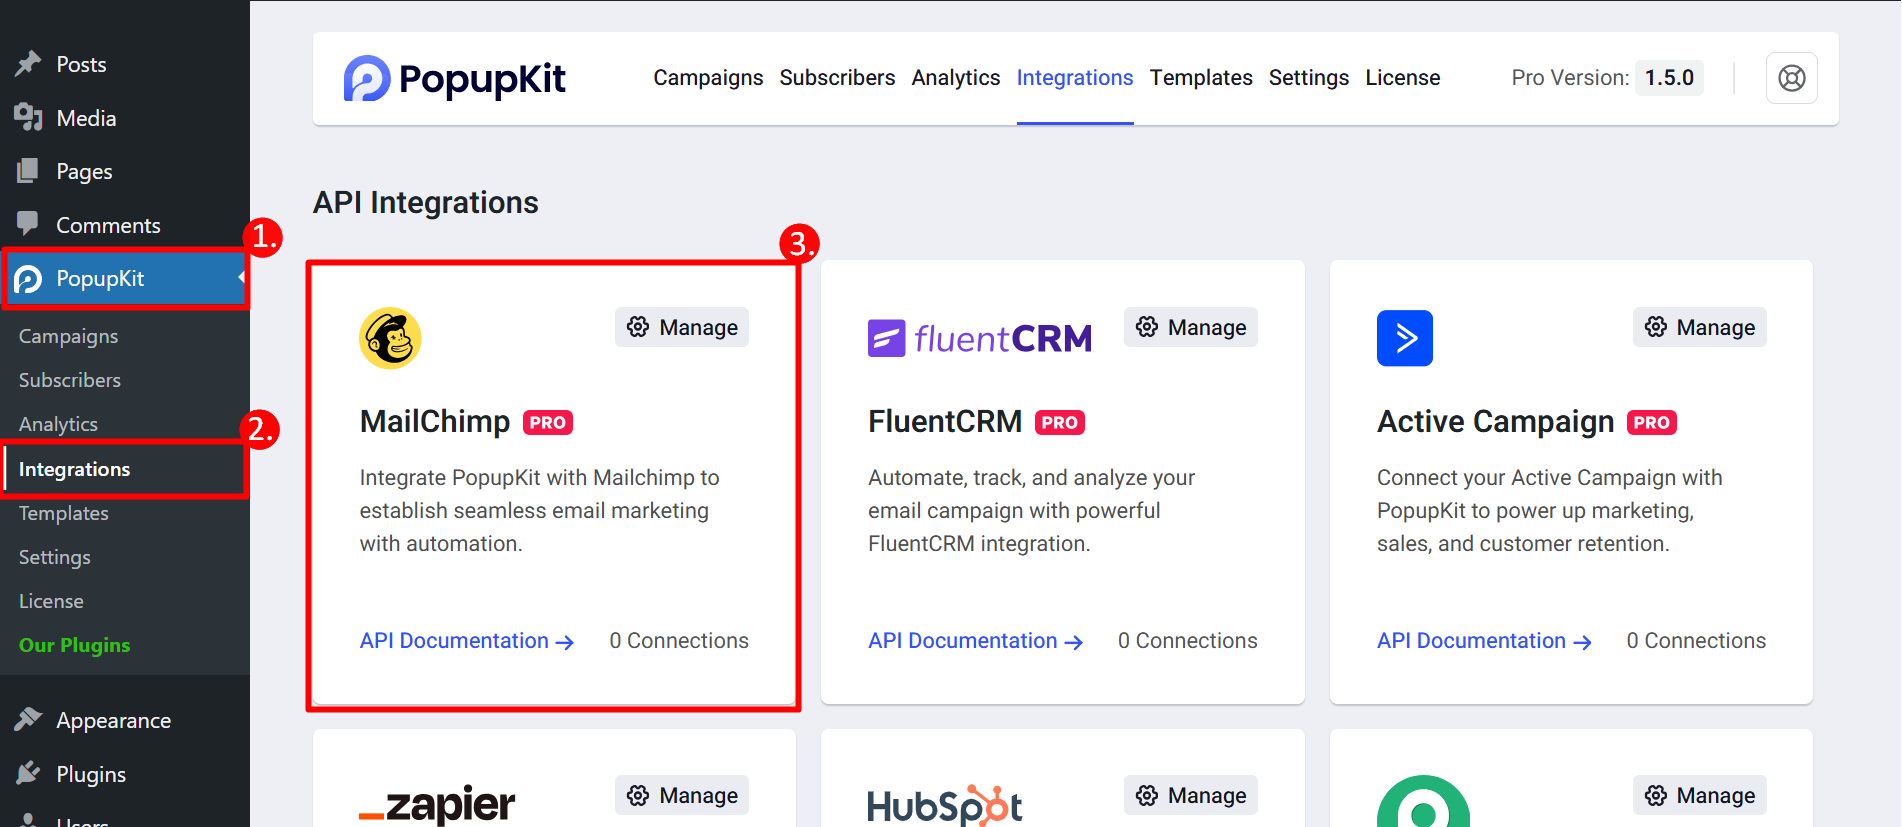
STEP 1: Access to your WordPress Dashboard #
After installing and activating the plugin, follow these steps:
- Navigate to PopupKit
- Find Integration
- Select MailChimp
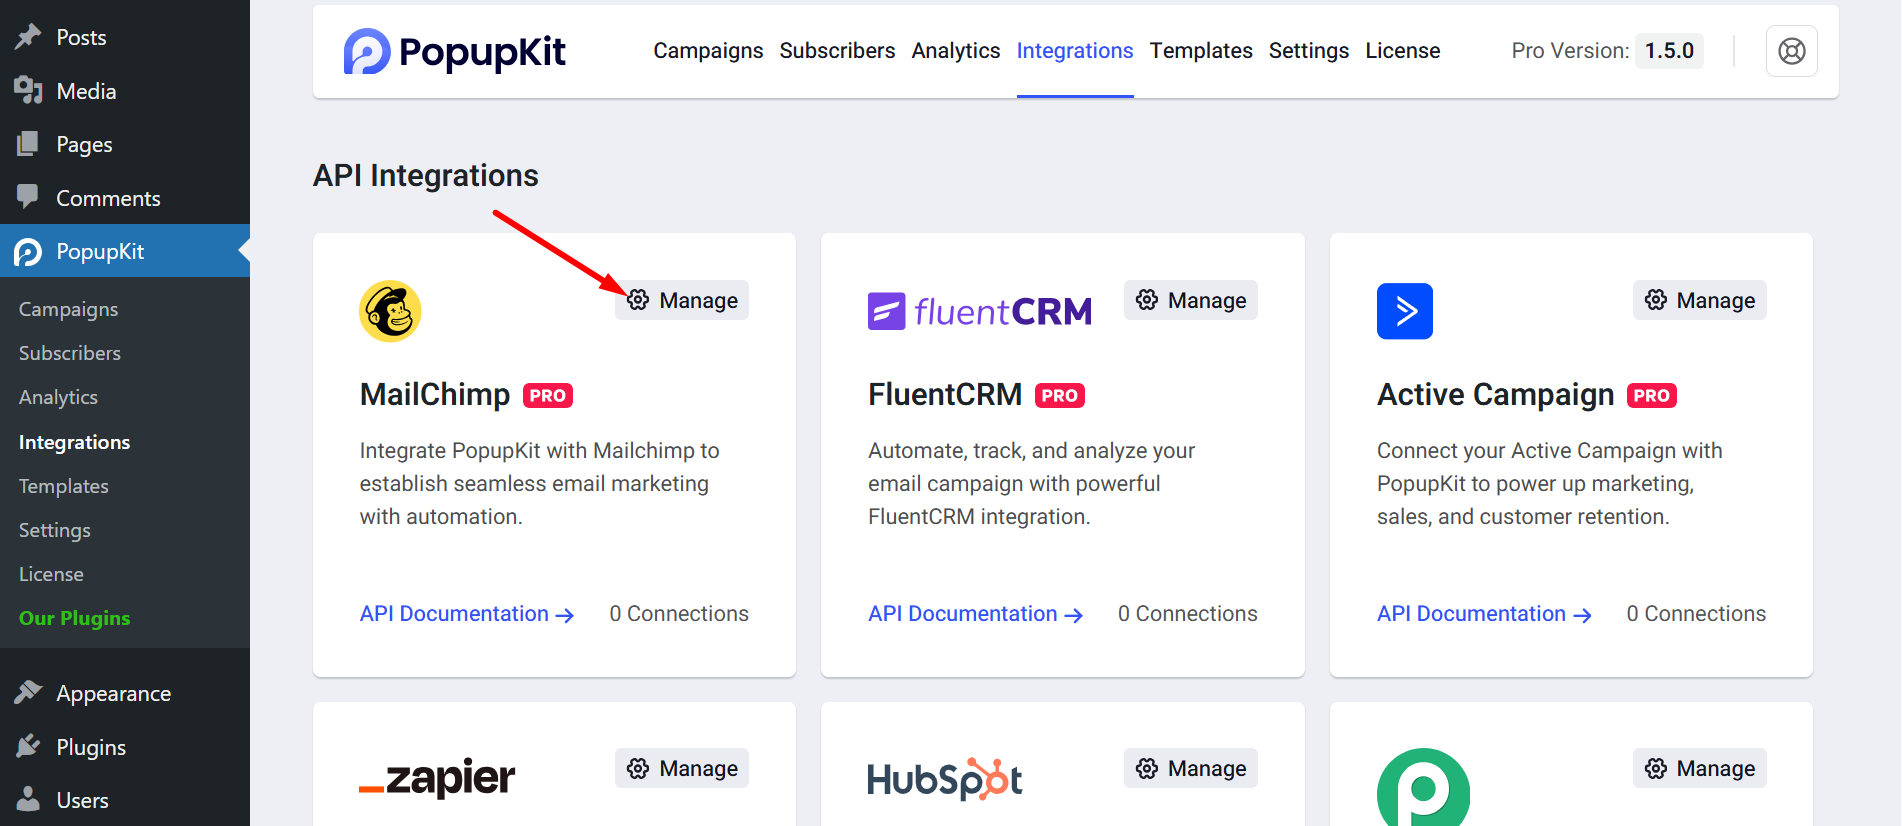
Now, click on the settings option “Manage”
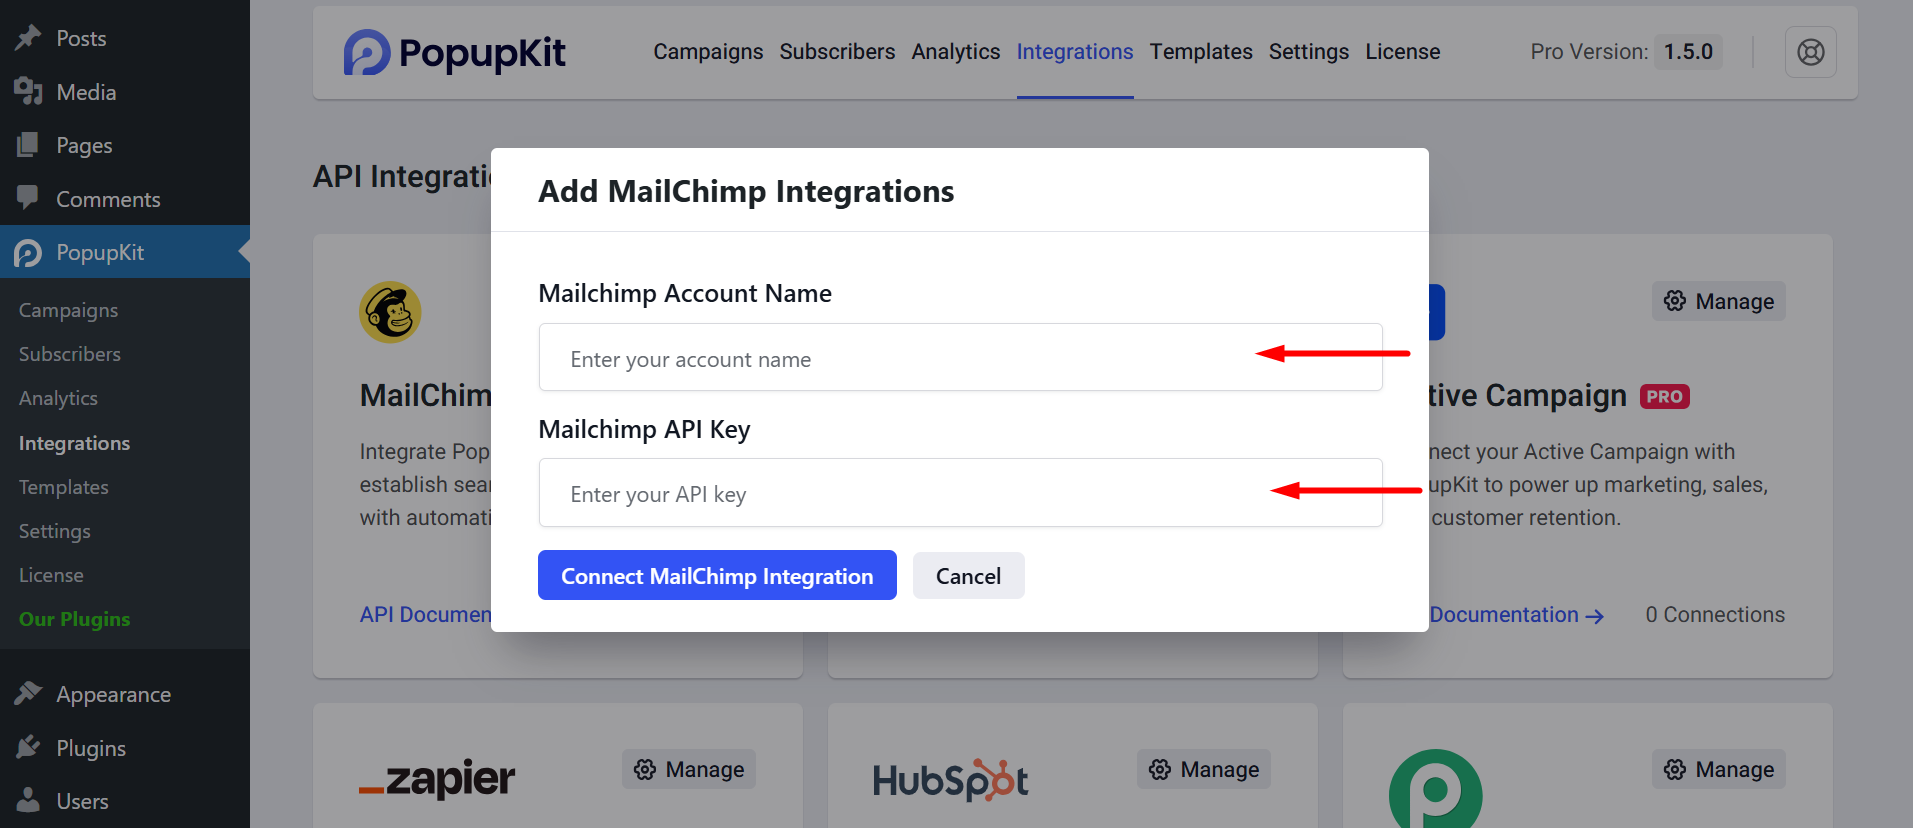
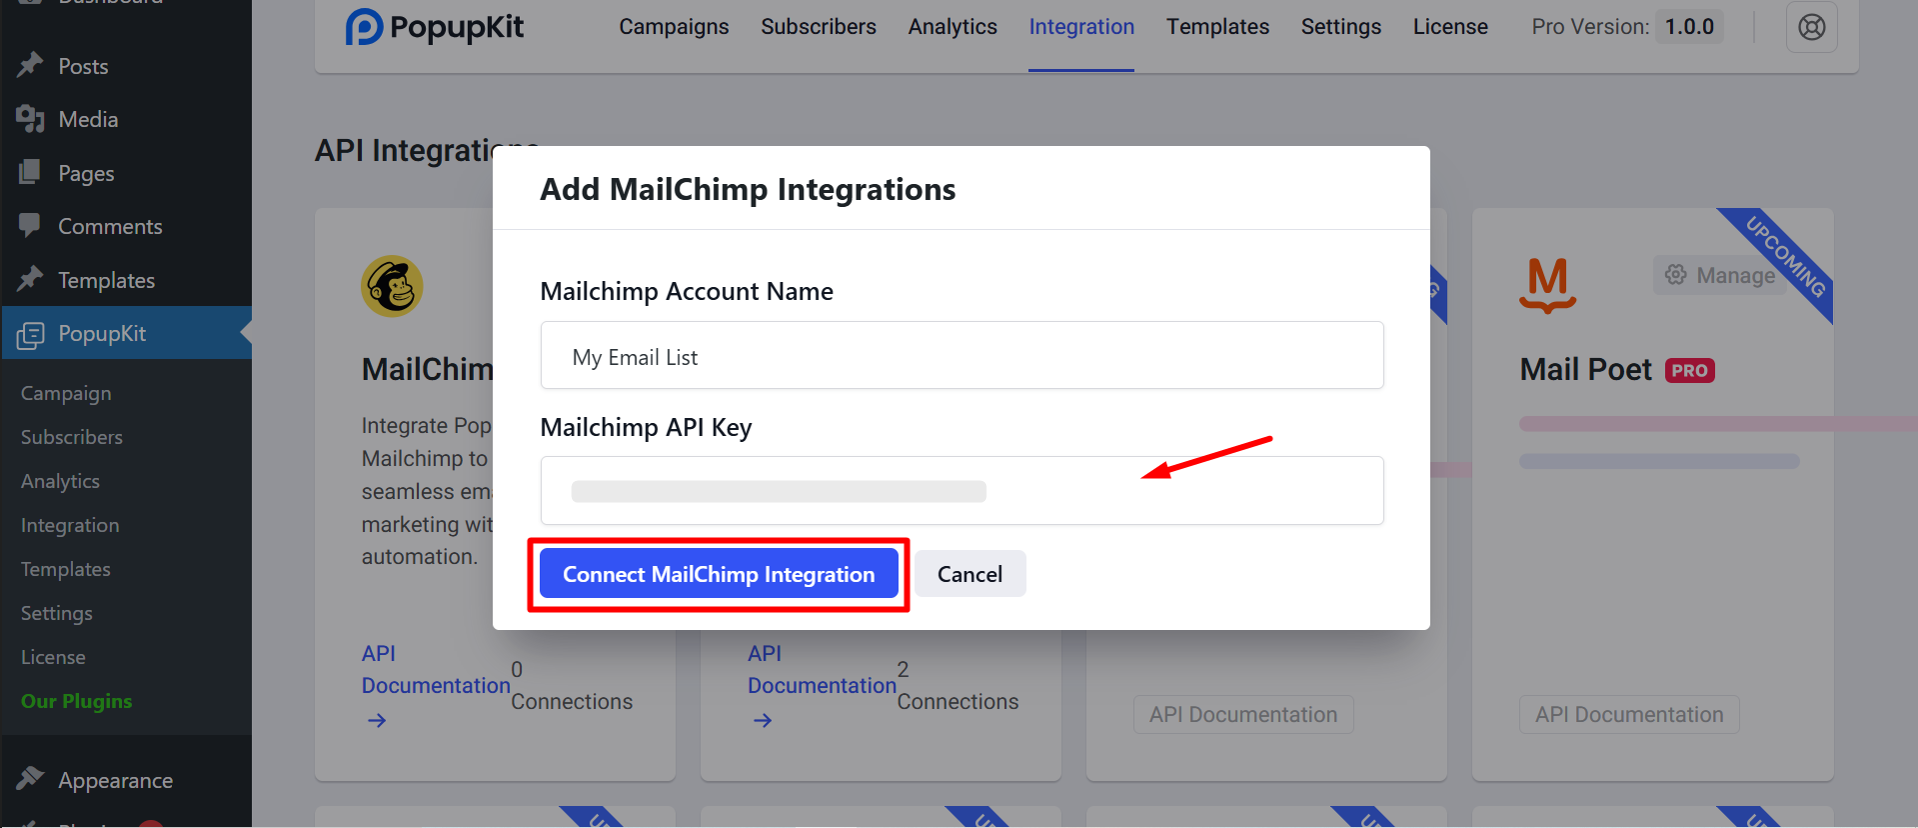
- Write your Mailchimp Account Name: Set a name according to your choice
- Mailchimp API Key: Here you have to insert the API key
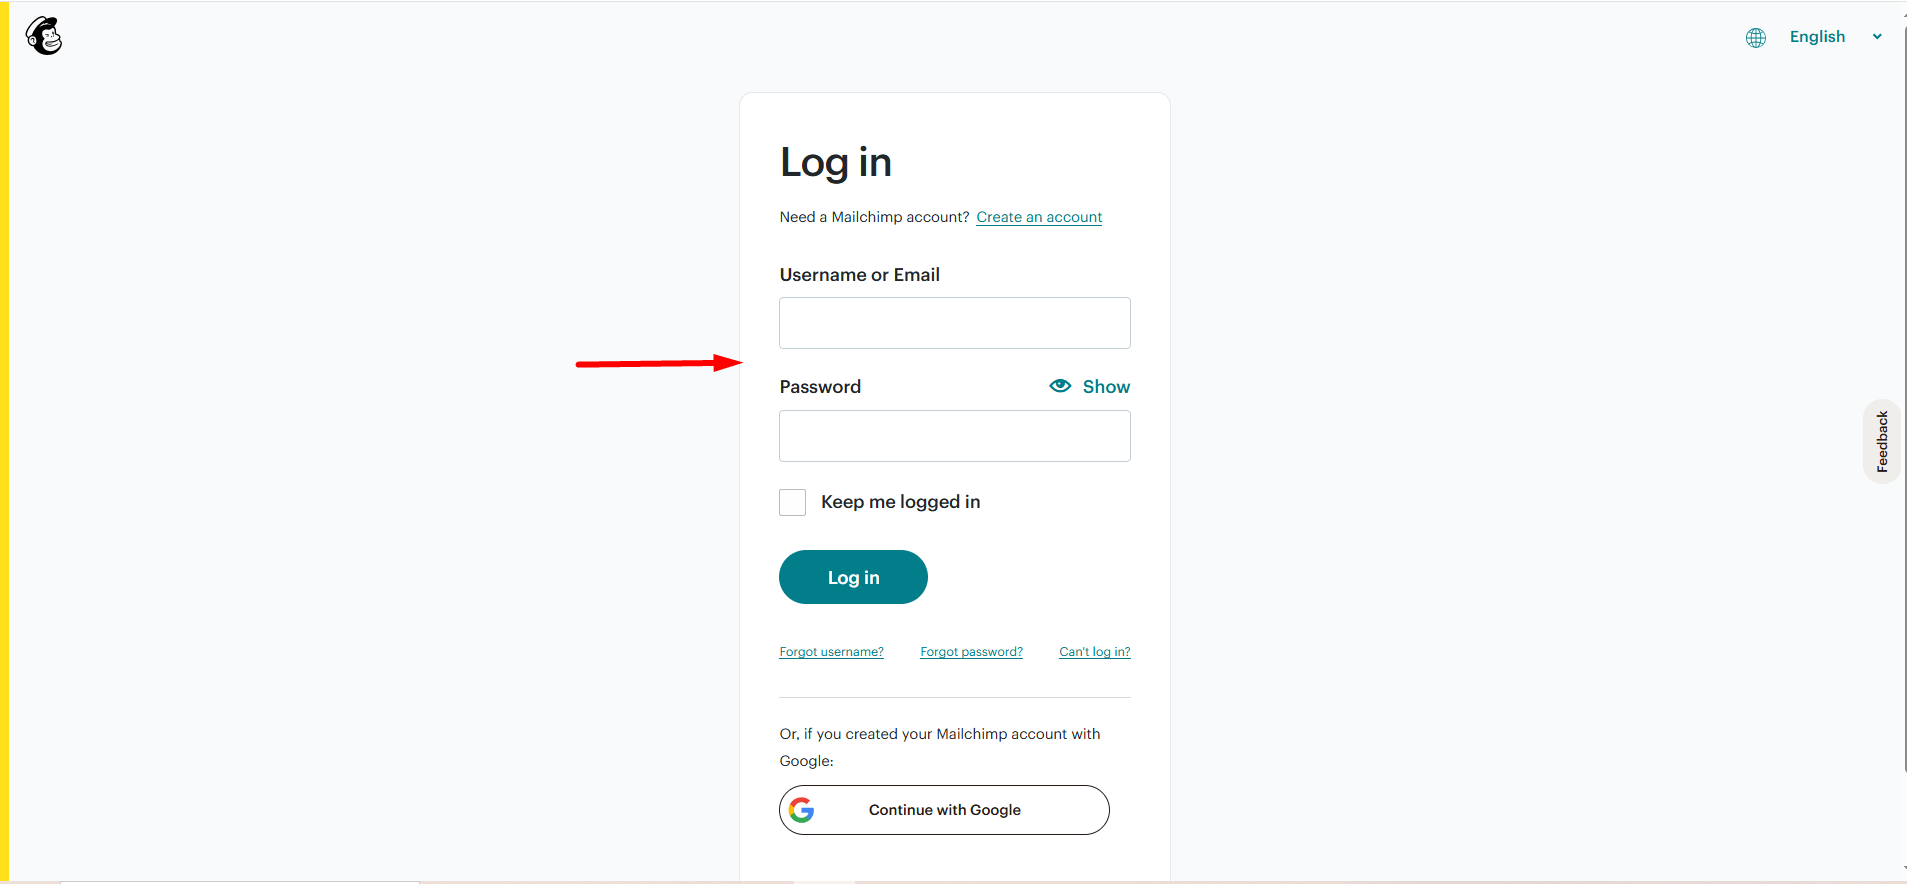
STEP 2: Log in to MailChimp #
Go to Mailchimp and acceso. If you don’t have an account yet, sign up.
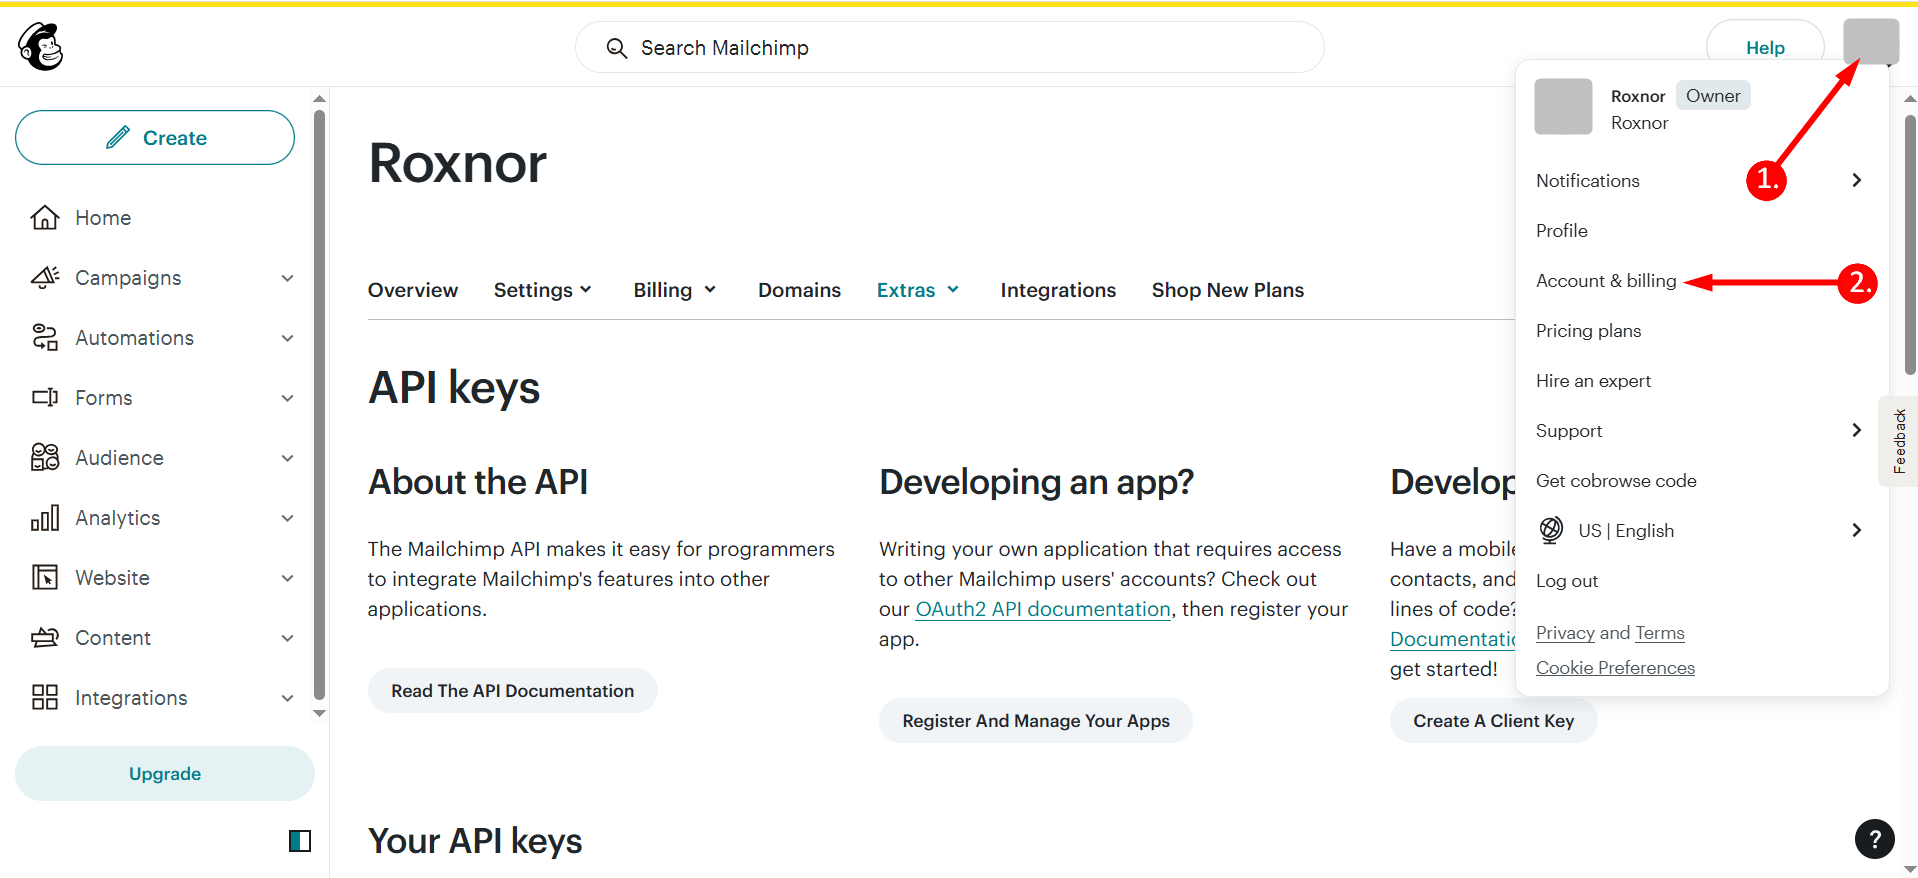
- Go to your account photo
- Click on your Account & Billing
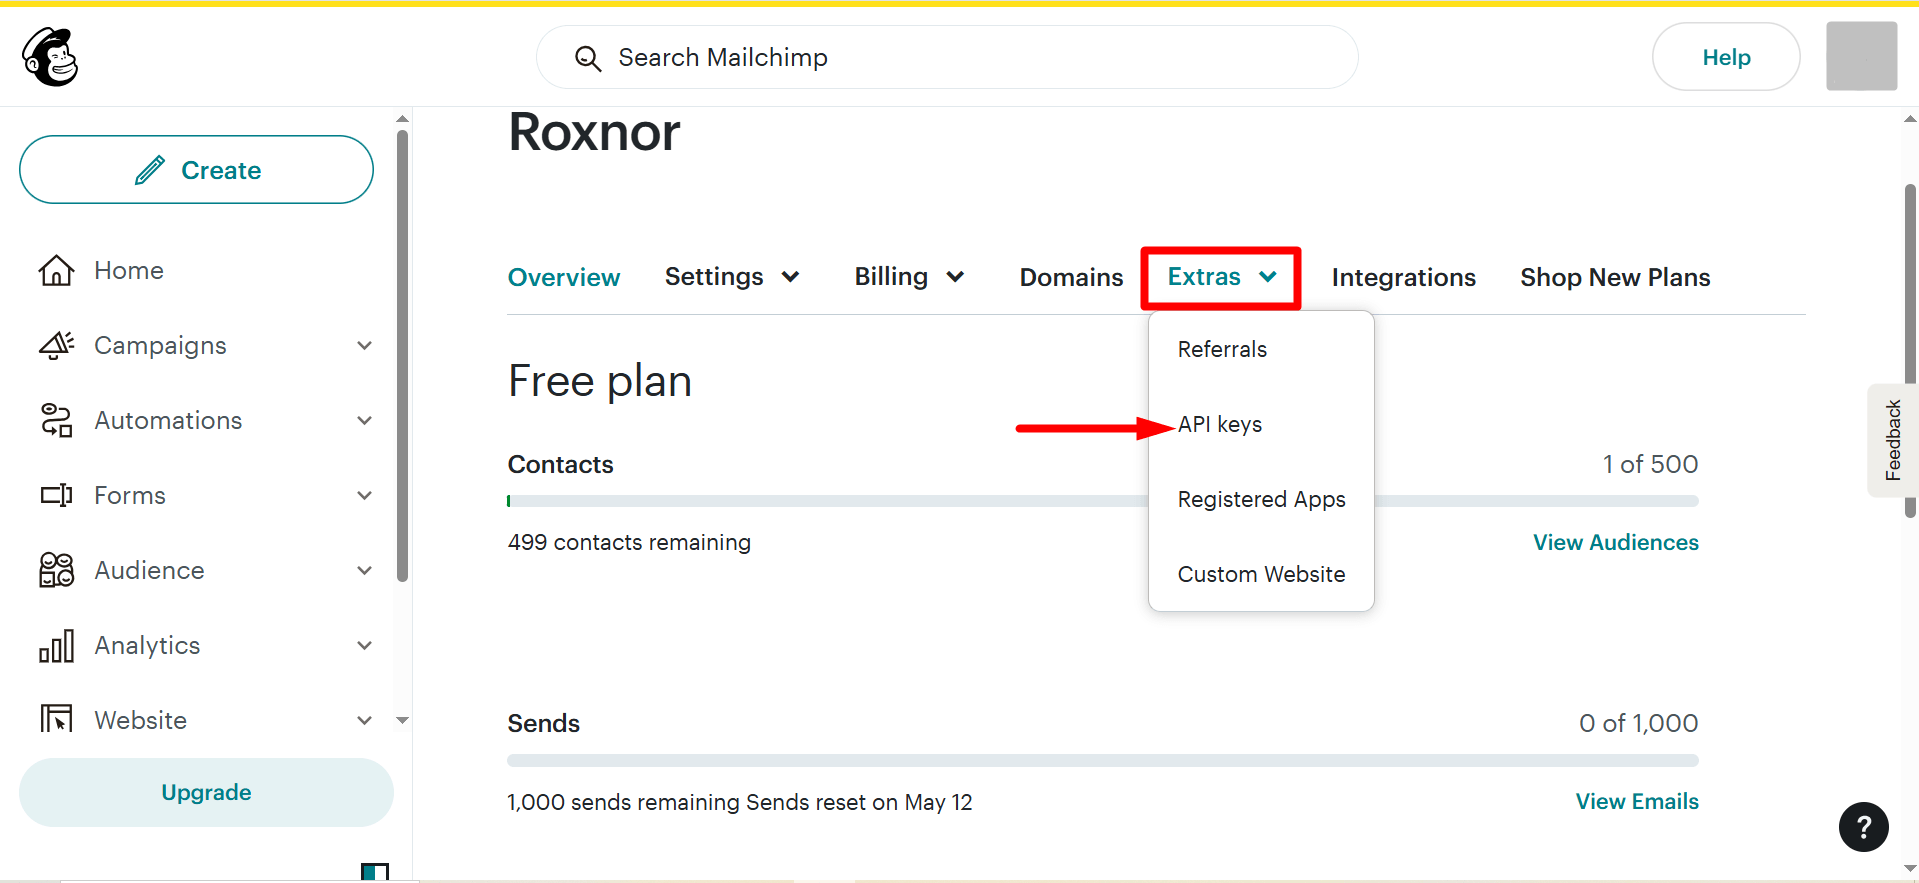
Expand the Extras menu and click on API keys.
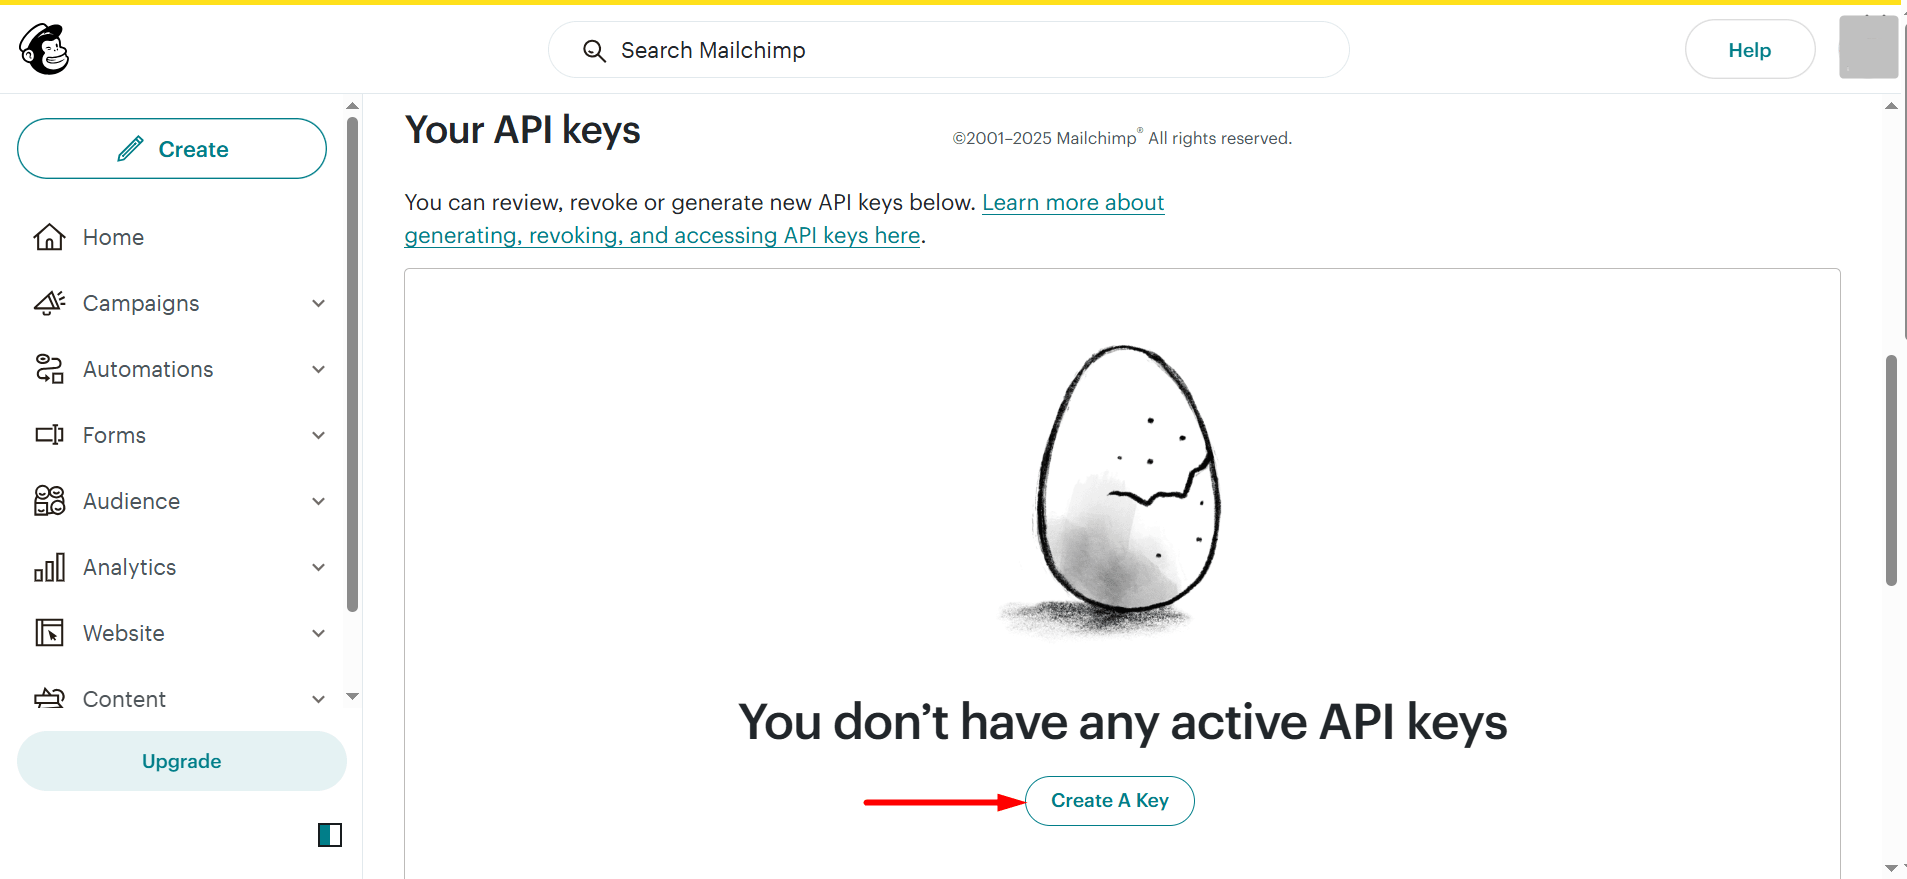
Click on the button “Create A Key”
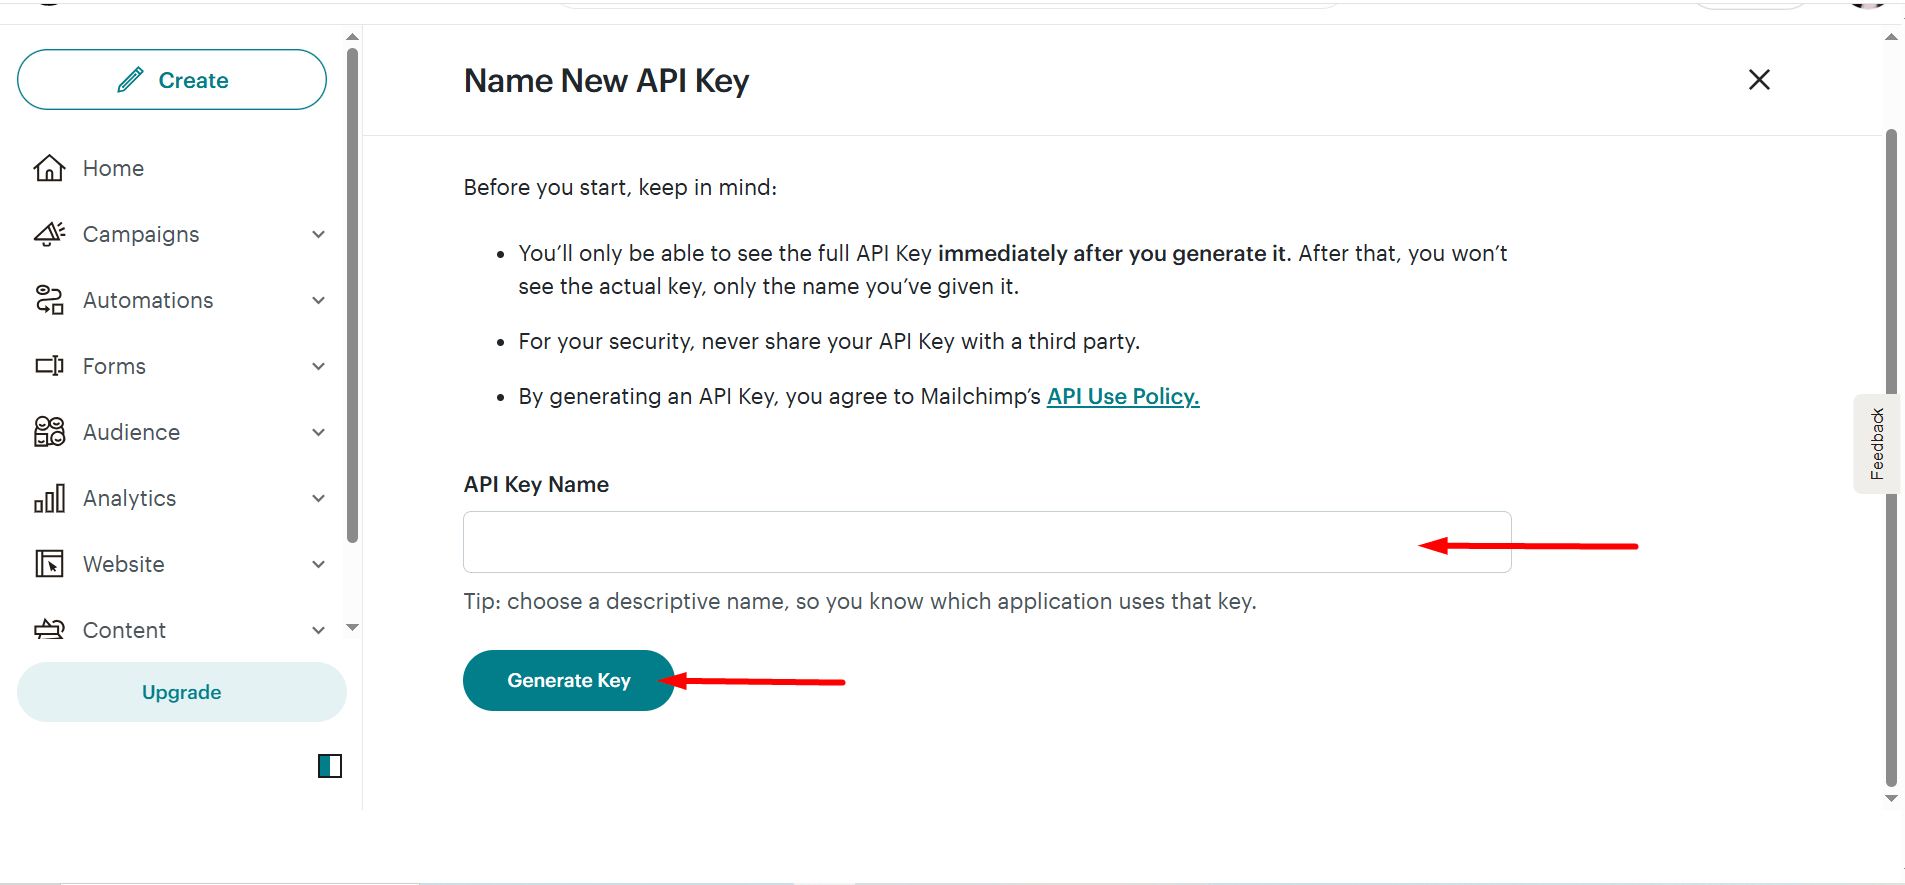
- Set an API Key Name
- Click on the button “Generate Key”
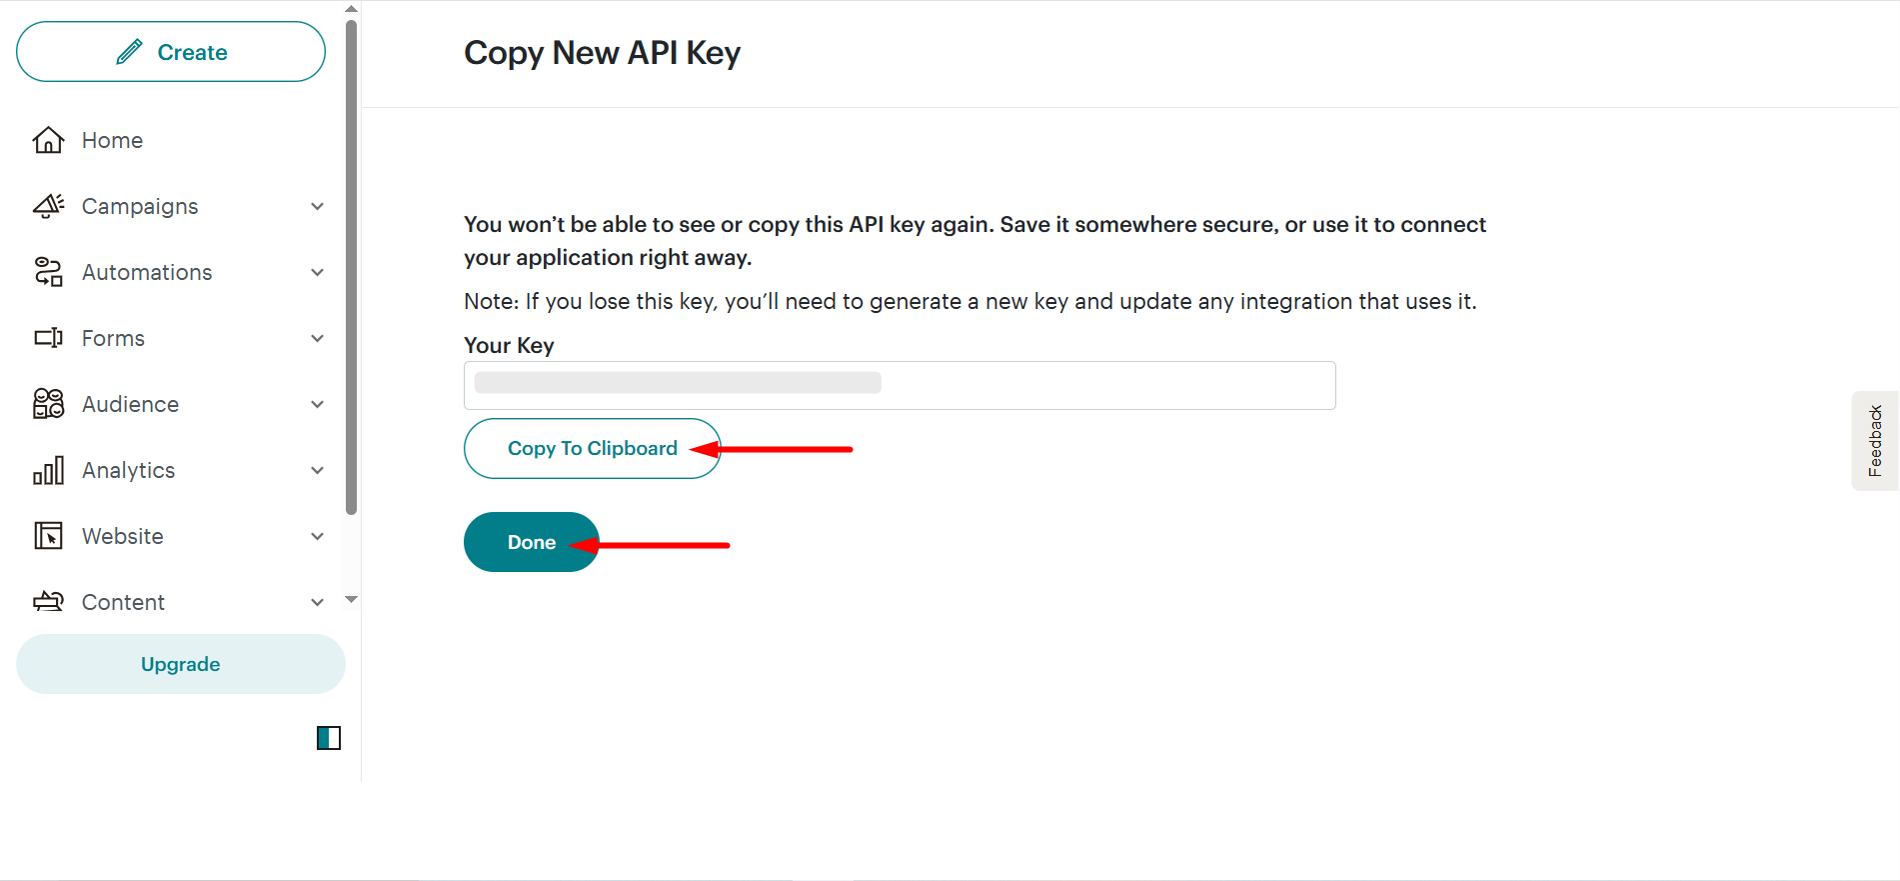
Your key is ready.
- Copy it by clicking on the “Copy To Clipboard”
- Clickea en el “Done” botón
STEP 3: Go Back To STEP 1 #
- Insert the MailChimp API Key you have copied in the settings section.
- Finally, click on the “Connect MailChimp Integration” button
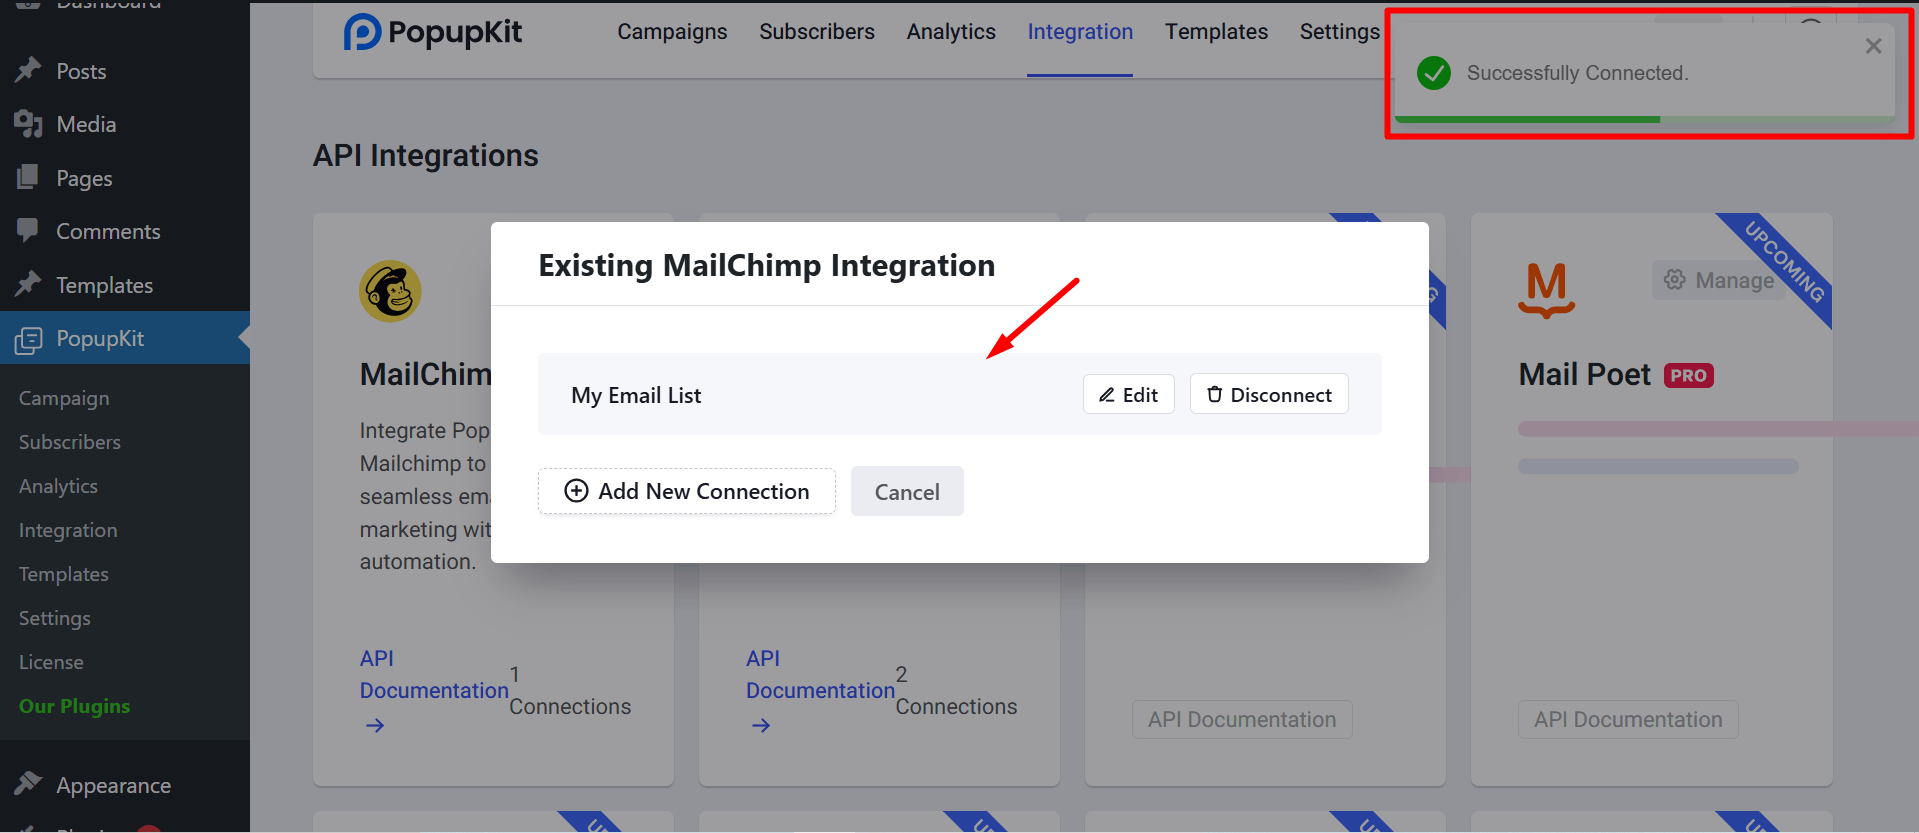
Check out the integration, it is created successfully. You can also notice a quick message “Successfully Connected”
With this integration complete, you’re now ready to seamlessly connect with your audience and maximize the power of Mailchimp within your workflow.


