


To enable pagination for large table, the best way is to use a table builder plugin. One that has made this process easy is the TableKit.
TableKit is a Gutenberg-native table plugin that provides pagination without requiring custom code. It works for both Data Tables for CSV, Google Sheets, JSON, and Post Tables for dynamic post listings.
So, if you are dealing with a large data table, this guide will discuss how to enable pagination for large table in WordPress using TableKit.
So, let’s dig in!
Quick Overview
This guide shows how to manage large table datasets in WordPress through pagination with the help of TableKit. TableKit is a Gutenberg-native solution for creating clean, paginated tables without coding.
☑️ Key benefits of pagination:
- Faster Loading: Reduces initial page load time and server strain.
- Mobile Friendly: Prevents endless scrolling on small screens.
- Better SEO: Improves Core Web Vitals and reduces bounce rates.
- Clean Layout: Keeps your site design professional and scannable.
☑️ Steps to enable pagination:
- Install TableKit: Search for “TableKit” in the WordPress Plugin repository to install it and activate it.
- Create Table: Use the Data Table block (for CSV/Sheets) or Post Table block (for blog posts).
- Import Data: Upload a CSV or paste a public Google Sheets URL.
- Enable Settings: In the “Block Settings” sidebar, toggle the Seitennummerierung Abschnitt.
- Add Icons: Select an icon from the built-in library or upload a custom SVG for the “Next” and “Previous” buttons.
- Set Row Limits: Define rows per page (e.g., 10 for desktop, 5 for mobile)
☑️ When to use pagination:
- Use it if: Your table has more than 15–20 rows, contains images/links, or is causing slow mobile performance.
- Skip it if: You have a small dataset (under 10 rows) or users need to see every single data point at once to identify patterns.
💡 Pro tips for paginating large tables:
- Public Access: If using Google Sheets, ensure the file sharing is set to “Anyone with the link can view.”
- Anpassung: Use the TableKit “Style” tab to match pagination buttons to your brand colors and typography.
What Is Table Pagination?
Table pagination splits large datasets into smaller, navigable pages instead of loading all rows at once. It should be used when tables exceed 15–20 rows, include images or links, or negatively affect performance, especially on mobile devices.
Why Use Pagination for WordPress Tables?
Why it matters:
- Reduces initial page load time
- Improves mobile usability
- Prevents browser memory strain
- Keeps layouts clean and scannable
When to Add Pagination? When Not?
Use pagination if:
- Your table has 15–20+ rows
- Page speed or Core Web Vitals drop
- Tables include images, buttons, or links
- Users must compare or scan data quickly
On the other hand, don’t use pagination if:
- The table has a small number of rows. For example, under 10–15 rows.
- Users need a full overview of the data to understand patterns, relationships, or totals. Pagination can hide important context.
- There’s a need for the data to be updated frequently. Pagination might miss data in times of frequent updates.
How to Enable Pagination for Large Table in WordPress Using a Plugin
You can technically code pagination using CSS and JavaScript, but the TableKit plugin is the most efficient way to handle it. It’s a no-code approach, lightweight. TableKit is built specifically for Gutenberg users.
First, let’s take a look at the prerequisites before you can enable pagination:
- A Gutenberg WordPress website (WordPress 5.0 or later).
- Access to the WordPress admin dashboard.
- Installed and activated the TableKit plugin (if you want advanced table features, you can upgrade to the pro version).
Now, here are the steps to enable pagination for a large table in WordPress:
Step 1: Installing and activating the plugin
To install and activate the plugin, you’ll need to perform these steps:
- First, log in to your WordPress dashboard.
- Navigieren Sie zu Plugins > Neu hinzufügen and search for “TableKit.”
- Klicken Jetzt installieren und dann Activate. Once activated, you’ll see a new TableKit menu item in your sidebar.
Step 2: Open a new page and create a table
TableKit allows you to create either static Data Tables or dynamic Post Tables, both of which support pagination. The table type depends on whether your data comes from files, APIs, or WordPress posts.
To create your table:
- Start by navigating to Pages in your WordPress dashboard.
- Either select an existing page or click Neue hinzufügen to launch the Gutenberg block editor and begin with a fresh canvas for your table.

- Create a table on a page or a post table with the use of the Post Table and Data Table blocks.
Option A: Data Table Block (CSV, Google Sheets, JSON)
To start with, the Data Table:
- Drücke den (+) icon in the editor and search for “Data Table.”
- Click on the “Start blank” and import data from a CSV file, Google Sheet, Json file, or Nested Json file.
- After you select your data source, it’s time to add the data. For a CSV file, you only need to upload the sheet. If you select the Google Sheet JSON file or the Nested JSON file, you only need to add the URL.
For instance, if you select the Google Sheet as your source, you only need to:
- Go to your Google Drive and copy the link.
📌 Tipp: Ensure Google Sheets files are publicly accessible.
- Your data table will then be added to your Gutenberg editor, where you can enable its pagination settings.

Option B: Post Table Block (Dynamic Content)
To add a table using the Post Table block:
- Simply add the Post Table widget in the Gutenberg editor.
- Click on the plus icon and search for the Post Table.
- All the posts you published on your website will reflect as data in your table.
- This option is best for blogs, product listings, and directories.
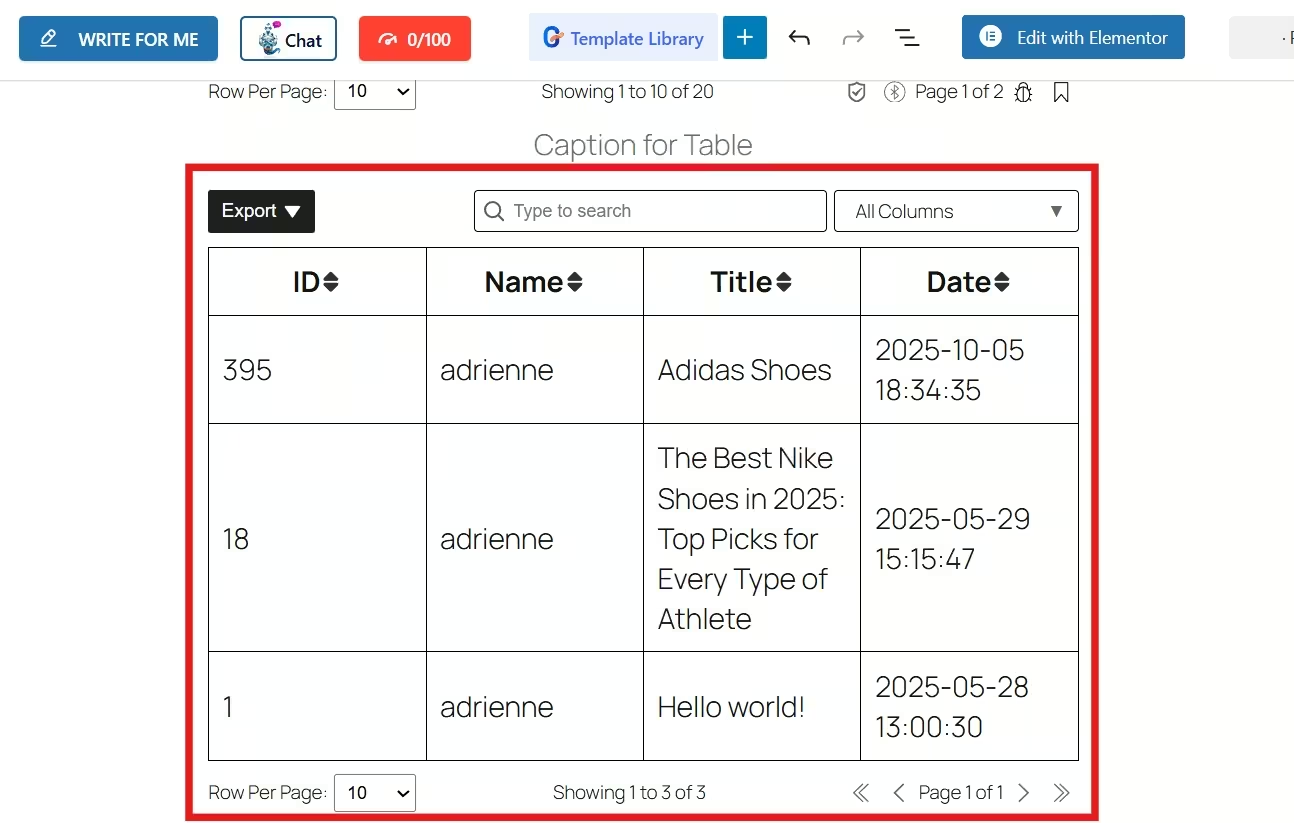
Step 3: Enable Pagination Settings
Once your data is in the table, it’s time to enable the pagination settings through the following steps:
- Look at the Block Settings in the right-hand sidebar.
- Scroll down the screen to the Seitennummerierung section and set the settings.

1. Add Pagination Icon
Add a pagination icon on each page. You can either select an icon from the library or upload an SVG. If you have GutenKit as your Gutenberg plugin, you can select from so many options.
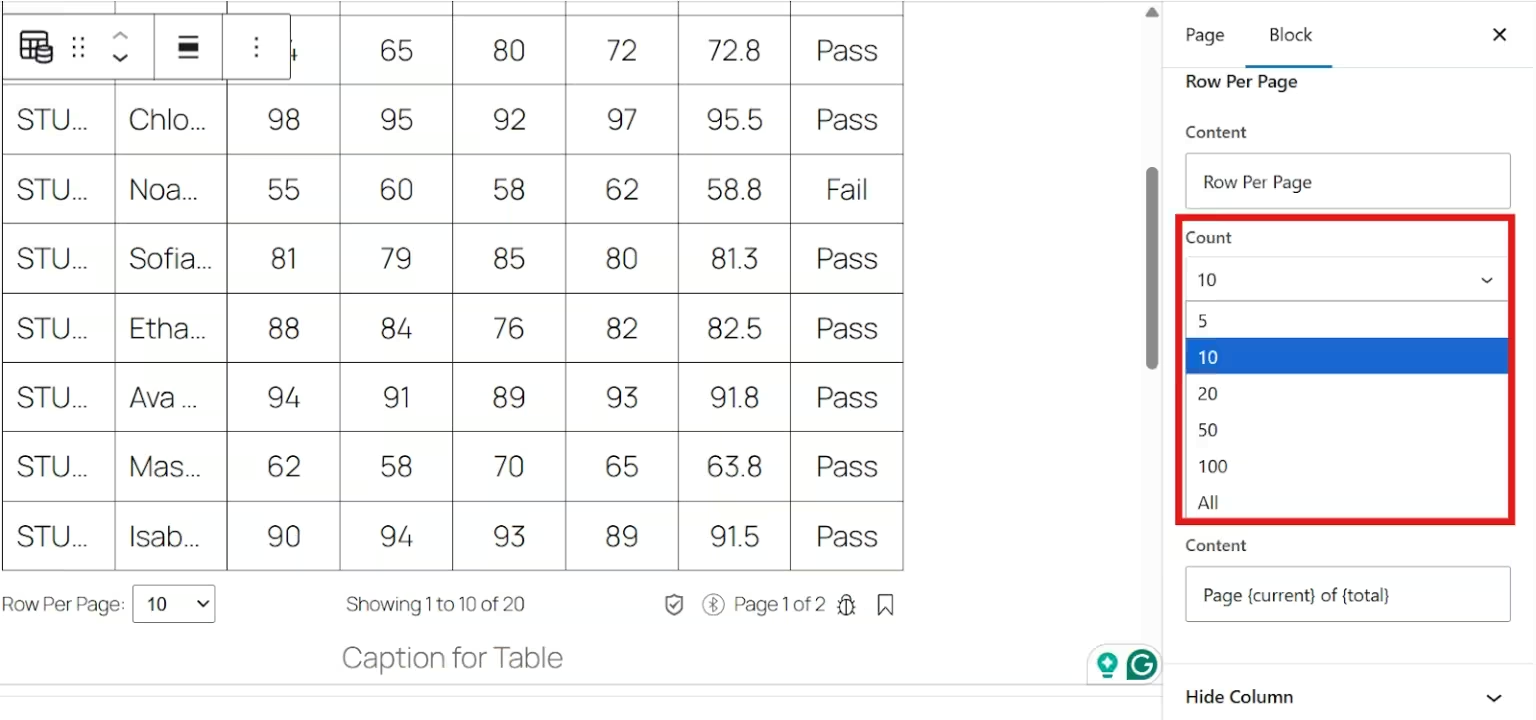
2. Adjust Rows Per Page
After you add the pagination icon, it’s time to set the number of rows you want to display per page. You’ll see an option for rows per page, and:
- Simply enter the number of rows you want to display at once. For example, you can set 5, 10, or 20.
- For common best practice, you can set 10–25 rows per page for Desktop viewing, and 5–10 rows per page for Mobile viewing.
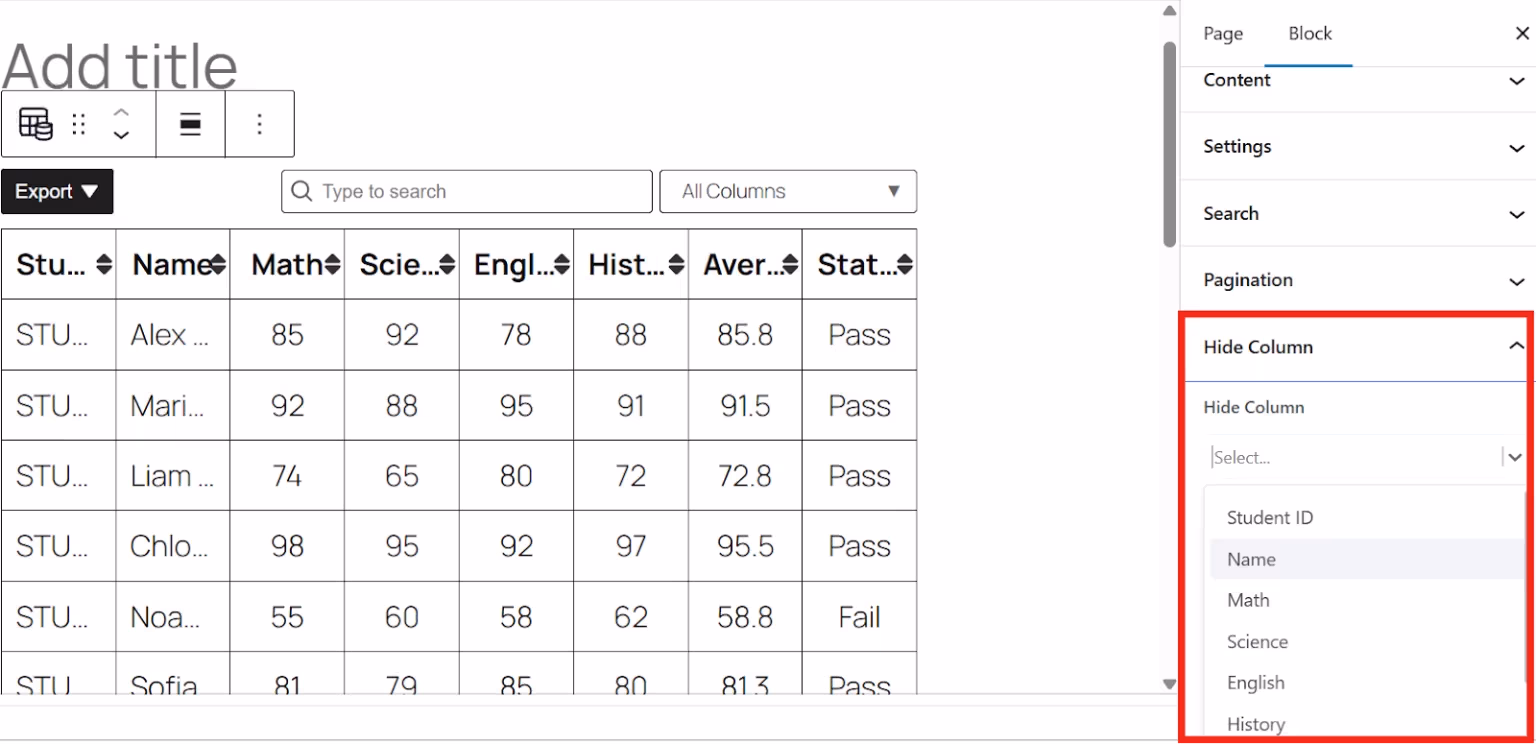
- If you want to hide a column, you can simply do that by going through the hide column section. You can choose which column you want to hide.
Step 5: Customize Your Table
TableKit allows full visual customization so pagination feels native to your site design. Styling can be applied per section using the style tab.
You can apply a global style to your table by adjusting the alignment, typography, background color, text color, border, etc.
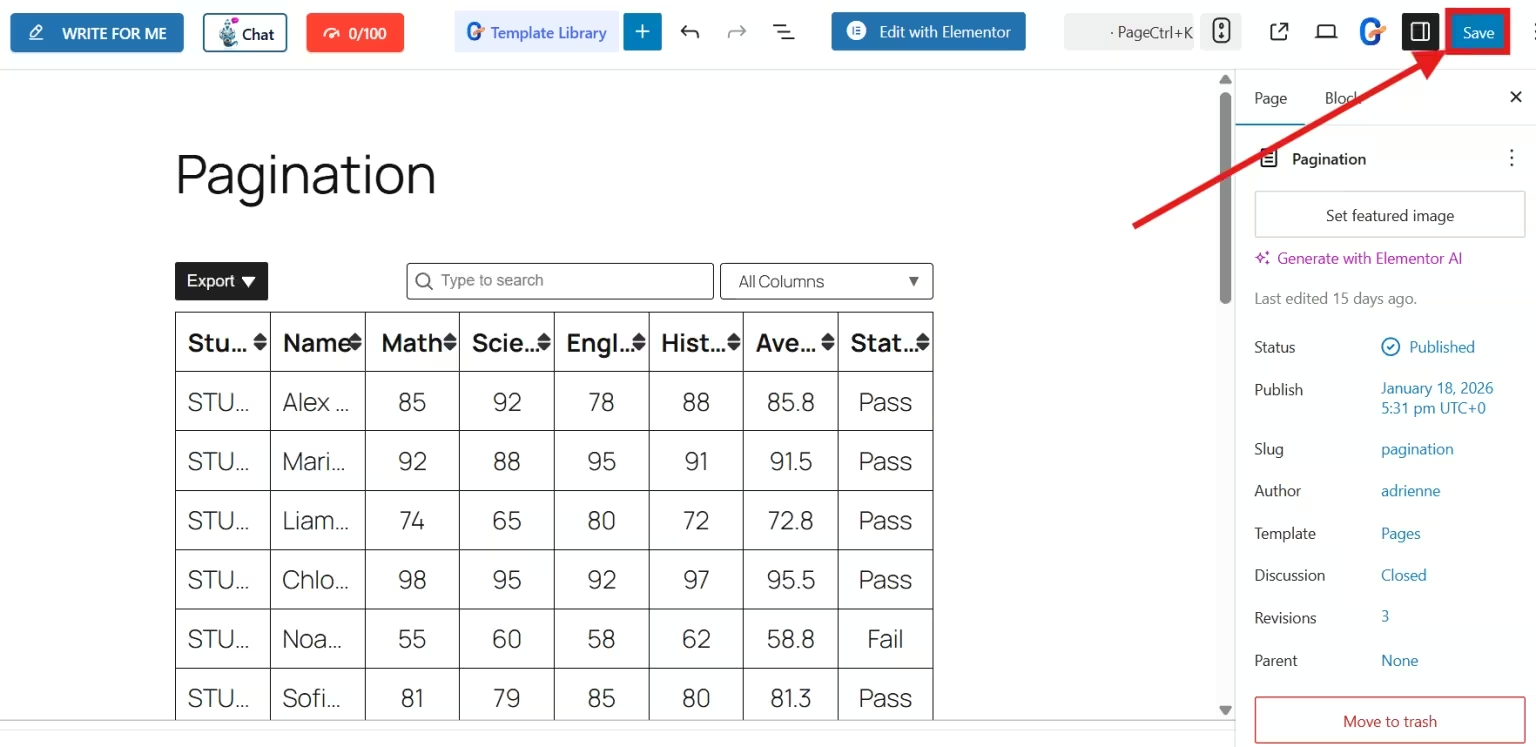
You can also customize the parts of your table individually.
Moreover, you can also customize your pagination just like the header, column, etc. Finally, after completing all customizations, press the “Save” or “Publish” button to integrate pagination for a large table.
Why You Should Choose TableKit for Pagination?
TableKit balances performance, flexibility, and editor-native control. It is ideal for large tables that must remain fast and readable. It’s specifically built for Gutenberg to avoid the bloat of the legacy table plugins.
Key advantages:
- Handles heavy datasets efficiently while maintaining fast and responsive pages.
- Pagination is managed directly in Gutenberg for easy styling.
- User-controlled number of rows per page.
- CSV, JSON, Google Sheets imports
- Built-in search and filtering for UX.
Why Pagination Alone Can’t Fix Large Table Performance
Pagination alone isn’t sufficient if you want to obtain a good table performance because it only limits results. It only improves UX, but not the database performance.
Here is why pagination alone can’t fix large table performance
- The increase of offset value leads to a higher query time. This means that the pagination becomes incredibly slow and could lead to slow query log.
- The large offset forces the database to skip many records.
- The database requires sorting and filtering before the pagination can be applied that leads to higher CPU and memory consumption.
- Frequent data changes, like deleting and inserting, can cause missing rows or duplicate rows.
Why Large Table Pagination Fails in Implementation
Large table pagination often fails in implementation due to the volume of data. As data increases, the problem with performance, consistency, and usability increases.
Here are the common reasons:
- Offset-based pagination does not scale well. For example, for a query like “Limit 10 Offset 500,” the database has to scan the 1000 rows before returning to 10.
- Occurrence of inconsistency in the data when there are data changes. This would lead to missing rows or duplicate rows.
- The increase in data volume needs complex handling of sorting, data changes, and the correctness of pagination.
- Non-indexed columns can cause full table scans, which can affect performance on large datasets.
- The frequent update could lead to page-based pagination unreliable,
The failure of implementation of large table pagination would lead to the user’s infinite scrolling.
FAQs
1. Does Pagination Help with SEO?
Yes. By reducing initial page load times and improving user experience metrics (like bounce rate), pagination indirectly boosts your SEO rankings.
2. Can You Style the Pagination Buttons?
Most plugins, including TableKit, allow you to change the button colors, font sizes, and alignment to match your WordPress theme.
3. Will Pagination Work on Mobile?
Absolutely. In fact, pagination is even more important for mobile users to prevent them from having to scroll through a never-ending list on a small screen.
4. Why Should You Enable Pagination for Large Tables?
Large tables can slow down page loading, affect Core Web Vitals, and overwhelm users. It helps:
- Improve page speed and performance
- Enhance readability and usability
- Reduce browser memory usage
- Prevent layout shifts on mobile devices
5. How Do You Fix if Pagination Works in Preview But Not on the Live Site?
This issue is often caused by:
- Page caching or minification plugins
- JavaScript conflicts with themes or other plugins
Clear the cache, disable JS minification temporarily to fix it. Then test pagination again. If the issue persists, try switching to a default theme to identify conflicts.
Was kommt als nächstes?
As the table grows beyond a manageable number of rows, the more reason you need to paginate it. Pagination is essential for performance, usability, and a clean reading experience.
With the help of TableKit, pagination for a large table becomes so simple. It’s flexible, no code, and even customizable. You can display your data from CSV files, Google Sheets, JSON sources, or list posts. You can control the number of rows per page and keep your tables fast and readable.
So, if you are a WordPress site owner relying on heavy data tables, pagination with TableKit is all you need.
What’s next? Install TableKit and easily deal with your large table!
Schreibe einen Kommentar