


Embedding a dedicated video gallery in WordPress is one of the simplest ways to present multiple clips in a tidy, searchable format without cluttering individual posts with scattered embeds.
In this guide, we’ll walk you through a four‑step process that uses ElementsKit with Elementor to add, arrange, and style your videos. Before you begin, make sure both the free and Pro versions of ElementsKit and the free version of Elementor are installed and activated. So, let’s jump in to learn the necessities of integrating a video gallery in WordPress along with the actual process.
Quick Overview
This tutorial will hand you with the best guide to create a video gallery in WordPress. ElementsKit comes with a premium video gallery widget that allows you to add video gallery by dragging-and-dropping in Elementor editor.
Tools Used: Elementor (free), ElementsKit (free & pro).
Next to installing the required tools, enable the Video Gallery widget and add video gallery to the Elementor editor. Then, customize the video gallery by adjusting:
✅ Content.
✅ Layout.
✅ Einstellungen.
What’s the need for integrating a video gallery in WordPress?
Showcasing a video gallery on your WordPress site provides numerous benefits. Here are the top advantages that indicate why video gallery is important for your site:
- Video content makes your website more engaging and interactive.
- You can effectively build strong communication with your audience with multimedia content.
- Video gallery can boost average time on site, which is good for SEO.
- It leaves a great impact on conversions and revenue.
- Video gallery ensures better space utilization by neatly displaying videos.
- This beautifies your site with proper video presentation.
✅ Bonus guide: How to add custom icons in WordPress.
How to integrate a video gallery in WordPress
Adding a video gallery is a piece of cake if you get the right and user-friendly solution like ElementsKit. ElementsKit is the best video gallery plugin for WordPress that is not limited to this feature. This is an ultimate Elementor addon that serves all website creation features along with integrating video gallery.
So, let’s dive into the complete guide of how to create a video gallery in WordPress using ElementsKit:
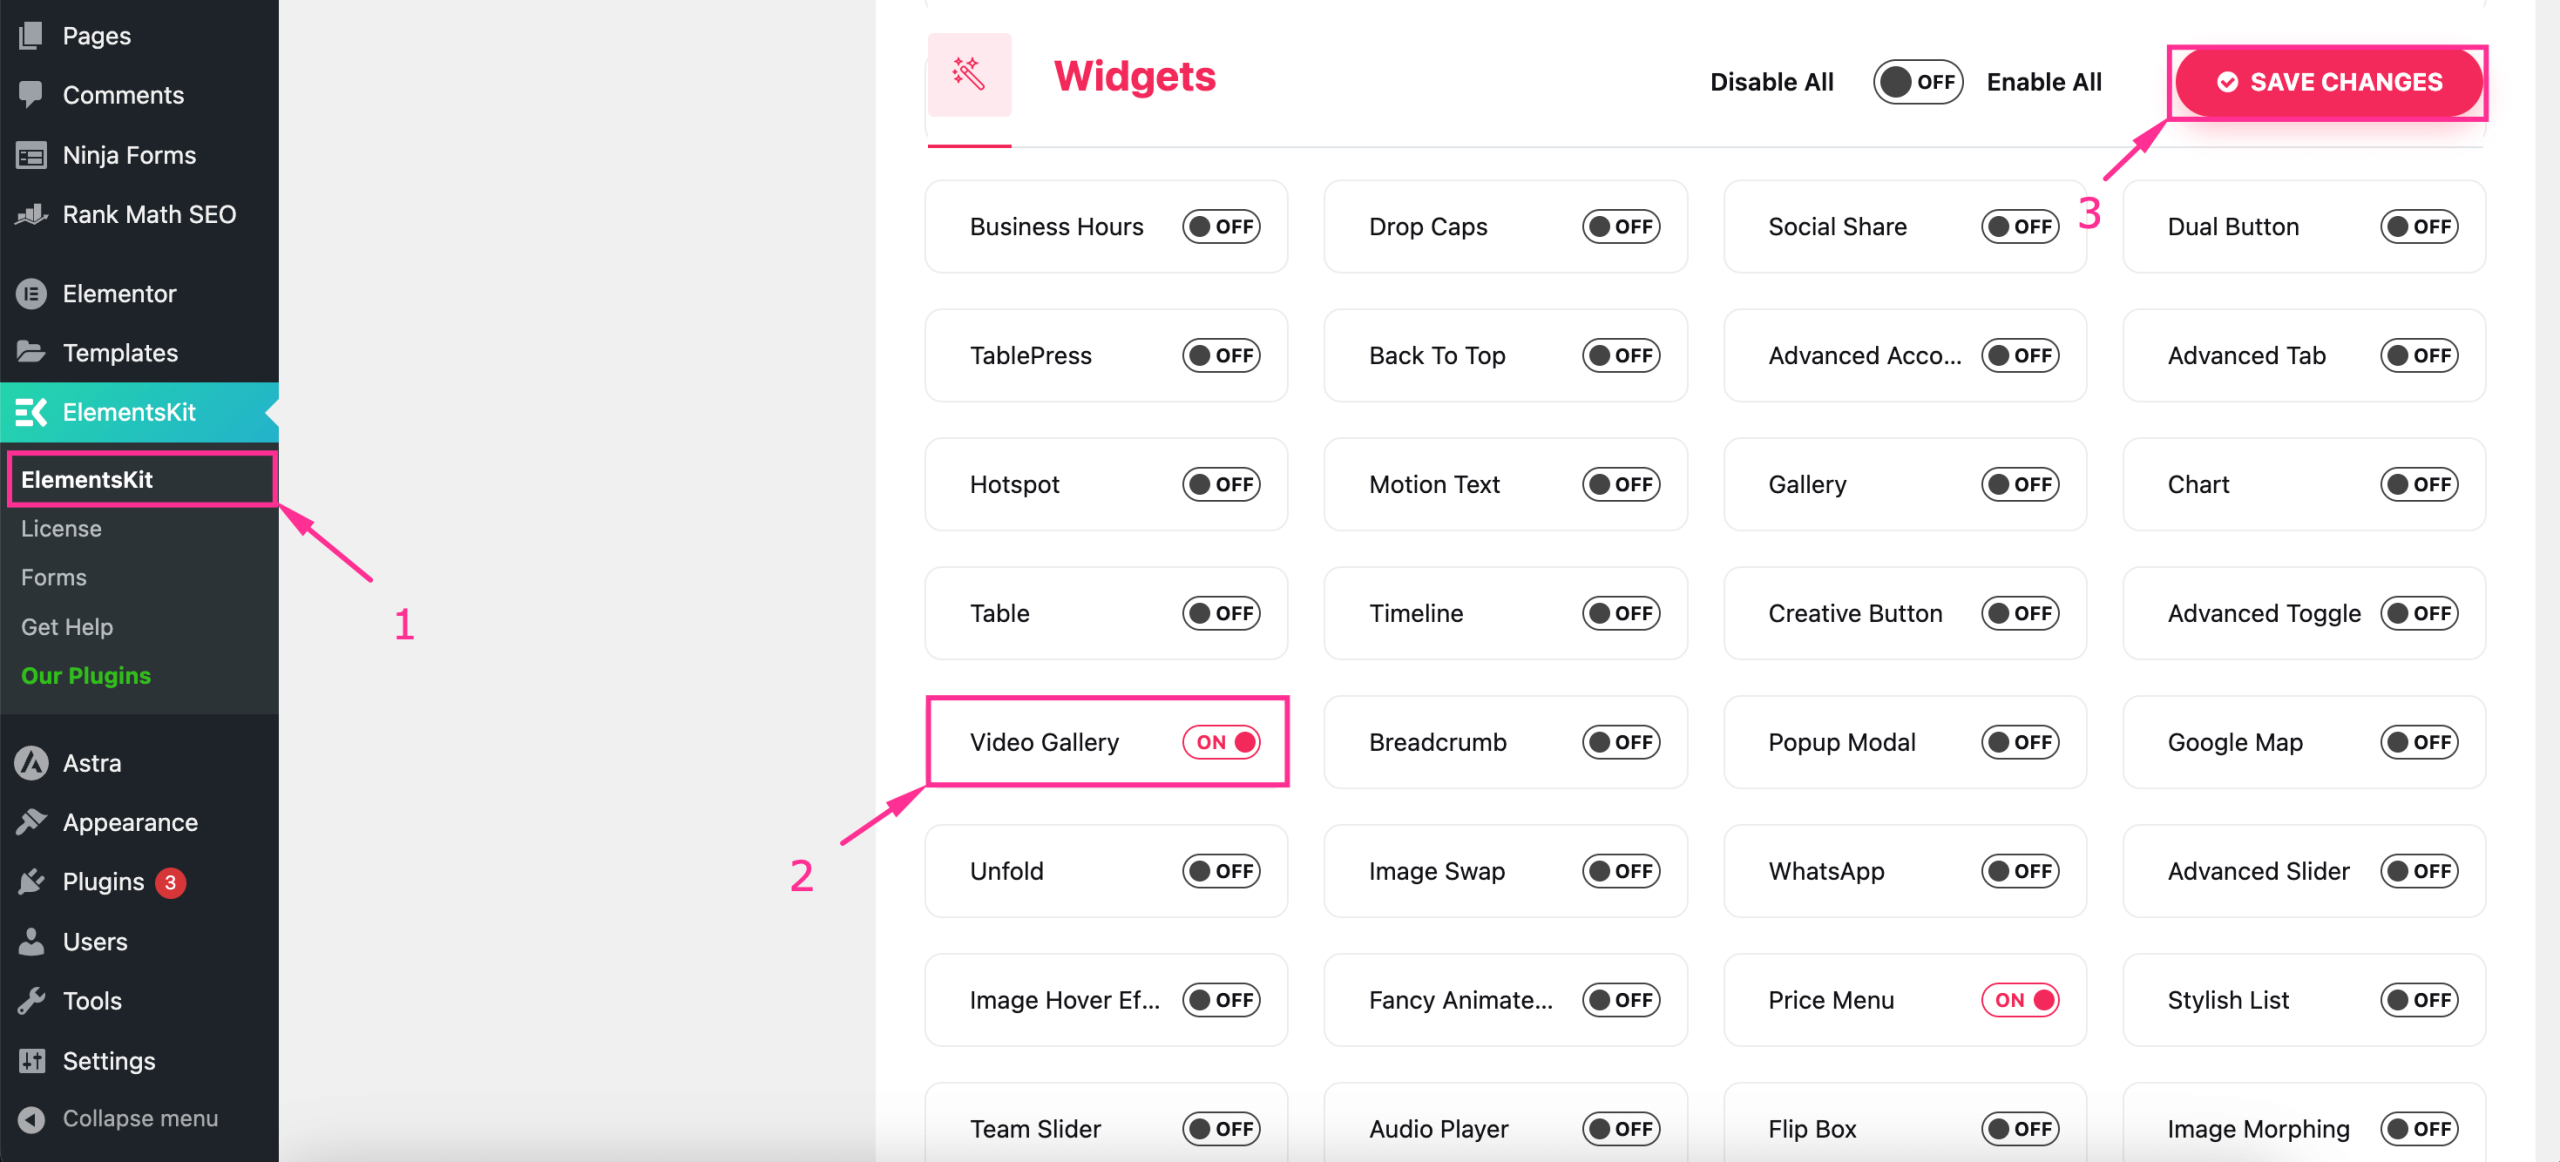
Step 1: Enable the Video Gallery widget.
First, you need to visit the WordPress dashboard and navigate to ElementsKit. Danach, enable the “Video Gallery” Widget und Klicken Sie auf „Änderungen speichern“ Taste.
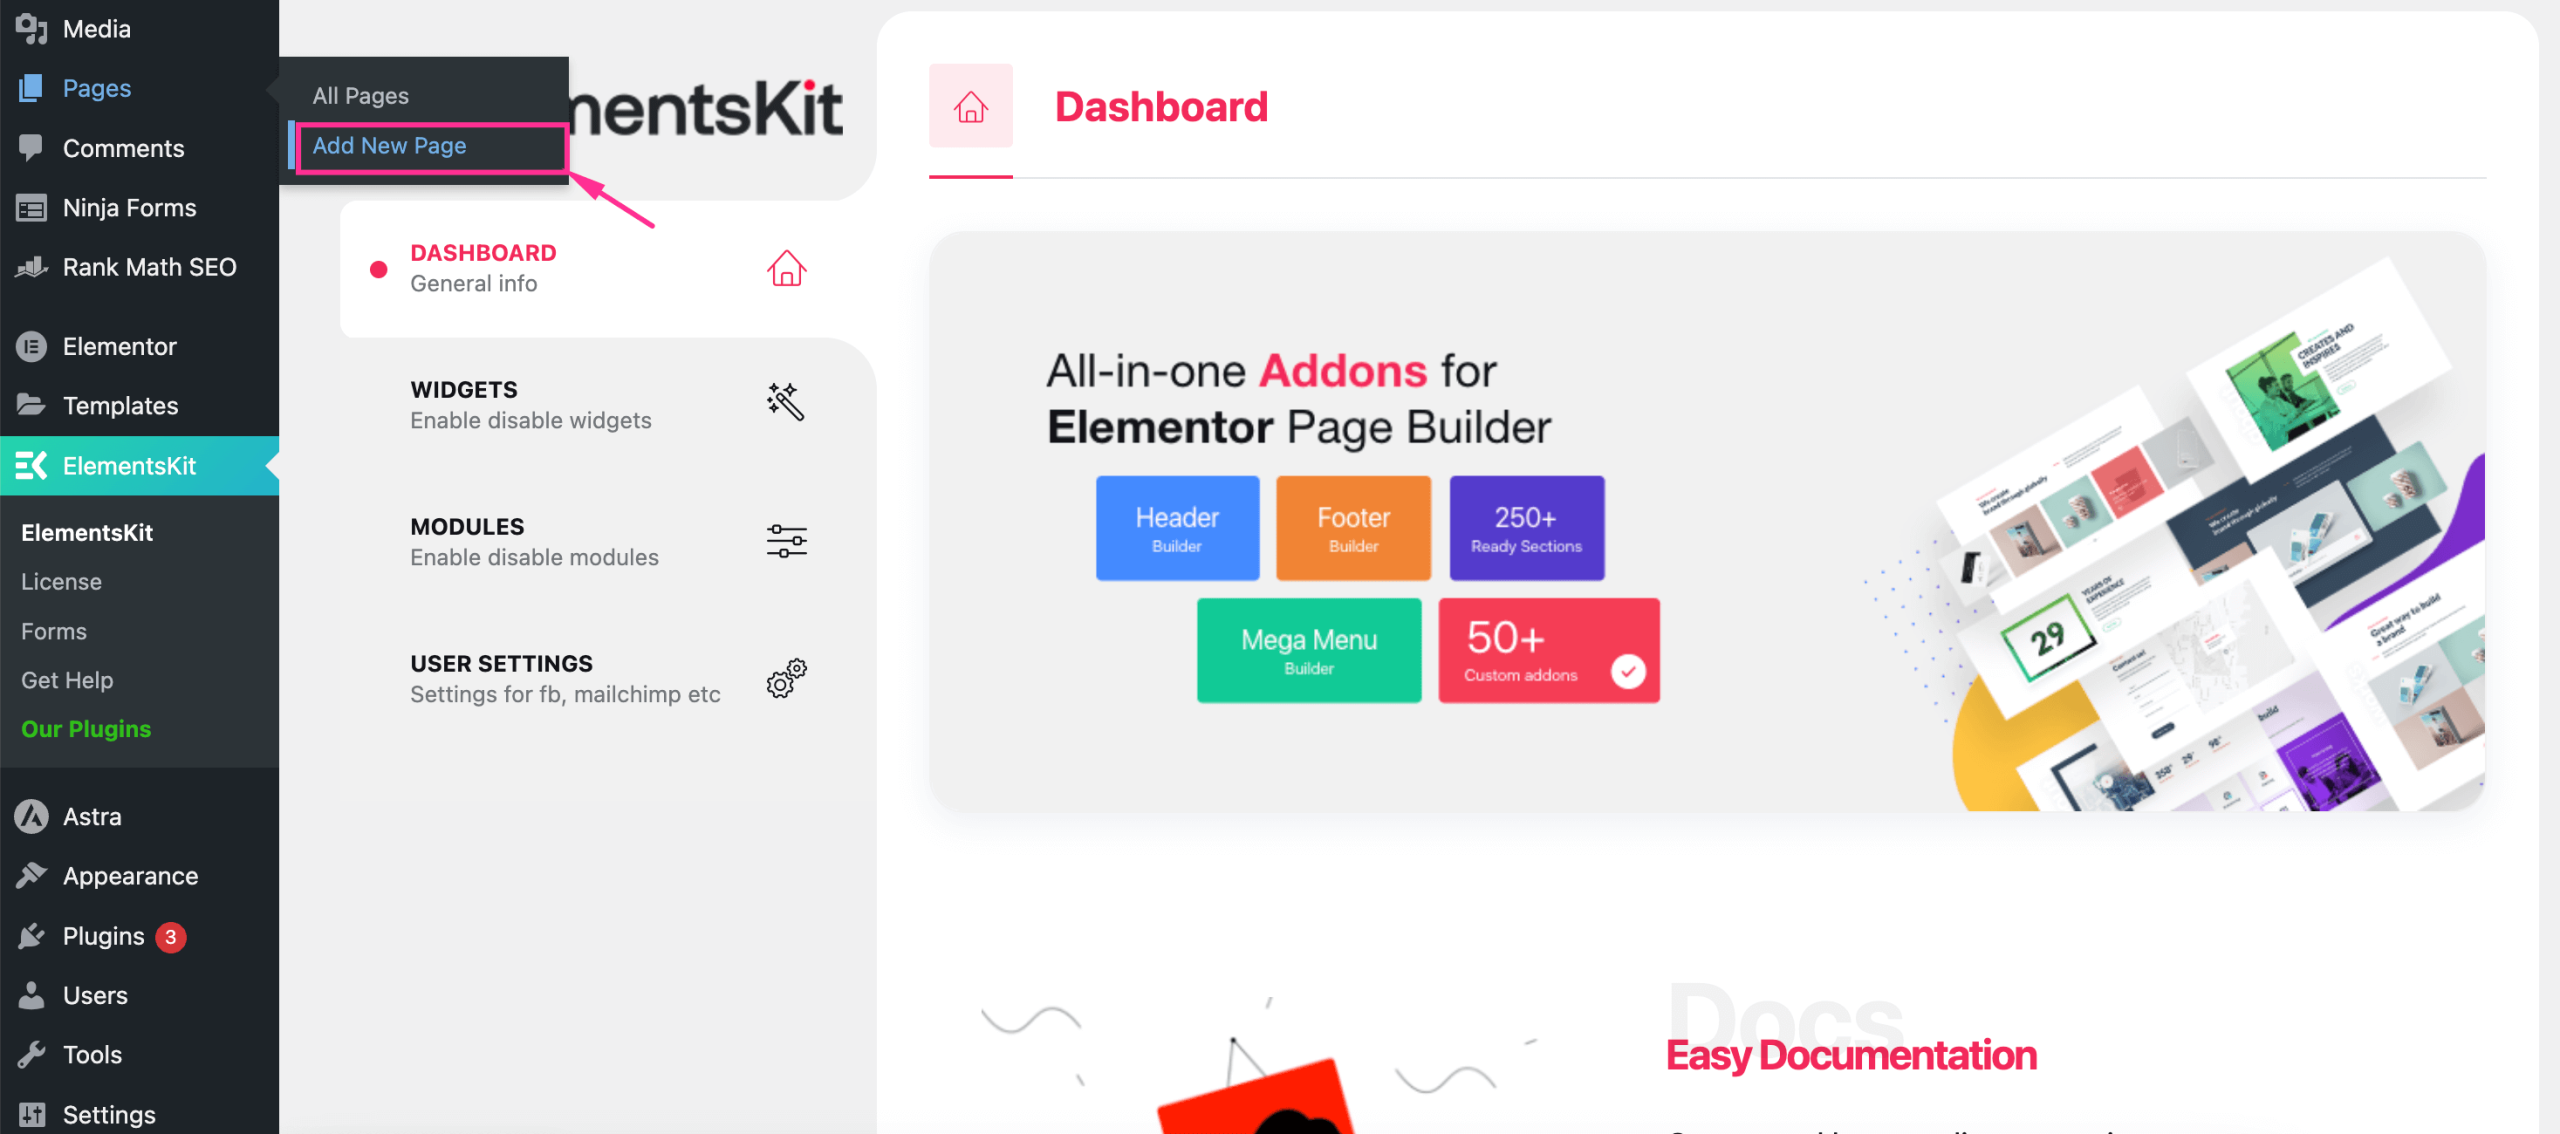
Step 2: Drag and drop the Video Gallery widget.
After enabling the Video Gallery widget, add a new page by navigating to Seiten >> Neue Seite hinzufügen.
This will take you to a new page from where you need to add a title Und Klicken Sie auf „Mit Elementor bearbeiten“. Taste.
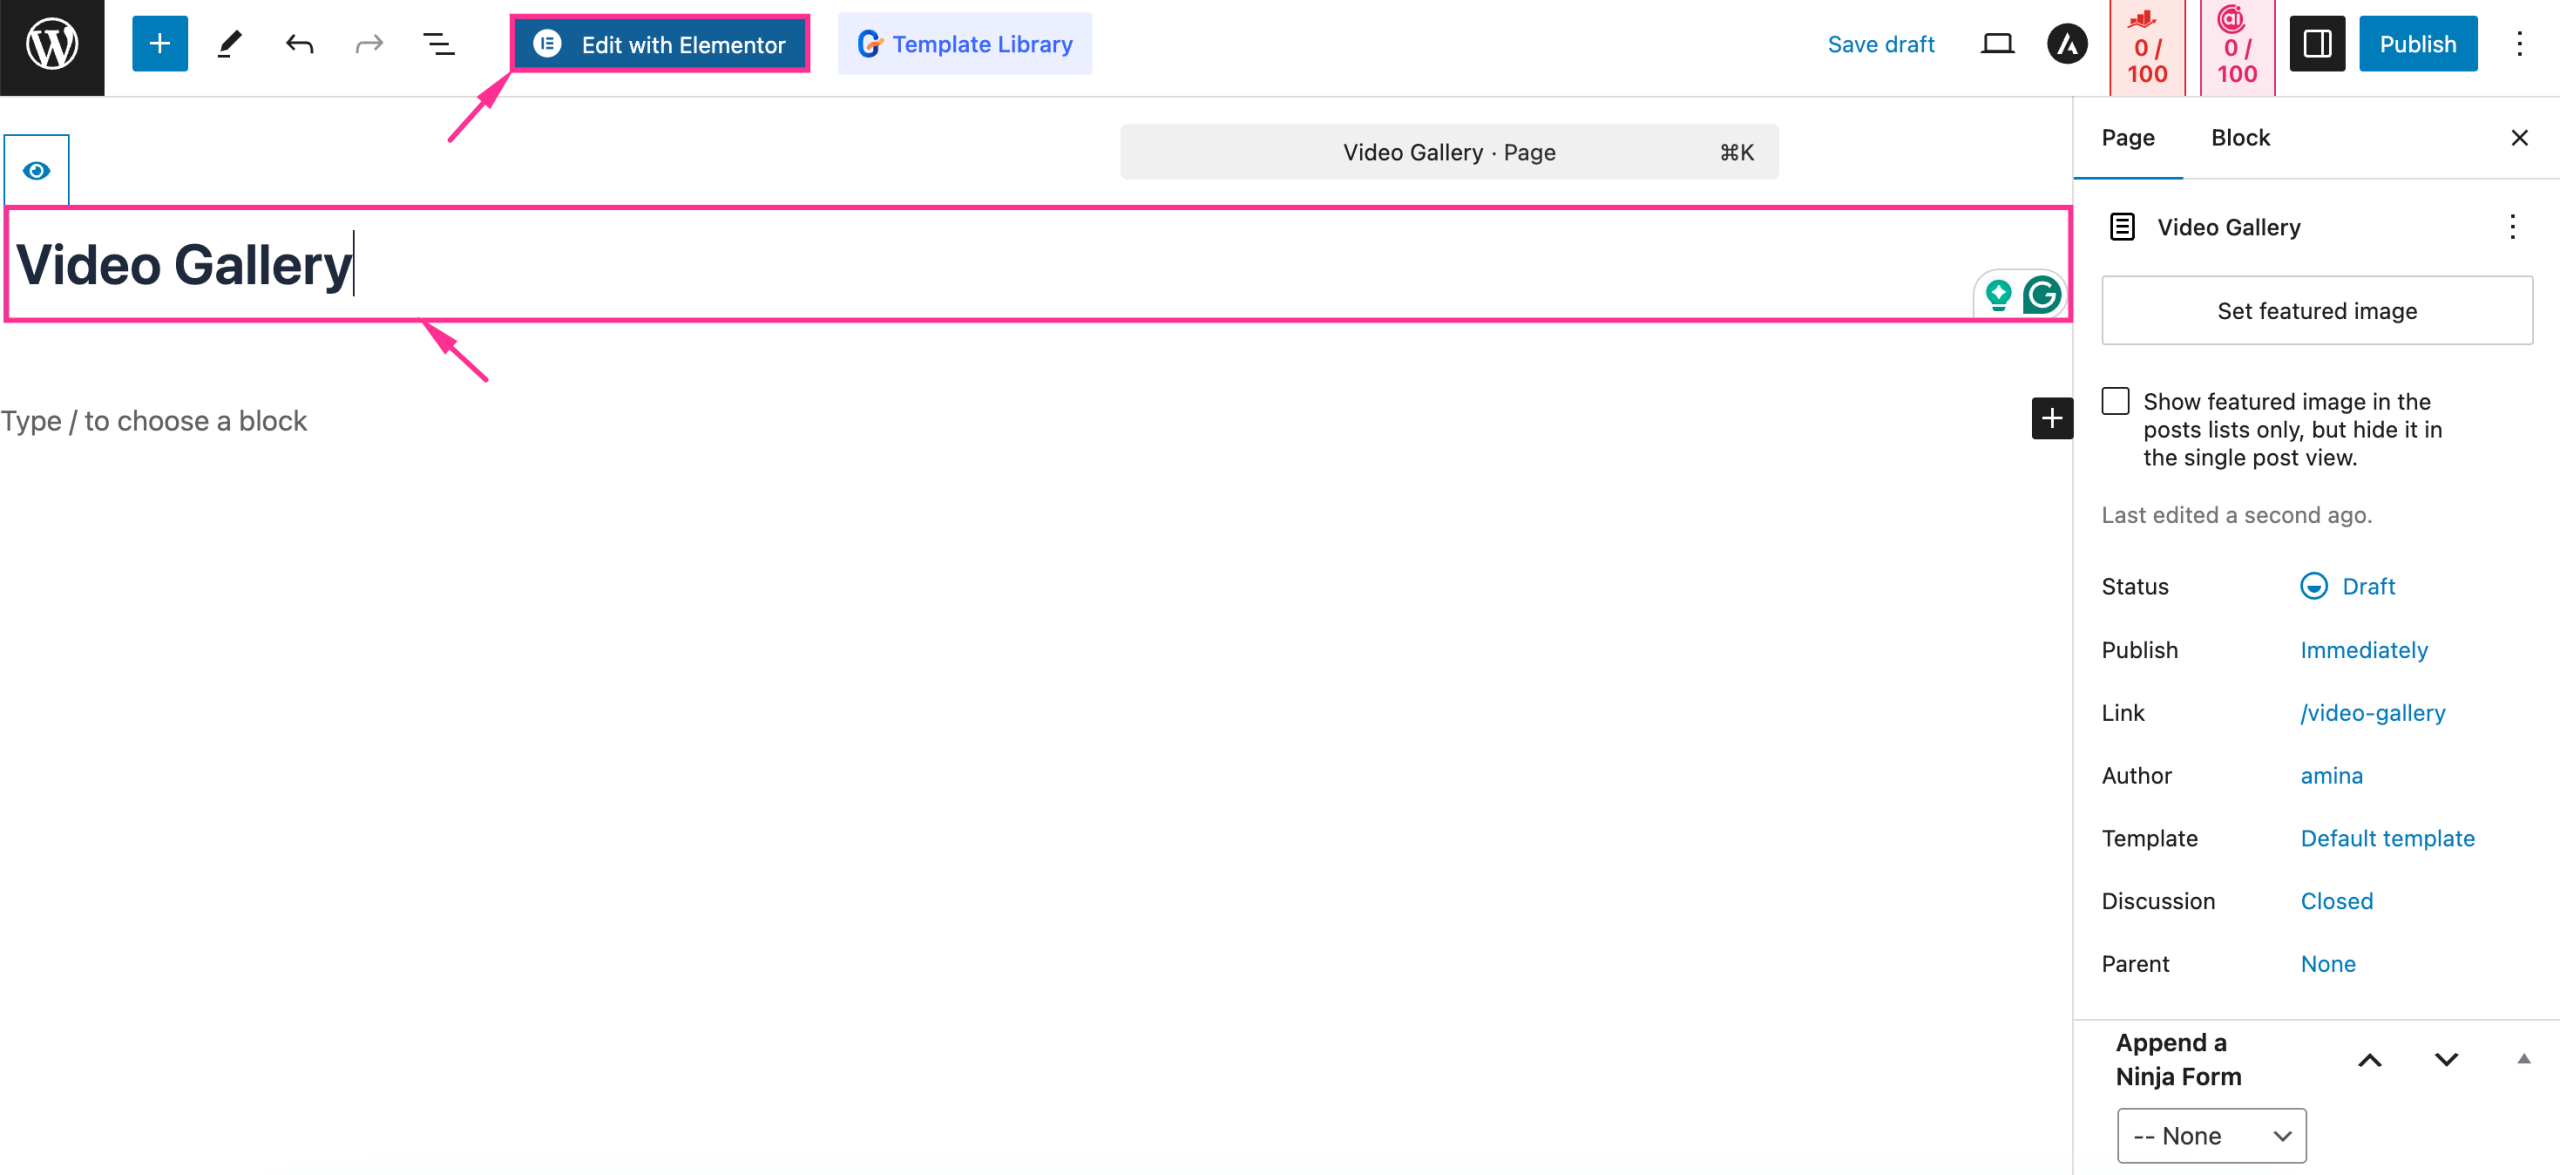
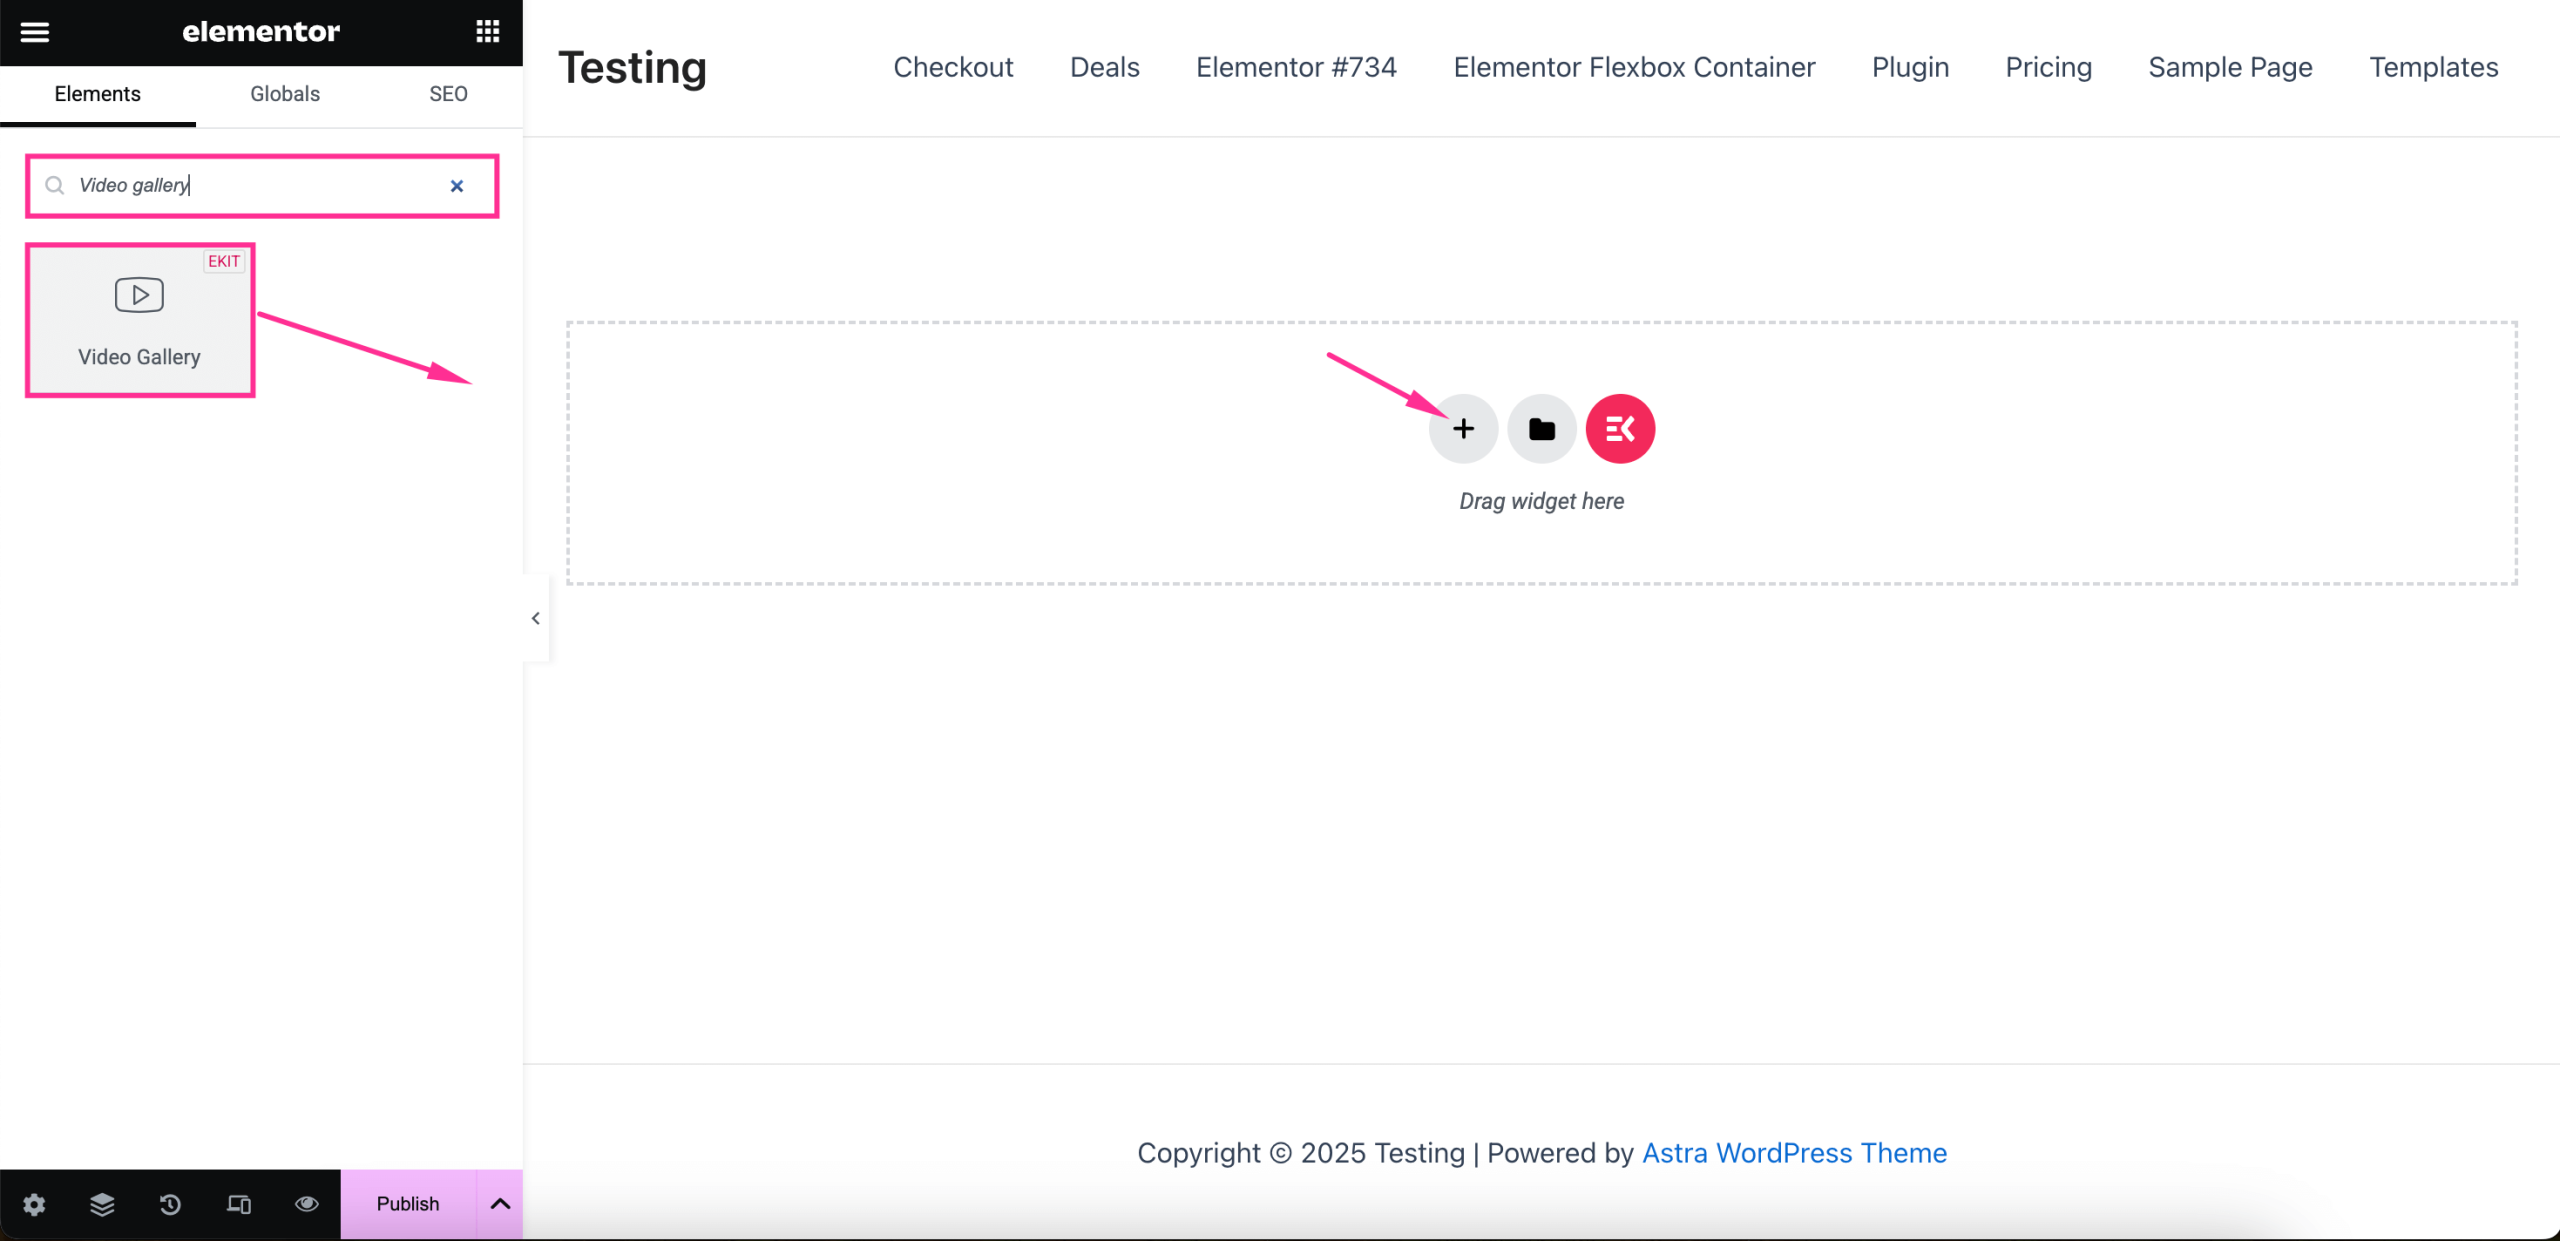
After pressing the “Edit with Elementor”, you will be taken to the Elementor editor. Now search for the “Video Gallery” in the search panel and drag-and-drop the video gallery to the “+” Symbol.
Step 3: Customize Elementor video gallery.
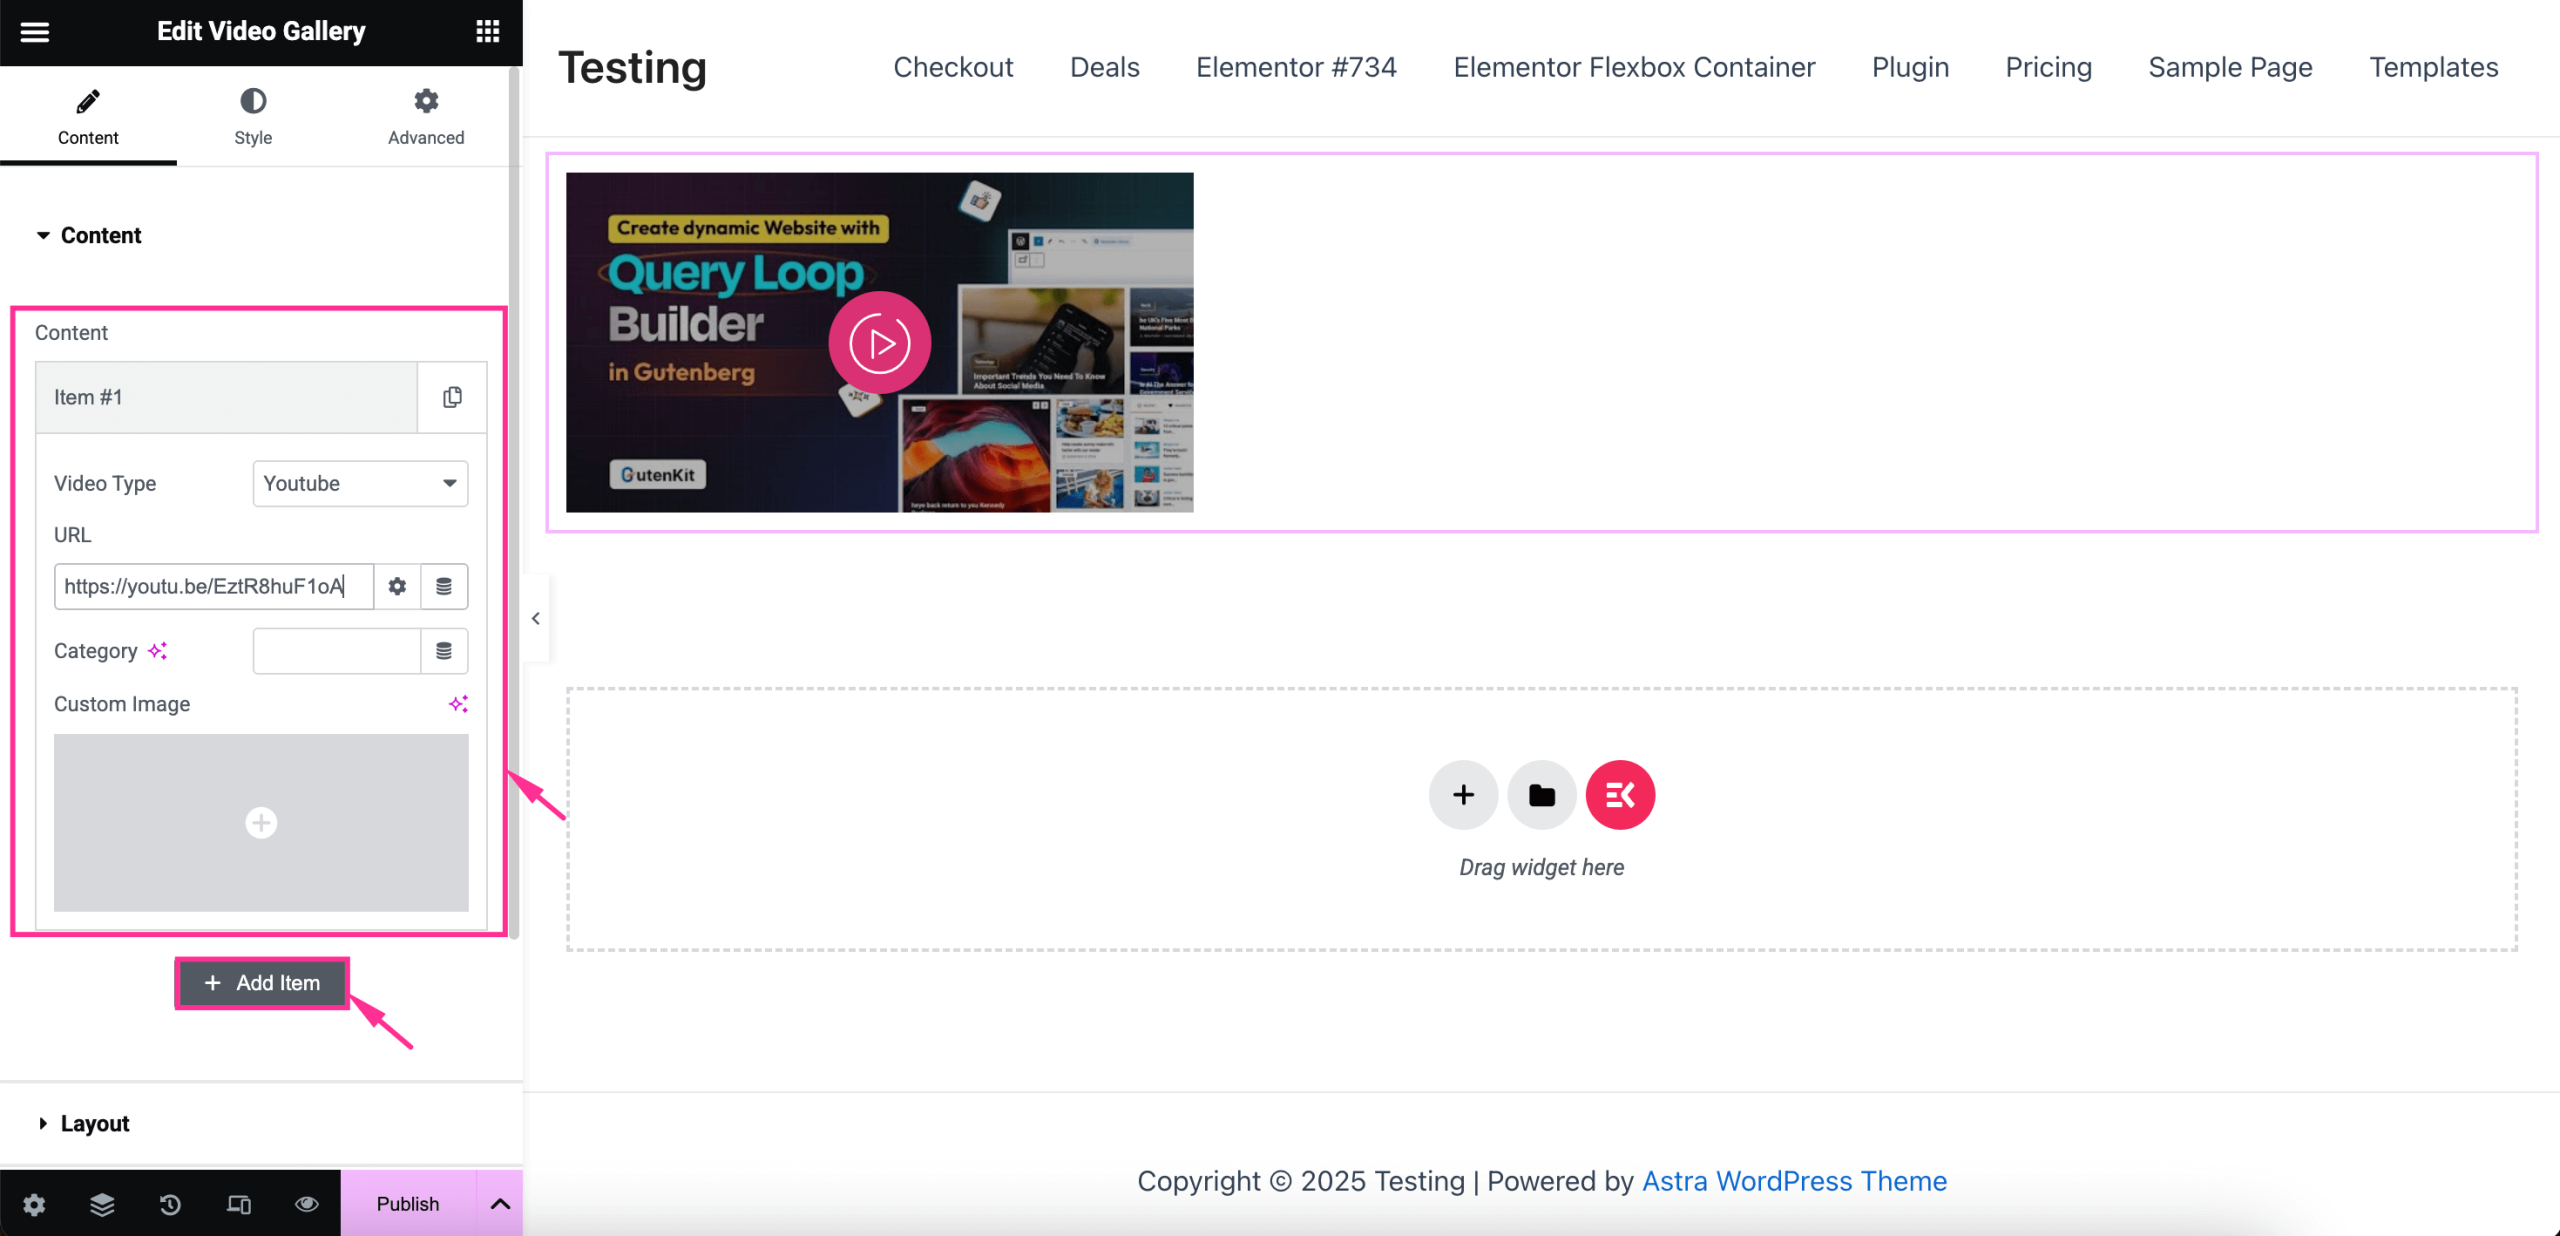
In the third step, you need to customize the content and style of the video gallery. First, navigate to the Content tab and expand the Item #1 tab by pressing it. Then adjust the following areas:
- Video Type: Select video type from the dropdown menu.
- URL: Paste the url of the video that you want to show.
- Category: Choose Category for the video.
- Custom Image: Add custom image or thumbnail for the video if you want.
Similarly, add more video content by Drücken Sie auf „Artikel hinzufügen“ Taste.
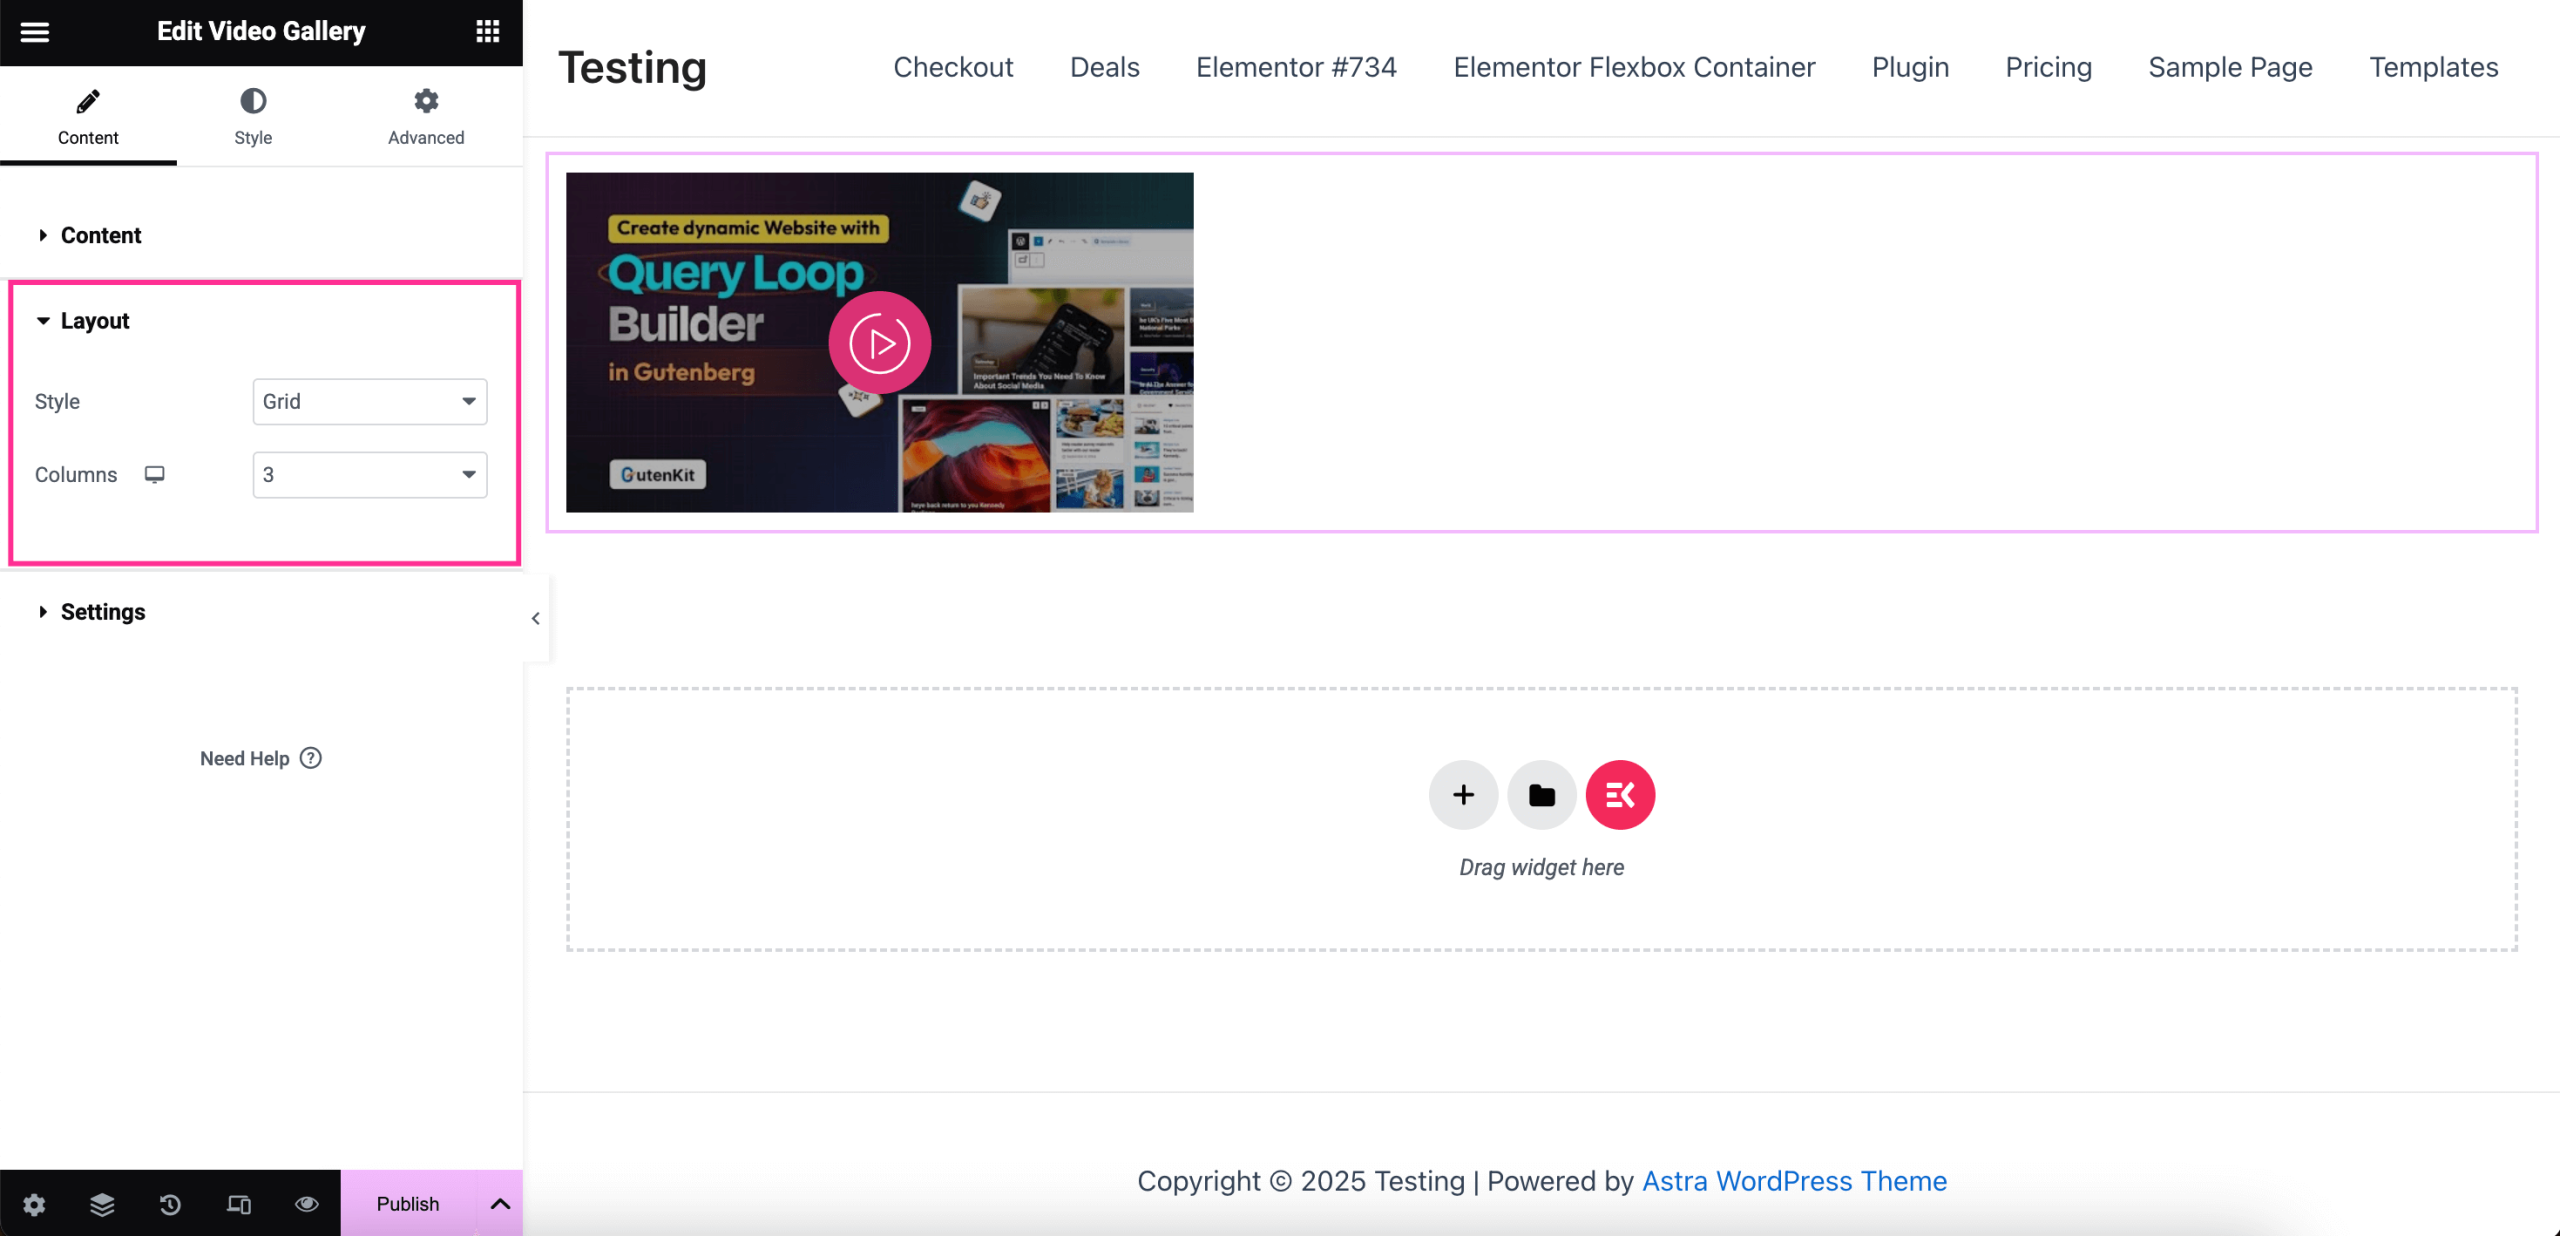
Dann, expand the Layout tab Und adjust the Style and Columns from the dropdown menu.
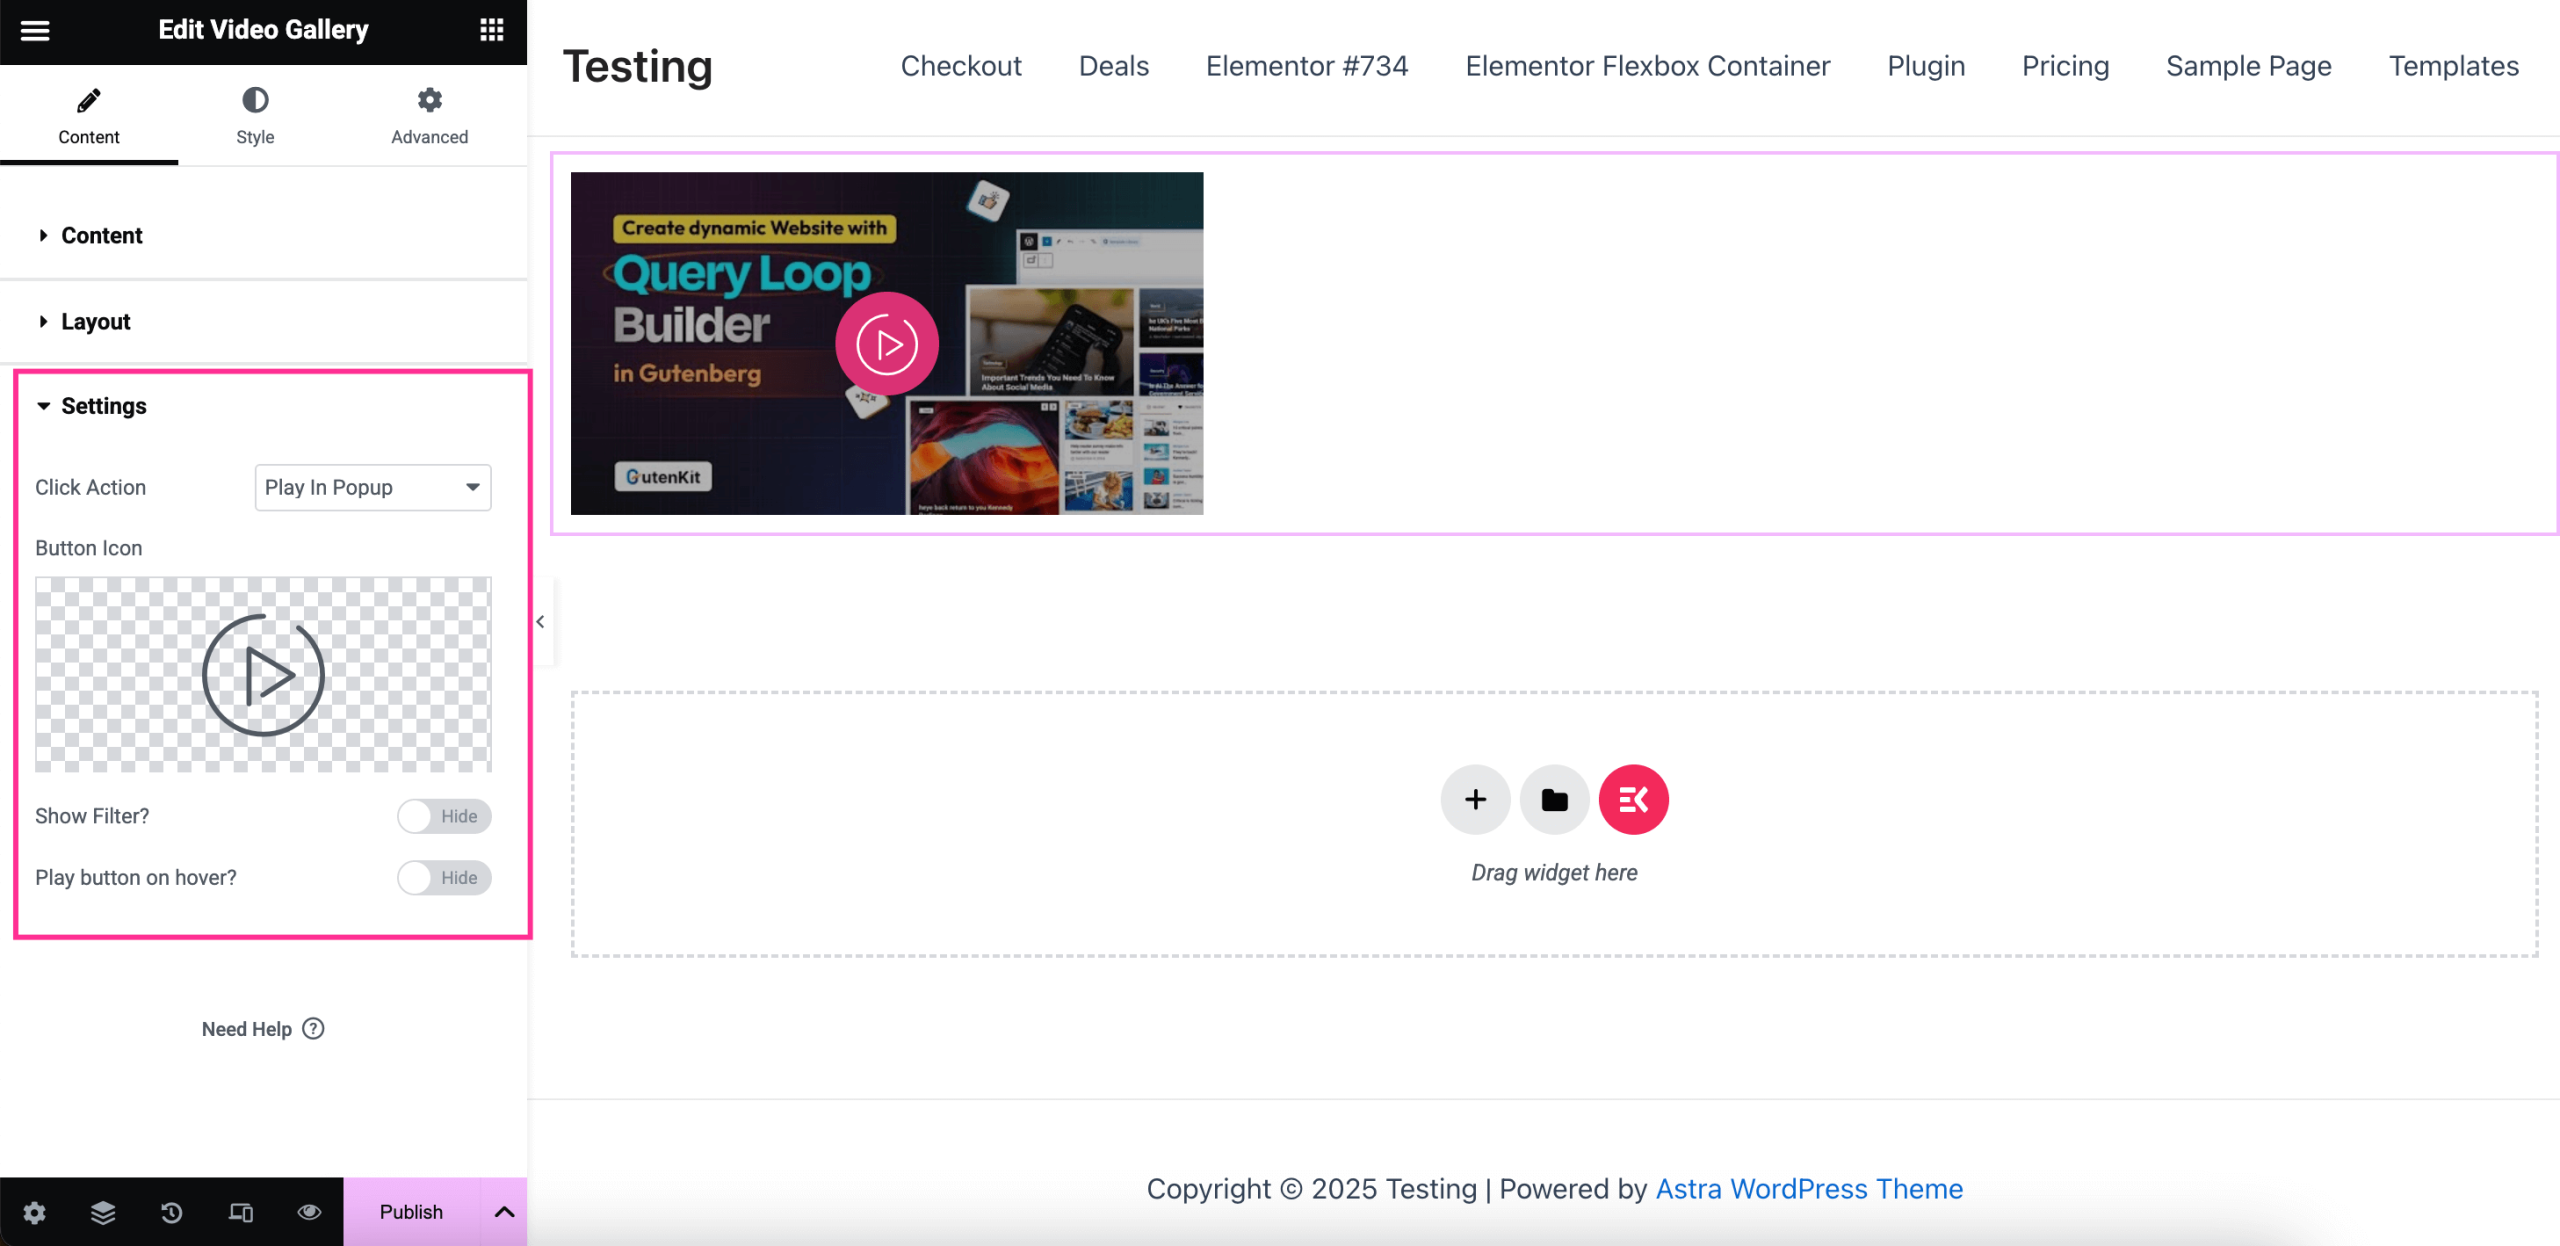
Next to adjusting the layout of the video gallery, expand the Settings and edit the following controls:
- Click Action: Select the Click Action from the dropdown menu.
- Schaltflächensymbol: Choose an icon for the video content.
- Show Filter: Enable the toggle button to activate the filter.
- Play button on hover?: Enable it to display a button on hover.
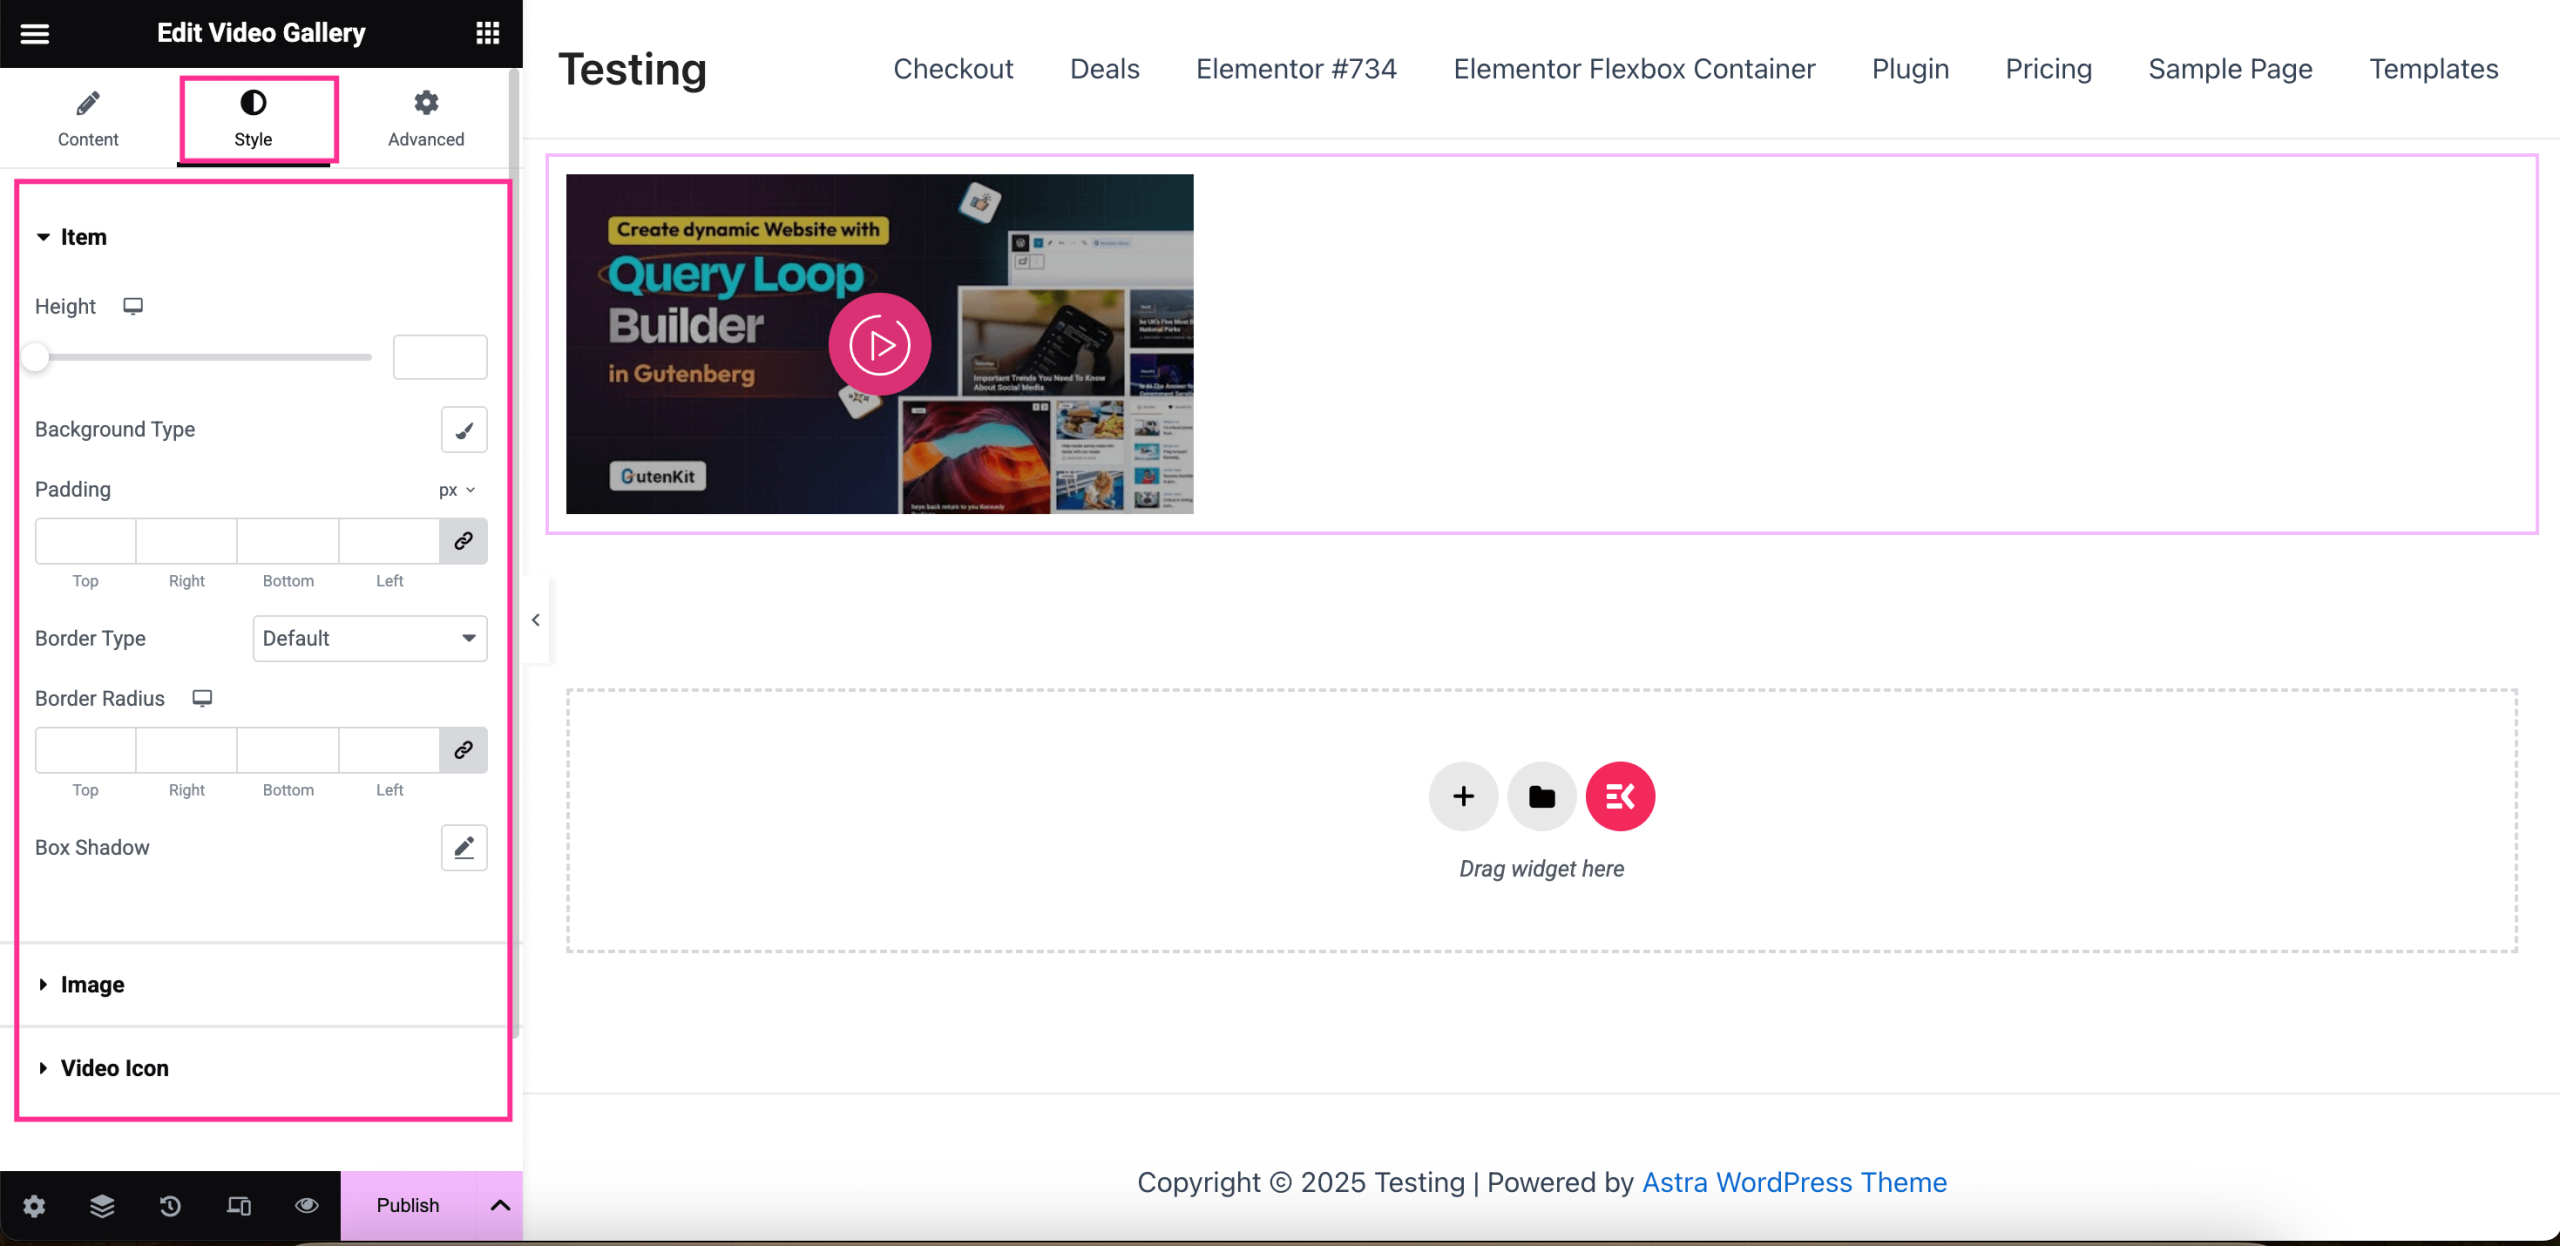
After editing the content customization, navigate to the “Style” tab und passen Sie die Höhe, Background Type, Polsterung, Randtyp, Grenzradius, Und Box Schatten of the Item. Similarly, adjust the style of the Image and Video Icon.
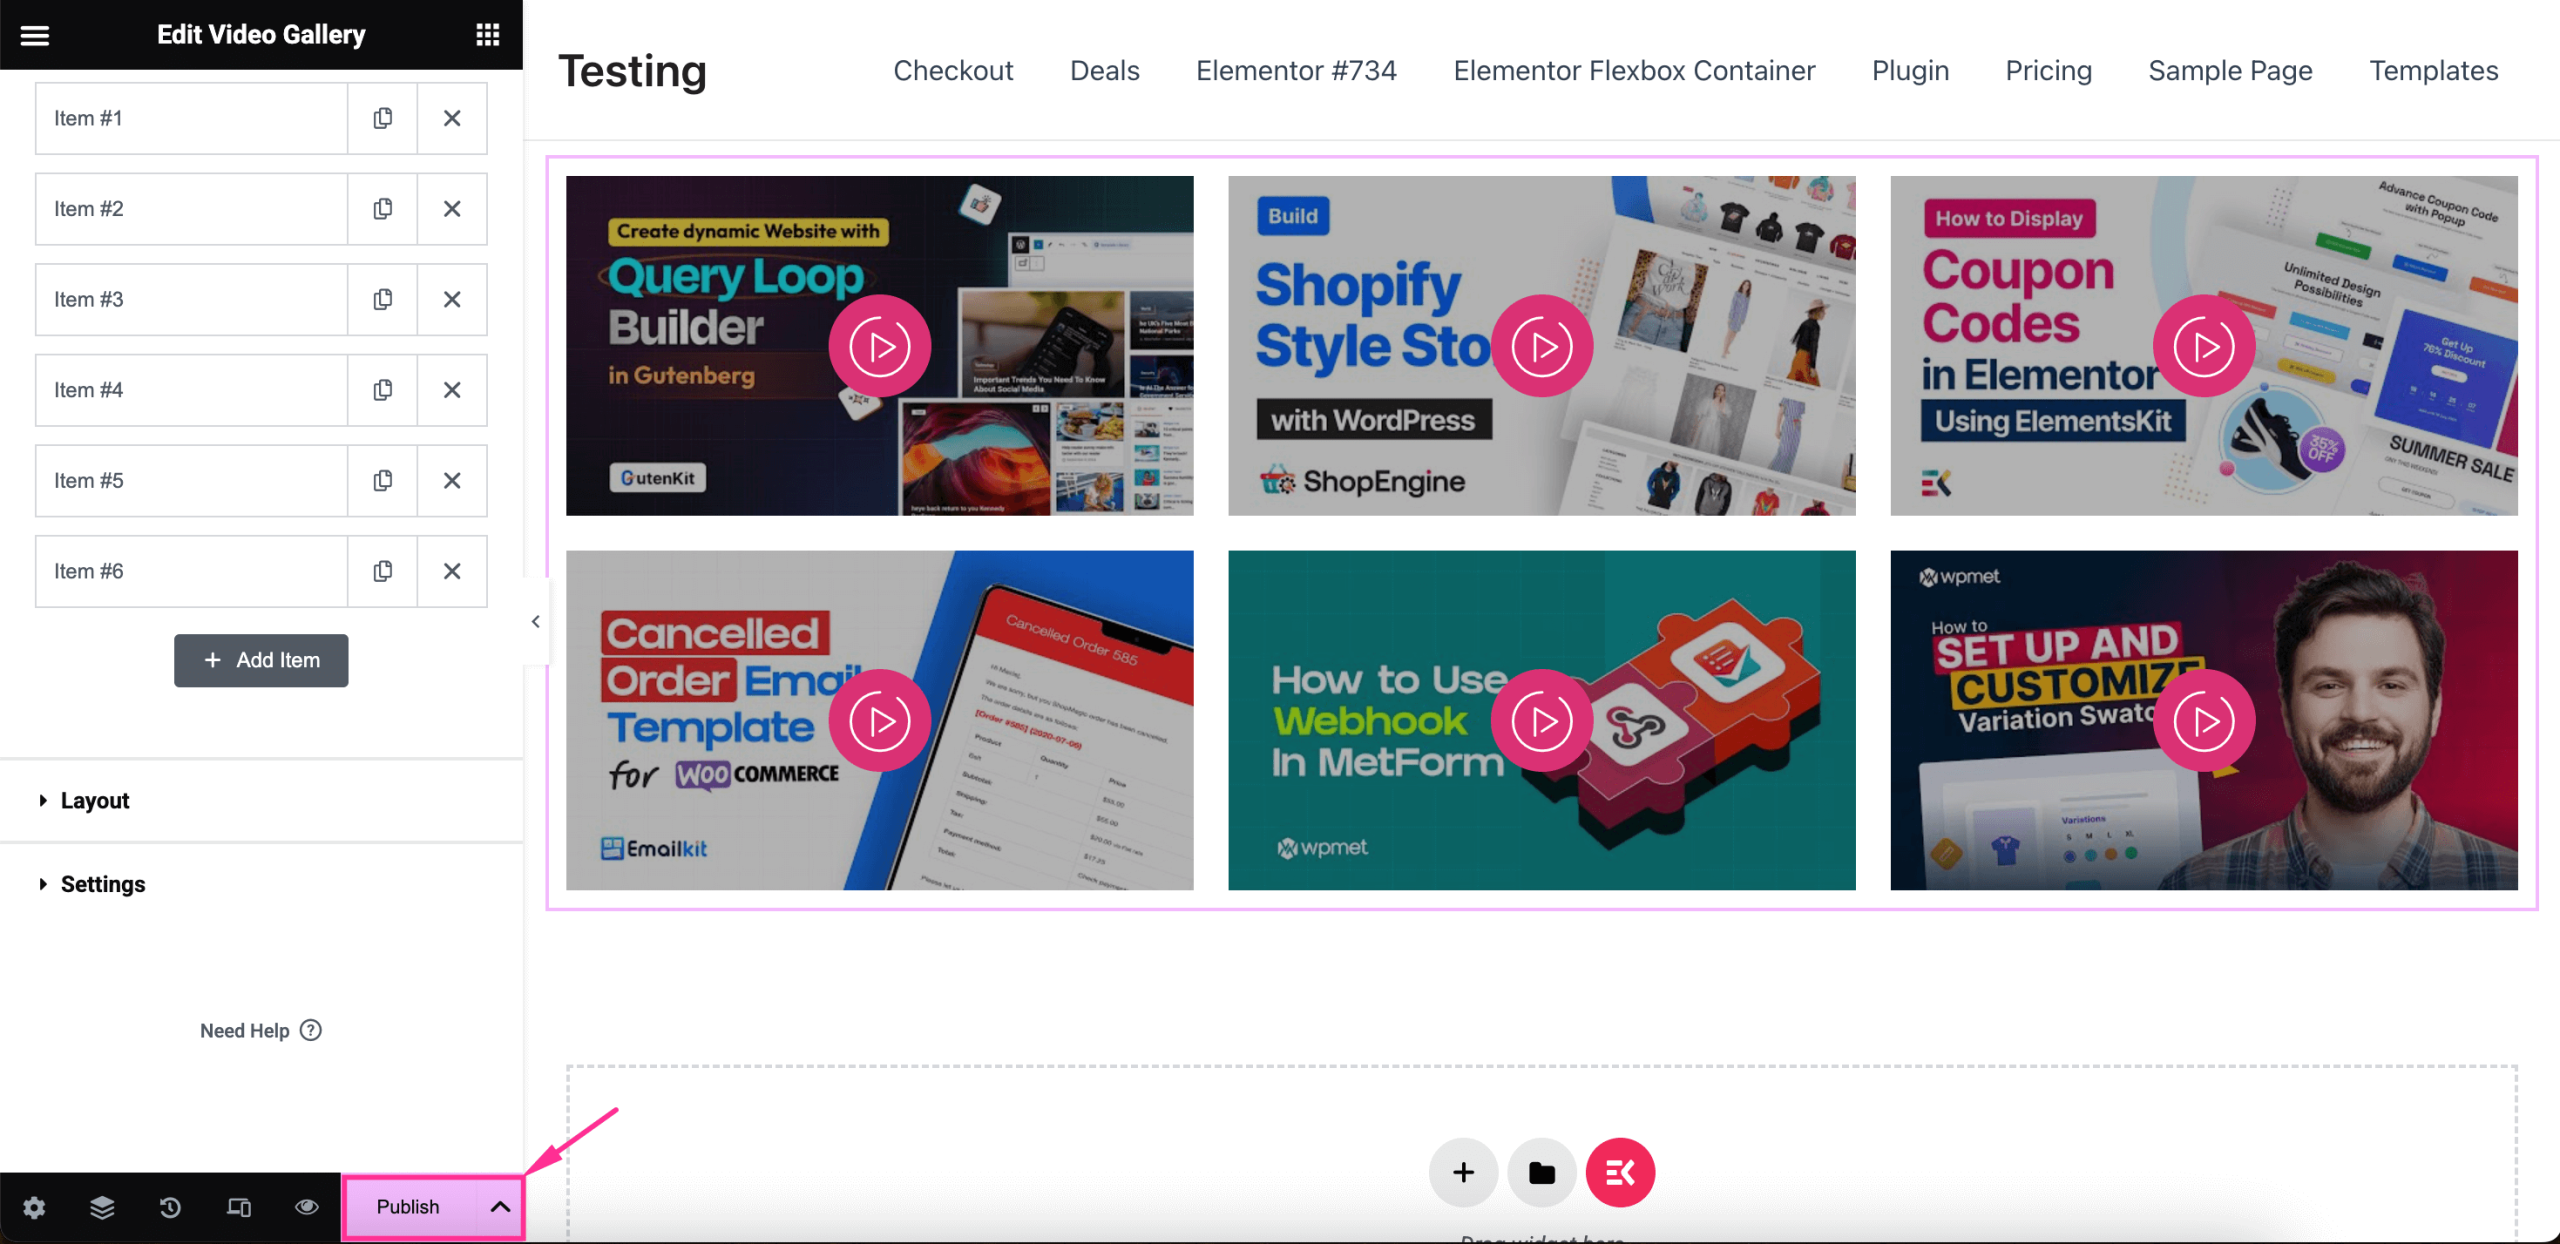
Step 4: Publish the video gallery in WordPress.
In the final step, after wrapping up all the customizations of your Video Gallery, Klicken Sie auf „Veröffentlichen“. Klicken Sie auf die Schaltfläche, um es zum Leben zu erwecken.
FAQs
Can you create video gallery for free?
Yes, it’s possible if you can find a free solution for integrating a video gallery. WordPress facilitates with numerous plugins that serves multi purposes. So, you can integrate a video gallery in WordPress if you can get a free plugin.
Which one is the best plugin to add video gallery?
ElementsKit is the best solution to integrate a video gallery since it requires zero coding expertise. Besides, it allows you to add a video gallery by dragging and dropping.
Can you host video directly on the WordPress site?
Yes, you can, but it’s not recommended due to storage issue. Hosting video from an external source like YouTube can provide better performance than direct hosting.
✅ Also, check how to create a liquid glass effect on WordPress.
Einpacken
A well‑structured video gallery helps visitors find the content they need quickly, keeps them on your site longer, and can even lift conversion rates. With ElementsKit’s drag‑and‑drop widget, you can finish the job in minutes by enabling the widget, placing it on a page, fine‑tuning the layout and styles, then publishing.
So, utilize this opportunity and make your site engaging by displaying an attractive video gallery with the best video gallery plugin for WordPress.

Schreibe einen Kommentar