


Your website’s header is one of the very first things people see. That’s why having a well-designed header isn’t just about looks. It makes your site easier to use and helps build trust with your visitors, too. It’s where people look for your logo, menu, contact info, and sometimes even a call to action. So, naturally, you want it to look good and work well.
Whether you’re using a latest block theme or a page builder like Elementor, updating your header is easier than you might think.
Here we’re going to walk you through two simple methods: one using the WordPress Site Editor with Gutenberg blocks, and the other with Elementor using the ElementsKit plugin.
How to change header in WordPress with Elementor
If you prefer more design flexibility in design Elementor is a fantastic option. It gives you full control over your website’s header without writing a single line of code.
With an Elementor add-on plugin that includes a powerful header builder, the entire process becomes super simple and visual.
For this guide, we will use the ElementsKit to create and change the header in WordPress.
Here is how to edit header in WordPress websites using Elementor and ElementsKit.
Step 1: Install a plugin (ElementsKit) with a header builder feature
First of all, install the pro version of the ElementsKit Elementor add-on. For that,
- Log ind på dit WordPress-dashboard.
- Go to Plugins → Add Plugin.
- Klik på Upload plugin button in the top left corner.
- Vælg "Vælg fil” and the elementskit.zip file from your computer storage.
- Klik derefter på Installer nu knap.
- Endelig, Aktiver plugin in the next step.

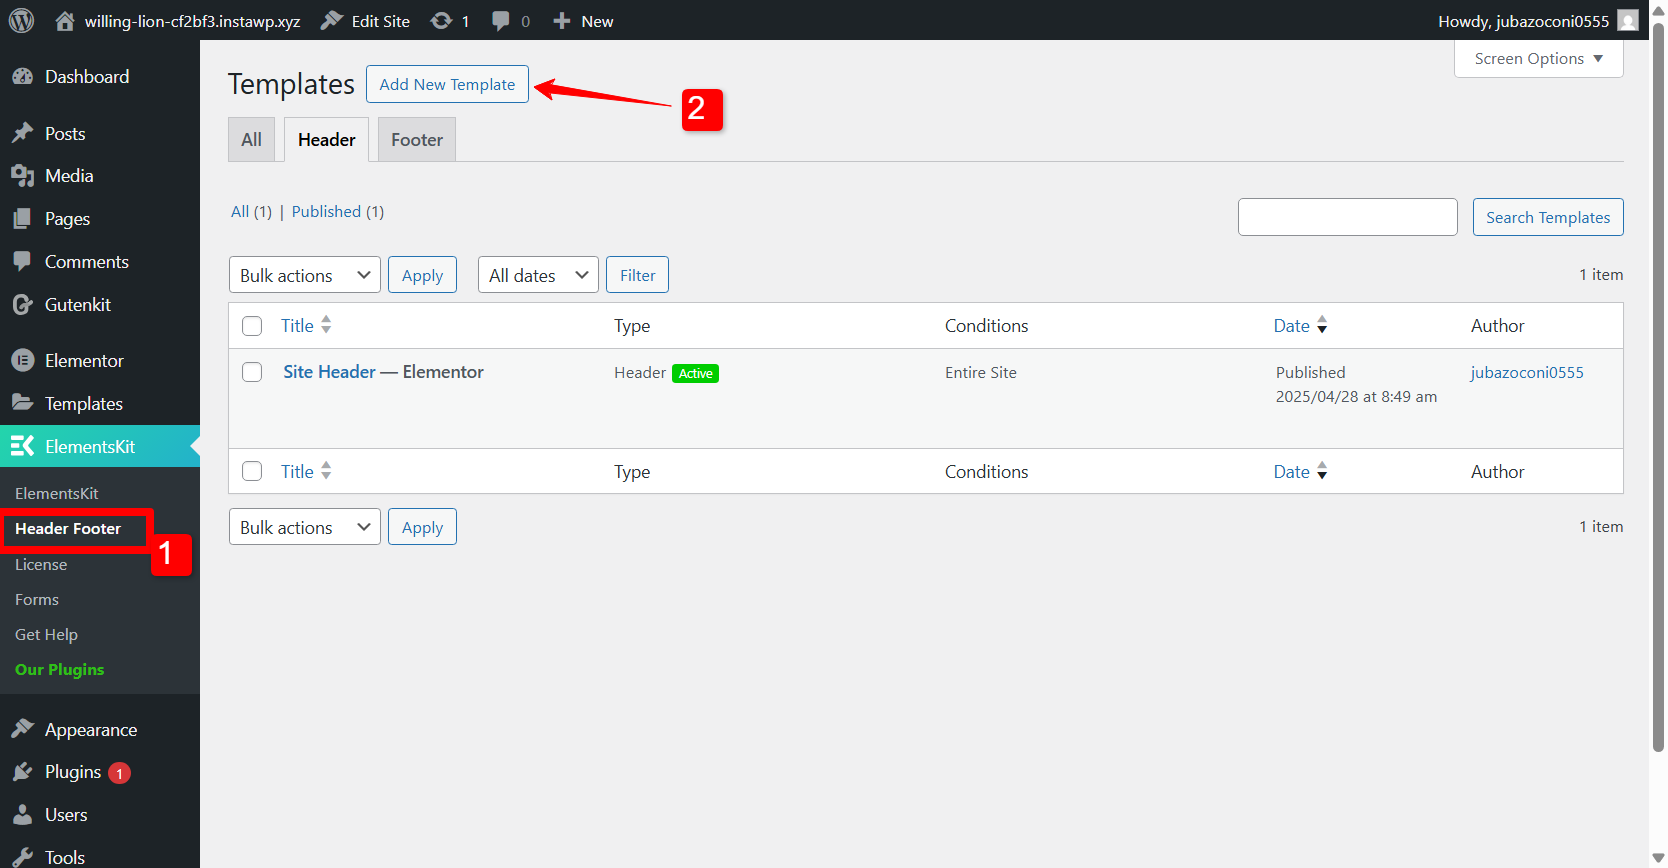
Step 2: Add header template
Now you can create a WordPress custom header design with Elementor. To create the header, first navigate to ElementsKit → Header Footer.
Once you’re there, click on the “Add New Template”. A pop-up for Template Settings will appear.
Step 3: Configure header template settings
In the Template Settings, you have the following options:
✔️ Title
✔️ Type
✔️ Header
✔️ Conditions
✔️ Activate / Deactivate
Give your new template a Titel, and for the Type, make sure you select Header.
Next, you’ll set the Betingelser for where you want the header to appear. You have a few options:
- Hele webstedet: To create a global header that appears across your whole website.
- Singular: If you want the header to show on just a single page.
- Arkiv: For creating headers for archive pages like blog categories.
After that, make sure to turn the toggle to ON to Aktiver the header. From here, click on the EDIT WITH ELEMENTOR button to start editing the WordPress header in Elementor.
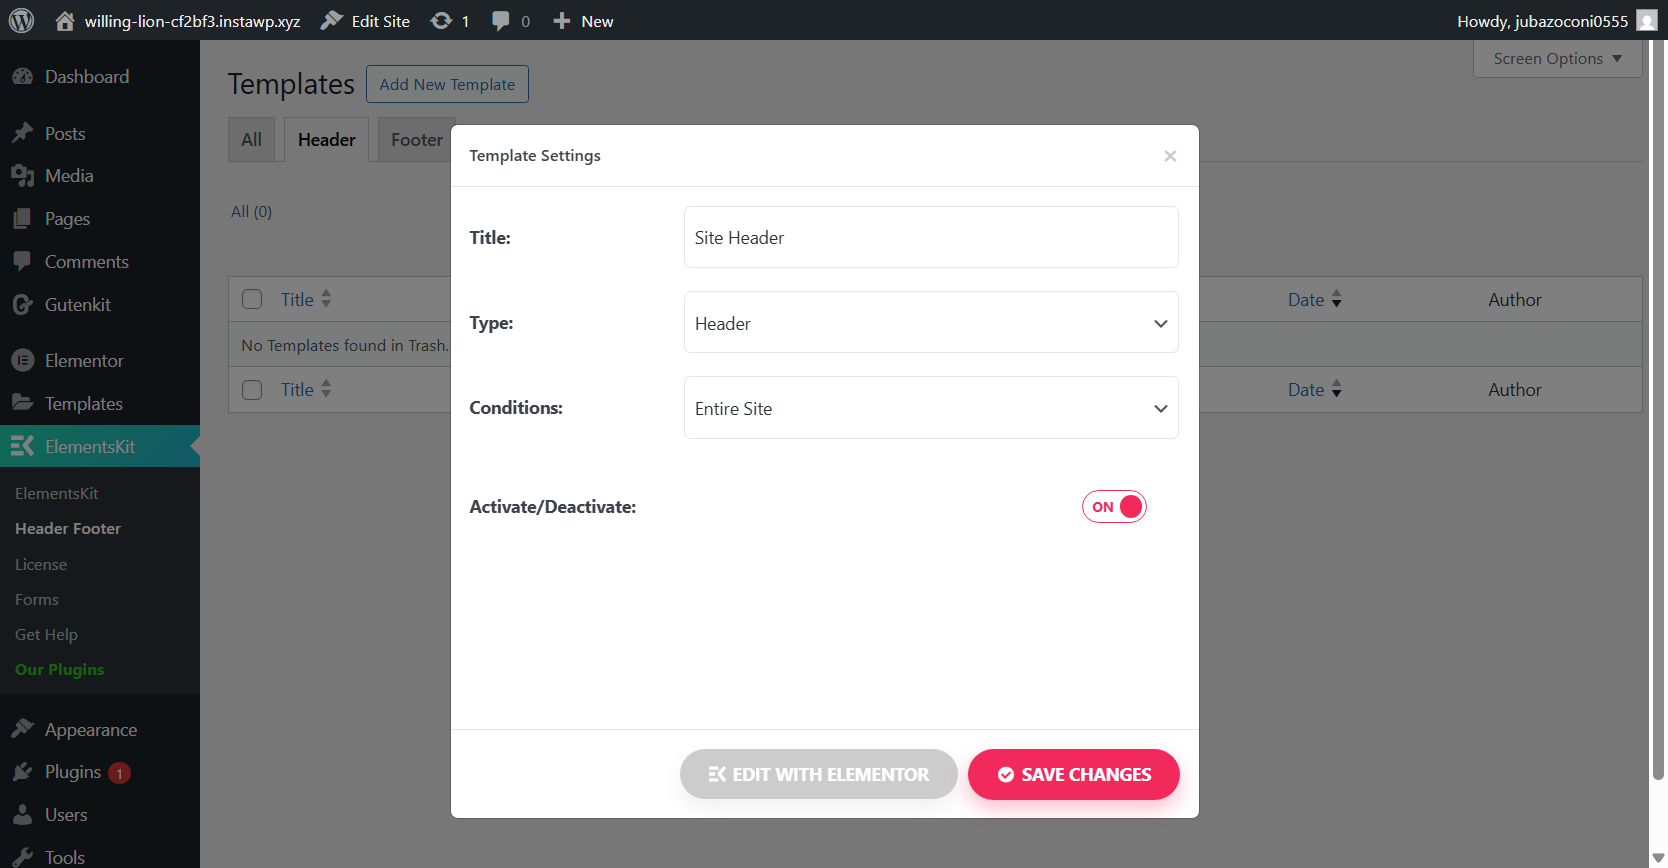
Otherwise, select the GEM ÆNDRINGER button to save the template, and edit the header later.
Now you can edit the WordPress header in Elementor to give it a professional look.
Step 4: Choose a pre-designed header layout
Once you click on the “Edit with Elementor” button, you will be redirected to the Elementor editor. In the editor, you can choose a pre-designed header from the ElementsKit built-in template library. To import a header template:
- Klik på ElementsKit-ikon in the editor area. It will open the ElementsKit template library for you.
- In the template library, switch to the ‘Sections’ tab.
- Under the ‘Sections’ tab, you will find the header section. You can search for “header” in the search box. Or, filter the templates by choosing “header” from the ‘Kategori’ dropdown.
- Choose a header template design from the library.
- Click on the “Insert” button of your chosen design.
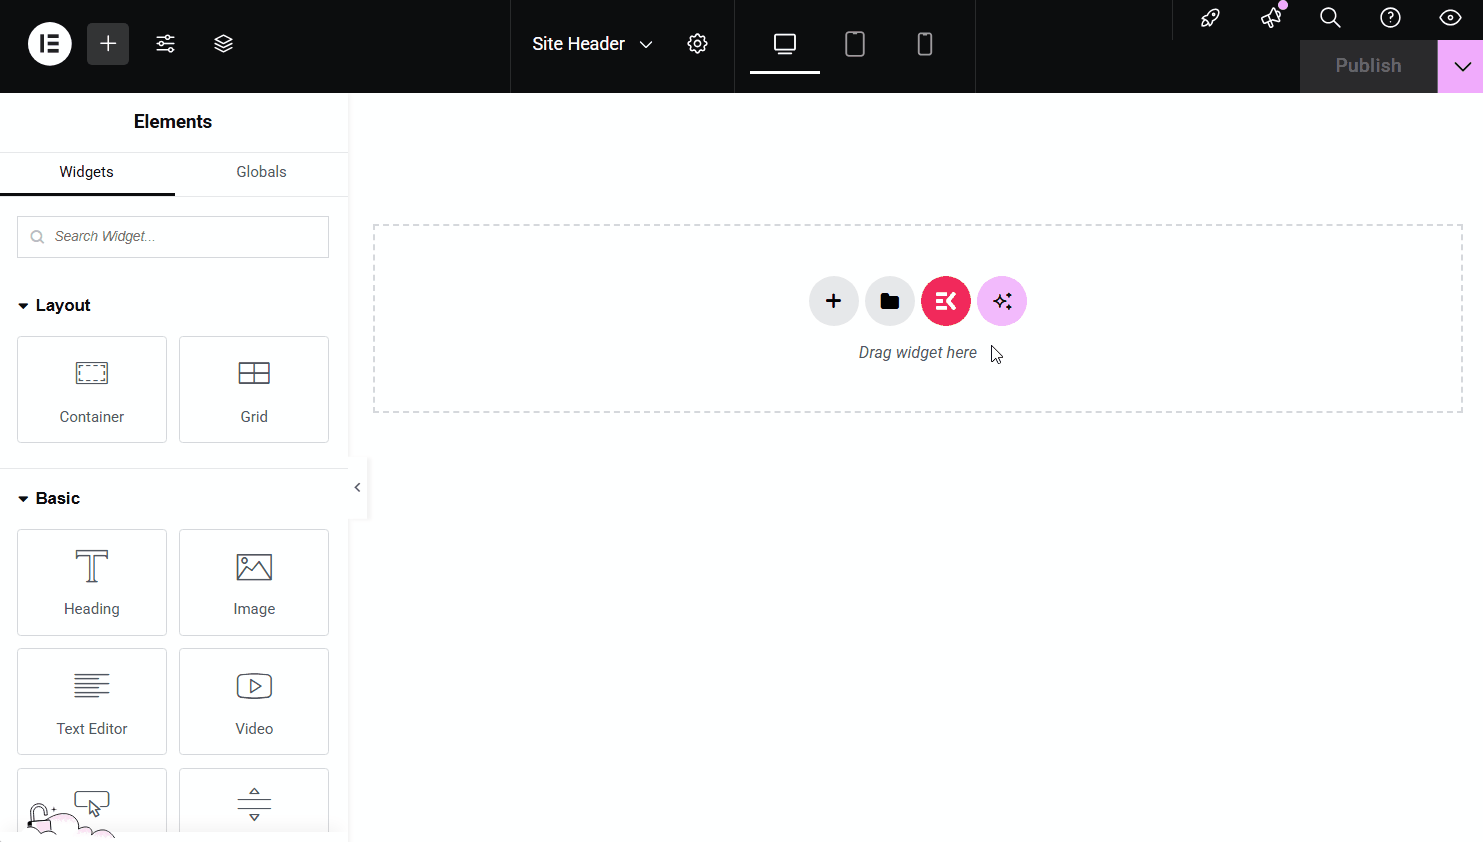
It will automatically put your custom header design on your webpage. After that, you can start editing the header layout in your WordPress website.
Step 5: Edit the header layout in WordPress
You can now start editing the WordPress header in the Elementor editor. First up, let’s customize the entire layout.
To edit the layout section, click on the customization button:
- Aktiver/deaktiver stræksektion: You can choose to stretch the section to full width if you want it to span across the entire screen.
- Juster indholdsbredde: Decide whether you want the content to be boxed or full width by selecting from the dropdown menu.
- Kolonnemellemrum: Adjust the space between columns, pick from Narrow, Extended, Wide, or Wider to get the spacing just right.
- Juster højden: Set the height by choosing either Fit to Screen or Min Height, depending on the look you’re going for.
- Vertical Align: Align your content vertically by choosing Top, Middle, Bottom, or go for options like Space Between, Space Around, or Space Evenly.
- Flyde over: Control how content behaves beyond the section by setting it to Default or Hidden.
- Vælg HTML-tag: Finally, you can select the appropriate HTML tag for your section from the dropdown.
Usually, a header contains multiple elements, like a site logo, a site menu, a CTA button, etc. So, editing a header in WordPress means customizing each element individually.
For example, let’s customize the header menu, as it is the most common element in a website header.
While creating a header menu, you can use the ElementsKit’s Mega Menu widget of Elementor. This gives you the easiest way to create and customize an advanced multi-dimensional menu section with the most amazing and advanced features.
Let’s see the functionalities:
- First, pick your previously created menu from the dropdown list.
- Next, decide where you want your menu to appear — left, center, right, or stretched across with a justified layout.
- You can also upload a logo for the mobile menu and customize the hamburger icon to match your design.
- Want to control how users open submenus? You can easily enable or disable the submenu click area, whether it’s on the icon or the text.
- There’s also an option to turn on or off one-page navigation, depending on your site’s setup.
- Finally, choose the responsive breakpoint to fine-tune your layout for tablets or mobile devices.
Why use ElementsKit to create and edit WordPress header in Elementor?
ElementsKit comes with a Header Footer Builder for Elementor, where you can create and customize the header and footer til dit WordPress-websted.
Using the ElementsKit gives you an extra advantage while editing a header in WordPress.
This popular Elementor add-on comes with 90+ widget elements that give you greater flexibility to edit and customize your site header.
Besides widgets like Mega Menu, Nav Menu, Icon Box, and Button, you can easily get the essential elements required to design and edit headers in WordPress.
Meanwhile, using the skabelonbibliotek, you can quickly design professional-looking WordPress headers quickly and more efficiently.
Overall, ElementsKit is a complete addition to your website not only for creating and editing a header, but beyond for your entire website building journey.

How to edit header in WordPress on Gutenberg block editor
In Gutenberg, you can customize a global header for your entire site. The Full Site Editor (FSE) brings the Gutenberg header and footer builder feature to WordPress.
First things first, you need to have a WordPress block theme installed to access full site editing features and start customizing your header.
Step 1: Access the WordPress header in the site editor
Once you’re using a block theme in WordPress (like Twenty Twenty-Four or Hello Blocks), you can easily change your header using the Site Editor. Here’s how:
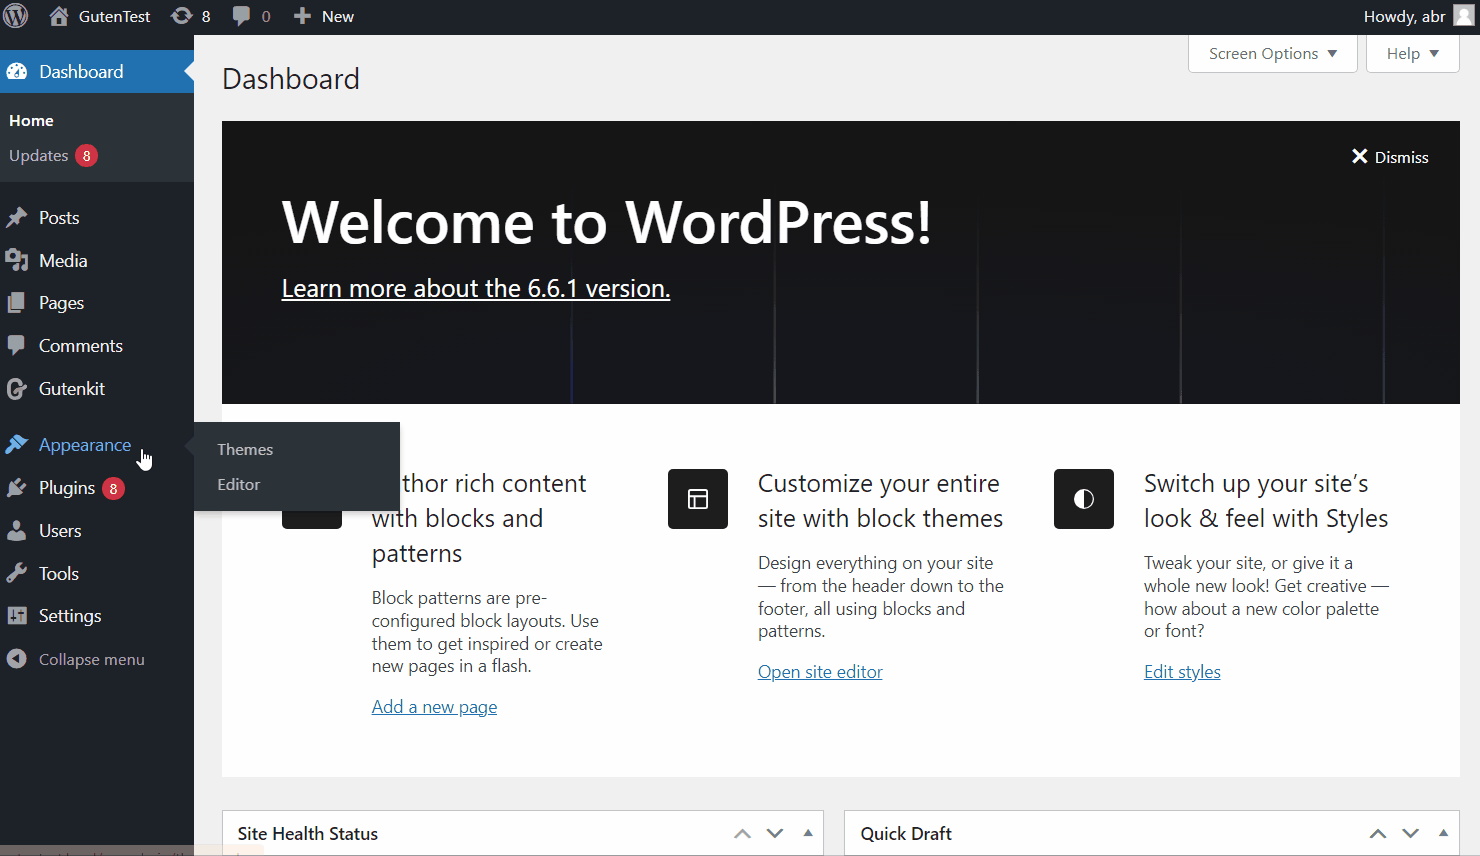
- In your WordPress dashboard, go to Udseende → Redaktør.
- When the editor loads, click anywhere inside it. This will slide out the sidebar and expand the editing area.
- Then, open the List View (click the hamburger icon) in the Top Toolbar.
- From there, find and select the Header section.
Now you can edit and customize the header of your WordPress site.
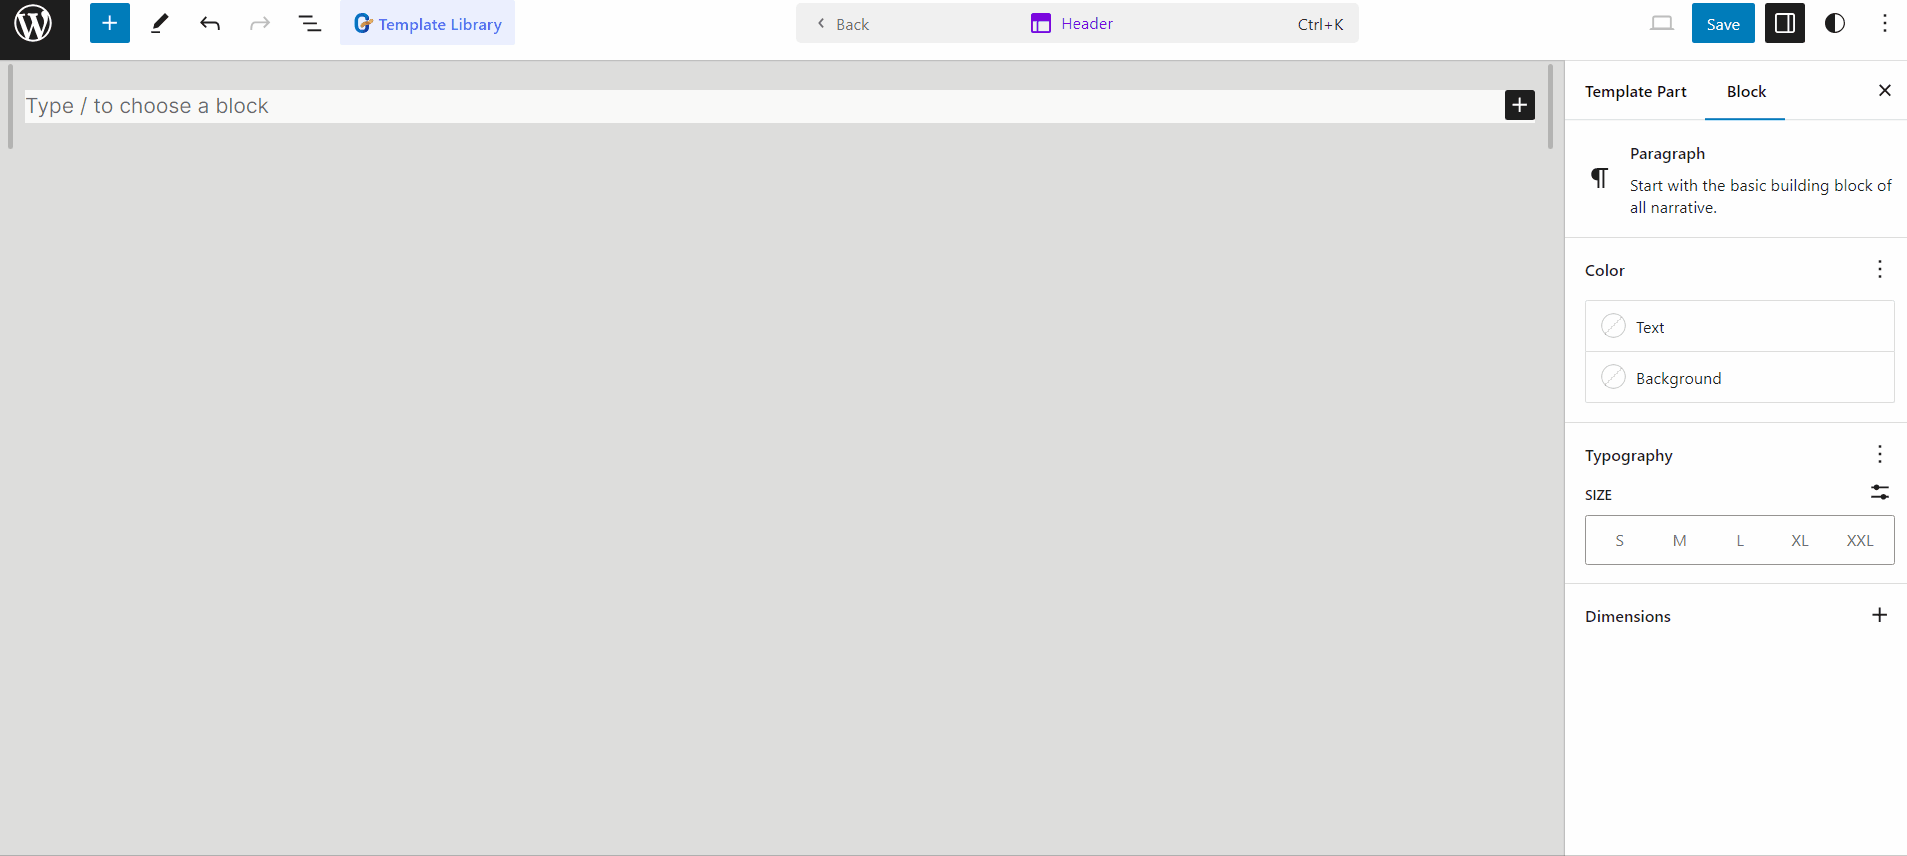
Step 2: Edit the header in WordPress site editor
After selecting the header in the List View, you can fully customize it using Gutenberg blocks. Here’s what to do:
- Click on Header in the editor.
- Add the blocks you want, like logos, navigation menus, buttons, or even search bars, to design your custom header.
- Once you’re happy with the layout, make sure to save your changes.
To design a structured layout, you can use the Containerblok in the header. Then, organize the blocks in the container.
Alternatively, you can also use the pre-designed patterns from GutenKit to simplify the process. To use the pre-designed patterns:
- Vælg Header in the editor.
- Åbn GutenKit skabelonbibliotek.
- Gå til Mønstre tab and scroll down to find the Header designs.
- Pick a pattern you like and import it straight into your site.
The header you have built here is a global header and will be available on your entire website unless you disable it for specific pages.
Why having a customized header is essential for your WordPress site
Here’s why customizing your header is more important than you might think:
👉 Showcase Your Brand: Add your logo, colors, and tagline to create a strong first impression.
👉 Improve Navigation: Help visitors find what they need quickly with a clear, user-friendly menu.
👉 Build Trust: A professional-looking header makes your site look more credible and reliable.
👉 Mobile Optimization: Customize your header for seamless navigation on phones and tablets.
👉 Boost Conversions: Add CTAs, promo highlights, or contact links to drive user actions.
➡️ Read this guide how to create search bar on Gutenberg.
Afslutter
And that’s a wrap! Now you know the simple ways to edit header in WordPress with two of the most popular editors, Elementor and Gutenberg.
If you are using Elementor, ElementsKit gives you the simplest way to build and edit a header with a dedicated Header Footer builder.
Meanwhile, for the block editor, GutenKit gives you the creative freedom to build and customize a clean, fast, and functional header right inside WordPress.
Choose the method that fits your site’s needs best and start building a header that not only looks great but also boosts user experience and engagement.

Skriv et svar