


When it comes to organizing and presenting your blog posts effectively, tabbed content can make a huge difference. It allows visitors to navigate through categories or topics without endless scrolling, improving both user experience and engagement.
In this guide, we’ll show you how to display posts in tabs using Elementor in WordPress, specifically with the ElementsKit plugin, one of the most powerful Elementor addons available today.
Quick Overview
Displaying WordPress posts in tabs helps improve content organization, user experience, and engagement by allowing visitors to switch between categories or featured content without scrolling. Using Elementor with the ElementsKit Post Tab widget, you can create responsive, professional post tabs with no coding required.
To display posts in tab with Elementor in WordPress, you need ElementsKit and Elementor itself. The steps include:
✅ Enabling post tab widget
Look for the tab widget and enable it. Make sure that you save the changes to use the widget.
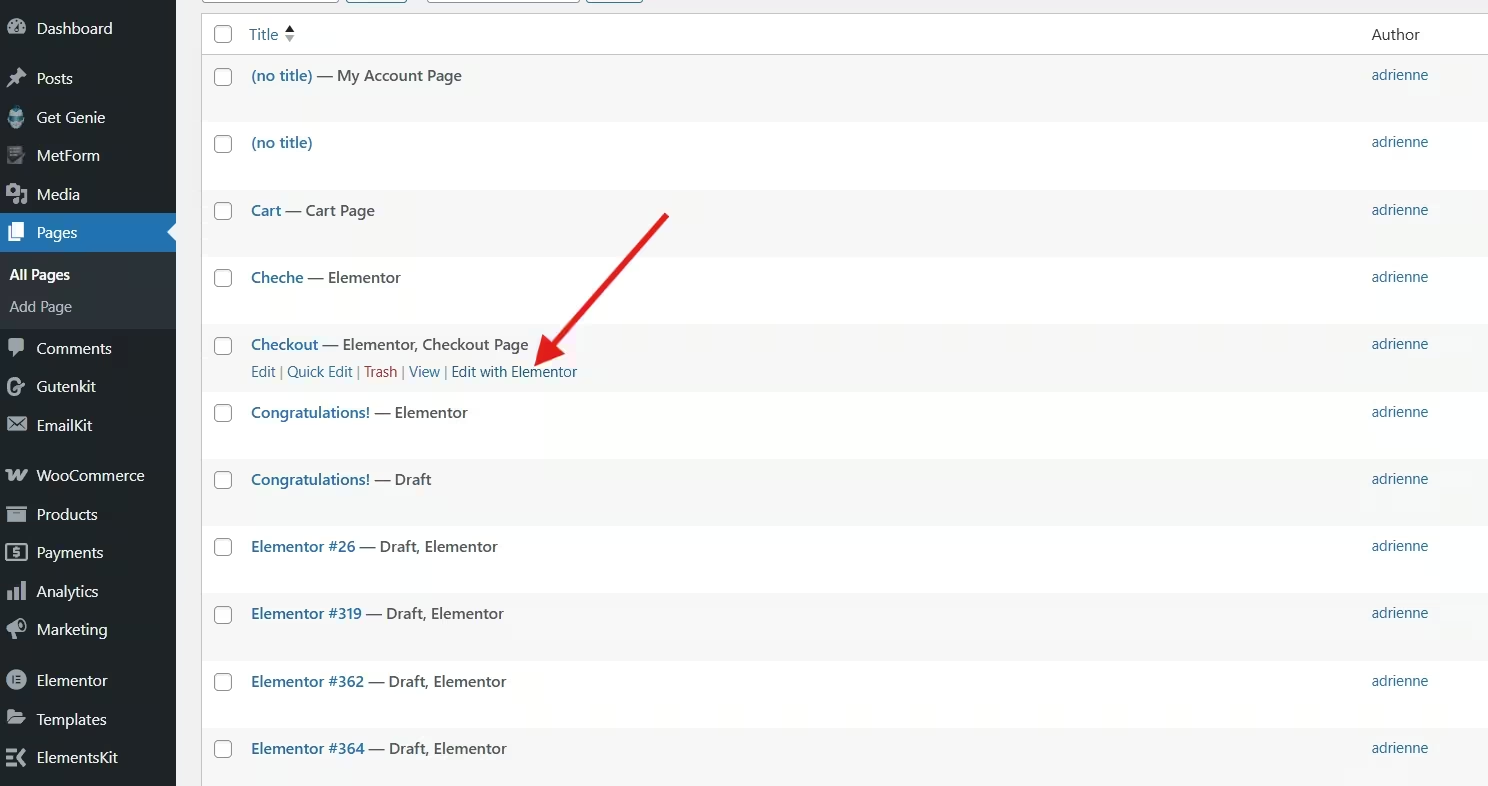
✅ Opening an existing page and adding post tab widget
Open an existing page and drag post tab widget into your Elementor editor. This will add a default tabbed layout displaying sample posts.
✅ Customizing post tab widget settings
1. Customize the post tab widget using the 3 settings, namely: content, style, and advanced settings.
2. Select the categories, the post count, and the number of columns for your post tab.
3. Design your tab container with, border, background, margin, and padding.
4. Add animated entrance in your post tab.
✅ Making the tabbed content live
Save the changes you made in your page to make the post tab live.
Why and When You Should Use Tabbed Content in WordPress
Tabbed content helps break down complex or lengthy information into well-organized sections that users can access quickly. Instead of overwhelming your visitors with too much content at once, tabs let them explore what interests them most.
Here are some scenarios where using tabbed content makes sense:
- Showcase blog categories (e.g., “Tech,” “Design,” “Marketing”) in separate tabs.
- Display the latest, popular, or featured posts in different tabs.
- Organize portfolio items or products for easy comparison.
- Enhance site navigation by reducing clutter and keeping pages neat.
In short, tabs are perfect when you want to improve readability, boost engagement, and maintain a clean, modern design on your website.
How to Display Posts in Tab with Elementor in WordPress Using ElementsKit
ElementsKit, a popular addon for Elementor, comes with a Post Tab-widget that makes creating tabbed post layouts simple, no coding required. Follow these steps to get your tabbed post section live in just minutes.
Step 1: Enable Post Tab Widget
Go to your WordPress Dashboard and navigate to ElementsKit → Widgets. Look for the Post faneblad widget in the list. Then enable the widget by toggling the switch next to it and click Gem ændringer to activate it.
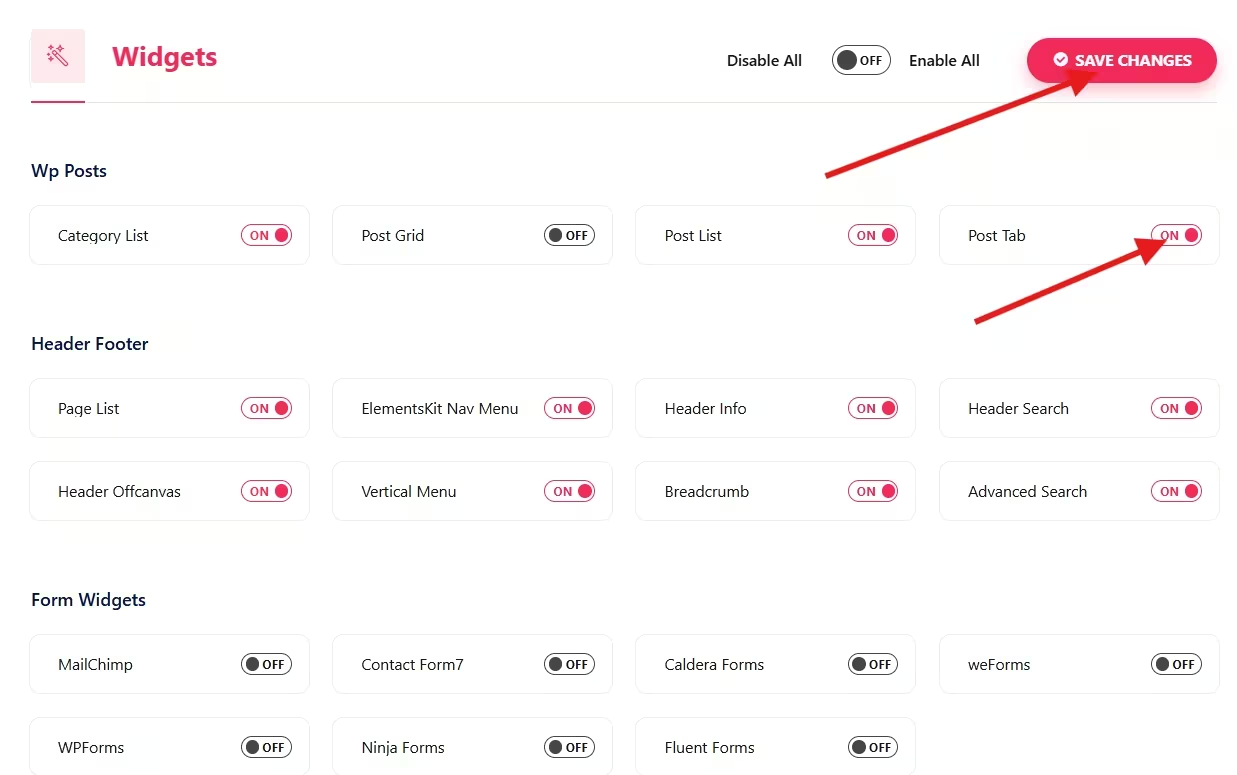
Once enabled, the widget becomes available inside your Elementor editor.
Step 2: Open an Existing Page and Add Post Tab Widget
Open an existing page and edit with Elementor Editor.
In the left Elementor sidebar, search for Post faneblad in the widget panel. Drag and drop the Post faneblad widget onto your desired section of the page.
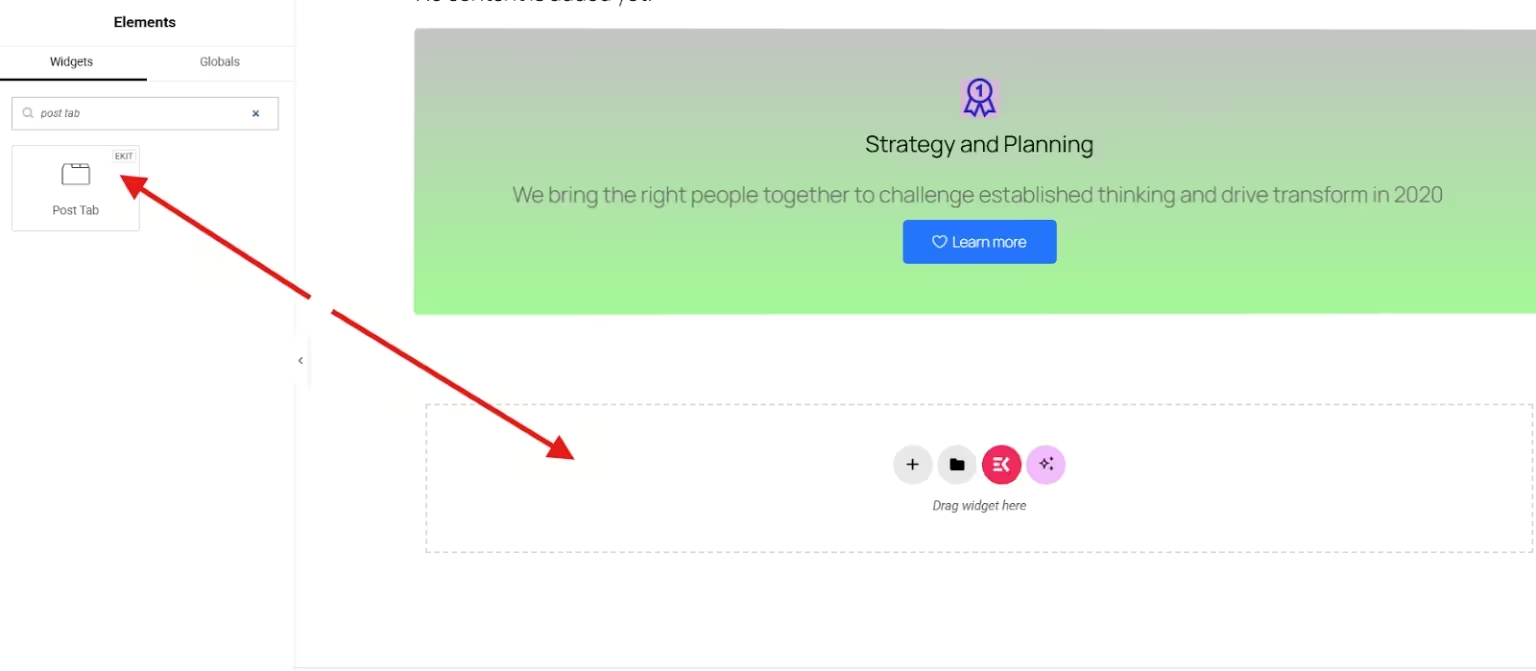
This will add a default tabbed layout displaying sample posts, ready for customization.
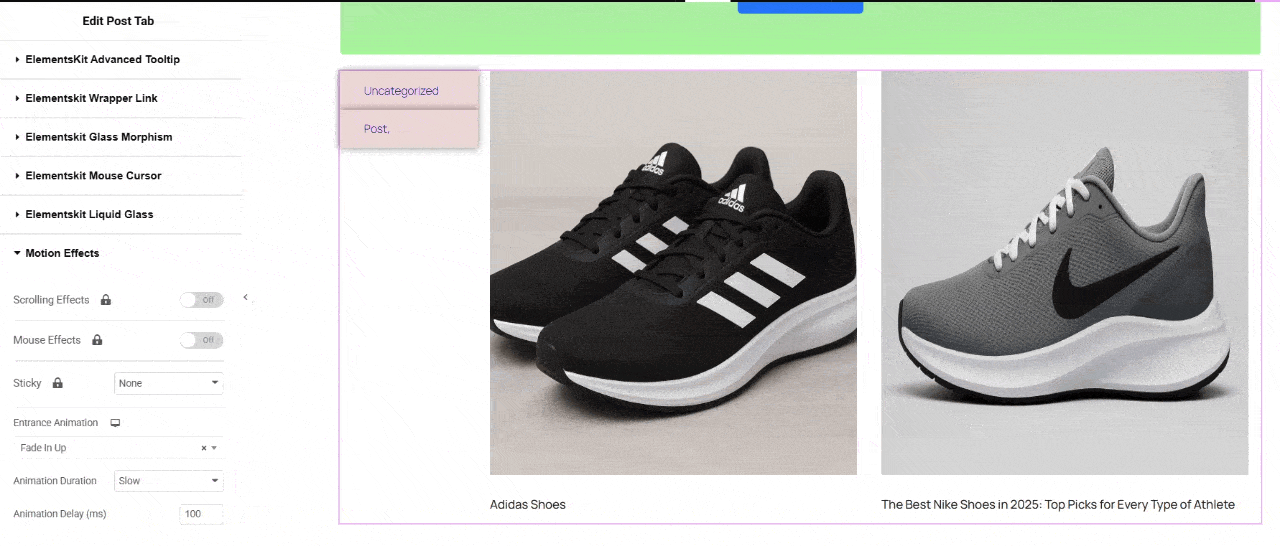
Step 3: Customize Post Tab Widget Settings
ElementsKit provides extensive options to control the appearance and behavior of your tabbed content.
Now, there are 3 settings where you can customize the post tab widget, namely, content, style, and advanced settings.
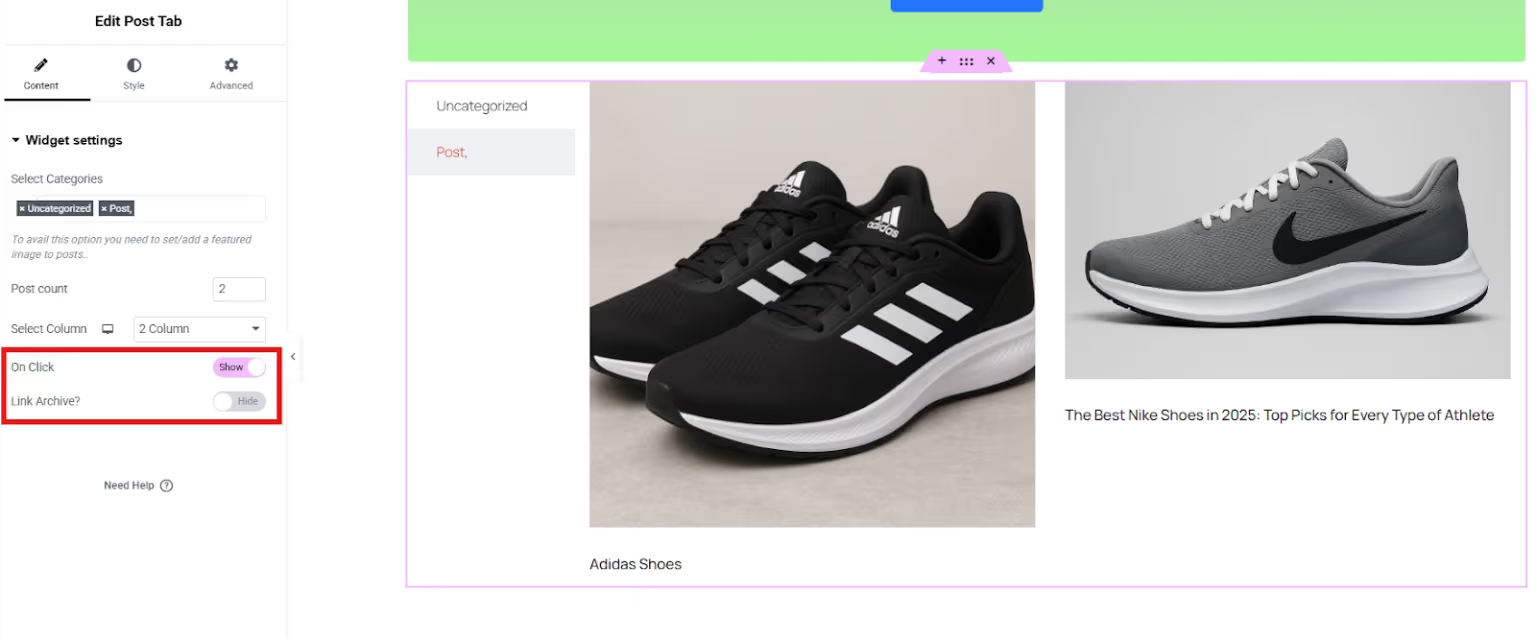
In the content settings, you’ll see the widget settings, where you can select the categories you set before for each post, the post count you want to show in the tab, and the number of columns for your posts.

You can toggle the Klik button to show and hide this option. When you click “At vise,” a new option called “Link Archive” will appear. You can also toggle show/hide for this archiving option.
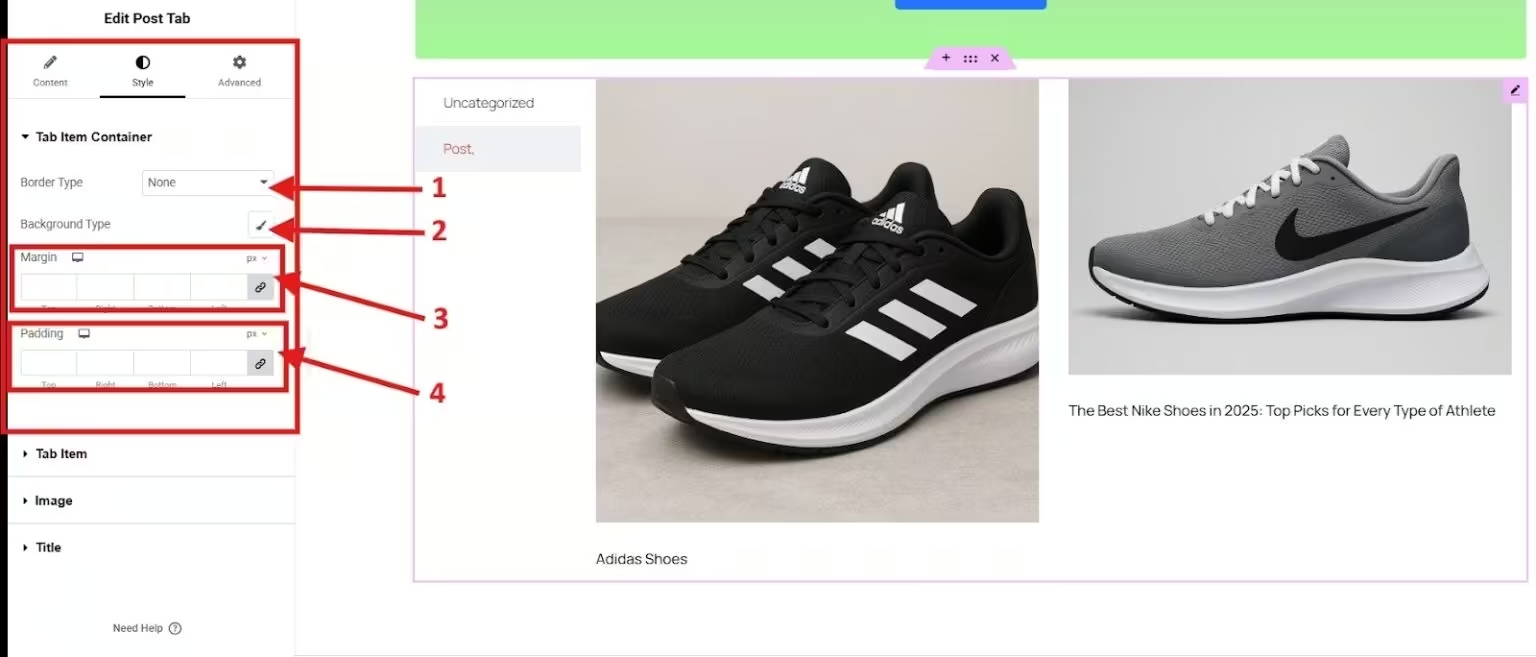
Now, style your post tab widget using the style settings. Design your tab container by choosing your border and background types, and deciding on the margin and padding.
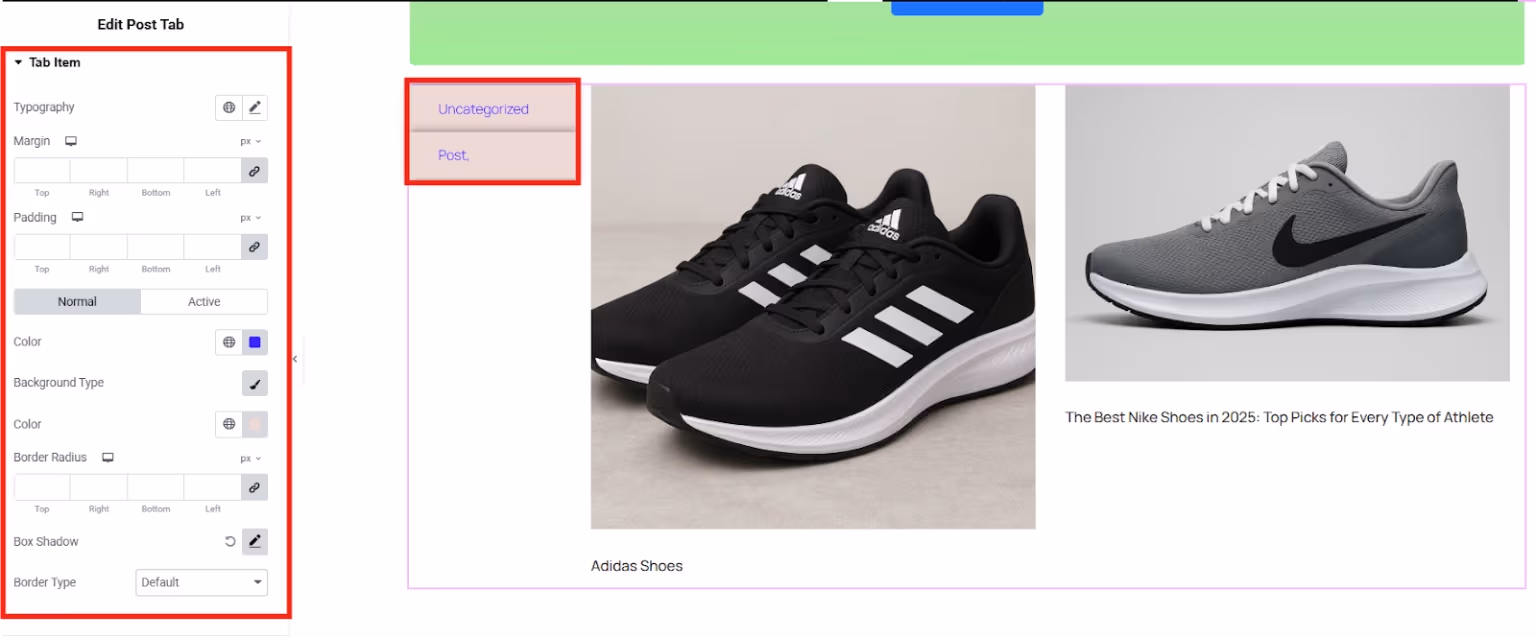
Customize your tab item by choosing your preferred typography, margin, and padding. You can also set your desired color, border radius, box shadow, and background and border types.
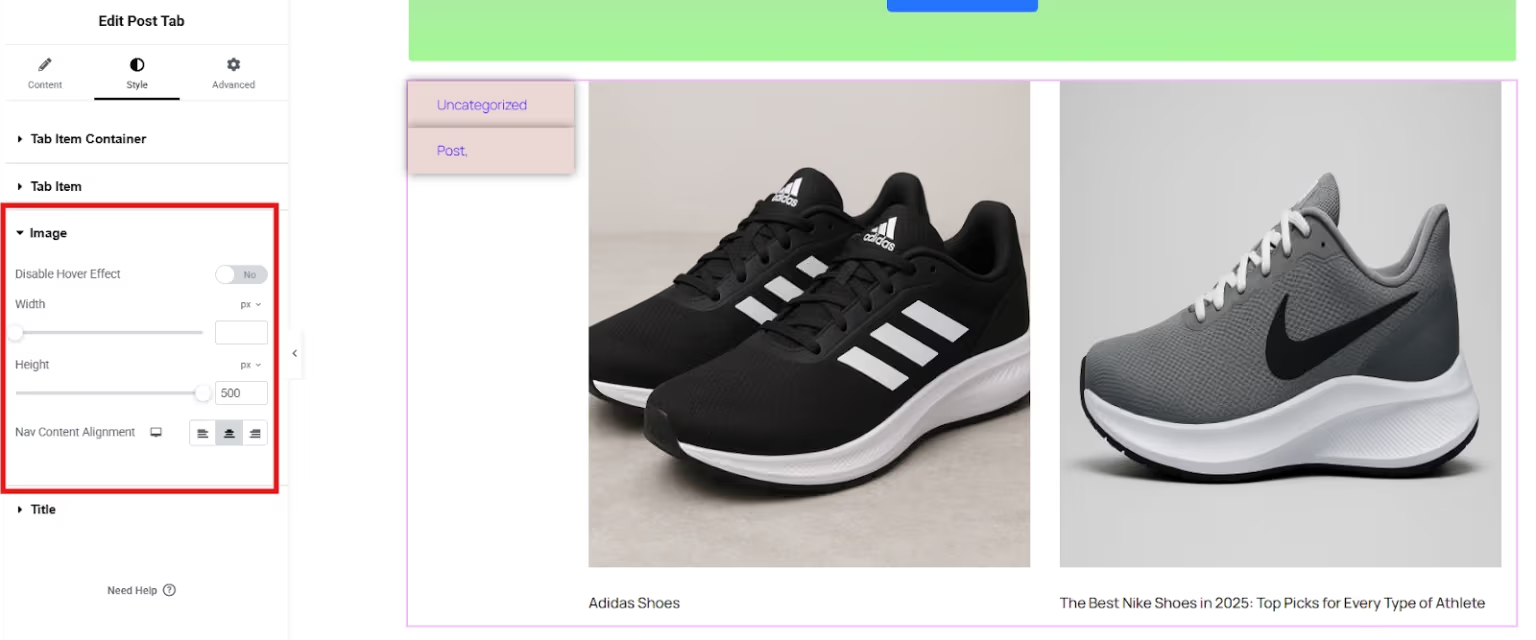
To customize the images in your post tab, you can set the height and width of the images even disable the hover effect.
Lastly, you can elevate the look of your post tab widget by playing with the elements in the advanced settings. For instance, you want to have an animated entrance. You can simply apply it by selecting the motion effects. Select the entrance animation from various options, and choose the animation duration and delay.
And that’s it! You can preview changes instantly in Elementor, making it easy to fine-tune the design before publishing.
Step 4: Save the Changes to Make Your Tabbed Content Live
Preview your work to see what it looks like in live and to determine if your work requires further enhancement. After you’re satisfied with the design and settings, click Publish to save your work.
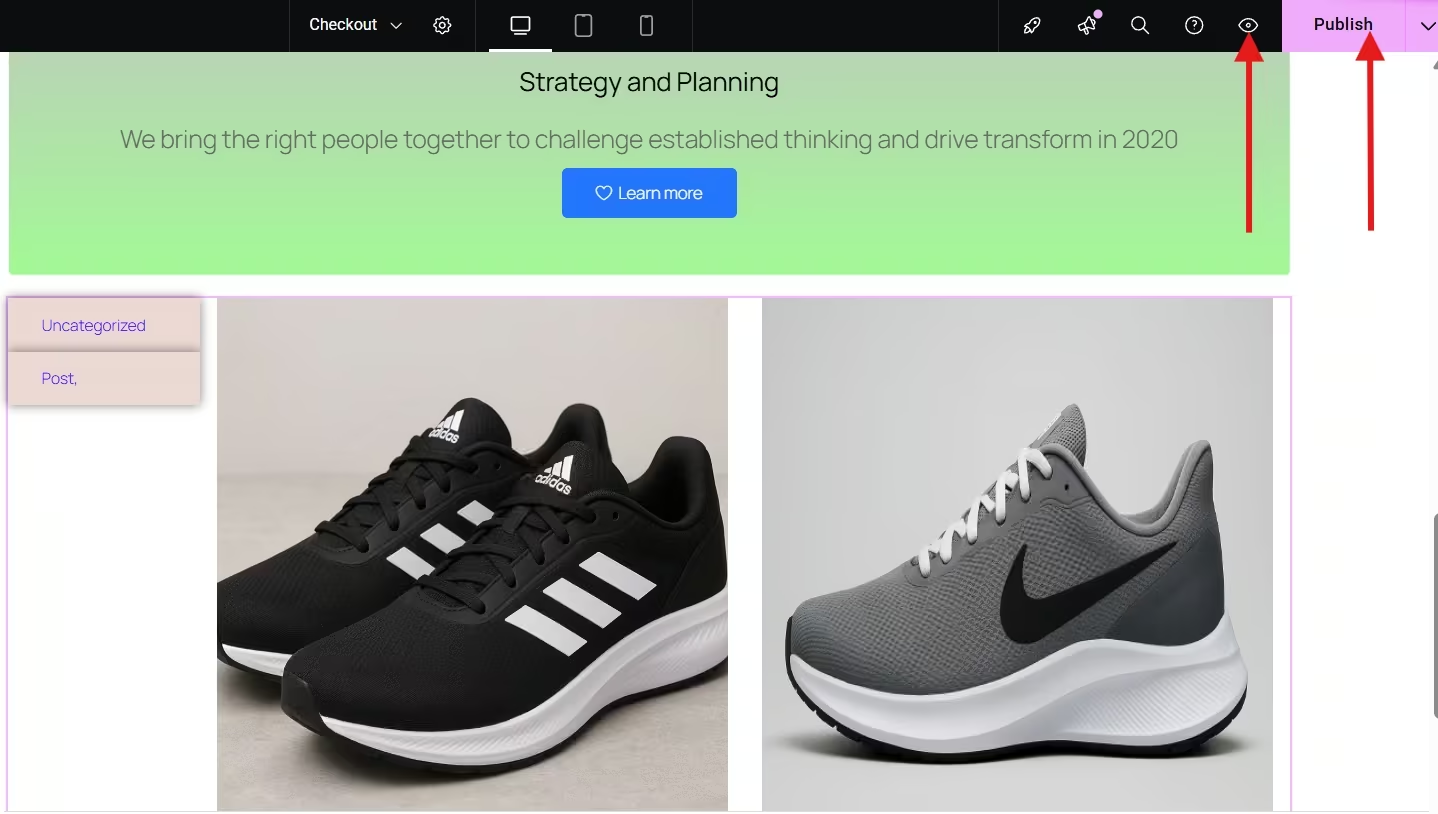
Your posts will now appear beautifully organized in interactive tabs, ready for visitors to explore.
Why Choose ElementsKit to Create a Tabbed Content
ElementsKit stands out to create tabbed content because of its flexibility, ease of use, and rich feature set. The Post Tab-widget in particular provides a seamless way to display categorized posts in a visually appealing layout.
Here’s why ElementsKit is an excellent choice:
- Brugervenlig grænseflade: Works smoothly with Elementor’s drag-and-drop builder. This allows users of all skill levels to create and manage tab layouts without any coding knowledge. Everything is visual, fast, and easy to control directly from the Elementor editor.
- Customization Freedom: Provides extensive styling controls, including colors, typography, spacing, animations, and layout options. You can fully tailor the appearance of your tabs to match your theme for a unique look.
- Responsivt design: Ensures tabs look perfect on all devices, including desktop, tablet, and mobile. You can fine-tune settings for each screen size so your content remains clean, readable, and visually appealing everywhere.
- Lightweight and Optimized: ElementsKit is designed for performance efficiency to ensure minimal loading to your website. Its clean code and optimized assets help maintain speed and a smooth user experience without unnecessary bloat.
- All-in-One Toolkit: Comes with many other useful widgets, extensions, and templates beyond post tabs. Goes beyond post tabs by including a wide range of additional widgets, extensions, and ready-made templates. This makes your Elementor website flexible with advanced functionality.
If you want a professional and dynamic way to display your WordPress posts, ElementsKit gives you everything you need.

Ofte stillede spørgsmål
Q1: Can you display posts from specific categories only?
Yes. With ElementsKit’s Post Tab widget, you can select specific categories or tags to display in each tab.
Q2: Do you need Elementor Pro to use this feature?
No. The Post Tab widget works perfectly with the free version of Elementor as long as you have ElementsKit installed.
Q3: Can you customize the tab design?
Absolutely. You can modify colors, fonts, spacing, hover effects, and more using Elementor’s design options.
Q4: Is the post tab widget mobile-friendly?
Yes. The widget is fully responsive and adapts automatically to different screen sizes.
Sidste tanke
Displaying posts in tabs is a smart way to organize your WordPress content while keeping your site visually appealing and user-friendly. With ElementsKit’s Post Tab widget, you can set up tabbed post sections effortlessly, no coding, no hassle, just creative control.
Start using ElementsKit today and give your visitors a smoother, more engaging browsing experience.
Skriv et svar