


76% of online shoppers say that how easy it is to find what they want is the most important factor in a website. So, if you are one who owns e-commerce stores, stop using confusing menus and messy navigation.
Create an effective mega menu. It’s not like your traditional dropdown menu. It’s the most powerful menu that prioritizes user engagement and conversion rates. It’s not only for aesthetic looks, but it’s the best way to a 30% increase in user satisfaction and a 20% increase in conversion rates.
So, if you want those big changes in your e-Commerce website and level up its UX, follow this guide. This will give you 2 options on how to create a mega menu for an e-commerce website.
Whether you are an Elementor user or a Gutenberg lover, we have dedicated plugins for you.
Quick Overview
Megamenu boosts user satisfaction by up to 30% and can increase conversions by 20% by organizing categories, subcategories, and visuals in a clean, expandable layout.
Tools Used: Elementor and ElementsKit, GutenKit
In this guide, you’ll learn two proven ways to create a professional mega menu in WordPress:
✅ Method 1: Elementor Users
Use ElementsKit to design advanced, drag-and-drop mega menus with templates, flexible layouts, icons, and WooCommerce items.
✅ Method 2: Gutenberg Users
Use GutenKit to build lightning-fast mega menus directly in the block editor, no coding needed.
Both tools make it easy to create a visually rich, mobile-friendly mega menu that enhances navigation, improves product discovery, and elevates your store’s overall UX.
What Is a Mega Menu and Why Is It Important?
EN mega menu is a large, expandable menu that displays multiple options in a two-dimensional dropdown layout. Unlike traditional dropdowns that list a few items in a single column, mega menus allow you to organize products, categories, and subcategories neatly across several columns, sometimes with images, icons, and promotional banners.
Why Mega Menus Matter for eCommerce:
- Improved Navigation: Shoppers can find products more easily, which enhances the user experience.
- Better Product Discovery: Display product categories, deals, or featured collections directly in the menu.
- Reduced Bounce Rates: Simplified browsing keeps users on your site longer.
- Increased Sales Opportunities: Use banners or product thumbnails in the menu to drive engagement.
- Mobile-Friendly Design: Modern mega menus adapt beautifully to smaller screens.
If you want your eCommerce store to feel professional and easy to navigate, implementing a mega menu is a must.
How to Create Mega Menu for eCommerce Website Using ElementsKit and GutenKit
Now that you understand the benefits, let’s move to the practical part. You can create a stunning mega menu in WordPress using either Elementor (with ElementsKit) or Gutenberg (with GutenKit). Both methods are simple and powerful.
Method 1: How to Create Mega Menu in Elementor (Using ElementsKit)
If your website is built with Elementor, det ElementsKit Elementor tilføjelse is one of the best tools for creating mega menus. It offers drag-and-drop flexibility and professional templates to get you started quickly.
Tools you need:
Elementor – Download the free version, which is already enough to build mega menus.
ElementsKit – Download gratis version from wordpress.org.

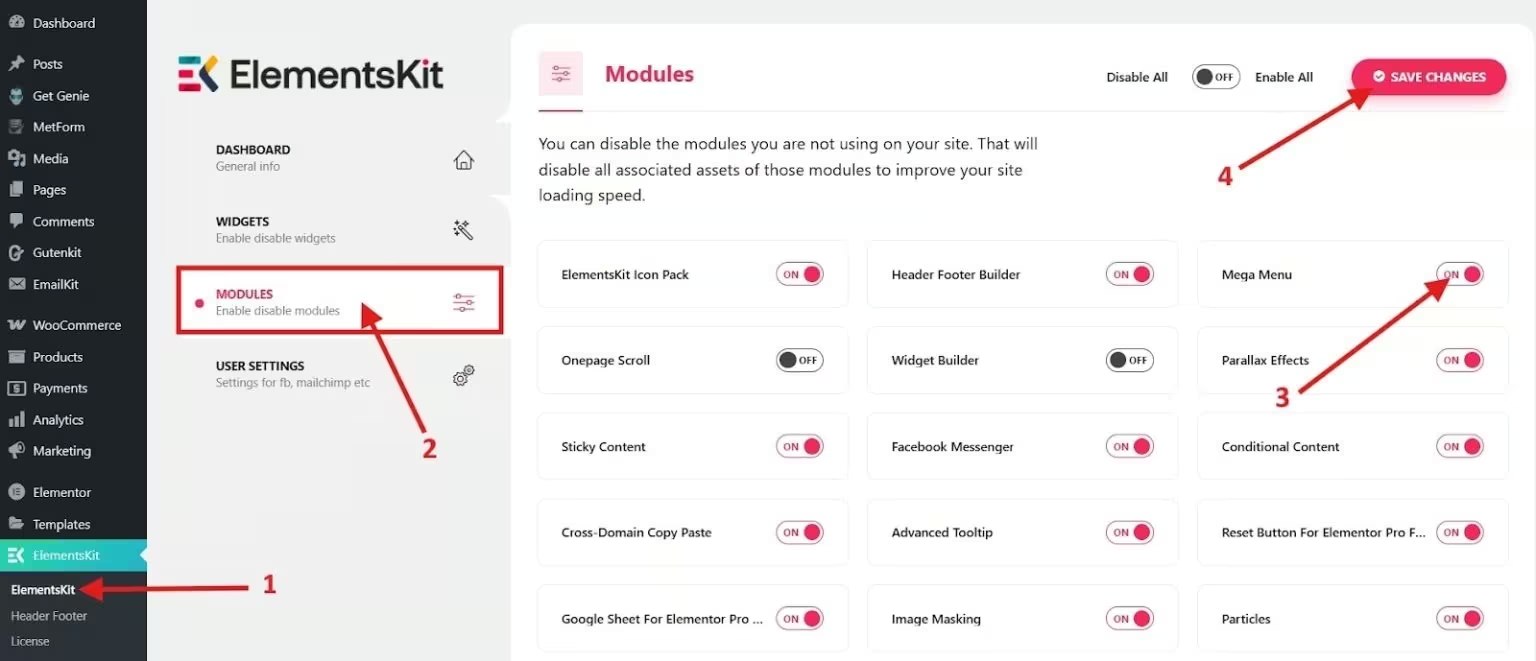
Step 1: Enable the Mega Menu Module
Naviger til ElementsKit → Moduler and find the “Mega Menu.” Toggle it on and save changes.
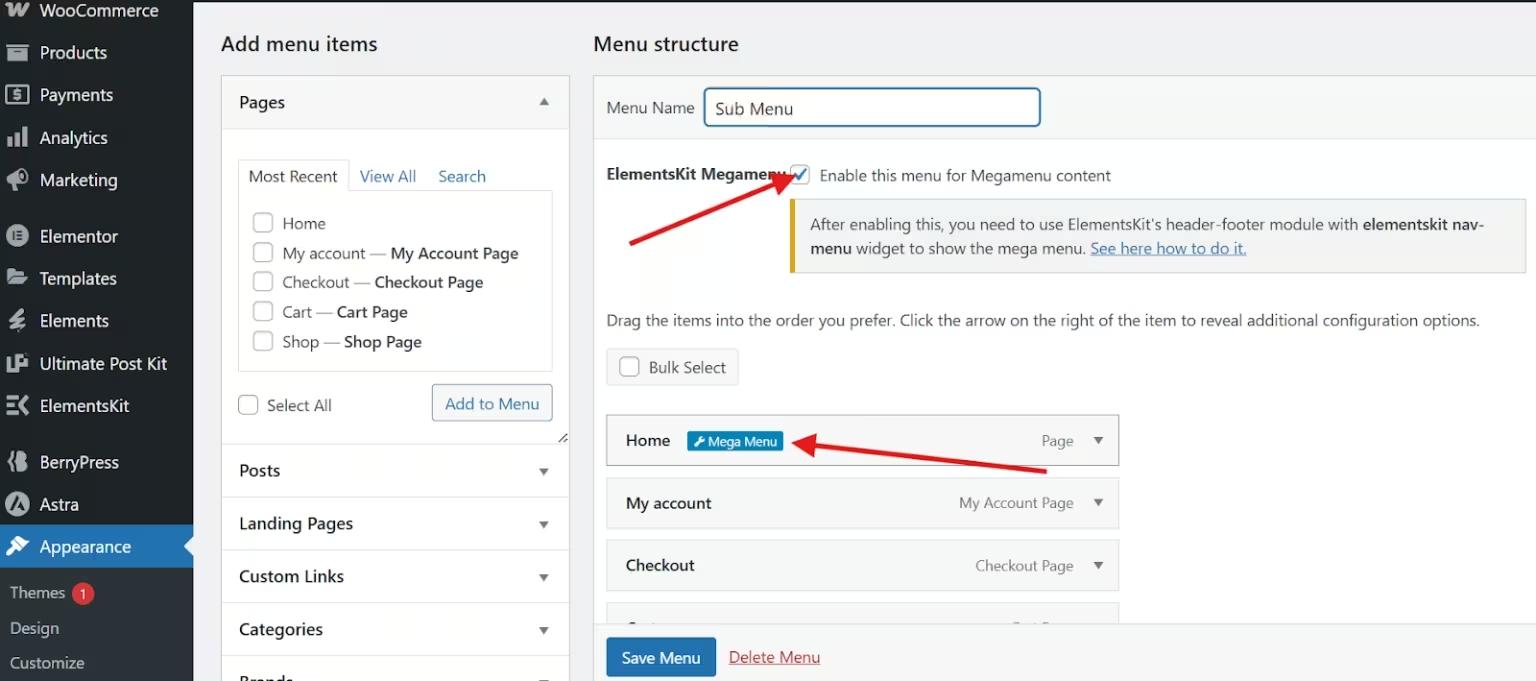
Step 2: Configure WordPress Menu
Gå til Appearance → Menus to create an eCommerce mega menu. Create or select a menu where you want to add the mega menu. In this tutorial, we’ll create a new menu.
Enter your menu name (i.e., Submenu) and click Create Menu. Find the custom link, then add the link and text, and click Add to menu.

Step 3: Design Your Mega Menu Layout
Check the ElementsKit Megamenu checkbox and click the mega menu settings icon when you hover over the menu items.
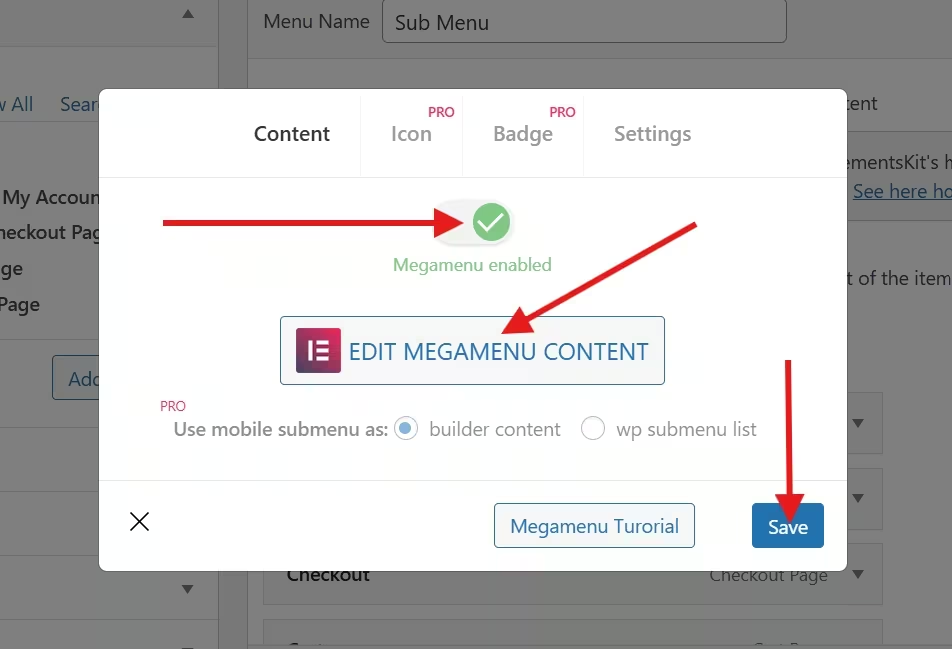
A new popup will appear, where you will need to enable megamenu, click edit megamenu content, and hit save.
Next, choose your template by clicking on the ElementsKit template library icon. Navigate to the section and select the megamenu from the categories. You’ll see different megamenu templates. Simply select the one you prefer and insert it.
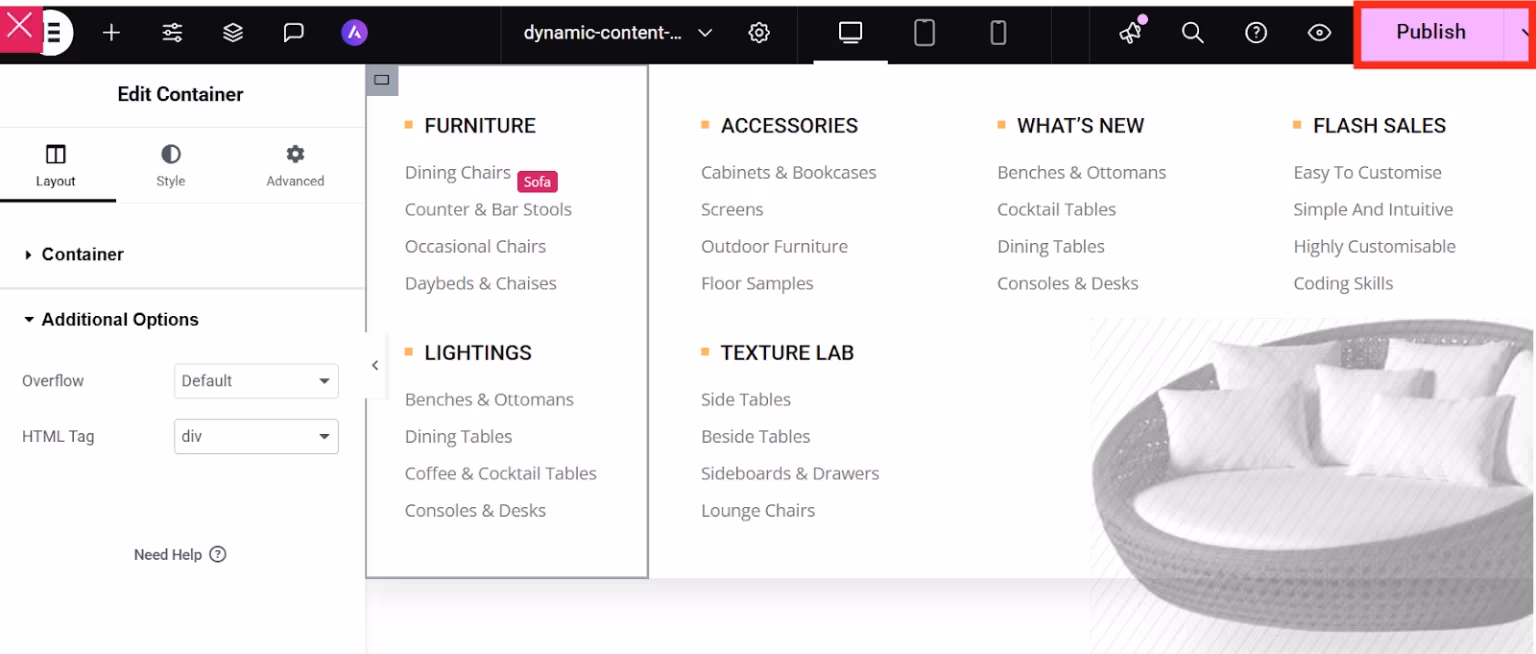
A megamenu template has been inserted. Now, customize your megamenu using the layout control.
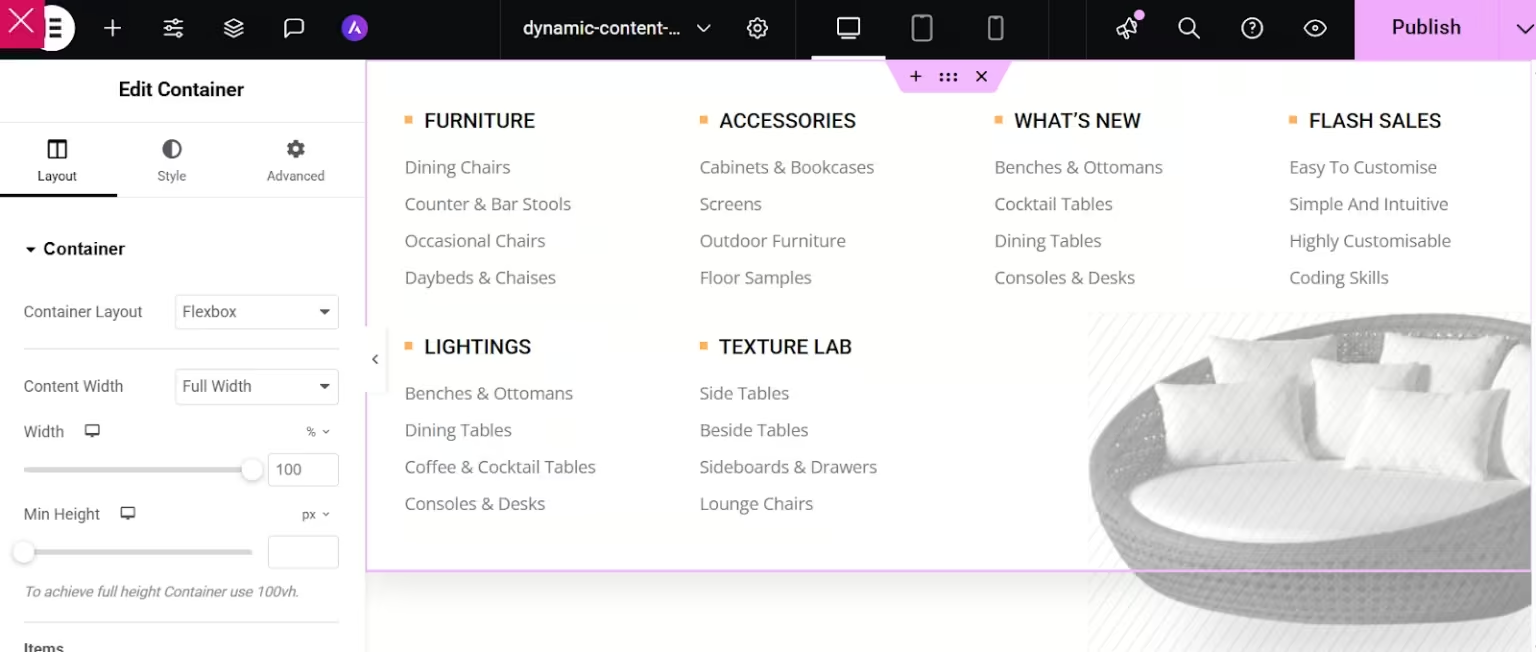
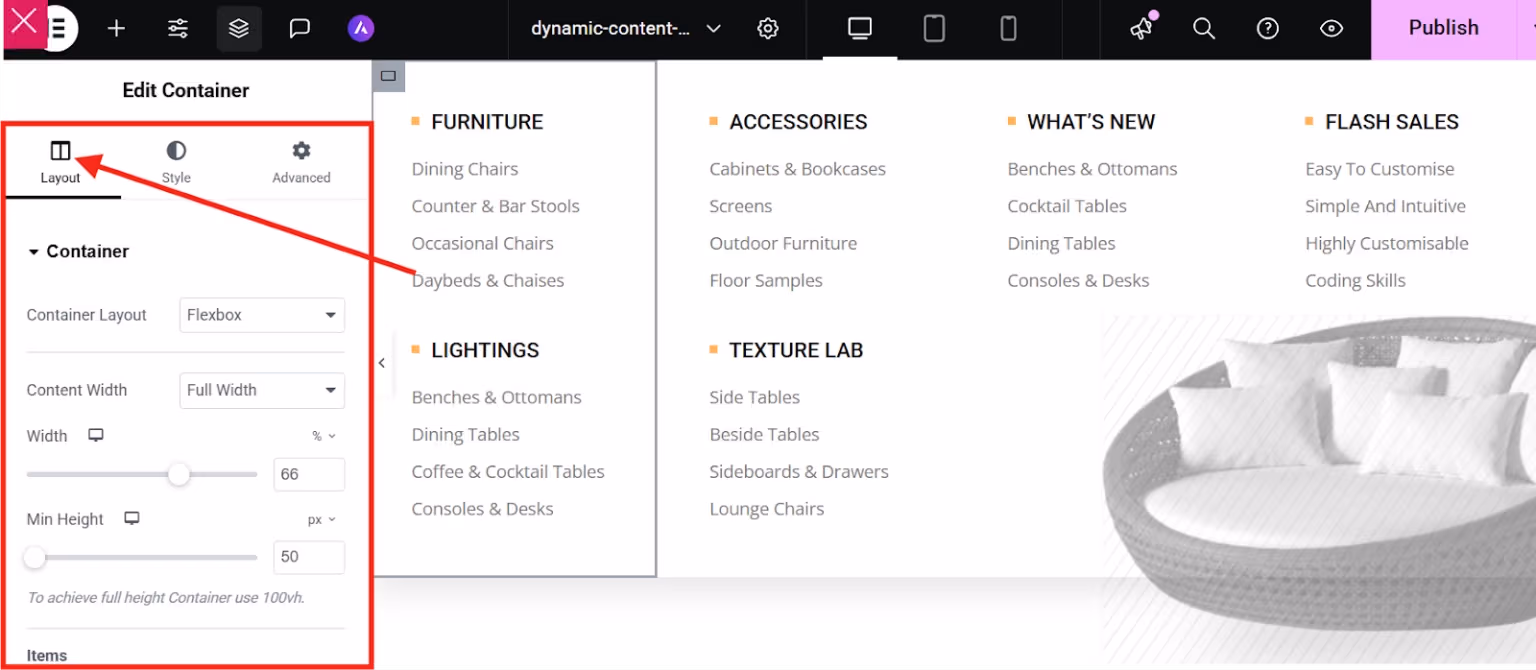
For instance, you can choose your container layout from Flexbox and Grid. You can also adjust the content width to full width or boxed, and set the height.
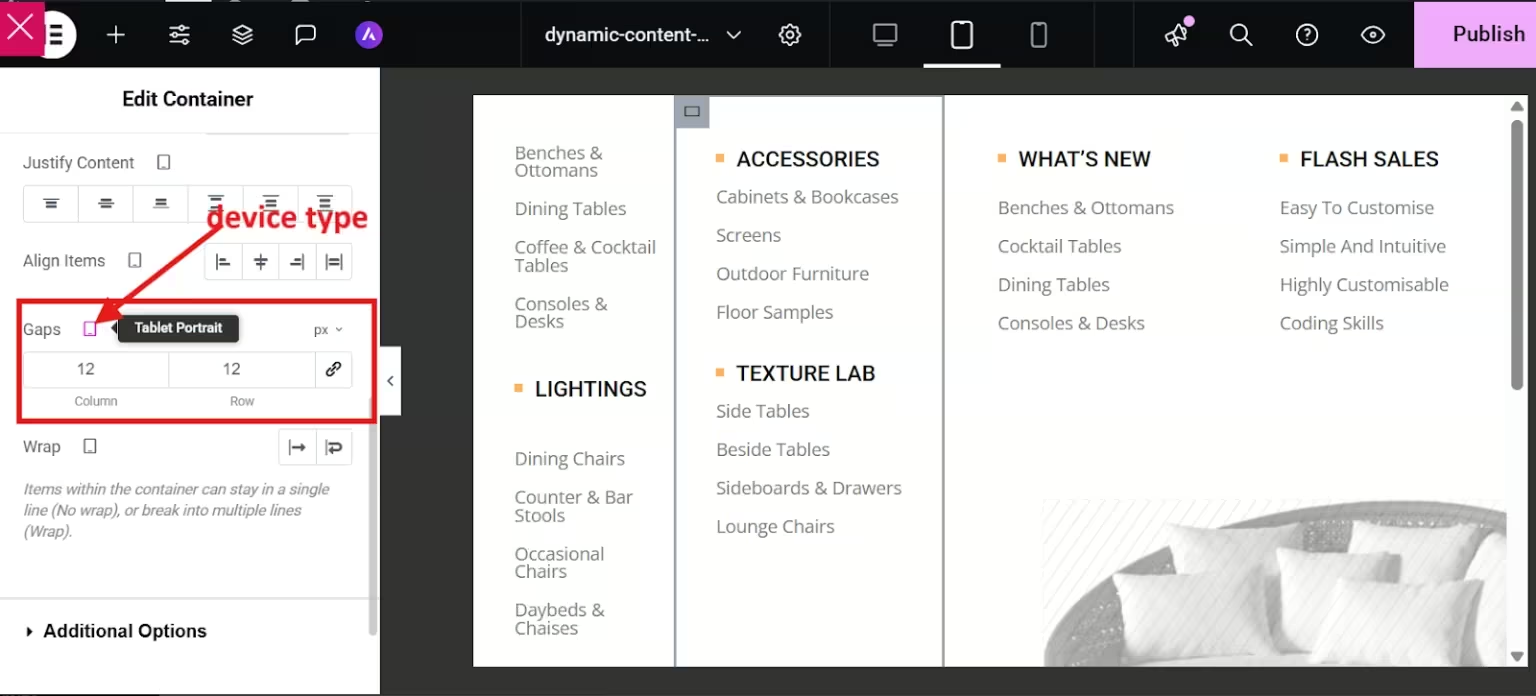
Additionally, you can decide on the column and row gaps for desktop, mobile, or tablet portraits.
If you want to adjust the position of your items, you can choose from vertical, horizontal, or even reversed.

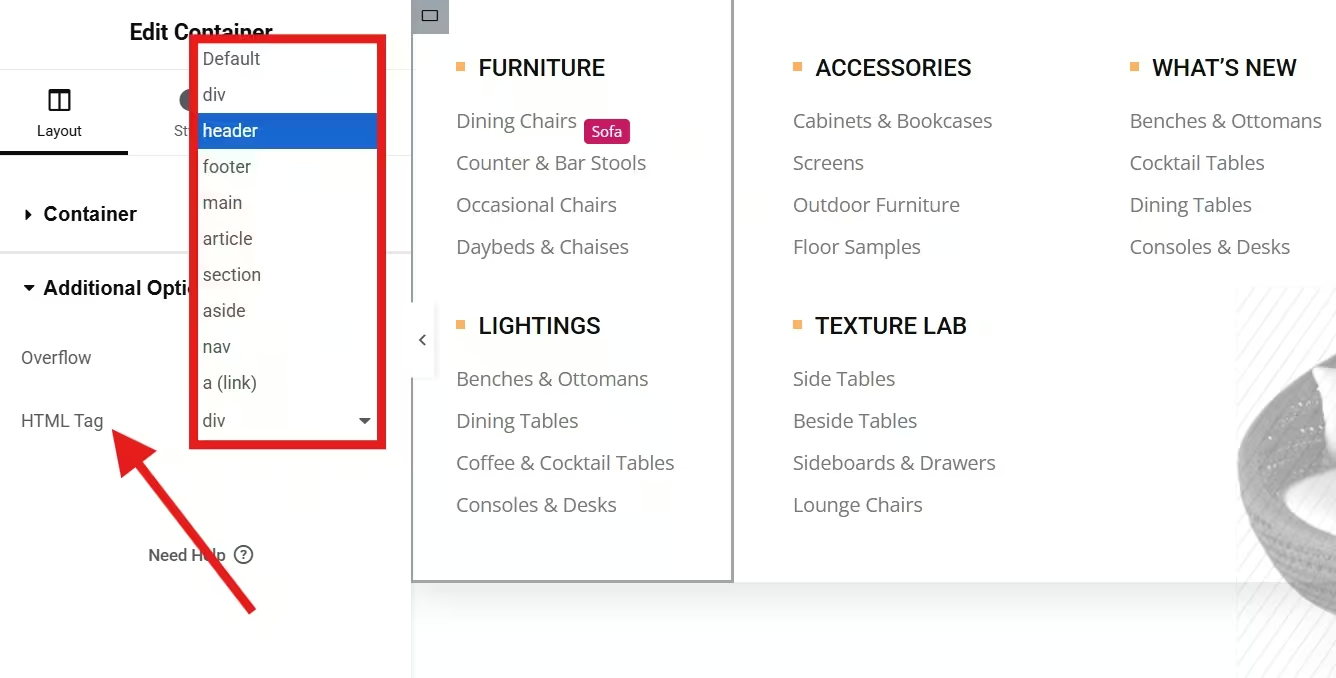
Now, with ElementsKit megamenu, you can also create a custom WordPress menu by assigning your HTML tag.
What’s more?……
You can customize the text of your megamenu, like headings and list items. For headings, simply select the heading and enable the show border. Next, select the border position from the start or end. If you want to float your title to the left, you can enable the float to the left button. Don’t forget to adjust your title width.

For list items, click on your list item and design each item. You can assign a background type for each item and even add an icon and show it on your megamenu.
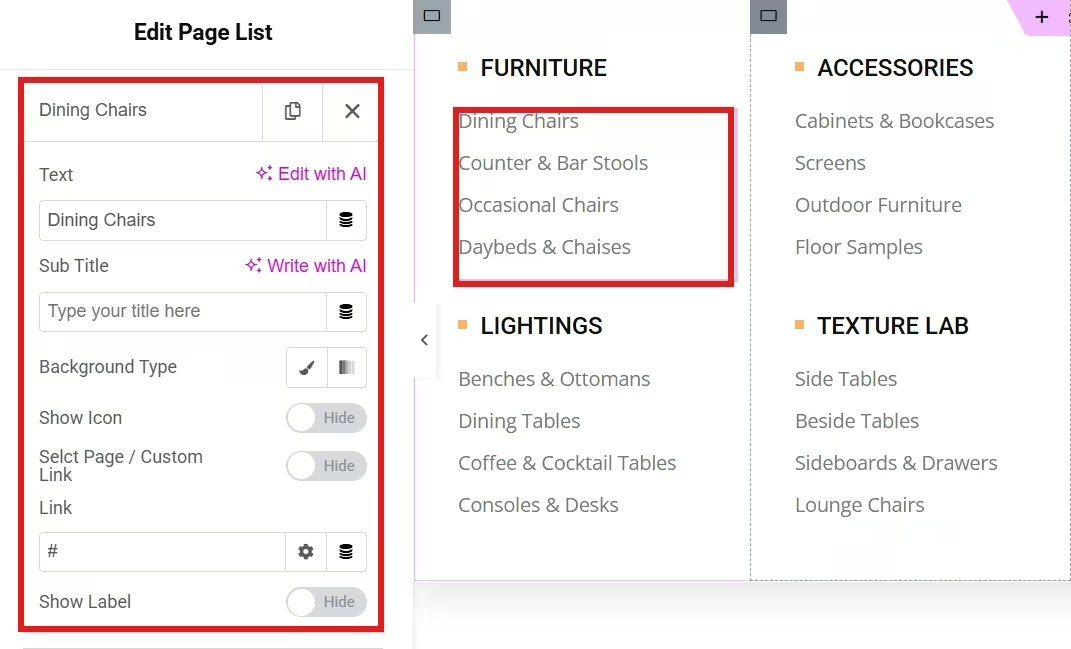
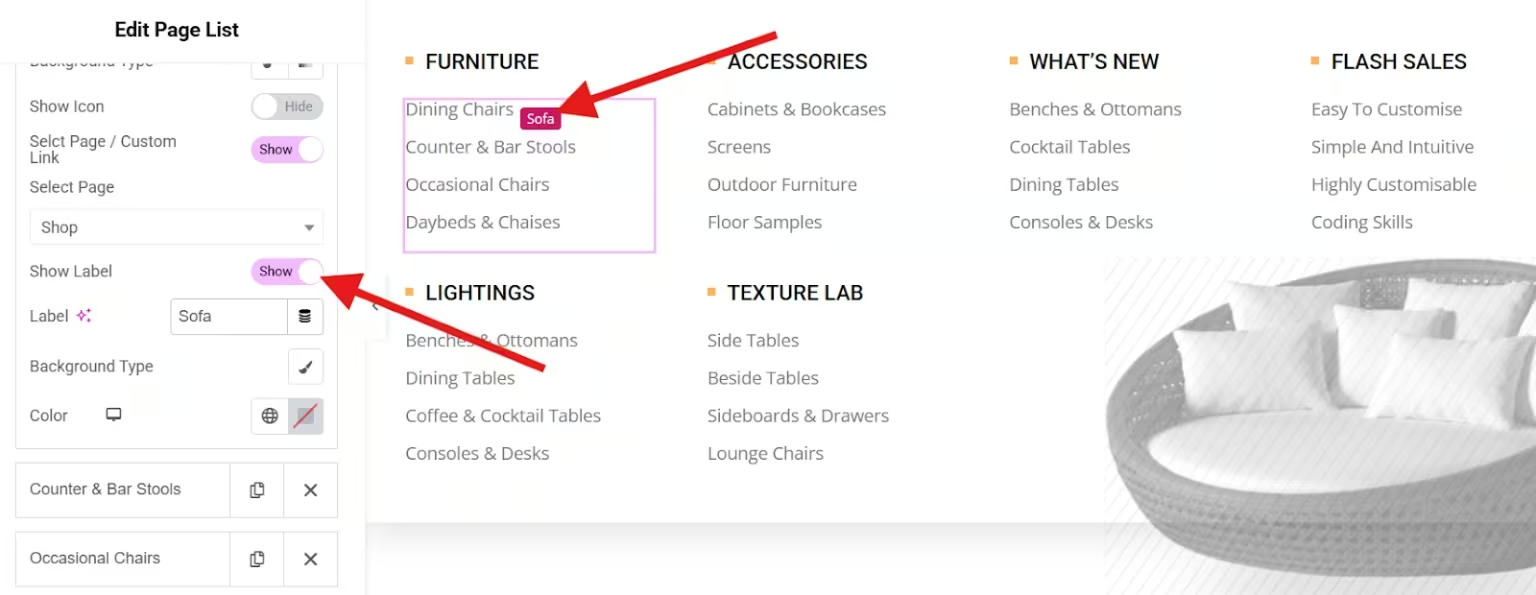
Enable the select page/custom link button so you can add the page intended for dining chair as an example.
If you want to add a label to your list items, you can enable the show label button and enter your label text.
Play with every element until you are satisfied with your megamenu layout.
For a more detailed steps, please click her 🥰
Step 4: Publish and Test
Once you are satisfied with your megamenu, save it. Then check it on live to test the responsiveness across different devices, such as desktop, tablet, and mobile.
ElementsKit also allows you to include dynamic WooCommerce widgets, making it perfect for eCommerce mega menus featuring live product categories.
Method 2: How to Create Mega Menu in Gutenberg
Prefer using the default WordPress block editor? GutenKit makes it incredibly easy to build mega menus directly within Gutenberg. Simply install the GutenKit free version and the pro version for a higher customization option. This method is ideal for Gutenberg users.

Here’s the step-by-step guide:
After installing the GutenKit and GutenKit Pro plugins on your WordPress site, navigate to GutenKit > Blocks from your dashboard. Then, toggle on the switch for the Nav Menu block to enable it. The nav menu needs to be enabled to use the mega menu feature. Mega menu is the extension of the GutenKit nav menu block.

To add menu items, open a new page. In the Gutenberg page, find the “+” icon located at the top of the editor screen. Then search for the GutenKit nav menu and drag-and-drop it into the editor screen. Click on Start Blank to get started.
Once you add the Navigation Menu block in the editor, it will automatically display all your published pages as menu items. You can also click the “+” icon to add a new menu item manually.
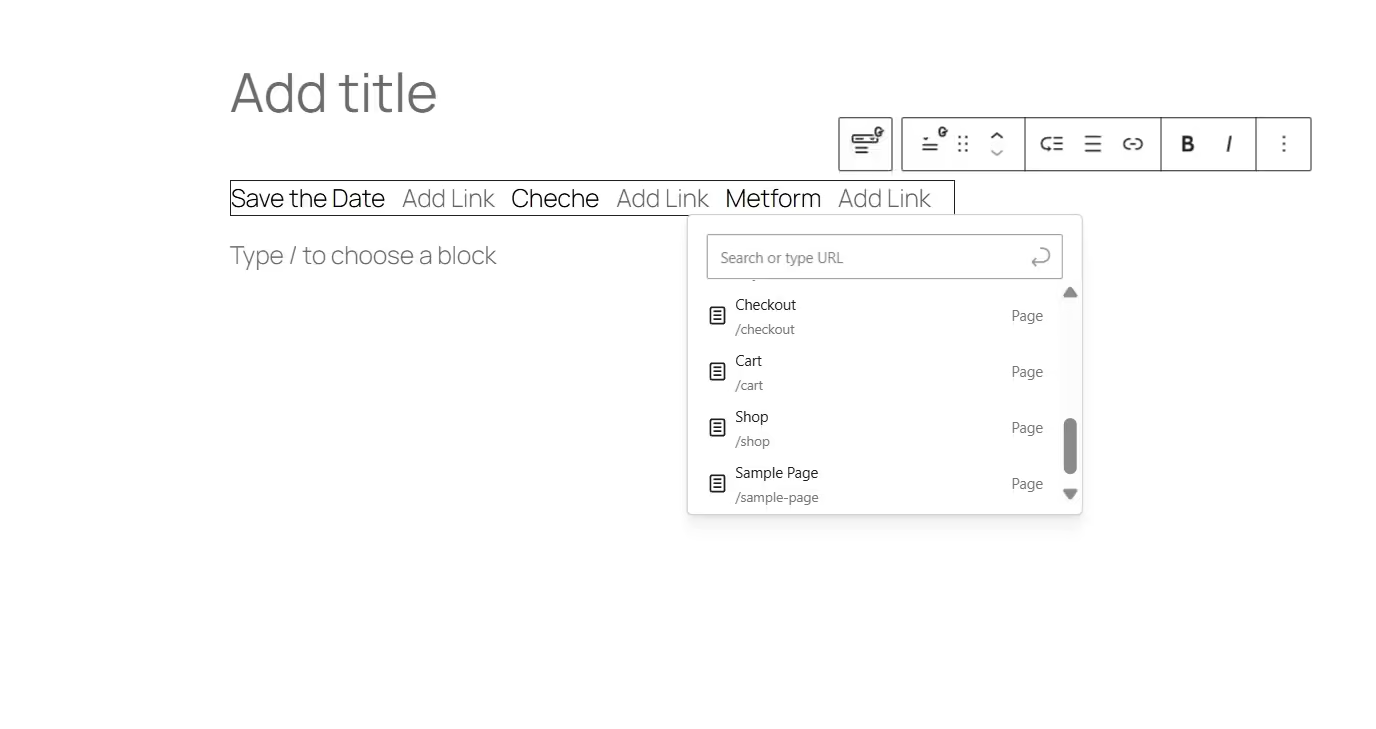
What makes GutenKit stand out is that you can add new pages directly to the navigation menu, and those pages will automatically be created on your website as drafts.
Now we come to the main step in creating a WordPress mega menu using Gutenberg.
When you select a navigation menu item, you’ll see an option to enable the Sub Menu. Once you turn it on, you can choose the submenu type, either Dropdown eller Mega menu. In this case, you’ll, of course, select Mega Menu.

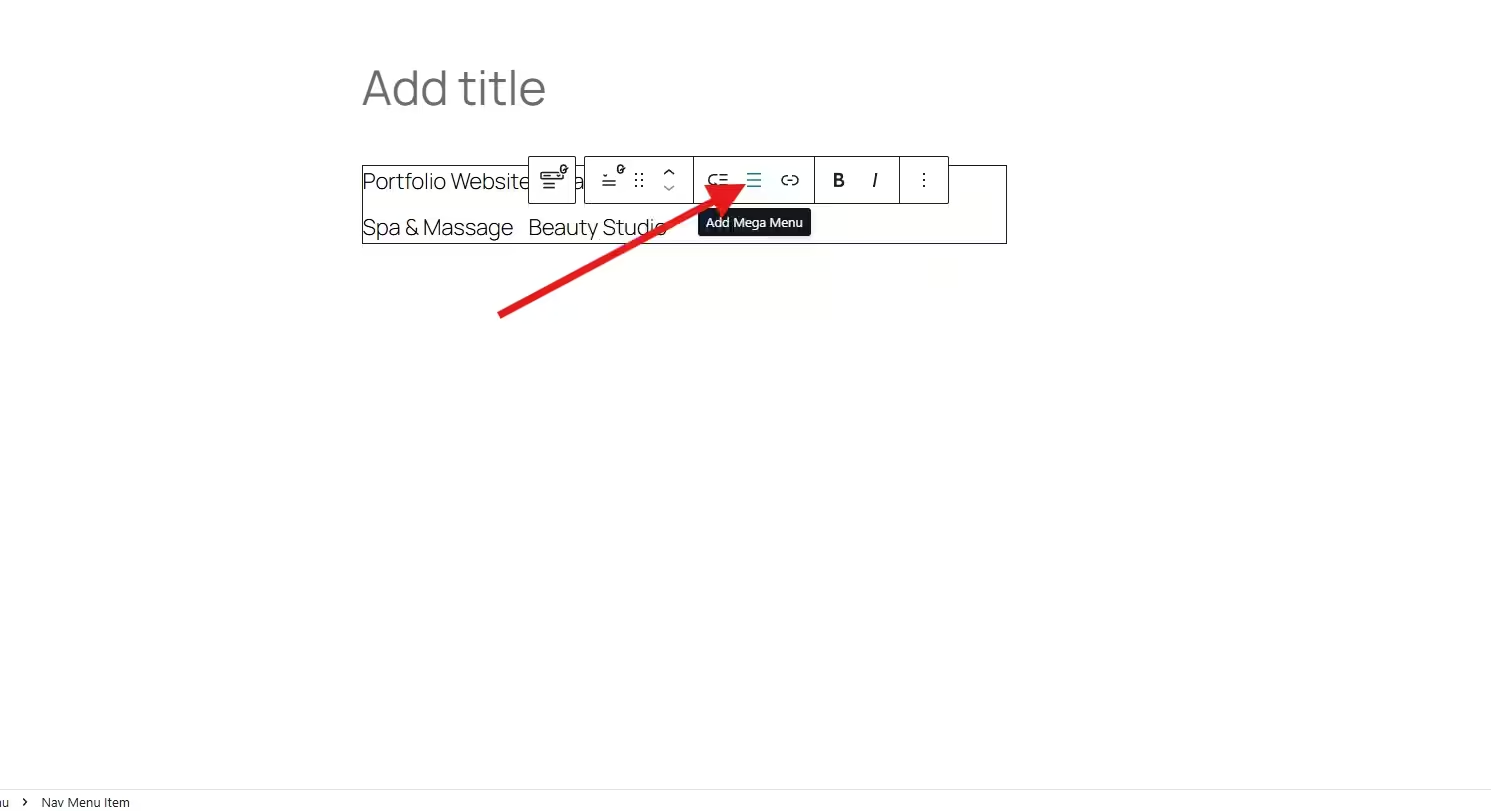
Alternatively, you can activate the mega menu as a submenu by clicking the “Add Mega Menu” button in the block toolbar.
Step 4: Customize the Mega Menu using any blocks
You can now personalize the look of your WordPress mega menu with GutenKit. You can design your mega menu with images, maps, accordions, forms, or any blocks.
GutenKit’s lightweight design ensures your mega menu loads fast, helping with both user experience and SEO.
For a more detailed steps, click her 🥰
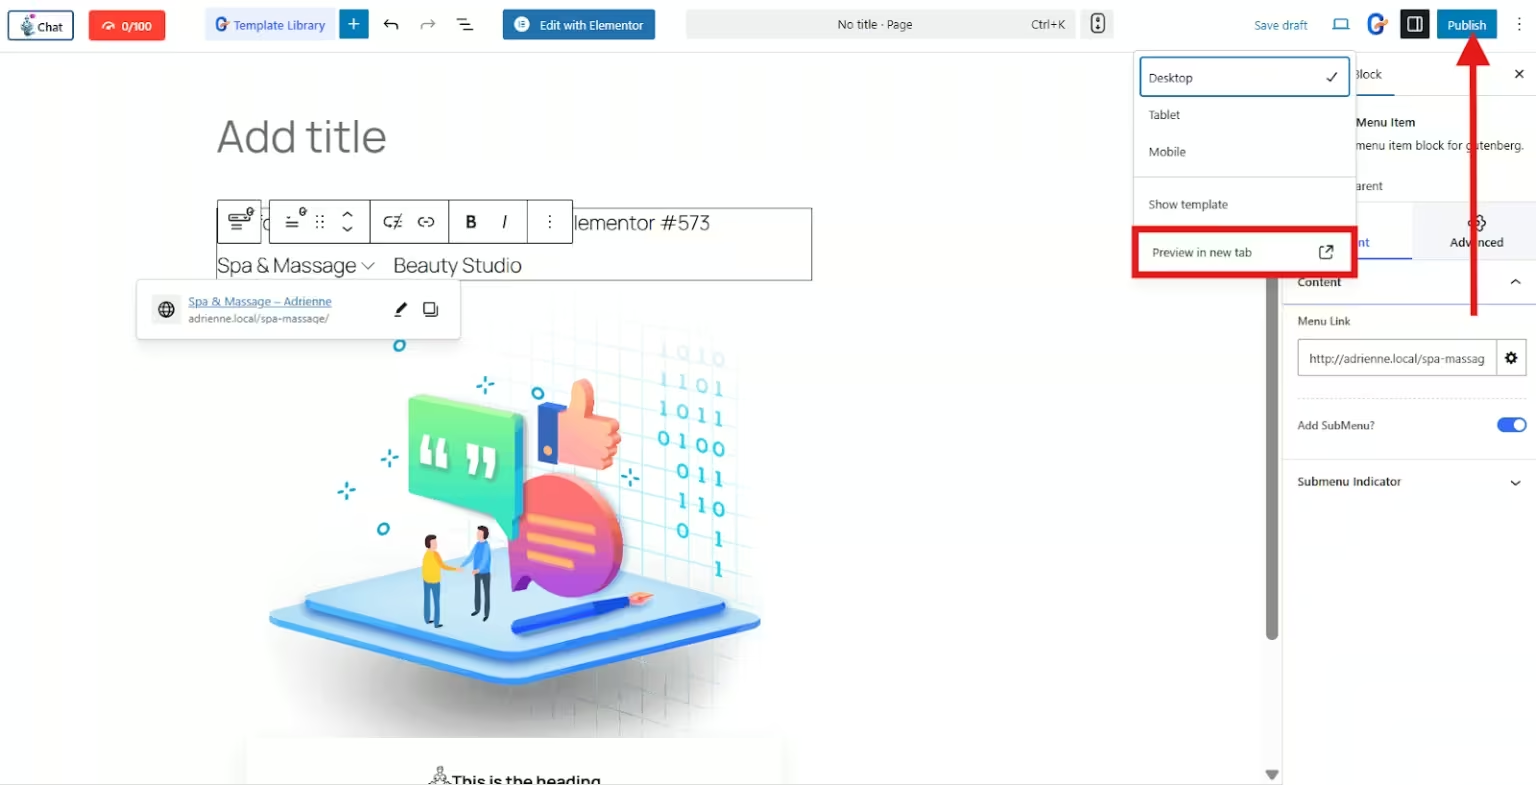
Step 5: Publish your page
Once you are done with your mega menu using GutenKit, publish your page. You may also preview your page so that you can check if everything works well or needs some adjustment.
Ofte stillede spørgsmål
1. Do You Need Coding Skills to Create a Mega Menu?
No! Both ElementsKit and GutenKit let you design mega menus visually using drag-and-drop or block-based editors.
2. Are Mega Menus Mobile-friendly?
Yes. Both plugins offer fully responsive designs, so your mega menu looks perfect on all devices.
3. Can You Include WooCommerce Products in the Mega Menu?
Absolutely. You can easily add product categories, featured items, and even product grids.
4. Do these Plugins Slow Down my Website?
Not if used properly. ElementsKit and GutenKit are optimized for performance and designed to keep your site fast.
So, What Now?
A well-structured mega menu can elevate your eCommerce website from good to exceptional. It not only enhances usability but also boosts conversions by guiding customers effortlessly to what they want.
Whether you prefer Elementor with ElementsKit eller Gutenberg with GutenKit, both methods give you complete control to design a mega menu that fits your store’s style and functionality.
Ready to get started? Choose your preferred builder, install the plugin, and give your online store the navigation upgrade it deserves!

Skriv et svar