You can easily build a feature-descriptive and stunning pricing table with various styling options.
Let’s know how to create a pricing table in the Gutenberg editor on your WordPress website.
Your WordPress site needs to have the GutenKit plugin installed. Then, follow the below steps:
How to Use GutenKit Pricing Table #
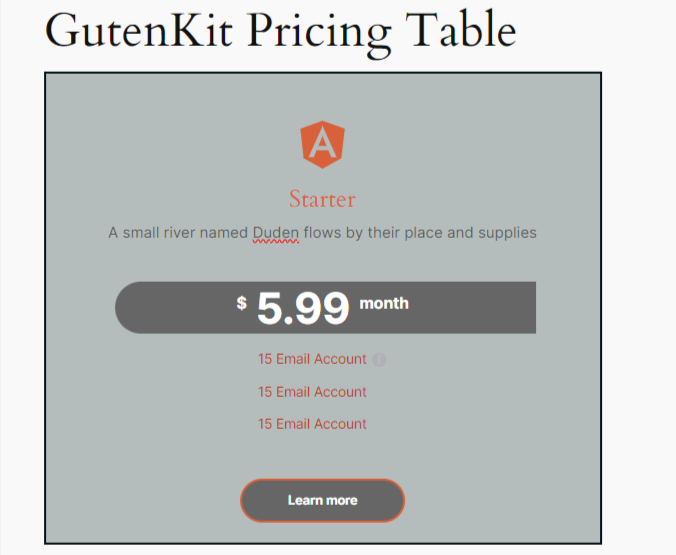
Step 1: Add the Pricing Table Block #
Start to edit an existing page or add a new page and click the “+” icon > Search for the Pristabel in the block library > Drag & drop the block to the editor screen.
Step 2: Add Pricing Table Content #
Open the block settings and go to the content tab. At first, we’ll enter the pricing table name and additional information.
Header: #
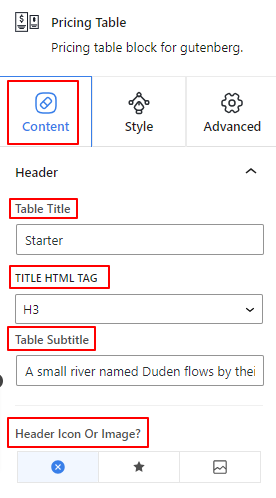
- Table Title: Enter the text of your table header title.
- Titel HTML-tag: Select the heading’s HTML tag to H1- H6, Div, Span, or Paragraph.
- Table Subtitle: Use this box to write the subtitle for the pricing table.
- Header Icon or Image: Add an icon or image for the table header. You can also choose to display none.
Step 3: Enter Pricing Info #
Price Tag: #
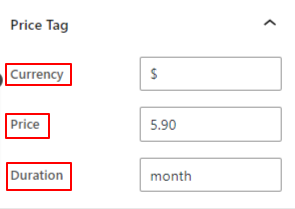
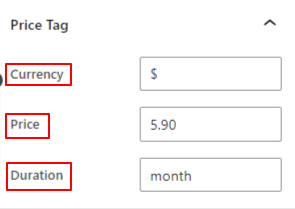
- betalingsmiddel: Add a sign or word to show the monetary standard.
- Pris: Enter a value for the price.
- Duration: Enter the text to show the package duration.
Step 4: Add Package Details #
From the feature settings area, you will add the details of your package.
Funktioner: #
- Features Style: Select a style from the dropdown to display the feature between a paragraph or list.
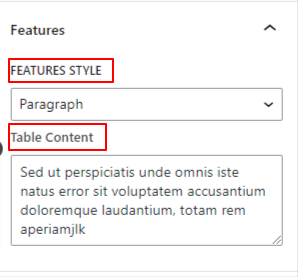
- Table Content: If you choose the paragraph style this option shows up. Enter the package details in the box.
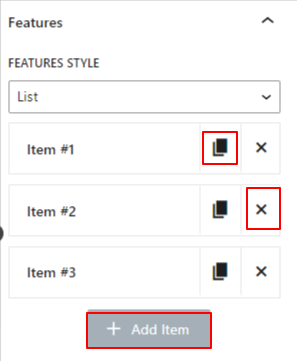
- Liste: Selecting the List option will open up settings for adding a feature list. To add an item, hit the + Tilføj vare button. You can also copy an item by clicking the “Klon vare” icon and delete one with the “x” icon. Now, click any of the items and there will be the following options.
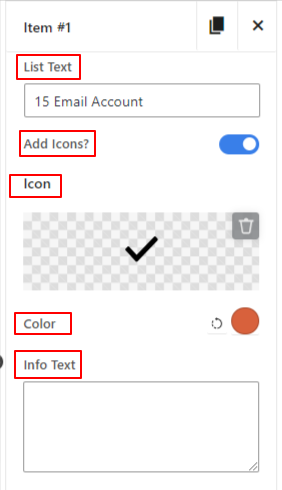
- List Text: Enter text for the feature or package.
- Add Icons: Enable this toggle button to show an icon with the feature.
- Ikon: Select an icon from the library or upload it from your device.
- Farve: Select a color for your icon.
- Info Text: Add any special info about the feature in this box. It will enable an info icon.
Step 5: Add Pricing Table Button #
Using this settings area, you can add a button within the pricing table
Knap: #
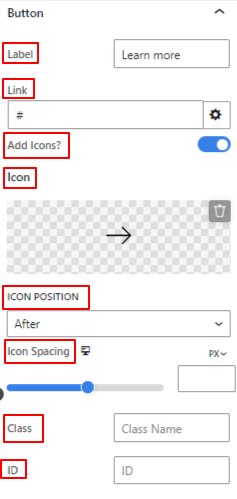
- Etiket: Indtast teksten til din knap.
- Link: Enter the link address of the webpage you want the visitor to go to.
- Tilføj ikon: Show an icon with the button text.
- Ikon: Choose an icon from the library or upload your own one.
- Position: Place the icon before or after the text.
- Icon Spacing: Use the slider to define the gap between the button text and the icon.
- Class & ID: Add a specific Class & ID in these boxes to target the custom CSS from the Stylesheet.
Step 6: Configure Element Ordering #
Custom Ordering: #
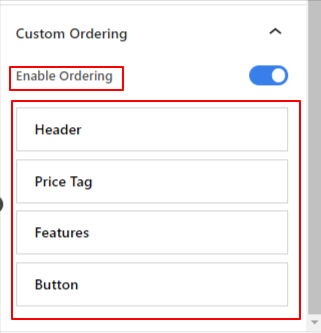
- Enable Ordering: Activate this toggle button to set the ordering of items. Drag an item up or down to place it in your preferred position.
Step 7: Style Content Area #
Now, we’ll focus on styling the text content of the pricing tale. You need to enter the “Fanen Stil”.
Pricing Body: #
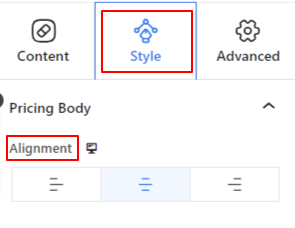
- Justering: Set the horizontal position of the pricing table to left, center, or right.
Up next, there will be Table Title and Subtitle options. Both settings have similar settings.
Table Title: #
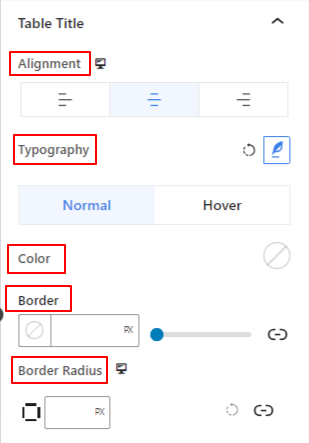
- Justering: Align the table title to left, center, or right.
- Typografi: Open this setting area to get all the typography customization for the table title.
The following options are applicable for both normal and hover options.
- Farve: Use the color picker to choose a color for the title.
- Grænse: Get all the border customizations like color, style, and thickness.
- Grænseradius: Define the roundness of the border roundness.
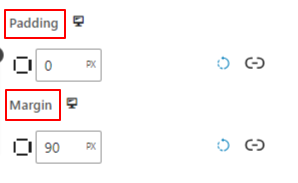
- Polstring: Add spaces around the title.
- Margin: Define the distance of the title with other elements.
Step 8: Customize Pricing Info #
Price Tag: #
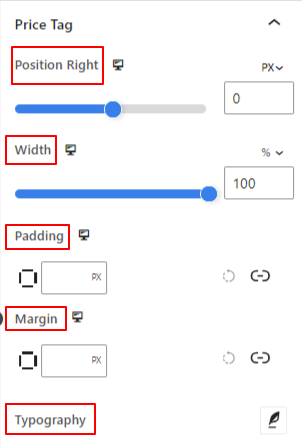
- Position Right: Adjust the left/ right position of the price tag background.
- Bredde: Use the slider to extend or shrink the background width.
- Polstring: Add inner space to the pricing tag.
- Margin: Adjust the distance of the pricing tag with other elements.
- Typografi: Open this setting to style the typography of the price tag.
Varighed:
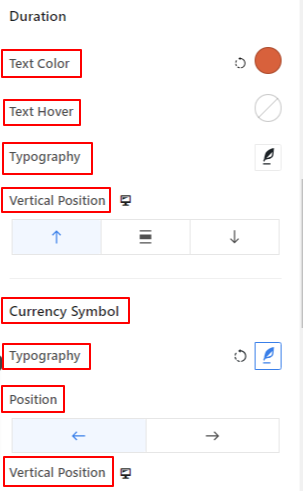
- Tekst farve: Choose a color for the duration text for the normal state.
- Text Hover: Set the text color on hover as in the previous option.
- Typography: Get all the typography options for the duration text.
- Lodret position: Define the vertical position of the duration text within the pricing tag. (Top, Middle, Bottom)
Valutasymbol:
- Typografi: Style the currency text.
- Position: Place the currency symbol before or after the pricing number.
- Lodret position: Set the vertical positioning of the currency symbol.
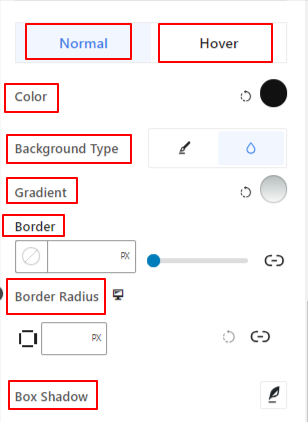
- Farve: Select a color for displaying your currency.
- Baggrundstype: Add a background type between solid color and gradient.
- Grænse: Set the thickness, color, and style of the border.
- Grænseradius: Enter a value to measure the roundness of the border.
- Box Shadow: Beautify this portion with a box shadow animation effect.
Step 9: Customize Package Details #
Funktioner #
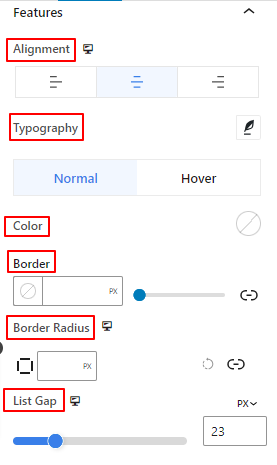
- Justering: Align the feature paragraph text or list to left, center, or right.
- Typografi: Change the feature text style, font family, weight, transform, spacing, etc.
The following styling features can apply to both normal and hover options.
- Farve: Pick a color for the feature text.
- Grænse: Customize the border style, color, and thickness.
- Grænseradius: Juster kantens rundhed.
- List Gap: This option only appears when you select the list option in the features setting in the content tab. Use this slider to define the gap between all the list items.
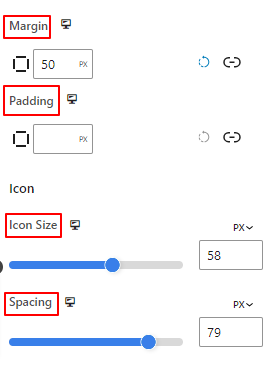
- Margin: Add spaces surrounding the feature text area.
- Polstring: Expand the space around the feature text area by entering a value in this box.
Ikon:
- Icon Size: Use this slider to measure the icon size of the list.
- Spacing: Define the gap between the icon and the text of the list.
Step 10: Customize Pricing Table Button #
Knap: #
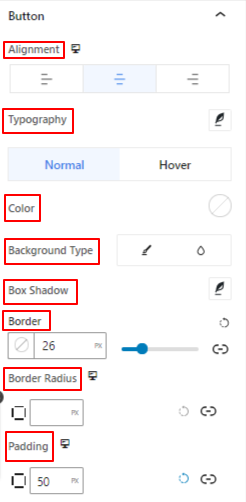
- Justering: Place the button to the left, center, or right.
- Typografi: Get various styling options for button text.
- Farve: Give a color to the button text.
- Baggrundstype: Choose a classic or gradient background type.
- Box Shadow: Give a shadow effect to your border.
- Grænse: Define the border thickness, style, and color.
- Grænseradius: Juster kantens rundhed.
- Polstring: Increase space inside the button border.
Step 11: Configure Advanced Settings #
Fra fanen Avancerede indstillinger kan du konfigurere harmonikablokkens layout, baggrund, kantstile og kontrollere dens synlighed.
Layout: #
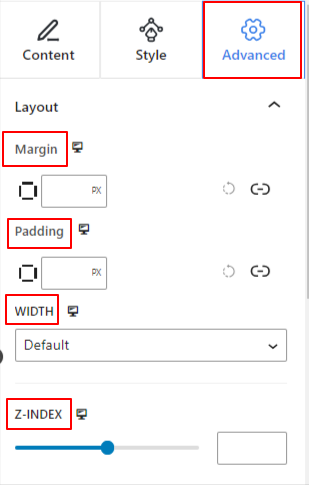
- Margin: Definer rummet omkring bloklayoutet. Det hjælper med at indstille afstanden mellem en anden blok.
- Polstring: Indtast en værdi for at indstille rummet omkring blokken i dens layout.
- Bredde: Bortset fra at beholde standard layoutbredde.
- Fuld bredde: Hvis du vælger dette, vil layoutet spænde over hele skærmens bredde.
- Inline (automatisk): Anvendelse vil have samme bredde som blokelementet.
- Brugerdefinerede: Hvis du vælger denne indstilling, vises en skyder for at definere det vandrette rum i bloklayoutet.
- Z-indeks: Brug skyderen til at angive stakrækkefølgen af blokken med andre blokke.
Position: #
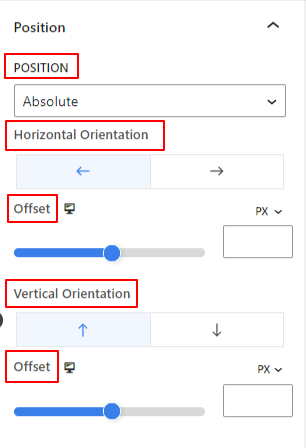
Under rullemenuen vil du se tre muligheder: Standard, Absolut, og Fast.
- Absolut: Hvis du vælger denne mulighed, får du en absolut placering af blokken, hvilket betyder, at elementerne passer ind i deres beholder.
- Fast: Indstillingen Fixed position vil lade elementet passe ind i hele visningsporten eller skærmen.
Både Absolute og Fixed muligheder har lignende indstillinger som nedenstående:
- Vandret orientering: Vælg positioneringsretningen mellem venstre og højre.
- Offset: Brug skyderen eller indsæt en værdi manuelt for at justere den vandrette placering af blokken.
- Lodret orientering: Vælg positioneringsretningen mellem op eller ned.
- Offset: Brug skyderen eller indsæt en værdi manuelt for at justere den lodrette placering af blokken.
Baggrund: #
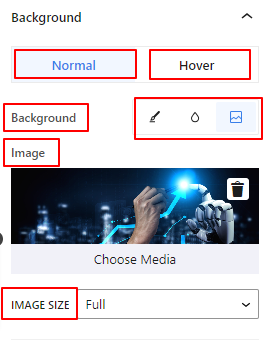
- Baggrund: Vælg en baggrundsindstilling mellem ensfarvet, farveforløb eller billede.
Under indstillingen Hover:
- Billede: Hvis du vælger billedindstillingen, åbner den følgende muligheder:
- Billede: Vælg et billede fra mediebiblioteket, eller upload dit eget.
- Billedstørrelsee: Vælg billedstørrelse mellem Thumbnail, Medium, Large eller Full.
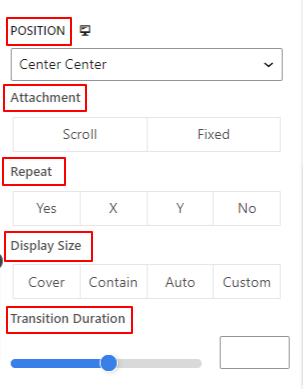
- Position: Vælg placeringen af de 10 forskellige muligheder.
- Vedhæftet fil: Angiv den faste eller rullebaggrundsbillederelation med resten af browserskærmen.
- Gentage: Vælg en indstilling for at indstille, hvordan baggrundsbilleder gentages.
- Skærmstørrelse: Vælg en skærmstørrelse blandt fire forskellige muligheder.
- Overgangsvarighed: Brug skyderen til at justere baggrundsovergangen fra normal til svævetilstand.
Grænse: #
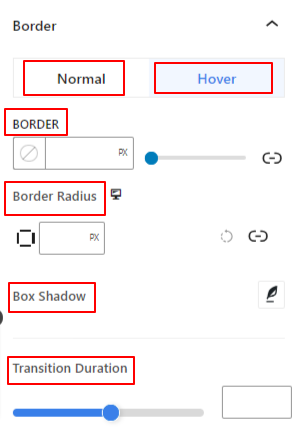
- Grænse: Under denne indstillingsmulighed får du indstillingsmuligheder for grænser som bredde, stil og farve.
- Grænseradius: Indstil grænsens rundhed ved at indtaste en værdi.
- Box Shadow: Få alle indstillinger som farve, vandret/lodret, sløring, spredning og mere for at give skyggeeffekter til kanten.
Under svævemuligheden:
- Overgangsvarighed: Du kan tilføje en værdi manuelt eller bruge skyderen til at indstille tidspunktet for ændring af kantdesignet i svævetilstanden.
Sigtbarhed: #
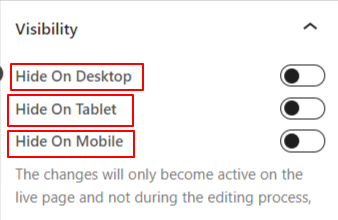
Synlighedsmodulet giver dig mulighed for at styre visningen af blokdesigns afhængigt af enhedstypen. Der vil være tre enhedsindstillinger (Desktop, Tablet, Mobil) med en skifteknap. Slå til/fra-knappen til for at skjule den pågældende enheds blokdesign.
Du kan dog stadig se det i redigeringsvisningen.
Fremskreden: #
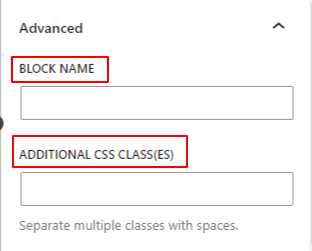
- Bloknavn: Giv et navn for at identificere denne blok unikt, mens du linker eller scripter for at style blokken.
- HTML-anker: Tilføj en URL for at linke en hjemmesideside.
- Yderligere CSS-klasser: Tildel yderligere CSS-klasser til blokken, som giver dig mulighed for at style blokken som du ønsker med tilpasset CSS.
NB: Du kan tilføje flere klasser separat med mellemrum.
That’s it! Now, it’s your turn. Create an amazing pricing table from the block editor on your WordPress website.


