


To add a before-and-after image slider in WordPress, you need a visual comparison tool that overlaps two images and provides an interactive, draggable handle. Using the ElementsKit Image Comparison widget for Elementor, you can easily showcase transformations, photo edits, or product results without writing any custom CSS or JavaScript.
Quick Solution: Before After Image Slider
✅ Activate Widget: Gå til ElementsKit > Widgets, tænd for Billedsammenligning widget, and click Save.
✅ Add to Page: Open Elementor, search for “Image Comparison,” and drag it onto your canvas.
✅ Upload Media: In the Content tab, upload your “Before” and “After” images.
✅Style Image Slider Container: Customize the container border, image, background, handle, etc.
✅ Publish: Update the page to make the slider live.
Also, watch in action ⬇️
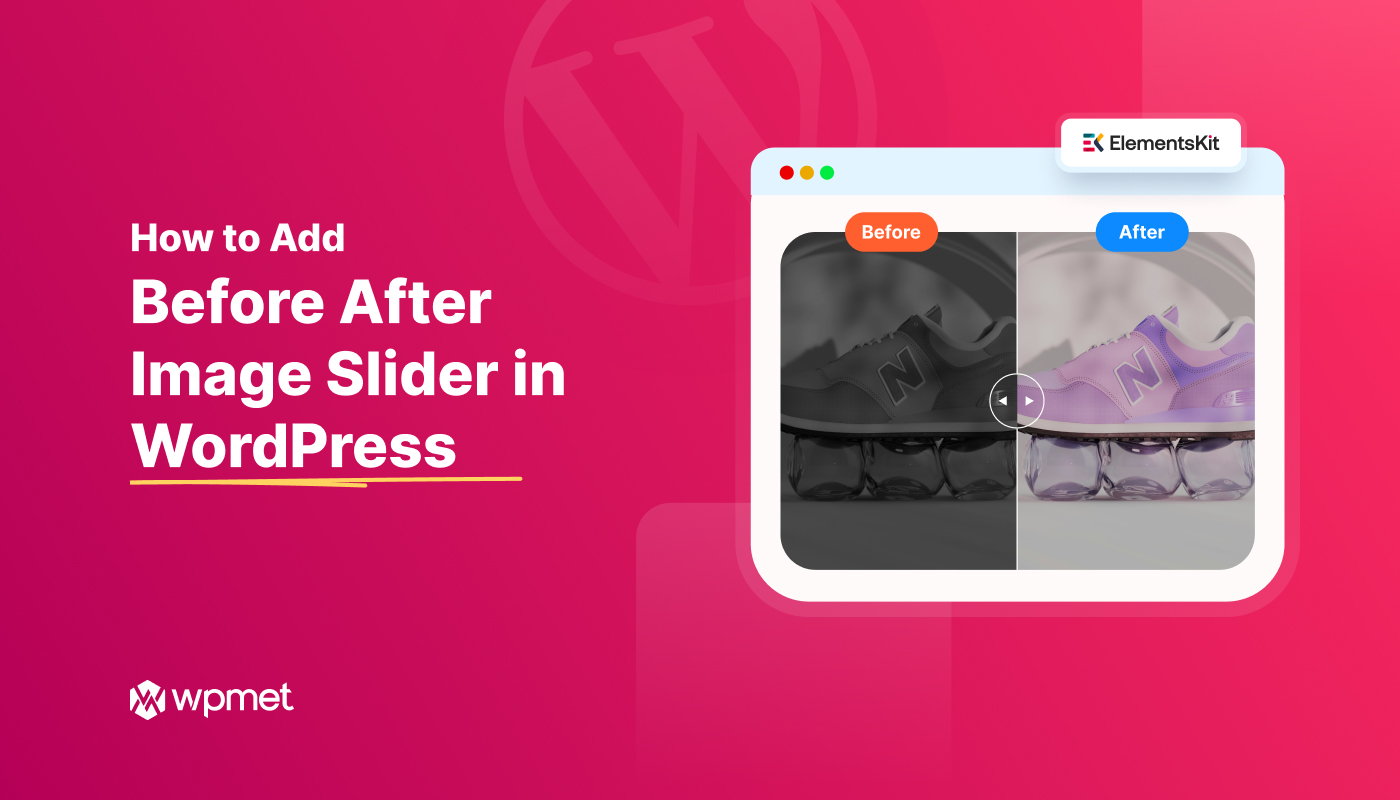
How to Add Before After Image Slider in WordPress
Let’s go through step-by-step process of adding a before after image slider in WordPress:
Forudsætning: Install and activate the Elementor Addon (Free Version is enough)
Step 1: Install & Activate ElementsKit Elementor Addon
Before building the slider, ensure the required tools are active on your site.
- Installer og aktiver ElementsKit plugin from your WordPress dashboard.
- Naviger til ElementsKit > Widgets.
- Find Billedsammenligning widget in the list, toggle it to PÅ, and save your changes.
Step 2: Upload Before After Images for Comparison Slider
Open your desired page with Elementor, drag the Billedsammenligning widget into a section, and establish your visual content.
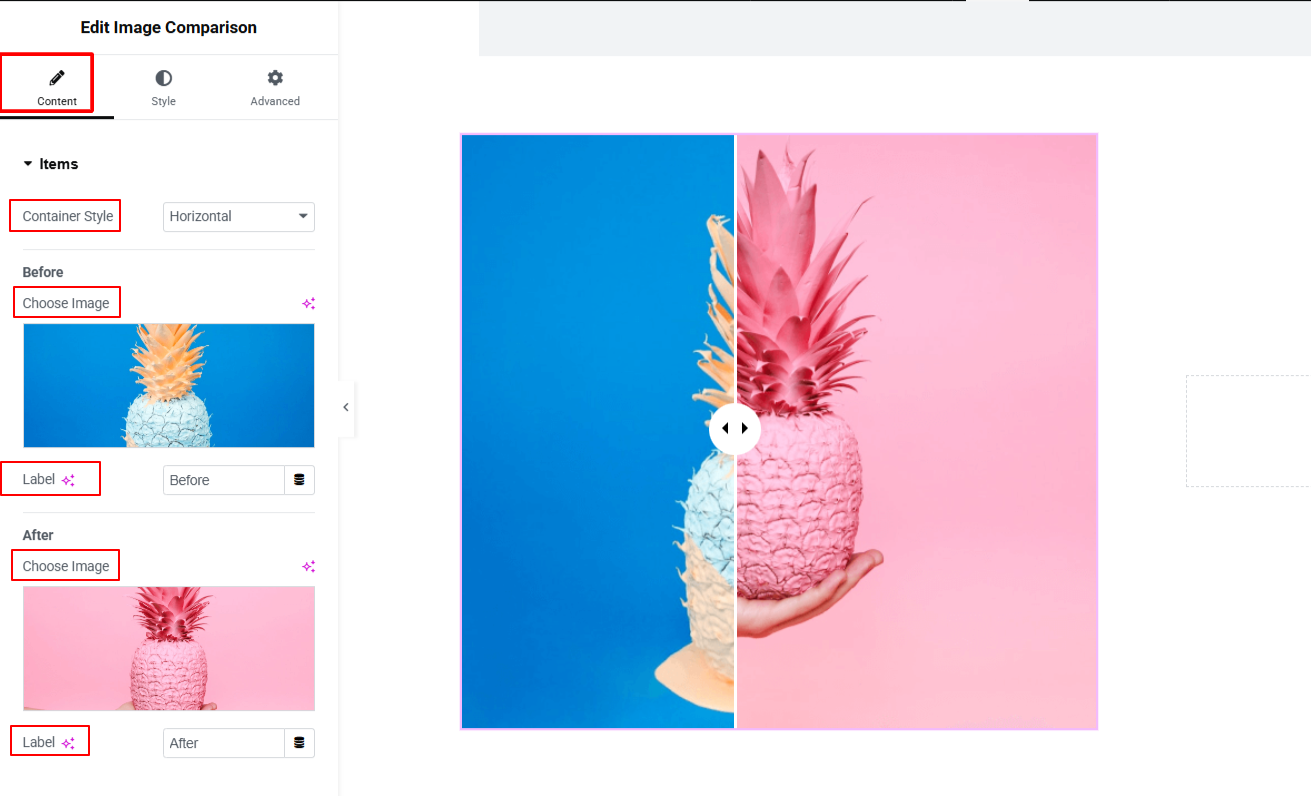
- Vælg stil: Choose between a Horizontal (side-to-side) or Vertical (top-to-bottom) container style.
- Upload Before Image: Click the image placeholder to select the original photo from your media library.
- Add or Edit Before Image Label: Type the text for the “Before” tag (e.g., “Original,” “Old,” “Before”).
- Upload After Image: Click the second image placeholder to select the transformed photo.
- Add or Edit After Image Label: Type the text for the “After” tag (e.g., “Retouched,” “New,” “After”).
Step 3: Configure Before After Image Slider Functionality
Define how users will interact with the slider handle. Under the Indhold tab, expand the Indstillinger section:
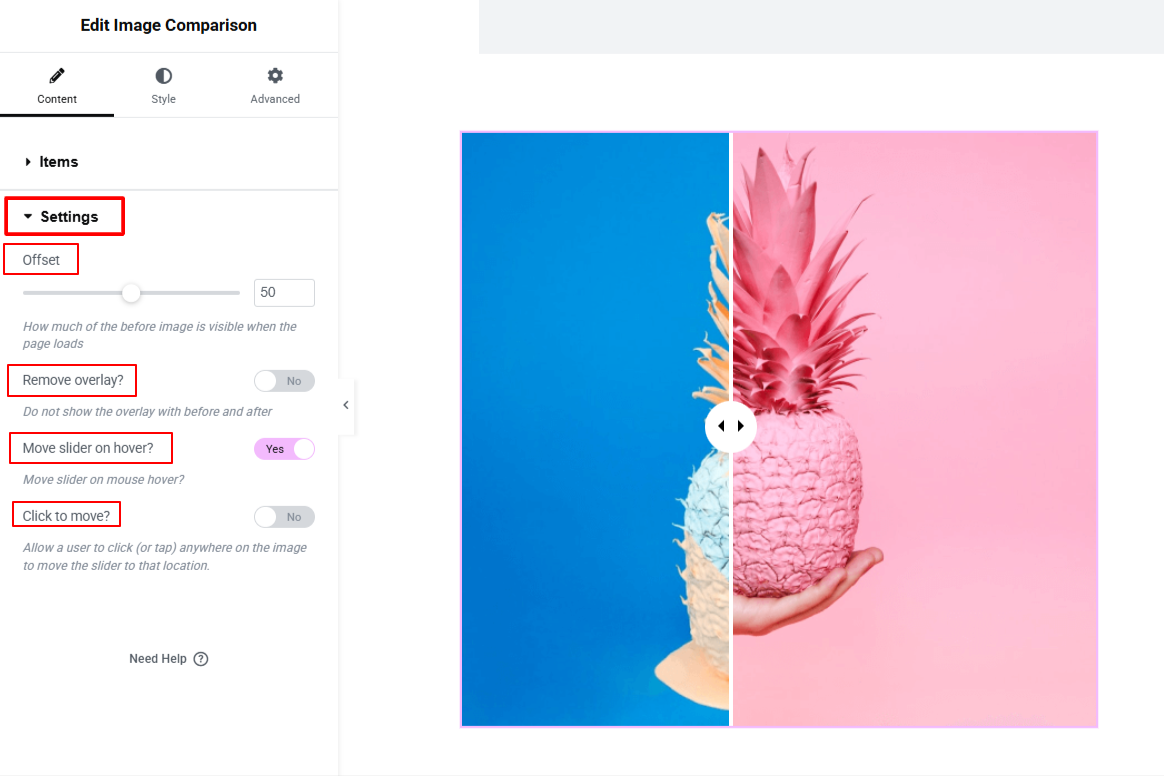
- Set Offset: Use the slider to determine where the handle sits by default upon page load (e.g., set to 50% for dead center, or 70% to reveal more of the “Before” image initially).
- Enable to Remove Overlay: Toggle this button to add or remove the dark overlay effect that appears before interaction.
- Enable to Move Slide on Hover: Toggle this button PÅ if you want the slider handle to follow the user’s mouse automatically without requiring a click.
- Enable to Move by Click: Toggle this button PÅ to allow users to instantly snap the slider to wherever they click on the image.
Step 4: Style Image Before After Image Slider Container
Skift til Stil tab to customize the aesthetics of your comparison tool to match your brand.
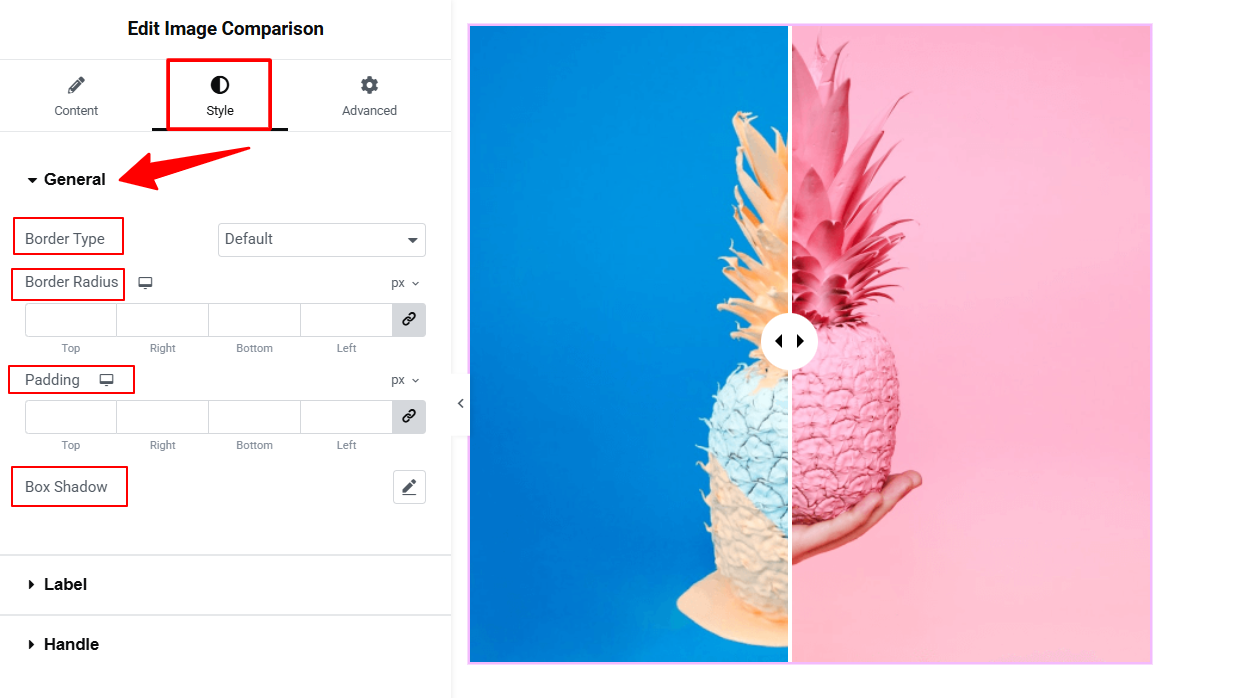
Under General Option:
- Customize the container’s Border Type, Grænseradius, Polstring, og Box Shadow to frame the images neatly.
Under Label Option: (Note: You can set different styling independently for both the “Before” and “After” labels.)
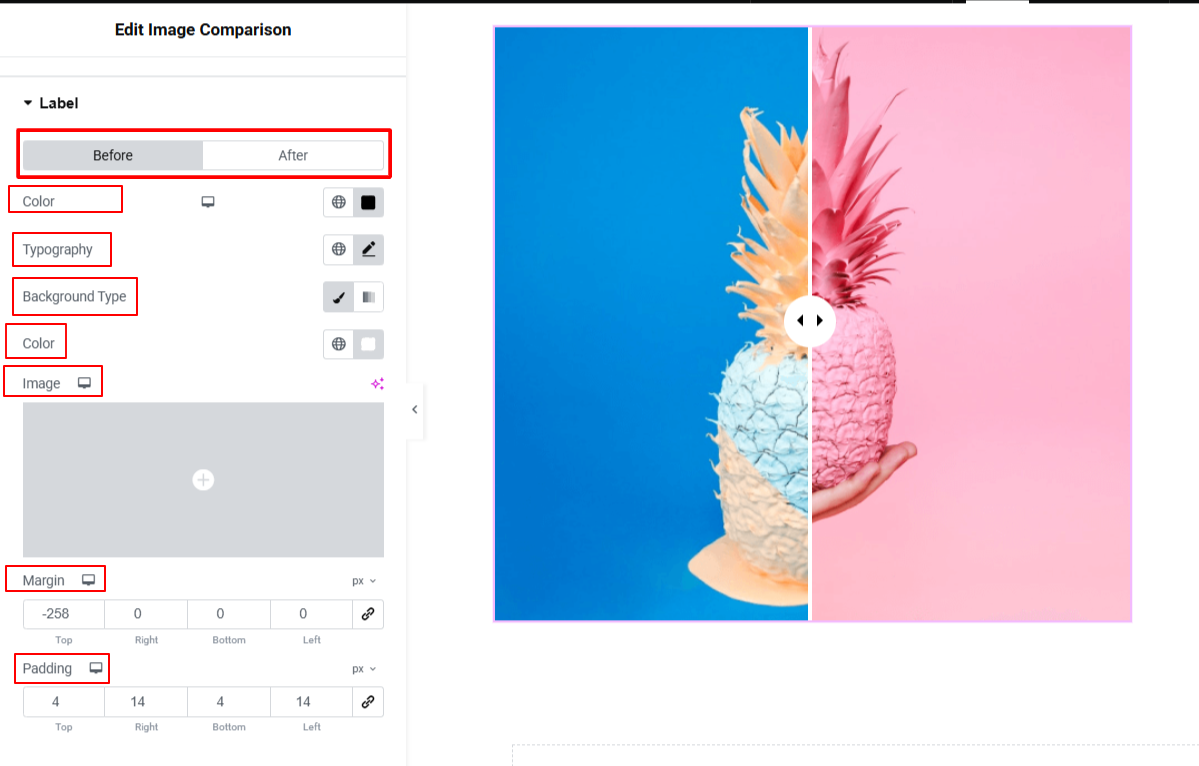
- Adjust the label Farve, Typografi, Baggrundstype, Margin, og Polstring to ensure the text is readable against your specific images.
Under Handle Option:
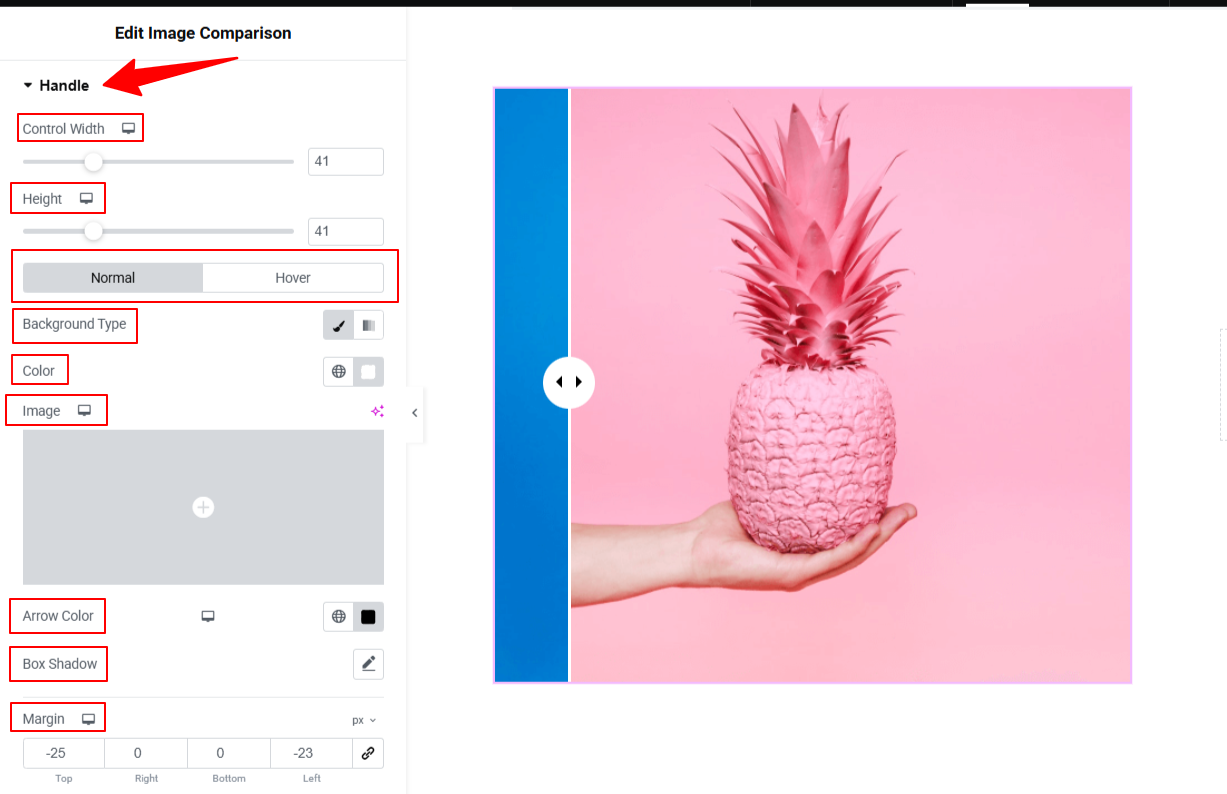
- Control Width & Height: Size the draggable handle.
- Background Type, Arrow Color, & Box Shadow: Customize these elements for both Normal og Svæv states.
- Margin & Border Radius: Refine the shape of the handle (e.g., set a high border-radius for a circular handle).
Under Handle Divider Option:
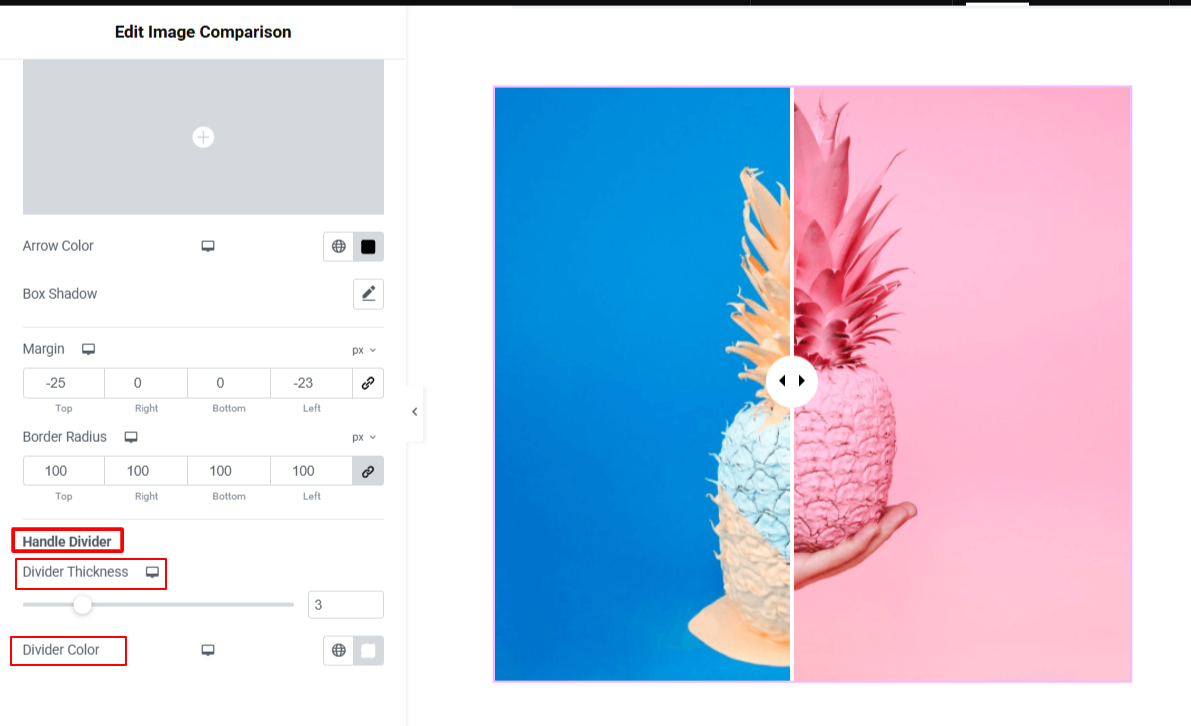
- Control the vertical line separating the two images by adjusting the Divider Tykkelse og Skillefarve.
Step 5: Preview & Publish Before After Image Slider
Use Elementor’s Responsive Mode to check how the slider behaves on tablet and mobile devices. Once you are satisfied with the touch functionality and image alignment, click Opdatering eller Offentliggøre to push the changes live.
Ofte stillede spørgsmål
Why Do Before And After Images Look Distorted or Stretched?
Does the Before and After Slider Work Fine on Mobile Touch Screens?
Can I hide the “Before” and “After” text labels
How can I change the default starting position of the slider?
Konklusion
Adding a before-and-after image slider to your WordPress site is one of the most compelling ways to visually prove your value and showcase real results. With the ElementsKit Image Comparison widget, you eliminate the need for custom coding and can build an interactive, mobile-responsive slider in minutes.
By giving your visitors a hands-on way to explore your transformations, you instantly build trust and keep them engaged on your page longer.
Skriv et svar