Want to learn how to add a sticky floating video on page scroll in your WordPress site?
Sticky videos are a powerful way to engage your audience to your website. Nowadays, people consume more video content than written content. So, if you find your website visitors not engaging enough with your site, adding a video can solve that issue.
If you are looking for an effortless way to make your website video sticky, then you have landed on the right article. Because in this blog, you will learn how to add sticky video in Elementor based WordPress site in a few steps and a few minutes.
So keep reading…
What is a sticky video?
Sticky videos are videos that are pinned on a webpage and it stays floating in the same place on a web page window even while a user is scrolling up or down.
Why add Sticky Video In Elementor WordPress website?
The concept of a sticky video on a website does not only sound cool but also has many advantages. Here are some of the benefits you can leverage by adding a sticky video to your WordPress website.
- Increases user engagement: With sticky video, people can watch and read the webpage’s content at the same time. As a result, people tend to engage more with websites.
- Increase video completion rate: Since sticky videos don’t block the whole page, customers are likely to watch till the end rather than close it on the midway. So, making your video sticky can actually increase video completion time.
- Grab user’s attention: Usually, people skimp through a site. In this case, if you rely only on text content, there is a possibility that your customers may miss out on important stuff that you would want them to notice. You can bring your user’s attention more effectively to specific information with video.
- Better Storytelling: Videos give you a broader canvas to tell stories than plain text content. Since, you get to use text, animation, and voice at the same time in a video, you are better equipped to tell a story more effectively.
Convinced that you should add a sticky video to your WordPress site? Well, if you are, move on to the next section to figure out how you can do it.
How to add a sticky video to Elementor website in 6 steps
This is the easiest process of making video sticky and floating on your WordPress site. Go through all the steps to add a sticky video to Elementor in a few moments.
Step 1: Install Elementor and ElementsKit
First, step is to install all the required plugins. To follow this tutorial on how to add sticky video in Elementor, you will need
- Elementor and
- ElementsKit (both free and pro versions).
Elementor is a drag and drop page builder, and ElementsKit is an addon for Elementor. So, you first need to install Elementor, then download ElementsKit and after that upgrade your plugin to the Pro version.
You can check out the documentation if you need help regarding the installation of ElementsKit pro and the process of license activation.
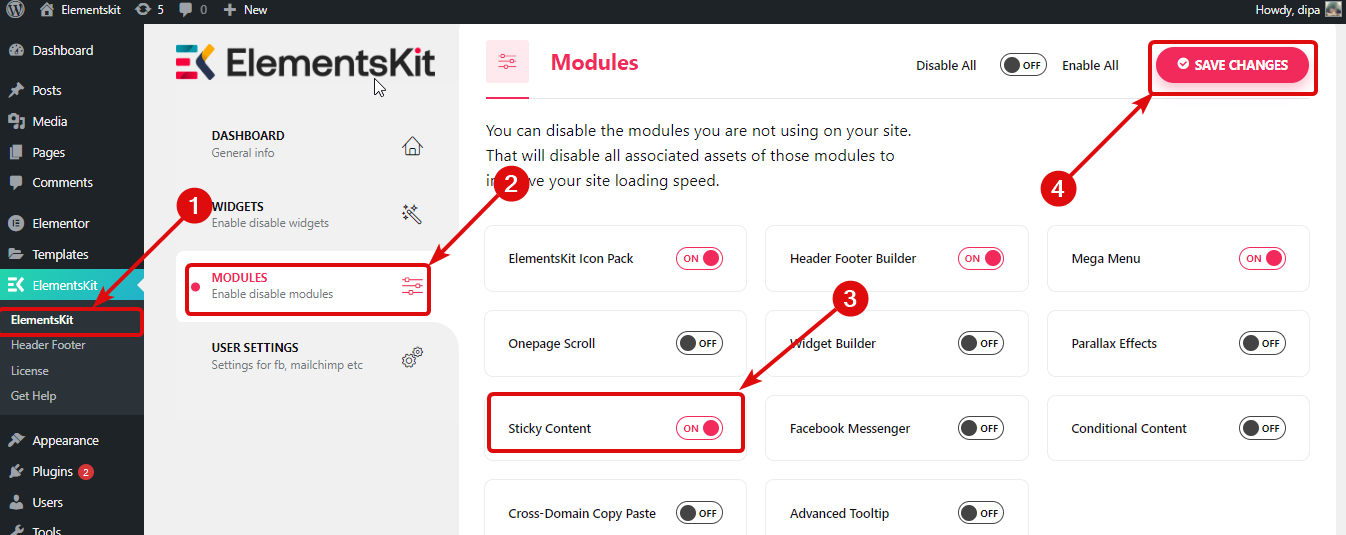
Step 2: Enable the Sticky Content Module of ElementsKit
To make the video sticky, I am going to use Sticky Content Features of ElementsKit. So, you need to enable the sticky content module.
Now navigate to ElementsKit ⇒ Modules ⇒ Sticky Content, turn on the option, and click on Save Changes to update the changes you just made.

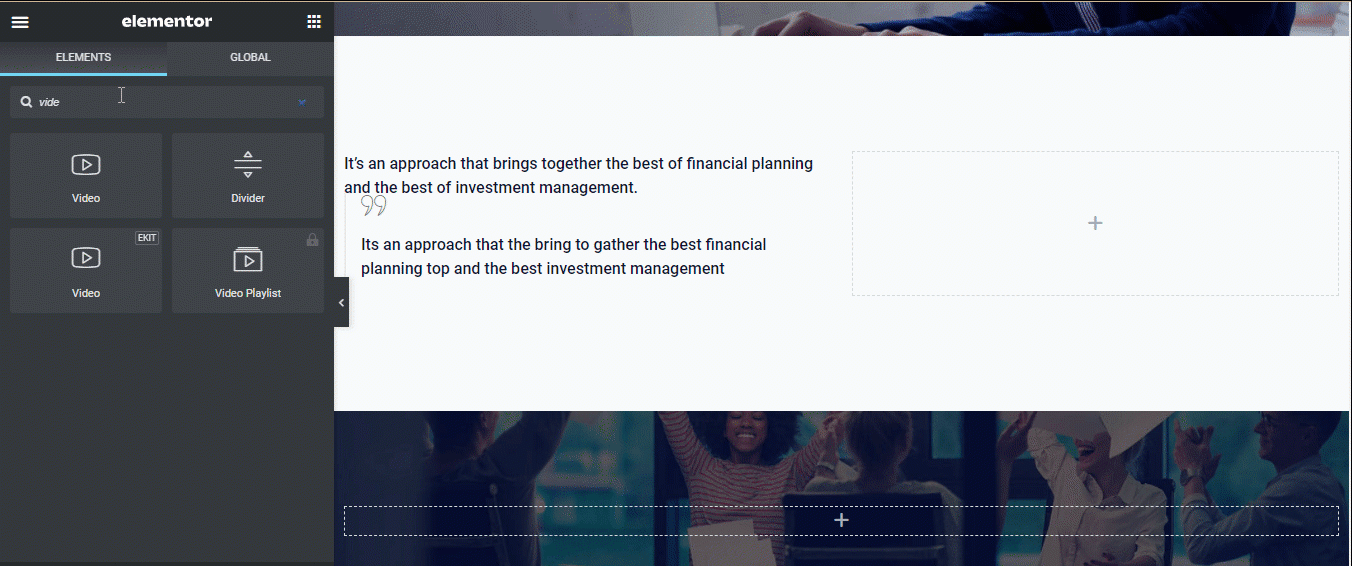
Step 3: Drag and drop the Elementor Video widget
Navigate to the page where you want to add the sticky video, click on the Edit with Elementor option.

Choose any layout you want by clicking on the + icon. After that, search for the Video widget, drag the widget and drop it where you want to add it.
Note: For this tutorial, I have already imported the premade page I am editing to show the whole process. You can create WordPress websites easily with the ElementsKit prebuilt section.
Step 4: Choose Video Source and add URL
With the Elementor video widget, you can display videos from sources such as Youtube, Vimeo, DailyMotion, and Self Hosted.
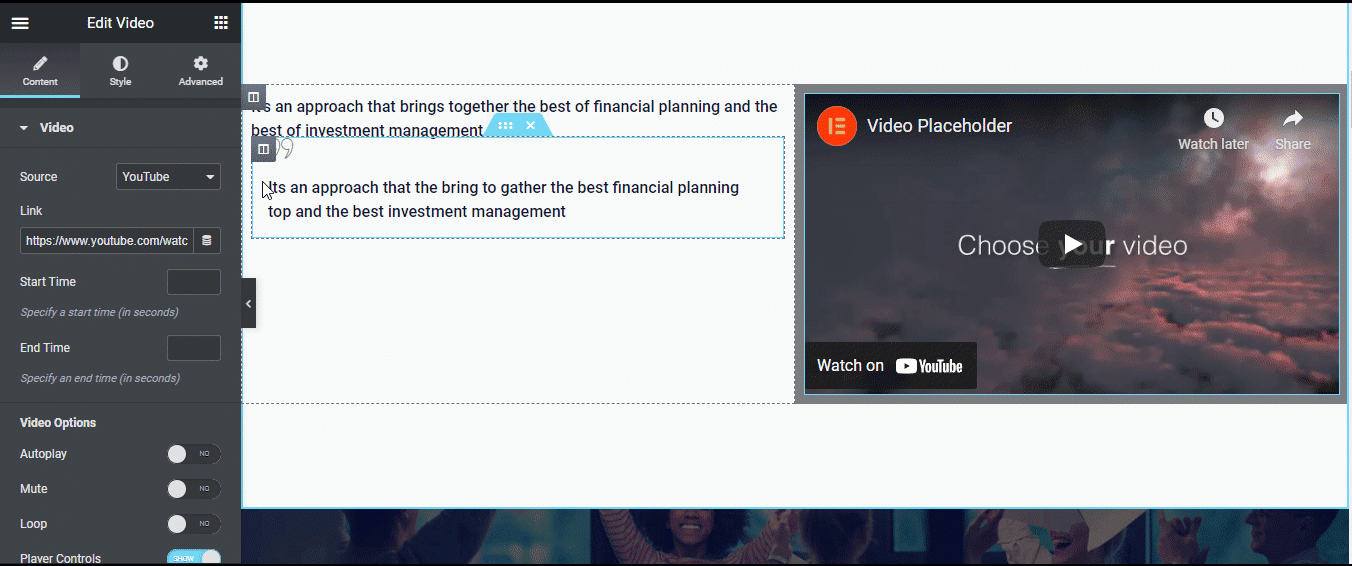
First, choose your preferred source type, then provide the video URL. I am going to use youtube for this article.
Note: In the case of self-hosted, you can upload a video to your server or provide an External URL.
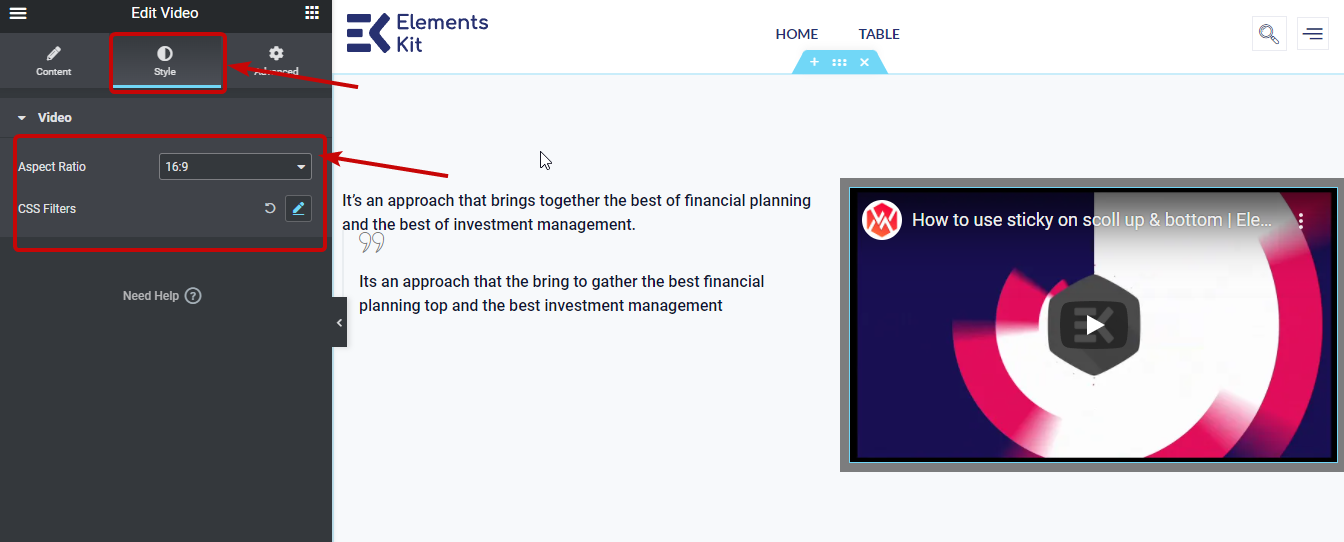
You can also customize the style of the video. To do so navigate to the style tab. Here you can choose the aspect ratio and CSS filter. You can choose from six types of ratio such as 1:1, 3:2, 4:3, 16:9 etc. Click on the CSS filter edit icon to customize blur, brightness, contrast, saturation and hue.
Step 5: Settings to make Elementor video sticky
Go to the Advanced tab. Then expand the ElementsKit sticky option. Here you can choose the sticky type as a top, bottom, column, and show on scroll up.

Once you choose Sticky type as anything other than none, you will get the following options:
- Sticky Until: Here you need to set the CSS ID of the section until which you want your video to stay sticky. You can set a custom CSS ID to the column and then copy and paste it in the Sticky until option.
- Sticky Offset: In this option, set the offset value. The offset value indicates the distance between the video and the top position of your page.
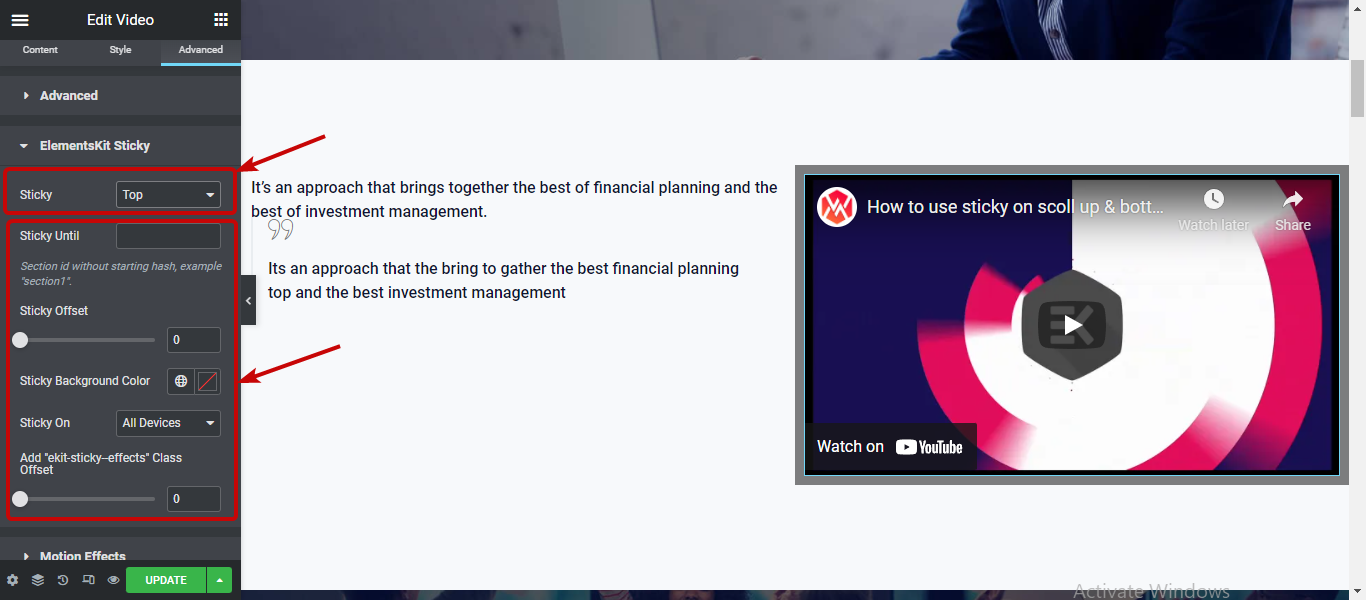
Note: Sticky until the option is not available with the sticky option column as it will only be visible till the parent column is visible on the screen.
You can change the Sticky Background Color and make the video sticky on all devices, desktop-only or both desktop and tablets.
🔥🔥 Looking for an easier way to add a huge amount of data to your website table? Check how you can add CSV/ Excel data in WordPress table in just few a steps using ElementsKit.
Step 6: Update to add sticky video in Elementor and see preview
After you choose the video type and set up all sticky settings click on update to save and click on the preview button to see the end results.
Note: If you want a sticky video button that popups to show a video on click then you can use ElementsKit Video widget instead of the Elementor Video widget. You can follow the same process described above to add sticky video in Elementor using ElementsKit video widget.
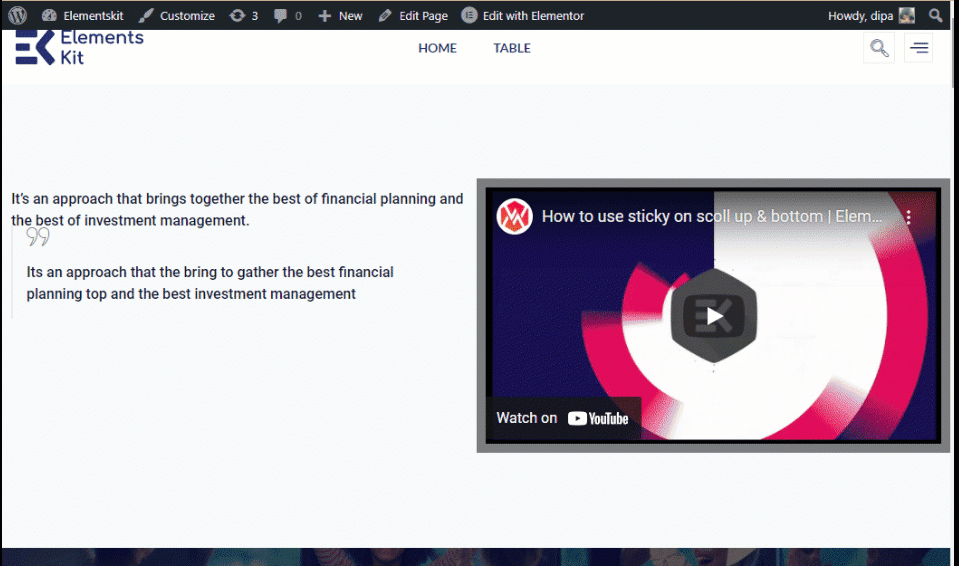
Here is a preview of Sticky Video using ElementsKit video widget.
👉👉 You can also checkout our blog on How To Create Custom Elementor Blog Post Template
Final Words
Congratulations! Now you know how to add sticky video in Elementor site. It’s a lot easier to do than it initially sounds like, right?
Do try out all the options and settings of ElementsKit sticky module and use it on your site for maximum results. If you are impressed with the ElementsKit sticky module and how easy it is to add how to add a sticky floating video on page scroll.
Then the wholesome collection of widgets and modules of ElementsKit has to offer will surprise you even more. So make sure to check out all the features ElementsKit has to offer.
Leave a Reply