
Do you want to create a Fundraising website for free on your own? 😇
In the current situation, Fundraising has increased and expanded to more online areas than ever before. Thanks to the arrival of digital trends and the fact that technology is here to stay.
Individuals and groups can use their online networks to easily expand their reach, raise donations and support humanity for good.
WordPress has made it much easier to create a Fundraising site in just a few clicks with Elementor. Here in this article, we will show you how to create a Fundraising site with WP Fundraising in just a few steps.
WP Fundraising is a multi-purpose plugin, in which you can create a single donation, multiple donations, or any personal funding website with just a few clicks.
It also has built-in payment systems, cash on delivery, direct bank transfer, checks payments, PayPal, stripe, etc. Along with all WooCommerce payment gateways.
WP Fundraising is an easy-to-use Elementor plugin with drag-drop functionality and is fully customizable.
Here are a few important features that make WP Fundraising special:

Now let’s get started! 😊
🧐 Are you looking for a Complete WooCommerce Solution?
With ShopEngine Pro, you will get a full package of 62+ Fully Customizable Widgets, 12+ Useful Modules, 15+ pre-designed templates, and more.
Check out our latest blog for more info 👉🏽 here
Developing Fundraising Websites from Scratch
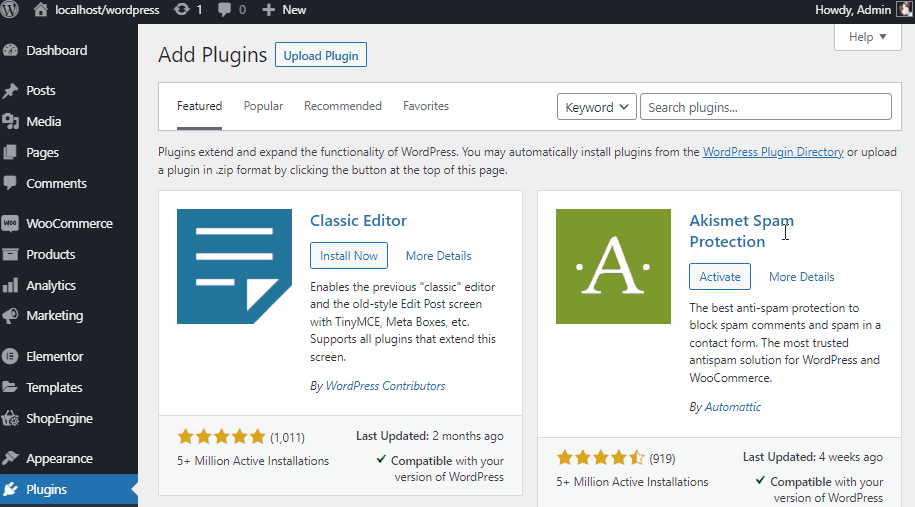
At first, you need to install WP Fundraising and for that, all you need to do is just go to your WordPress dashboard, hover over Plugins > Click on Add New
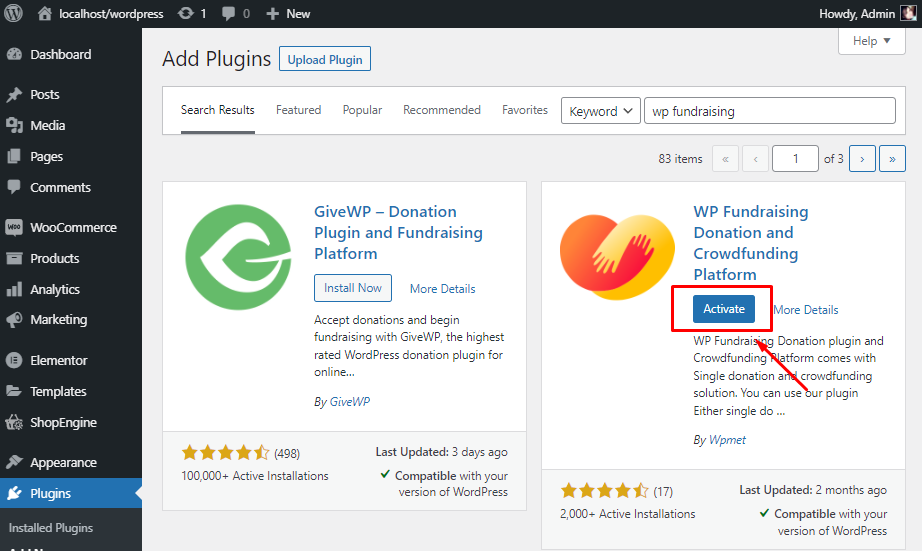
Then on the search panel, type WP Fundraising > click Install.
After that simply click on Activate and you’re all set!
Now that you have installed WP Fundraising as well as activated, a quick startup setting will take place right after when you’ll click on Add Campaign for the first time.
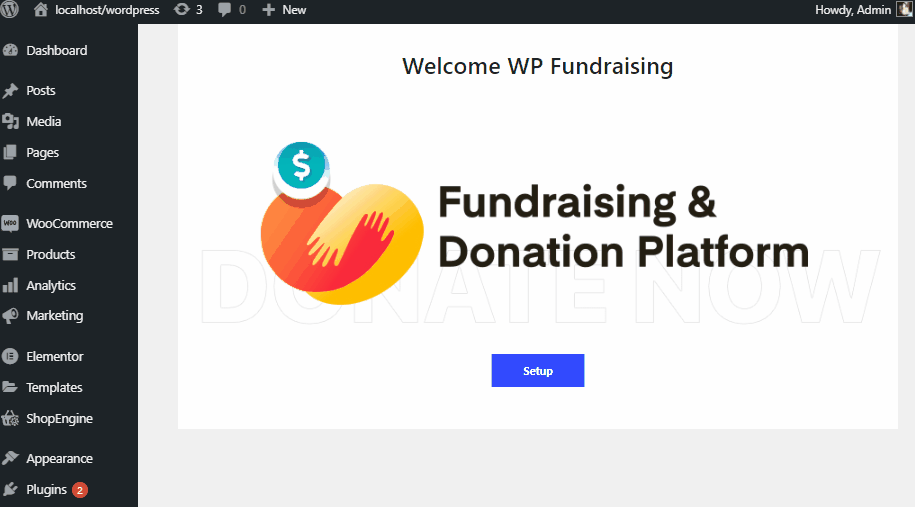
Welcome to WP Fundraising, now let’s create a fund-developing website in just a few clicks. 😃
How to set up a Campaign (Single/Crowdfunding)
WP Fundraising website will give you the floor to receive donations anywhere, anytime! Now we will show you how you can add up a single donation or crowdfunded campaign in a few simple steps.
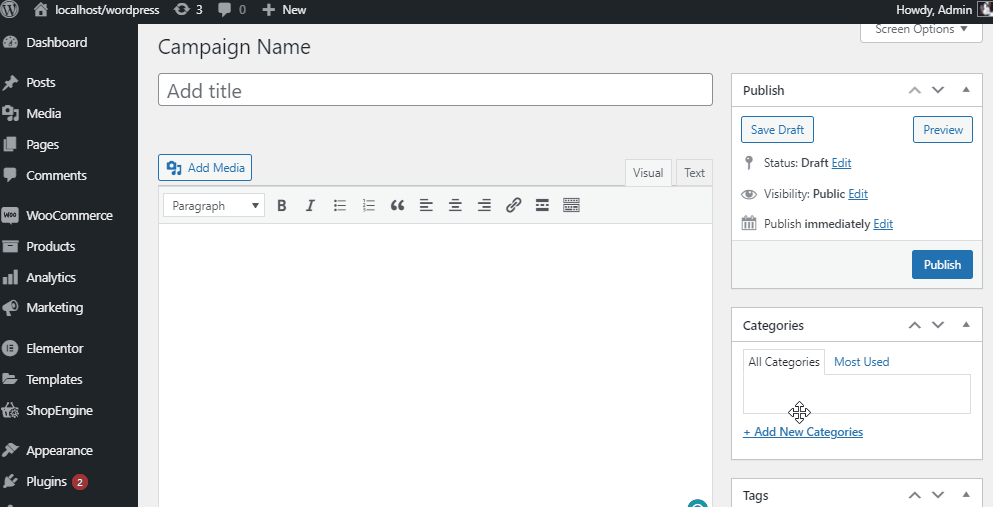
Just click on Add Campaign > give your campaign a Title > Insert image or video by clicking on Add Media > Then give your campaign a precise description on the Paragraph section.
Note: You can even select your preferred headers, as well as fonts while writing the description.
For Single Donation Campaign:
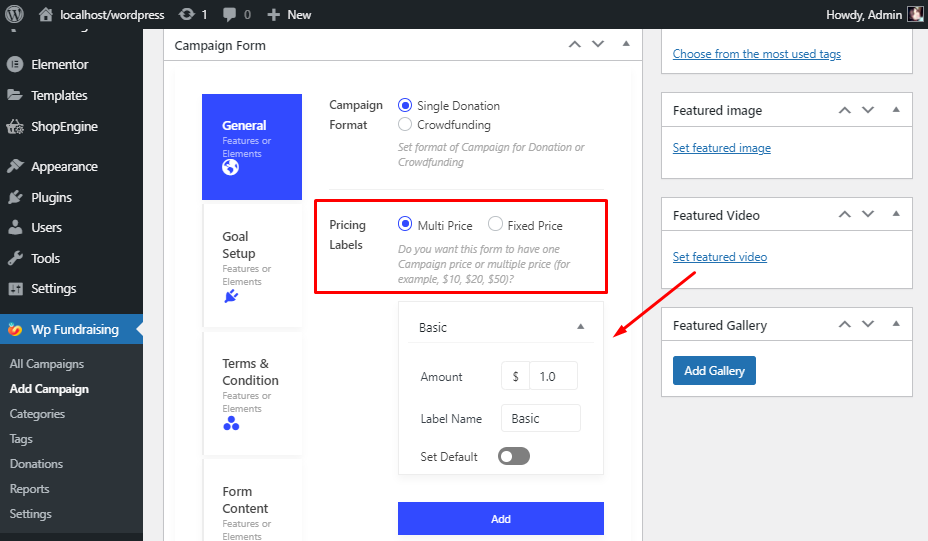
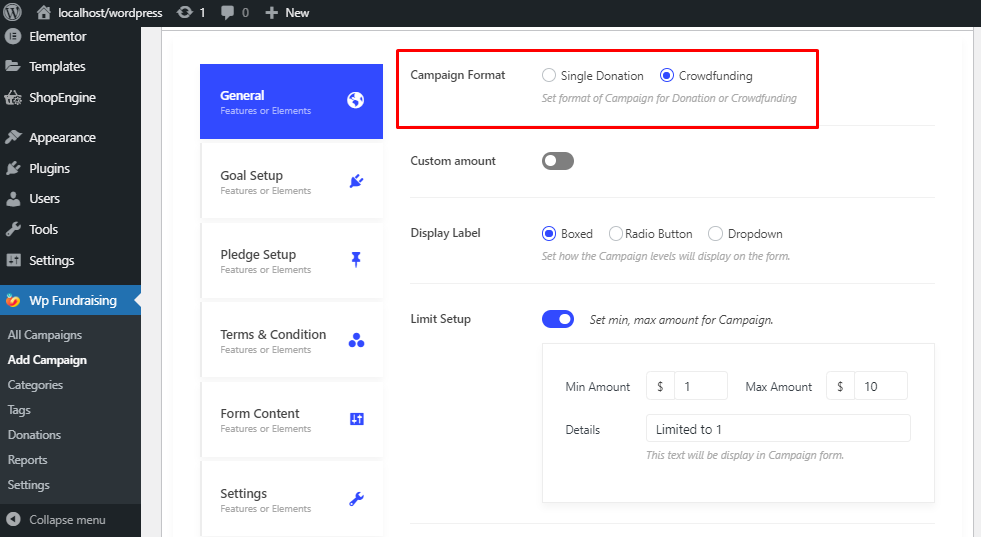
Now it’s time to select your Campaign Format. For that, you need to scroll a little down in the Campaign Form tab you’ll find the General section > Choose Single Donation.
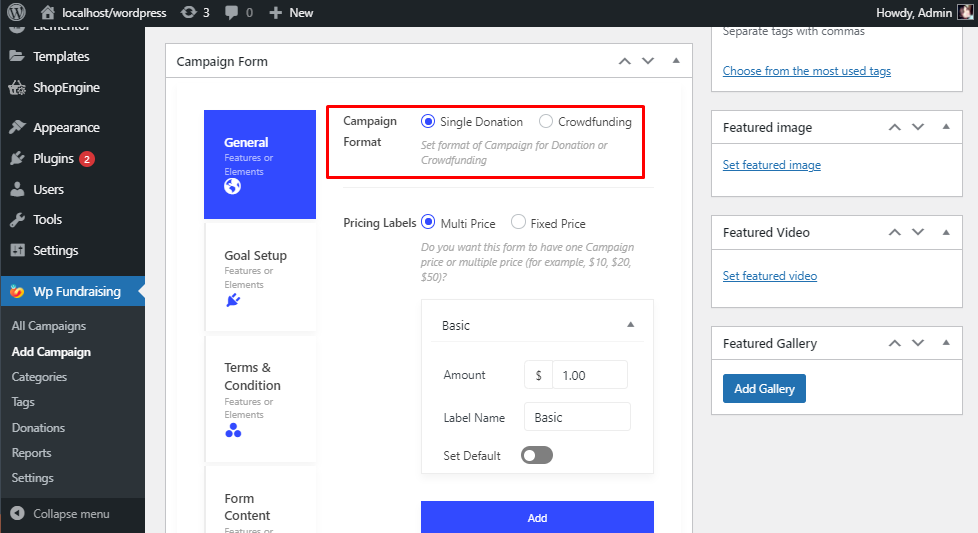
Now it’s time to configure your Price Labels > select Multi Price. Update the Basic settings and select Amount > provide a Label Name > Enable Set Default represents the amount by default. So you may enable that if you count it as a default amount.
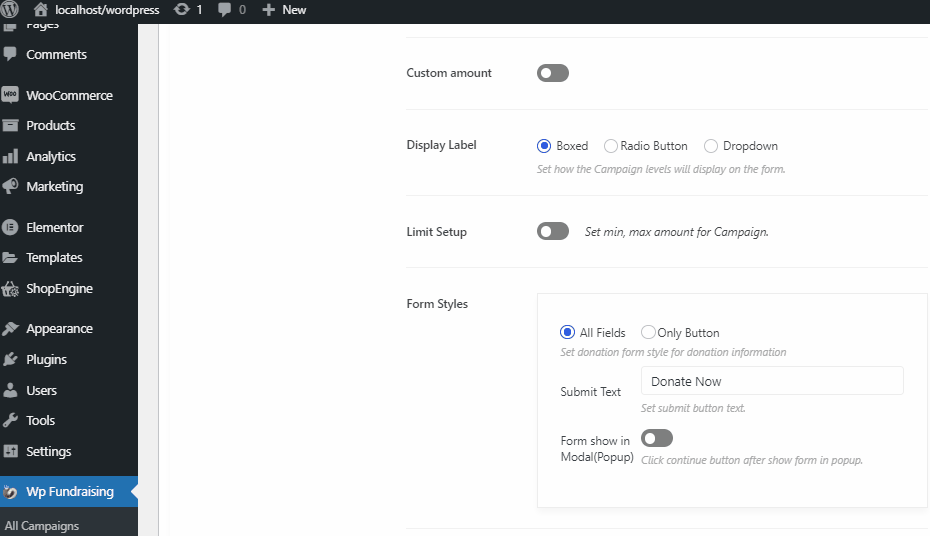
Additional customization: here you can enable the Custom Amount. Then Select Display Label from the following options Boxed or Radio-Button or you can select Drop-Down.
By Enable Limit Setup you need to set the maximum or minimum value that the user can give a short message about the donation limit. For example, you can give min amount of 1$ and a maximum amount of 10$
In the From Style, you can either choose On Fields or Only Button. After that add up a customized Submit Text. You can Enable the Form Show in Pop-up Modal too.
For Crowdfunding Campaign:
For Crowdfunding, you need to Choose Crowdfunding. And all the following terms, such as Display Label from the following options Boxed or Radio-Button or you can select Drop-Down.
By Enable Limit Setup you need to set the maximum or minimum value that the user can give a short message about the donation limit.
For example, you can give min amount of 1$ and a maximum amount of 10$.
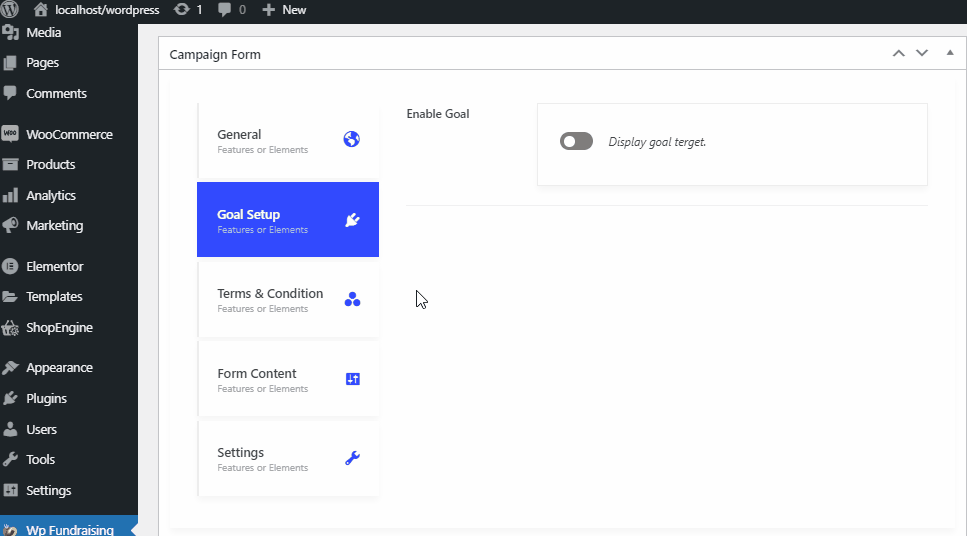
For the Goal Setup section first, you need to enable the Display Goal Target. There you can customize your Goal Style (Progress or Pie), Display As (Percentage, Plat, or Both), select a styling Color.
Now configure your Goal type. Here you can select either Target Goal, Target Date, Target Goal & Date, Campaign Never Ends. Update the Raising Amount and Target Date.
After reaching the goal enable and display a short Message to provide updates.
For Crowdfunding Campaign:
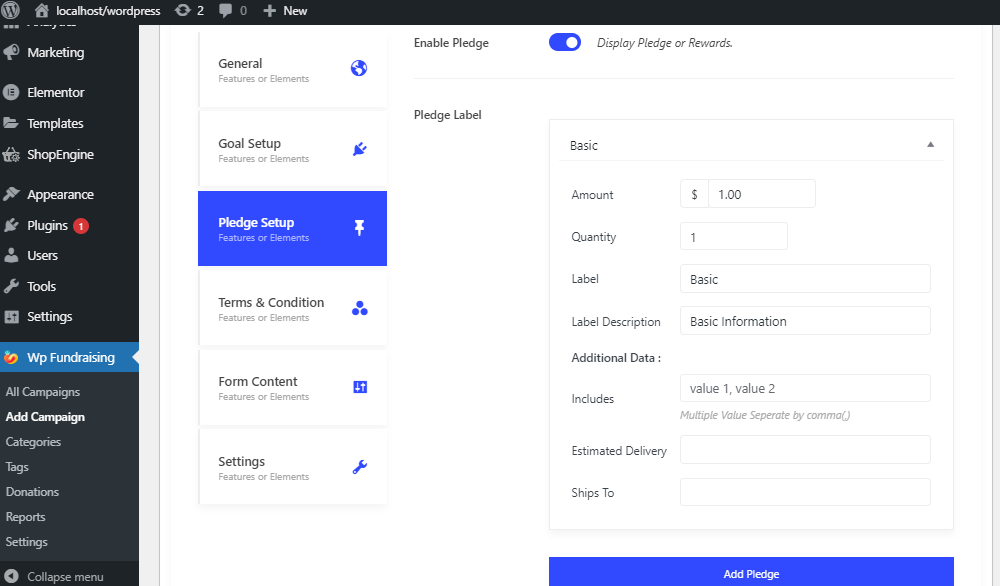
Basically, Pledge is providing a certain amount of money for a period of time with a condition that the user will pay it back to the donor after reaching the targeted amount.
On the Pledge Setup, the user can display Amount, Quantity, Label, and Label Description. On the Additional Data part, you can include multiple Values, Estimated Delivery date, and Shipping location to the site.
🙆🏻♂️ Tips & Tricks
Worries about aptomizing conversion rates? If you want to know the ins and outs of the CRO we can walk you through the process of calculating 👉🏽 the sales conversion rate in this article.
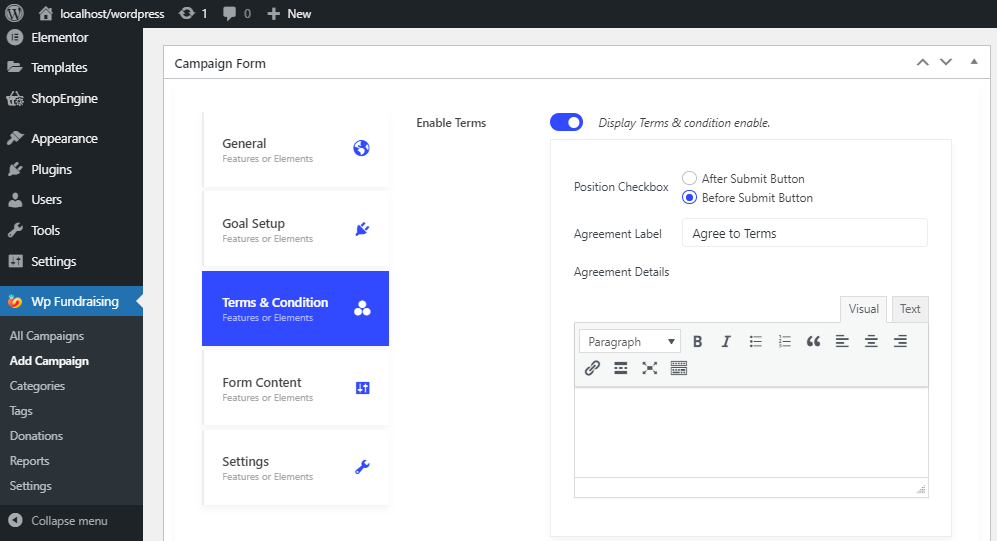
This field contains all the Terms and Conditions stuff between the site owner and donor. You have to make an agreement with the donor and these contracts must be followed accordingly.
By enabling the Display Terms & Condition you can select the Position Checkbox (After Submit Button or Before Submit Button), Agreement Label, and Agreement Details.
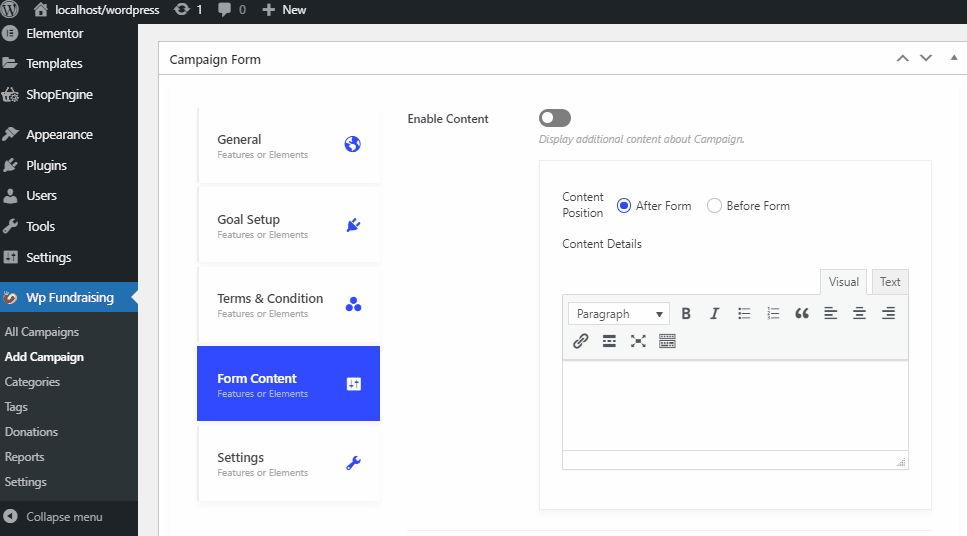
Without enabling the content button you can add a Thank You note before or after the form by default.
And, once you turn on the Custome Fields in which you can display an Additional Content Form (first name, last name, email) for your donors.
Finally, in the Settings tab, you can customize different sections. You can Show or Hide sections regarding your preference.
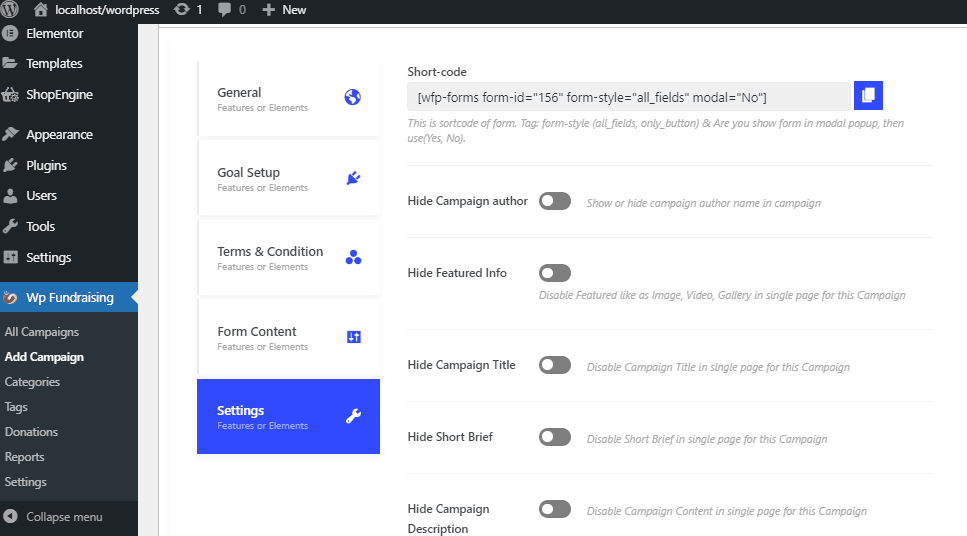
This section includes the following aspects along with a shortcode row:
- Hide Campaign author
- Hide Featured Info
- Hide Campaign Title
- Hide Short Brief
- Hide Campaign Description
- Hide Campaign Reviews
- Hide Updates
- Hide Recents Funds
You can alter your Page Weight, Custom Form Class, and Custom Form ID.
Setup Payment Methods (Default/WooCommerce)
To set up payment gateways, all you should do is just go to your dashboard and hover over WP Fundraising, and click on Settings.
For Default Payment Setup:
Make your WP Fundraising payment method easy with Default payments set up.
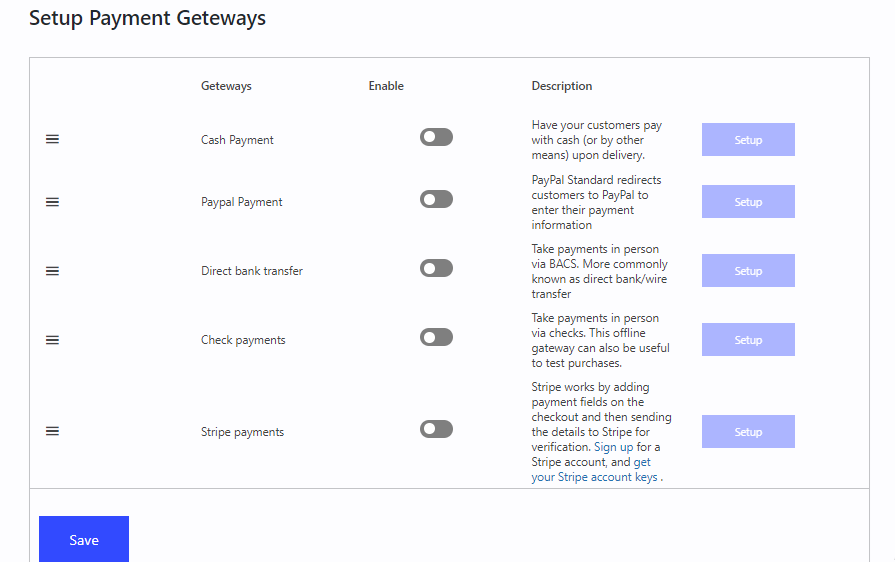
We have provided so many options for payment including:
- Cash on Delivery
- Direct Bank Transfer
- Check payments
- PayPal
- Stripe and many more.
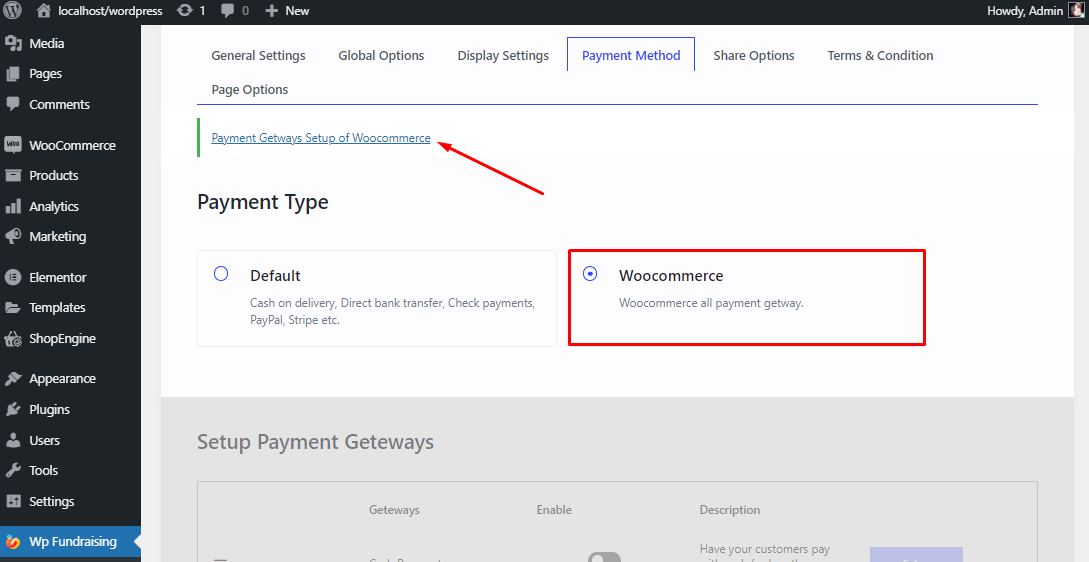
For WooCommerce Payment Setup:
You can also configure your payment gateways with Woocommerce payments set up. And to do that you need to go to WP Fundraising > Settings > Payment Methods > select WooCommerce.
Then click Payment Gateway Setup of WooCommerce.
🧐 Quick Guide
Are you worried about using the WooCommerce plugin on the WordPress website to set up an eCommerce store? Learn 👉🏽 How to Set-up a WooCommerce Account: Step by Step
Additional Infos
WP fundraising is always there to assist you in making the best campaign platform for you and your donors.
Here is some additional information that will help you to create/update your Campaign. We have also mentioned a list of shortcodes and their functional list.
✅ Other ways to create a campaign
✅ Shortcode
✅ Do action
Wrapping Up
WP Fundraising for Elementor has been programmed by a team of WP specialists, and it receives regular upgrades, excellent support services, and detailed documentation.
And it’s easy to understand, user-friendly interface will help you to create a donation campaign in just a few mins.
Finally, I hope that the article was helpful enough to provide you with a clear picture of WP Fundraising and how to create campaigns with it. If yes then please don’t forget to drop your feedback in the comments section below.
And for more helpful tips and blogs by join our WP community on Facebook/Twitter. Please don’t forget to subscribe to our channel on YouTube for useful tutorials.
Leave a Reply